Showing posts with label EKC15. Show all posts

Sunday, 15 May 2022

2022 Topic 07: Specimen Jar {by Victoria Wilding} with Kay Carley stamps


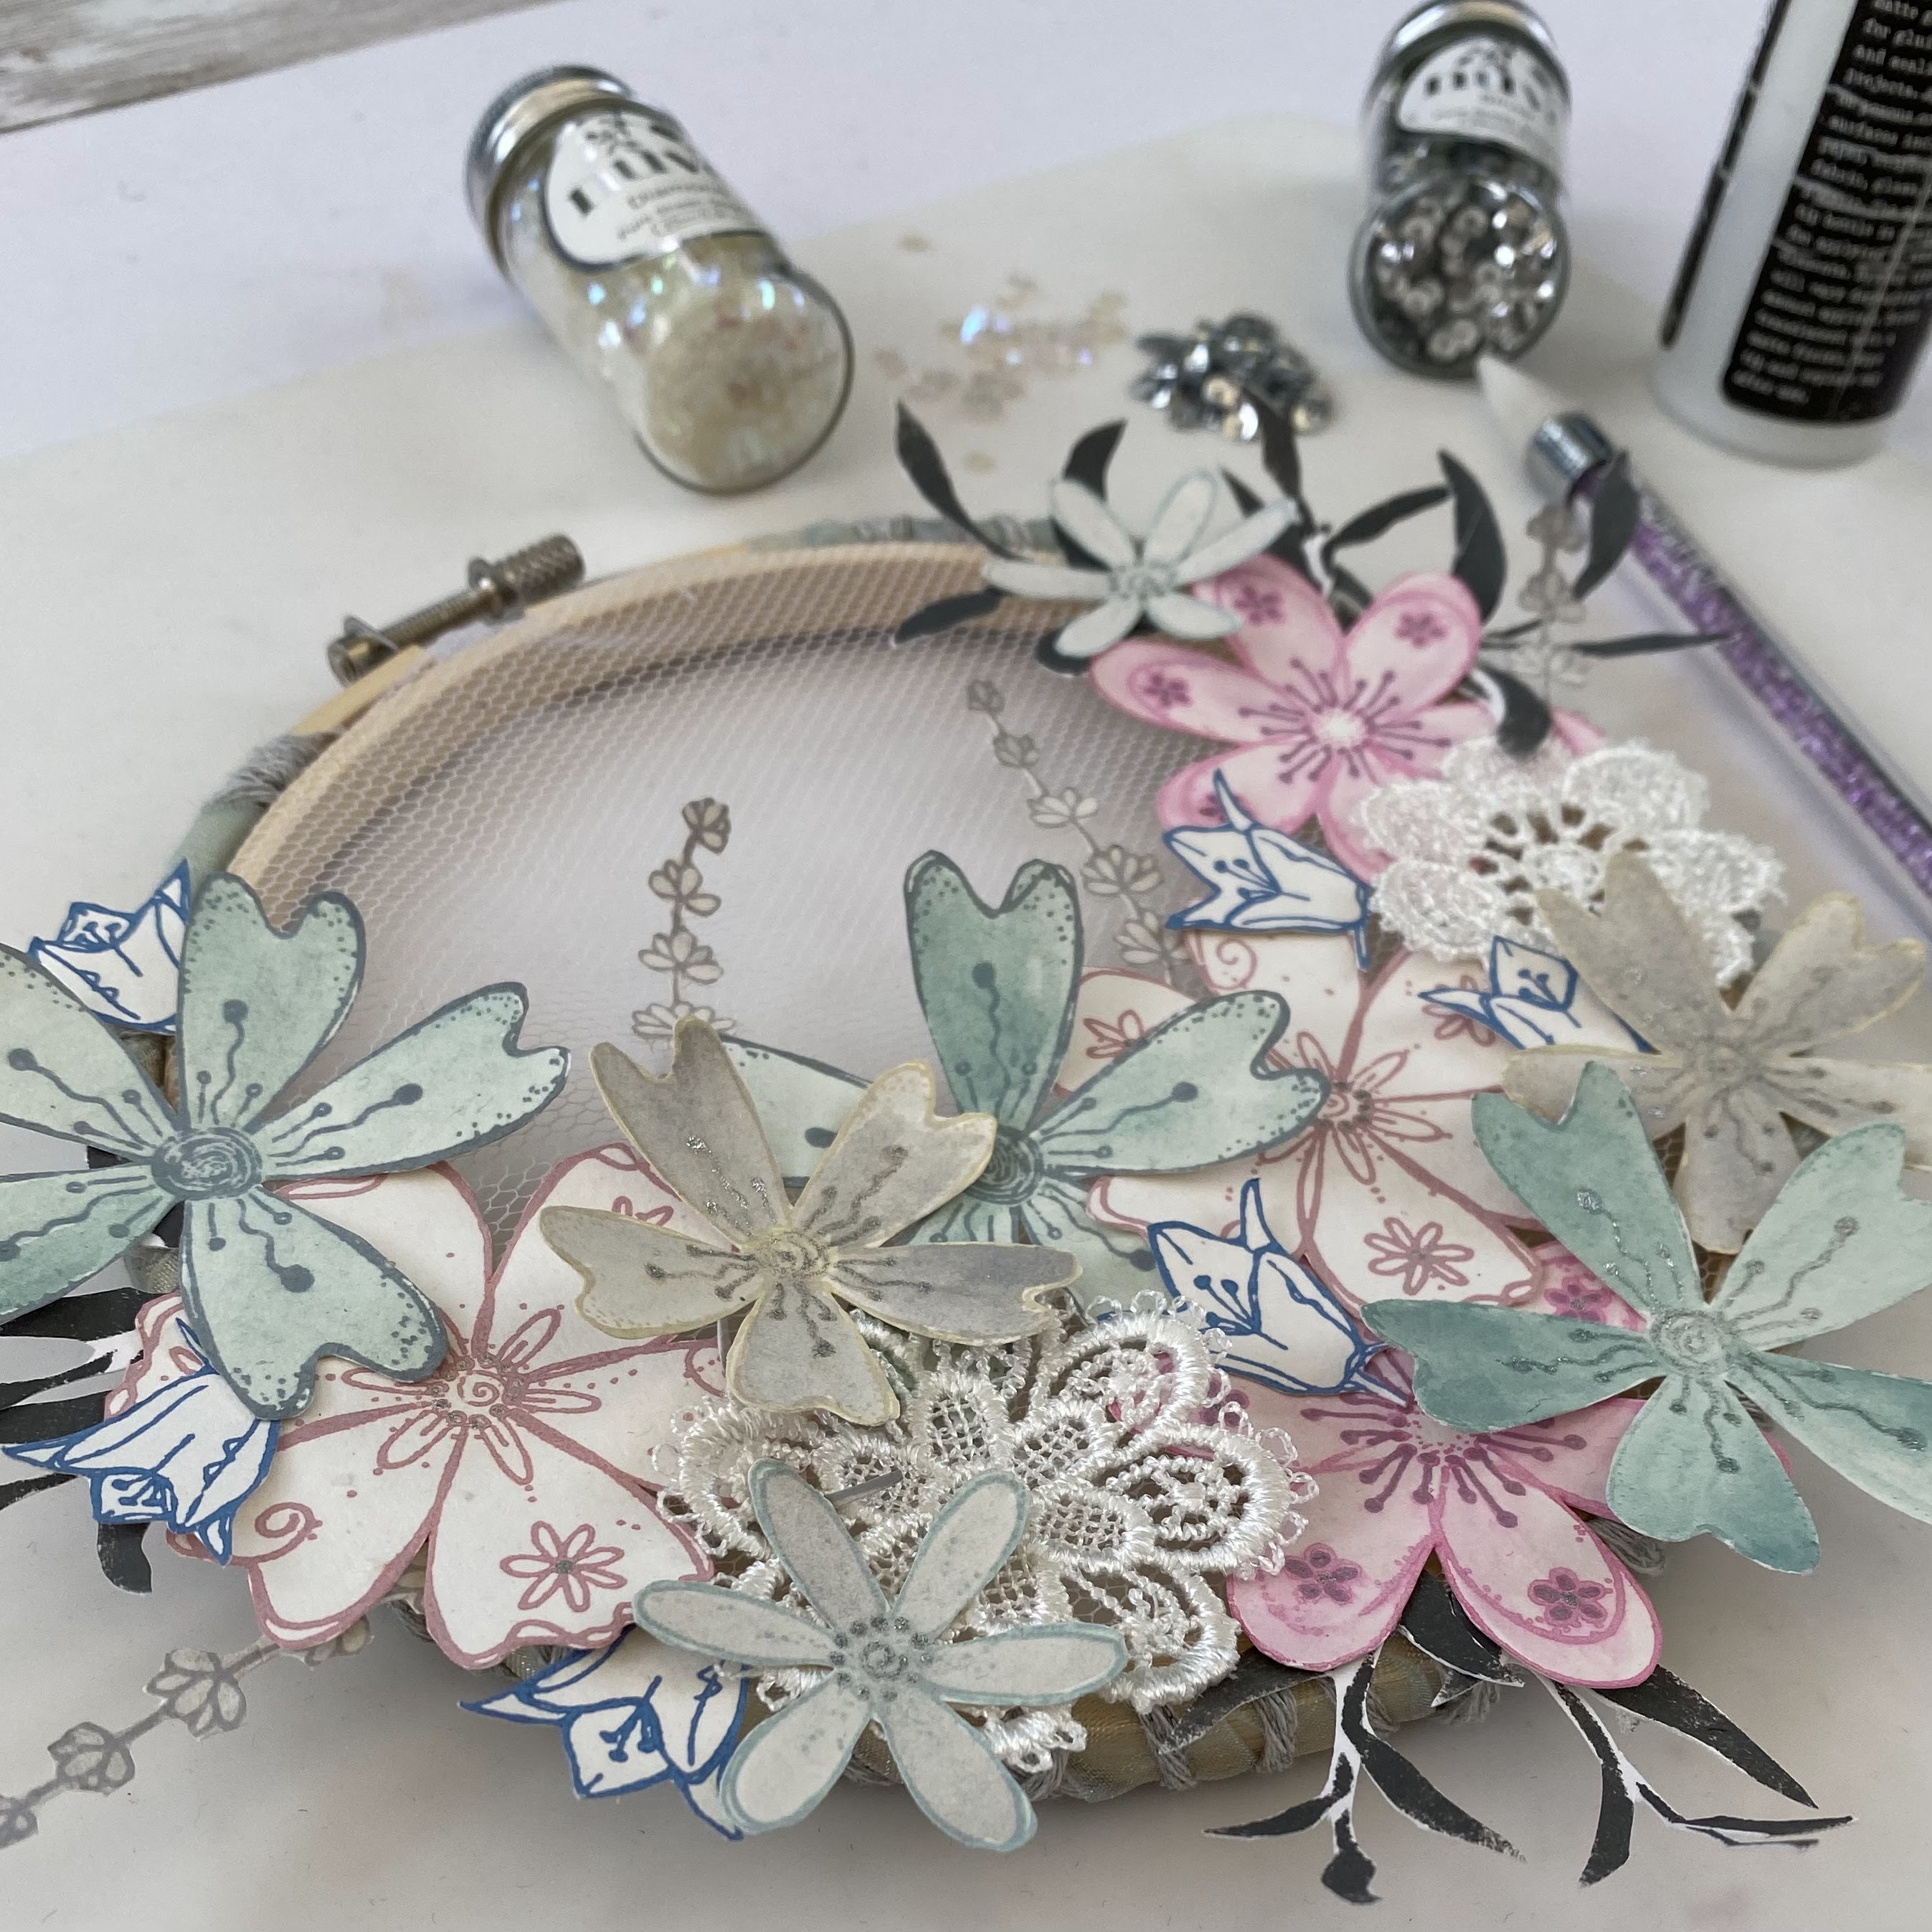
Hi everyone, it's Victoria with you today, and I'm here to share with you my idea for a flower hoop.


As soon as I saw the Specimen Jar topic, I knew I wanted to create a flower hoop. It's something that's been on my creative to-do list for a while and one of those fiddly projects that is right up my street!


To start off I gathered together the supplies I wanted to use. Kay Carley's flower designs were perfect as there were flowers of all different shapes and sizes which would add variety to the finished project. I selected two of Kay's newest sets, EKC58 and EKC59, and two of Kay's older sets, EKC15 and EKC20. 

 
Initially I thought I would use a neutral colour palette full of creams and browns, however, looking at the different flower stamps I was going to be working with, I thought some soft pastel colours would work really nicely, so I picked out three Fresco Finish Chalk Acrylic Paints (Niagara Falls, Pixie Dust and Koala). I also picked out a 6" embroidery hoop, some wool, ribbon and twine and sequins. With all my supplies picked out, it was time to get started.

The first step was to make the flowers for the hoop. Initially I thought I would make a selection of paper and material flowers, however, I didn't think that the cotton material I was going to use was stiff enough to hold the flower shape once I got to the stage of assembling the layers. So I chose a heavy weight piece of watercolour paper and started off by stamping out a selection of the different flowers in Distress Oxide. I then squirted a small blob of each paint colour onto my craft mat and added a little water using my paint brush, before colouring the flowers. It's important that you don't add too much water on this step or you will start shifting the ink as it isn't water resistant, but as you can see in the image below, with care and a light hand, the stamped image softens slightly but is still clearly defined.


Once the flowers were all painted, I went back in with glitter gel pens to add some sparkle to the details on each flower. I then fussy cut them all out and set them aside.
 

On looking at the flowers all cut out, I decided I needed some leaves to add more variety to the final design. Using Kay's new stencil PS326 and Fresco Chalk Acrylic (Slate) I stippled the leafy designs onto another piece of watercolour paper. Once dry I fussy cut them and set them aside with the flowers.
 

Before assembling everything together, I needed to prepare the embroidery hoop. As I wasn't sure how much of the hoop would show through the flowers, I decided to wrap the outer hoop with some wool and ribbon to add a pretty finish to the outside of the hoop. 


I then used some fine netting fabric to place between the outer and inner hoop, pulling the material tight before trimming the edges. This would provide a firm base to adhere the flowers to without being really obvious to the eye at a distance, which would be important as I wanted to leave some open space in the final arrangement of the flowers.
 

Next I arranged the paper flowers on top of the netting, leaving a small section of open space. I also included two crochet flowers from my fabric stash, to add a final bit of texture.
 

With all the flowers arranged and glued in place, I added some sequins for a final sparkly touch.


The fussy cutting of all the flowers was the most time consuming bit of this project. The rest of it came together really quickly and is one of those projects that in all its separate parts doesn't look like much, but once assembled it has a definite wow factor.  


I love how it turned out and can think of lots of variations to try the next time I make a project like this. Different flower combinations, colour palettes and materials would give a completely different finish. This would be a great project to make for a gift and you could easily add lettering or numbers to give it a personal touch.


Wishing you a creative, happy week.

Victoria

Saturday, 15 February 2020

2020 #3 On This Tag: Dance with the Fairies with EKC {by Carol Fox}

2020 Topic 3: On This Tag


Intro:
Carol is so good at sharing all the detail of the choices she makes and why. I love how she started with quite a bold background, but knocked that back with a bold stencil in a very gentle wash of 'Snowflake'. For those paint geeks, snowflake is not quite as opaque as 'Chalk' or 'Cloud 9', so it can be helpful at time to have a white that is less 'bold', although yu can achieve the same effect by adding a glaze to any opaque if you wish. It's an interesting background on top of which Kay's new stamp-stencil combo really sit well.
~ Leandra

Hi everyone, it's Carol with you today, and I'd like to share with you a tag.
I have built a scene on my tag using stamped elements and dry brushing for my background. I also used my Stamping platform for the first time, it was a gift and I had just stuck it away, but Kay's instructions on the Coordinating stamp stencil said use a stamping platform so I did and it worked together like a dream.

The finished Tag

I went 2 colour contrast, but colours of similar depth and intensity for my background using the new paints Gold Rush and Khaki along with Mini stencil PM008.


I added more interest to my background by using Snowflake Paint through stencil PS136, I do love a nice big stencil on a background.


I stamped the house image using EKC35. 


I used the coordinating stencil PS181 to help colour it along with the latest paints Blue Bayou, Marbles and Globe Thistle and Mauve.


I had never used any of the coordinating stencils before, but there are  instructions in the Stencil Pack and I just followed these, it was very easy. Along with my shades of blues and Purples I used Gold Rush and Snowflake to add the final stencil details.


I re-stamped my image over the top and it brought the whole thing to life.


I stamped and coloured the flowers fom EKC35 using Marbles and Blue Bayou with Highlights of Snowflake and Gold Rush on the flower heads .I used Magic Moss and Granny Smith on the stems, just painting them freehand with a brush.


Here they are re-stamped over the painted images.


I added the pebbles from EKC35 and used Stencil PS179 with Little Black Dress Paint to add the little mushrooms.


The quote from EKC35 is stamped onto a bit of acetate packaging that just happened to be a nice shape and hung from the side with a little clip.


I do love a bit of height on a tag and here I have stamped and coloured flowers from EKC15. Layering them up to add that little pop of height.

As I previously mentioned I had never used any of the coordinating stencils for the stamps before and I was a bit worried when I saw the painted image before I added the stamping back over it, but I was amazed how it all worked and the extra depth it seemed to add to my painted image. Definitely something to add to my stash in future, 

I hope you enjoyed my post and I can be found at the following places.

Carol xx

Blog: http://gingernonutsbits.blogspot.com/
Facebook: https://www.facebook.com/GingersAlteredBits/
Instagram: https://www.instagram.com/gingernonuts/
Pinterest: https://www.pinterest.co.uk/gingernonuts/