Showing posts with label EEV10. Show all posts

Saturday, 24 October 2020

2020 Topic #18 Geometric with EEV (by Miriam Grazier)

    2020 Topic 18: Geometric


Miriam is right; geometry creates a satisfying order and her grid formation of stamping makes for a pleasing effect. Repeated stamping takes a steady hand but is a great way to make a creative background for a beautiful card.
~ Keren.

Hi everyone, it's Miriam with you today, and I'd like to share with you a simple but elegant card using a geometric shape to create a modern look.

I love symmetry in my crafting, it creates an order to my makes.  Using Ellen Vargo stamps made creating a geometrical card simple but effective.


I love the carved look of the Ellen Vargo stamps and they work so well with the geometric theme.


I didn't want too much white space in the background and so I painted a layer of Concrete on my panel first.  This still created the look of a blank background without the stark colour of white.


I also tried to add more depth by stamping with Concrete before I stamped the Ellen Vargo carved image.  I liked this, but decided to use the panel that I created without the background stamping for my finished project.  It definitely showed that the panel design could be 'stepped up' in different ways.


I added a border using another of Ellen's amazing stamps, this time stamped in midnight.


I stamped the flower twice and painted using Tinned Peas, Ochre and a touch of Smoke Paprika.  I really liked the touch of Smoked Paprika on the petals.


I found it therapeutic creating a geometric design and I really enjoyed it.  Using the Ellen Vargo collection also meant that I was able to create a background quickly, so this would be great for batch making cards.  With the festive season coming up this would also be a great idea to create a set of gift cards or notecards to give as gifts.  I would also love to use this design on a cushion cover, I think it would look great.

I really hope that I have inspired you to try this yourself.  I think it would look great with all sorts of shapes and plan to try circles next. 

Thank you for joining me this evening.

Miriam


Wednesday, 10 April 2019

2019 #5 Maps & Plans: Geometric Florals with EEV {by Alison Hall}

2019 Topic 5: Maps & Plans


Alison has produced some masterboard masterpieces with maps and even used an old A-Z. She's thought out of the box to create flowers with geometric design stamps and used buttons to create a real wow for her trio of cards.

Hi everyone, it's Alison Hall (Craftytrog) with you today, and I'd like to share with you some abstract style cards with a floral theme, that I made with Ellen Vargo Eclectica stamps.

I used some map paper for collage, and made a stamped and painted master board, both of which are favourite techniques of mine. Then I was going to use Ellen's floral designs, but looking afresh at her stamps, I decided that using her bold geometric designs to create flowers would be a fun idea.


I began my master board by collaging torn index pages from an old London A-Z onto Regular A4 White Smoothy Card. I adore the texture created from the ripped binding edges!


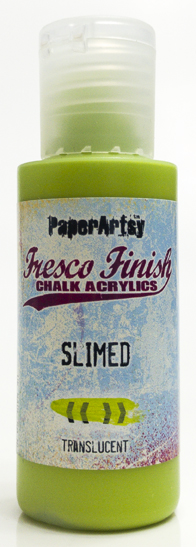
I lightly added some colour using the fabulous new PaperArtsy Brayer, and PaperArtsy Fresco Finish Acrylic in Slimed and Seaglass. I wanted to highlight the texture, and I didn't want to cover up the index pages totally. 


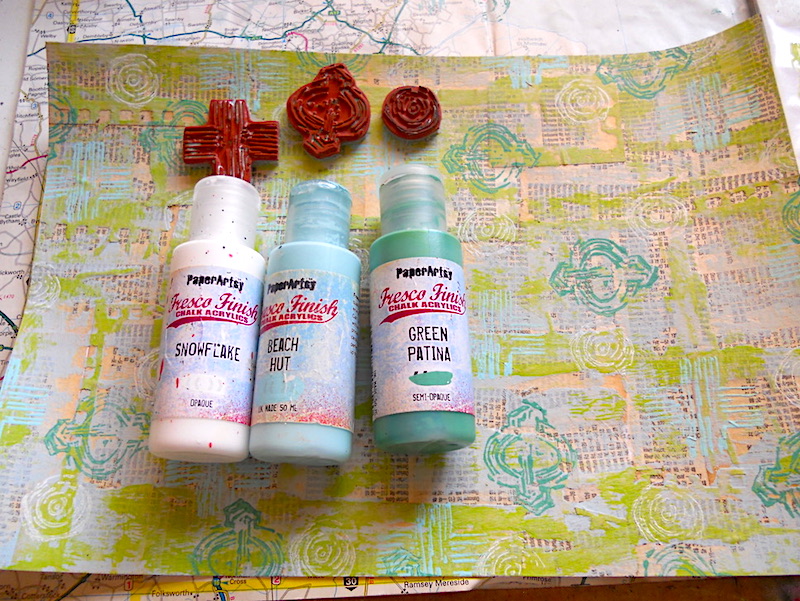
Next I used PaperArtsy Eclectica Stamp Set EEV08 with Snowflake, Beach Hut and Green Patina Fresco Finish Acrylic, to add a background design, and that was my master board finished. I'm really loving this fresh Spring colour palette with the vintage paper!


Time to create the focal elements for my cards. I stamped the arch, triangle and diamond designs from EEV01 with a Versafine Onyx Black Ink Pad on a map page from my old A-Z. As the paper is slightly glossy, I used a heat gun to dry the ink. 


These stamp designs are super easy to cut out, which I appreciate as my fingers struggle with 'fiddly' these days. Too much crocheting! Hahaha! I later stamped the smaller triangles from EEV03 (not shown here).


Having cut up my master board, and cut out the stamped shapes, here's the first card I created.


I cut strips of map page for the flower stems, adding black gel pen doodles. The quote from EEV10 was stamped onto an index page from my London A-Z, the words individually cut out, then glued on and outlined with a fine black gel pen.


I created a border by stamping the little rectangle from EEV08 with Green Patina Fresco Finish Acrylic around the edges, and for added interest and colour contrast, I glued red buttons to the tops of the flowers.

For my next card, I used the stamped triangles and smaller diamonds to create a floral style design, with a black border this time.

  
I didn't want to waste the off-cut strip of master board, so I created a more clean and simple design with the stamped diamonds from EEV01, adding buttons, doodled dashes with a black gel pen and another quote from EEV10.


Here's a closer look at one of my cards. I love how the street names show through on the background, and can you spot my mistake? I smudged the ink dashes when I glued on the diamond leaves! Whoopsie!


I hope you've enjoyed my tutorial here, and that you have a go at the techniques I've used. I had fun using Ellen's stamps in a different way. Maps and A-Z's make such wonderful collage material, and I think you'll agree that they're a great stamping surface. I look forward to seeing how you all use maps in your artwork. Have Fun!

Alison x

Facebook: Alison Hall
Instagram: @craftytrog 

Friday, 1 March 2019

2019 #2 Brayers: Friendship And Flowers with EEV {by Miriam Grazier}

2019 Topic 2: Brayers


Continuing our brayer topic is Miriam with some gorgeous gel plate delights that look so dimensional it's hard to believe there aren't multiple layers. I love her handy tip for stamping out and about using the brayer too!

Hi everyone, it's Miriam with you today, and I'd like to share with you my experiments with the amazing new PaperArtsy brayer and the Gel Press plate.


I love using a brayer to create quick and easy back grounds but there are so many other uses for a brayer too. I set out to show you some of the ways that I use my brayer. I also wanted to take myself out of my comfort zone and so chose really bright colours as I think they suit Ellen's stamps perfectly.

I used a combination of these Ellen Vargo stamps, EEV01, EEV02, EEV05, EEV06, EEV10.


I used my brayer to create a quick master board background for the flowers. I also created a separate gel plate background for the card. 


I used the plastic backing that comes with the brayer to add texture to my gel plate background.


I also like to use a brayer to add paint to large stamps. I find this gives an even coat to the stamp and is not too wet to stamp with. I used this method to add stamping across my backgrounds. For more detailed stamps I also like to run the brayer across the back of the stamping block once I have placed it onto my project. This is really useful when I craft out and about and don't have my stamp platform with me.  


By brayering lots of layers I was able to create depth to the flowers. I cut them up and paper pieced them. I was thrilled at how they looked.


Using the left overs from the backgrounds I also created three ATC's. 


The ATC's are one layer, but again, the multiple brayered layers have created depth and almost look dimensional.


Fresco acrylic paints work amazingly well with brayers. It enables you to layer the semi-opaque and translucent over the opaque colours really well.


I really enjoyed creating these projects with the new PaperArtsy brayer. It is just the right size and it's also super smooth. It makes it really easy to add layers onto your project, as well as giving you a helping hand in ensuring even and firm stamping where needed.  

I really hope that I have encouraged you to have a go for yourselves. I would definitely recommend the brayer. Create some brayered backgrounds and cut them up. A little goes a long way.

Thanks for joining me today. Happy crafting!