Showing posts with label 2015 Topic 15. Show all posts

Saturday, 22 August 2015

2015 #15 Syringed GP Tree {By Debs Wainwright}

Topic 15: Gels and Mediums

Hello everyone, I'm Debs Wainwright.

When I was asked to make something for the theme this fortnight I jumped at the chance, what I didn't  expect was to have so much fun. So I do hope you will play along too.

This is what I created...


For the background, I started building paint on a White/Grey board (size 8x8") from PaperArtsy. 

Step One: I smooched  four colours of Fresco Chalk Acrylic paint on with my fingers until the whole board was covered. The colours were Cherry Red, Turquoise (both Limited Edition JOFY sets from 2014), Lavender and Autumn Fire. I dried the board and applied Petroleum Jelly in places  as I wanted it to look like peeled paint. Next I applied a coat of Crackle Glaze from PA. I let this dry, and then with a palette knife I gently applied Fresco Acrylic paint in Chalk over the background. The chalk layer cracked on top as it dried, and where the vaseline patches were, you could wipe away to see the layers protected beneath.


Step Two: I mixed Grunge Paste with Fresco Acrylic in Holly and filled a syringe. You can see above that I used the syringe to draw a tree, I also drew some flowers. While this was drying I stamped the tulip from ELB23 ...


onto Transluscent shrink plastic 5 times and cut them out. I painted them with  Fresco Acrylic in Claret, then heated them to shrink. I then darkened the tree by painting it with French Roast Fresco and let it dry.


Step Three: While the tulips cooled I gave the board a coat of Modge Podge in Vintage white. It's very translucent but provides a barrier between the layers as next I wanted to spray the tree with Lindy’s Stamp Gang sprays in several colours. I love these sprays as the glimmer looks fabulous. (NB. You could easily tint a PaperArtsy Satin or Gloss Glaze with Nougat or Chalk to achieve the same effect, or use a Gel as a more archival barrier)


Step Four: You will see from the photo that the background is made up of some script text in Watering Can Archival ink as well as some flowers from ELB 22...


...and ELB23 in  Olive Ink. The Lindy's spray from the tree just wiped off  the background because it was sealed. I then sprayed the lighter colours on the background and let them run and drip.


Step Five: Once it was all assembled I felt something was missing so transferred a vintage photo using Heavy Matt Medium from Golden onto the background. I added my sentiment and finishing touches, and then coated the whole background except  the tree in Gloss Gel.

I hope I have inspired you to have a go. You can see more of my work on these sites:
My blog, FaceBook, and  Pinterest. I also teach Journal Pages at Birds In the Barn. Please see my blog for next class. 

Bye for now, Hugs 

Debs xx

Wow, how fantastic that you have explained all the stages so well. I really love the vaseline resist, and the syringed tree is such an awesome texture! Love the metallic Treasure Gold Highlight on that too! Thanks Debs! ~Leandra
We would love you to join in with challenge #15: Gels If you are inspired by any of our guests who blog with us over the fortnight, then please join in and link up your creativity HERE. 

All links go in the draw to win a voucher to spend on products of your choice from the PaperArtsy online store. The Gels link will close 17:00 (London Time) Sunday, Aug 23rd winner will be announced 2 hours later at 19:00.

Friday, 21 August 2015

2015 #15 Magical Mediums {by Lynn Price}

 2015 Topic 15: Gels and Mediums


Hi, Lynn Price here! I am so honored PaperArtsy has asked me to play around with various mediums for this post. I am a nursing professor here in Connecticut, and have recently discovered mixed media as a fun way to re-charge by creating something unique using an entirely different part of my brain - working with various mediums satisfies all of that!
Today I am playing with a two-page journal layout . 


For this layout, I played with three mediums: Regular gel medium (matte) (familiar to most of us, but used here also as more of a faux encaustic technique), glass bead gel, and Clear Tar Gel (from Golden) – Liquitex calls it's version of this product string gel.

I started with card stock heavily sponged with Distress Ink in warm colors. I die cut dragonflies, butterflies and bees and applied with these gel medium to gessoed pages with a few dry embossed bits which created a light yellow and orange background from the ink reacting to the medium. After stamping with Paper Artsy Mini 44, I then covered most of the plain (non-embossed) die cuts with extra gel medium, to really blend them into the background.
Mini 44

Next I stamped with the end of a beautiful Lynne Perrella stamp from LPC28  in archival ink to create additional detail and added more gel medium.


Then I swiped Golden's Bead Gel with my finger in areas that I thought would pool when I sprayed on the final colors. Because of the gel medium already on the surface, the distress inks on the die cuts no longer react. I love the effects of the beads – so shimmery!


After spraying the two pages with various colors of distress inks, I used the end of a thin paintbrush to write and draw, by dipping into the clear tar gel like a pen. This medium not only dries clear, but is also self-leveling, so small areas originally left open will likely fill in (like the loop in a small “e”, for instance). Here you can see how the clear tar gel indeed dries clear, so that the stamping and colors underneath come straight through - can you see the word “Love” ?


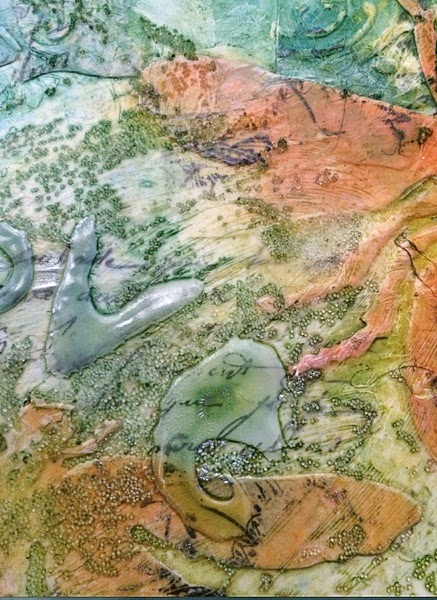
Below is one more close up, showing the beautiful beads after spraying, as well as the phenomenal effect from the Clear Tar Gel on stamping and background color. I have more examples on my blog if you’d like to see more of this finish.


This was such a fun make, that I actually made another one, with clear tar gel which you can see on my blog Experiments in Paper, along with more details of this layout. 
Lynn. 

Welcome Lynn and thankyou for creating such a fun page. You have show just how versatile the gels are, from regular 'sticking' to adding the shimmer and texture of the beads and the dreamy, fluidity of the tar gel. Indeed magical. ~Darcy

We would love you to join in with challenge #15: Gels If you are inspired by any of our guests who blog with us over the fortnight, then please join in and link up your creativity HERE. 

All links go in the draw to win a voucher to spend on products of your choice from the PaperArtsy online store. The Gels link will close 17:00 (London Time) Sunday, Aug 23rd winner will be announced 2 hours later at 19:00.

Wednesday, 19 August 2015

2015 #15 Acrylic Tag {by Lauren Hatwell}

Topic 15: Gels and Mediums

Hi everyone. Lauren here, joining you this evening with a project using a few of my favourite Gels and Mediums for a JOFY inspired acrylic tag. 


I love working with acrylic as you can build so many layers onto both sides and still see them all at the end. Gels and mediums add some great texture and sparkle for added interest. To me, they are the (non-surgical) enhancers of the art world. Think of an effect you want to create and there will be a raft of great gels and mediums to make it possible.

I've used JOFY37, JOFY38 for my project...


and Stencils PS007 and PS011


NB: Acrylic tags and ATC's usually come with a removable sheet of plastic on one side, which I left in place to protect the front of my tag while I worked on the background (I had my #10 tag cut for me at That's Crafty. They offer a range of acrylic items and will also cut bespoke items to order).

On the back of the tag I stenciled a layer in Snowflake using JOFY stencil 011. I then stencilled a layer in French Roast using JOFY Stencil 07 and 011. When it was dry I brayered over some acrylic gel medium to protect the stencilling before adding the background (because I'm going to move the paint around a bit and I don't want to smudge or remove what I've already done).


When everything was completely dry I mixed a pea sized amount of soft matte gel medium with about a dessert spoon of each Fresco paint colour to extend the drying time a bit and get better movement with the paint. The colours I used were Chalk, Nougat, Antarctic, South Pacific, Space Cadet and Blue Oyster. I dribbled several lines of each colour across my tag before tipping the tag to let the paint lines spread and merge together. I then used a cocktail stick to move the paint about a bit and create some lines. When I was happy with it I laid the tag flat and left it overnight to dry. Pretty cool but it bears no relation to the other side, which is the side you will be able to see...


When the tag was dry I turned it over to reveal the pattern on the reverse side and peeled off the protective sheet. It looks like one of those bottles you fill up with different layers of coloured sand doesn't it.


You can see that the two stenciled layers show through nicely against the backgound paint technique. Now to build up the layers on the front. I've used flock for an interesting but understated layer of texture. I made my own paste by mixing a teaspoon or so of Matte Medium with a half teaspoon of Snowflake Fresco Paint. I stenciled the mixture onto my tag using a palette knife and then sprinkled on the white flock powder (I used Fun Flock by Stampendous. It has a nice fine texture that doesn't clump).


One of my favourite gels is Glass Bead Glitter Gel by Faber Castell. Golden has glass bead gel too here. It adds a really beautiful sparkle and texture to a project. I've used it in its raw state here as I wanted it to dry clear, but as with all gels and mediums, you can add colour to them if you want to.


Last but not least I stamped the Bloom sentiment from JOFY37 and the gorgeous "paving stones" stamp from JOFY38 in white Archival ink and heat embossed using white fine detail embossing powder. It shows up really while still allowing the detail behind to show through.


I really enjoyed this project and I hope you can get a sense of how versatile the many gels and mediums on the market are. Maybe you could try this yourself mixing colour with the different mediums or using stamping rather than stencilling. It doesn't have to be on acrylic. You could easily translate this onto other substrates. Just have fun with it.


Ohhh, that's a really interesting idea Lauren. Funky double sided use of paint that can be awesome from both sides! I love how you don't exactly know what its going to really look like underneath until its dry and you peel back the protector (depending on how opaque the protector is). Thanks for another fascinating post! ~Leandra

We would love you to join in with challenge #15: Gels If you are inspired by any of our guests who blog with us over the fortnight, then please join in and link up your creativity HERE. 

All links go in the draw to win a voucher to spend on products of your choice from the PaperArtsy online store. The Gels link will close 17:00 (London Time) Sunday, Aug 23rd winner will be announced 2 hours later at 19:00.

Sunday, 16 August 2015

2015 #15 Masterclass {By Leandra Franich}

Topic 15: Gels and Mediums


Hi Everyone, Leandra here.

Tonight I'm showing you an in-depth look at mediums and gels. I did a rough overview at the start of this topic, but there really is not a lot of specific nitty gritty info for crafters working with gels and mediums comparing brands. So I wanted to explain some of the products we stock, how they differ from each other by actually opening up the tubs to show you the consistency and texture, and I'll finish with an abstract journal background that I've gradually built up using lots and lots of layers of tinted glazes, and showing you how that came about via a series of pictures.

I could spend every day making backgrounds with texture, colour and layers. That is my go-to zone when I want to relax. It has always been this way since I first started crafting, and so I have been drawn toward texture products like gels, pastes, and mediums for many, many years. I hope you get hooked too. They are kind of addictive I find!

These conclusions and statements summarise how I prefer to work with them, as an experimental crafter, NOT as a fine artist. I have no fine artist training, I don't know the 'proper' rules... I just love exploring these products. You may have similar or different experiences to mine, and that is exactly how it should be... there is no right or wrong in mixed media...it's more about... 'what happens if...?'

To recap what have have been learning in this topic so far.... I have filmed some videos to show you in detail the gels and mediums that I work with regularly. You can find our gels and other products here in the online shop.

A medium is a pourable runny product that is designed to be added to paint to extend the colour, working time, or change the acrylic paint to make it more glossy or matte, 2-tone (interference mica) or perhaps alter it to be fabric friendly. Glazes, as top coats also fall into this category, as do tinted glazes for scumble effects, both dark and light on top of texture.


A gel is a thicker product (compared to a medium) it is translucent once dry, but milky when wet. It is primarily used to alter the viscosity of paint to make it thicker (eg a fluid acrylic can be made into a heavy body acrylic) or thinner (heavy body acrylic paint can be made into a much softer product). Gels have matte, semi -gloss and gloss finishes that can also alter the finish of your paint. So you can easily make a chalk paint glossy and thicker with a gel while not compromising the colour integrity. Gels also can be used to alter the translucency or a paint, for resist techniques, or used on their own as an adhesive for thin tissue through to awkward dimensional objects such as pebbles, buttons, and metal charms. Gels also can have inclusions - mica, chunky or fine beads, glitter. And don't forget about Clear Tar gel for making skins or goopy tinted drizzles. Normal gels also work for toner based image transfers too.


Here are some of the close up photos of samples shown in the video...

Dreamweaver Translucent Embossing Paste - applied very thick, stencil lifted creating suction, dropped to leave ridge at edges.

Golden Granular Gel. These are the larger of the 2 bead gels, They are plastic, and a dye spray on top highlights the texture nicely.

Still very hard to see, but at the top centre is the Glass Bead Gel (very fine small beads that reflect more light than the Granular Gel), and the lower centre is the Granular Gel.


Prima 3D Gloss Gel (admittedly I did not apply the gel as thick as I could have, but it does not have the strong structure I expected for a 3D Gel)

Prima Clear Crackle Paste - a Brucey bonus sample. Not shown in the video as this is weirdly called a 'paste' even though it is a clear product, and the consistency in the tub is odd... reminds me of curdled egg, certainly not a paste, more like a soft, sloppy, almost lumpy gel. But I really wanted you to see how fine the cracks are, much finer than I expected. There is no variety in the crack size in this sample. Very difficult to highlight the texture, as you need a runny product to sink into the cracks like a dye spray. But, very delicate, subtle and pretty.

My favourite.. the skin from paint and Golden's Clear Tar Gel. Here is how it dried after the second application of paint as demoed in the video. Very easy to peel off the embossing folder, and no release agent required.


This just shows you how flexible the skin is. It can even be stretched!

So now you need one of everything right?? They are just so much fun! Remember, pay the price you are comfortable with, and get the size that suits your style of crafting... but if you need archival/ UV resistant properties, then you will need to use Artist Grade products.

So lets finish with my journal pages...I had nothing in mind except that I knew I wanted to see how much depth I could build with glazes

Step One: The page had Golden Gesso and Grunge Paste randomly applied with a palette knife, I made sure to leave some parts of the pages directly exposed (my journal is a Finnabair one). Then Golden Glaze (Burnt Sienna and Violet Earth) were added and blended about. Heavy Body Gloss Gel was tinted with South Pacific Fresco, and applied through the 'Art Is' stencil. The deep blue dried with a glossy finish.

The facing page had some Prima Clear Crackle Paste applied generously, and was left to dry overnight. I was please to see more variation in cracks then I got in the stencilled sample above. French Roast was made into a glaze with PaperArtsy Gloss Glaze, and applied to the cracks to highlight them. Along with some South Pacific Glaze to the edges.

Step Two: I added the same glazes all over again, and you can start to see the depth build already. 


Step Three: Then I decided I needed more contrast at the top and bottom of the pages. So I added a Cheesecake Gloss Glaze at the foot, and kept building depth at the top with shades of orange glazes: Pumpkin Soup, Tango, Brown Shed, Autumn Fire, Blood Orange. This was then topped with Bora Bora mixed into a Gloss Gel and scraped over for patches of gloss and colour contrast.


Step Four: Now I decided it was too dark at the top, so I added some greens to soften it back.


Step Five: So when you build these glazed layers, you have to be a bit more careful about what colour you put where, and if you want to lighten, I did use a bit of Cheesecake (glaze) and then started to build on top again but the colour depth you get with the warm orange shades is wonderful and very easy to do.


Step Six: Then finally I added some Golden Iridescent Bronze (Top) and Cheesecake (Bottom) Clear Tar Gel drizzles, but I was still learning how to control it, in hindsight, I would now prefer drips coming down from the top of the page. But I think I am going to continue and add some French Roast Glaze around the drizzles, to get more shadowing around the texture. I'm still not finished with it. I want to doodle something and block out part of the background too! So its still a WIP. Just need to decide what I'm going to draw on top.

NB. Those last 2 pictures I took in different light the following day so the Orange colours look different to the previous ones, but IRL they are still the same as the earlier shots.

To be honest, I liked these backgrounds at all stages. There were penty of times when I could have stopped, but I wanted to deliberately push myself to keep going, just to see what happened. 

I love how, with a Fresco Paint and a gel or a medium you can easily morph it into a soft gloss, matte heavy body, shiny drippy gel, or fabric paint with the addition of the right product. Gels and Mediums open up a whole new world, and I hope you find time to explore all the doors that are now open to you. Just jump in the deep end! What's the worst that could happen???
We would love you to join in with challenge #15: Gels If you are inspired by any of our guests who blog with us over the fortnight, then please join in and link up your creativity HERE. 

All links go in the draw to win a voucher to spend on products of your choice from the PaperArtsy online store. The Gels link will close 17:00 (London Time) Sunday, Aug 23rd winner will be announced 2 hours later at 19:00.

Saturday, 15 August 2015

2015 #15 Gel Resist {By Ellen Vargo}

 2015 Topic 15: Gels and Mediums

Hi everyone Ellen Vargo here, joining you this evening with a post about using gels medium as a resist. I have always loved a good resist technique, and gels work beautifully. We'll be working with gloss gel medium, distress inks, collage, and some of my favorite PA stamps.


Step One: Use a brayer to apply gloss gel medium to your stamp.  I used a brayer because the stamp I chose, the scratchy diamond background stamp from EEV07...


...has a very fine texture and I wanted nice crisp stamping.  If you are using a bolder stamp you could either lightly paint the gel medium onto the stamp, or spread the gel medium onto your craft sheet and lightly stamp into it.


Step Two: Let gel medium dry or speed things up by using a heat tool.  Then use ink blending tools to apply your choice of distress inks over the stamped gel medium.  The gel medium will "resist" the distress inks, which are water based and translucent, leaving a nice clean stamped image intact.


Step Three:  Next I applied some tissue paper, stamped with one of my favorite dotty texture stamps (EEV06).


I used Ranger Glue N Seal, another type of medium, for this step, It's slightly looser and thinner than the Golden regular matte gel, and so it dries flatter and more invisible. With Golden's regular gel you would still see brush strokes, less so with the Golden soft gel. All of these products have a nice matte finish that will vanish once dry.


Step Four:  I created some flowers using maps and my petals and pods stamp set (EEV09). 

I glued the petals to the circle base using glossy accents, yet another type of medium which can be used as an adhesive or as a way to give a shiny finish to any embellishment.  


The flower stems were stamped using just the stem from my sketched flowers stamp set (EEV10).


Step Five:  After adding a torn strip of map paper to the base of the card, I then added a quote from Lin Brown's ELB06.  I stamped the quote on white Smoothy card, cut out the words to fit the arrangement I wanted, adhered to card and outlined each word with a fine tip black pen.  I decided to add little white dots (Sharpie fine tip paint pen) to the center of each black dot to make them "pop" - I use this technique a lot - one of my faves.


And, once again, here is the final result.  I outlined the whole card with a black paint pen to give it a nice finished look.


I hope you liked today's project and if you haven't ever tried using gel medium as a resist, then give it a try!  You could use distress inks as we've done today, or you could use watered down paint.  I have had success with both methods, but distress inks give a cleaner, crisper result, in my experience.  

Thanks so much for stopping by today.  Have fun playing!  ~ ellen.

Wow your resist really pops to show the fine detail of that gorgeous diamond scratchy stamp Ellen! It's so lovely to see how you use the fantastic 'petals' set of stamps with the map to make such cool flowers. Thanks for joining us tonight, we love to see your bright and cheerful projects! ~Leandra

We would love you to join in with challenge #15: Gels If you are inspired by any of our guests who blog with us over the fortnight, then please join in and link up your creativity HERE. 

All links go in the draw to win a voucher to spend on products of your choice from the PaperArtsy online store. The Gels link will close 17:00 (London Time) Sunday, Aug 23rd winner will be announced 2 hours later at 19:00.