Showing posts with label Glass Bead Gel. Show all posts

Wednesday, 13 January 2016

2016 #1 Icy Cards {by Anneke de Clerck}

 2016 Topic 1: Transparent Art

Hi everyone Anneke here.  

I'm happy to be back here tonight with a blog post about transparent art. I have two cards for you on which I used two interesting transparent mediums: Glass Bead Gel by Golden and Mica Flakes by Finnabair. To embellish the cards I've created a few flowers using a wax paper technique.


I love transparent papers and mediums, they are perfect to use on winter themed projects. The moment I heard about the transparent topic I knew I would make some icy cards. To create these shabby chic cards I've chosen a soft color combination: kraft, light blue, white and silver.

Below I will walk you through the making of the first card. I'll show you how I did the background and some of the embellishments. I've added the second card as extra eye candy. There is a description at the bottom of this post.

Let's get started.


To start I've cut a 4 x 6" (10 x 15 cm) panel out of corrugated cardboard. I randomly applied heavy gesso by Liquitex to the panel with a palette knife. 


After drying I applied Glass Bead Gel by Golden the same way. This gel takes a while to dry, I let it dry overnight.


I diluted some PaperArtsy Fresco Finish Chalk Acrylic Mermaid with water to color the background. The beautiful light blue color enhances the icy look.


Finally I added some 'Frosted' Mica Flakes by Finnabair. I applied gel medium with a brush and sprinkled the flakes on top. I love the transparent effect of the flakes. At that point the background of the first card was done.


I've made a few embellishments for the cards as well. First I've created flowers. I used an old technique, sandwiched wax crayon shavings in between two sheets of wax paper by ironing the sheets. You can easily find more details on this technique on Pinterest.


After ironing the wax paper I stamped spirals on top with a spiral stamp and Mermaid. For this blogpost I could work with the brand new EEG15 stamp set by Emma Godfrey, a very versatile set! 


After cutting out the 'flowers' I ironed them again, to secure the layers.


I decorated white ribbon by stamping on it with a small stamp from the EEG15 set and Mermaid.


I punched a silver heart out of an old button card. I love to use unusual materials on my cards :)


To put the card together I first adhered the stamped ribbon together with some zigzag ribbon and cord. I sewed some beads in the centre of one spiral flower and arranged two flowers on the card together with some gauze. To further decorate the card I looked for a few silver embellishments in my stash: a button and a metal piece.


I finished the card off with two sculpure flowers by Tim Holtz and a paper clay heart.


For the second card I created a background by applying PaperArtsy Fresco Finish Chalk Acrylics Chalk, Mermaid, Buff, Blue Oyster and Caribbean Sea to a card panel with a plastic card. I added white squares using Snowflake paint and a stencil (Tim Holtz Layering Stencil Tiles). I stamped on top with stamps from the EEG15 set and the same paints. After drying I added flowers using the JOFY PS009 stencil and Glass Bead Gel.


I finished the card off with corrugated cardboard,  frayed gauze, ribbon, a crumpled wax paper flower and silver thread.


I'm fond of working with Glass Bead Gel because it dries beautifully and transparent when applied in a thin film. As you can see on the second card it looks awesome when used 'raw' and uncolored. But I do like the effect of the light blue paint on top of the Glass Bead Gel on the first card too. The perfect medium to use on shabby chic cards!

For the wax paper technique make sure to work with a medium heat iron, don't use steam and put an piece of kraft paper on top to protect the wax paper and your iron.

Because I had no wax crayons in my stash I used oil pastels, not quite the same. The melting of the shavings wasn't wat it had to be but I'm happy with the result though :)

I love the fragile transparent flowers.

I hope I've inspired you to make some cards, an art journal spread or a canvas with an icy look yourself now. Or why not try the wax paper technique? I would love to see what you come up with.

Have fun creating!
Gorgeous cards Anneke, they look totally wintery and frosty with your clear, blue and kraft layers!! Fabulous how the glass bead gel worked out through that JOFY stencil! Beautiful, thank you for sharing!

We would love to see how you interpret this Transparent Art topic by linking what you make to our 2016 Challenge #1: Transparent Art, on this page HERE.

All of our bloggers love to see your twist on their ideas, particularly if you were inspired directly by their post. 

Links go in the draw to win a £50 voucher to spend on products of your choice from the PaperArtsy online store. The Transparent Art link will close 17:00 (London Time) Sunday, January 17th. The winner will be announced 2 hours later at 19:00.

Wednesday, 25 November 2015

2015 #22 Christmas Masterboard {by Alison Hall}

 2015 Topic 22: Christmas Masterboard {by Alison Hall}

Hi everyone! Alison here, joining you this evening with a Christmas themed masterboard.

I've used my favourite way of applying paint, with a brayer. It's so quick and easy to get a lovely random background. There's also a little bit of collage thrown in for good measure, and some stamping with paint, and I've used Sara Naumann's beautiful Christmas Eclectica sets ESN17 and ESN18.


Step One: I began with a light layer of paint on a sheet of White Smoothy Stamping Card. I used my Brayer to apply Chalk, Moonlight and Mermaid Fresco Finish Paint.


Step Two: Next I added some medium shades of Fresco Finish Paint in Captain Peacock and Professor Plum (both from the Sept. 2015 Special Edition Set of Fresco Finish), then a light application of Claret and South Pacific.


Step Three: Time to knock those dark shades into the background with another application of Moonlight and Mermaid Fresco Finish Paint.


Step Four: Next I took a piece of White Tissue Paper, and used Jet Black Archival Ink to stamp a collage of images and words from ESN18


Step Five: I ripped the tissue into thin strips, then used Ranger Glue 'N Seal Matte to adhere them to my background.


Step Six: To finish my masterboard, I stamped some images from ESN17, using Captain Peacock, Professor Plum, and Chalk Fresco Finish Paint.

I decided to cut my masterboard into four to make some Christmas cards.


To make my cards, I mixed a little Golden Fluid Acrylic Micaceous Iron Oxide into some Golden Glass Bead Gel, and used a Palette Knife to apply this through PaperArtsy Stencil 001 {ELB}, onto two of the masterboard quarters.


I used Jet Black Archival Ink to stamp the lovely bird image from ESN18, as well as some branches in the opposite corner, and some of the words. I finished by sponging Chalk Fresco Finish Paint lightly onto the Bead Gel stencilling, then matting my artwork onto black card and then a white card blank.

Here's a closer look at one of the cards. I just love the texture of the Bead Gel. Mixing it with the Micaceous Iron Oxide Acrylic gives it a lovely sparkle...thanks Leandra for that tip!


Using a brayer is such a quick and easy way to apply paint, definitely my favourite, and it looks different every time. Build up some layers with a little collage, and stamping, and you soon have a handy masterboard to use for any type of project. It's definitely a good way to get started on your Christmas cards! I hope I've inspired you to give this technique a try.

Alison x

Blog: Craftytrog's Inky Adventures
Facebook: Alison Hall
Twitter: @craftytrog

I love the idea of mixing the micaceous iron oxide into the glass bead gel! How lovely to add that texture to the masterboard. These look great Alison, I know you are a massive fan of Sara Naumann's stamps and this is a fabulous was to use them! I love how the brayering technique is always so individual to whoever is holding the brayer! ~ Leandra

We would love you to join in with challenge #22: Masterboards If you are inspired by any of our guests who blog with us over the fortnight, then please join in and link up your creativity HERE

All links go in the draw to win a voucher to spend on products of your choice from the PaperArtsy online store. The Masterboards link will close 17:00 (London Time) Sunday, Dec 6th winner will be announced 2 hours later at 19:00.

Friday, 21 August 2015

2015 #15 Magical Mediums {by Lynn Price}

 2015 Topic 15: Gels and Mediums


Hi, Lynn Price here! I am so honored PaperArtsy has asked me to play around with various mediums for this post. I am a nursing professor here in Connecticut, and have recently discovered mixed media as a fun way to re-charge by creating something unique using an entirely different part of my brain - working with various mediums satisfies all of that!
Today I am playing with a two-page journal layout . 


For this layout, I played with three mediums: Regular gel medium (matte) (familiar to most of us, but used here also as more of a faux encaustic technique), glass bead gel, and Clear Tar Gel (from Golden) – Liquitex calls it's version of this product string gel.

I started with card stock heavily sponged with Distress Ink in warm colors. I die cut dragonflies, butterflies and bees and applied with these gel medium to gessoed pages with a few dry embossed bits which created a light yellow and orange background from the ink reacting to the medium. After stamping with Paper Artsy Mini 44, I then covered most of the plain (non-embossed) die cuts with extra gel medium, to really blend them into the background.
Mini 44

Next I stamped with the end of a beautiful Lynne Perrella stamp from LPC28  in archival ink to create additional detail and added more gel medium.


Then I swiped Golden's Bead Gel with my finger in areas that I thought would pool when I sprayed on the final colors. Because of the gel medium already on the surface, the distress inks on the die cuts no longer react. I love the effects of the beads – so shimmery!


After spraying the two pages with various colors of distress inks, I used the end of a thin paintbrush to write and draw, by dipping into the clear tar gel like a pen. This medium not only dries clear, but is also self-leveling, so small areas originally left open will likely fill in (like the loop in a small “e”, for instance). Here you can see how the clear tar gel indeed dries clear, so that the stamping and colors underneath come straight through - can you see the word “Love” ?


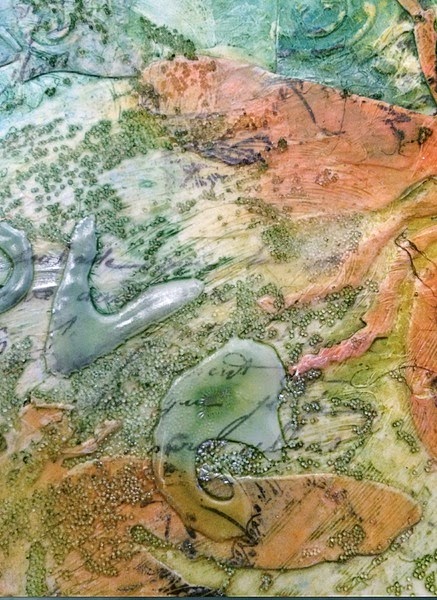
Below is one more close up, showing the beautiful beads after spraying, as well as the phenomenal effect from the Clear Tar Gel on stamping and background color. I have more examples on my blog if you’d like to see more of this finish.


This was such a fun make, that I actually made another one, with clear tar gel which you can see on my blog Experiments in Paper, along with more details of this layout. 
Lynn. 

Welcome Lynn and thankyou for creating such a fun page. You have show just how versatile the gels are, from regular 'sticking' to adding the shimmer and texture of the beads and the dreamy, fluidity of the tar gel. Indeed magical. ~Darcy

We would love you to join in with challenge #15: Gels If you are inspired by any of our guests who blog with us over the fortnight, then please join in and link up your creativity HERE

All links go in the draw to win a voucher to spend on products of your choice from the PaperArtsy online store. The Gels link will close 17:00 (London Time) Sunday, Aug 23rd winner will be announced 2 hours later at 19:00.