Showing posts with label Gels and Mediums. Show all posts

Thursday, 31 December 2015

2015 Round Up: Time, Flowers, Gels and Mediums {curated by Wanda Hentges}

Good Evening again, Leandra here to kick off Part 5 of our 2015 review.

Tick-tock, tick-tock, do you have a sense of urgency to get something done? Why is it the older we get the faster time passes? Here we are on the cusp of a New Year and it only seems like yesterday we were celebrating the turn of the century! Tomorrow is the start of the 16th year of this century... Wow!

I'm feeling the need to write lists to keep me on track and utilise my time well. Darcy and I often joke that our lists have lists! There are zillions of apps to help us manage our time more efficiently, but there is nothing like a planner on the wall and LISTS! But no matter what the system, I feel more able to relax and be creative when all the chores are done, when the house is tidy, and when the bleugh things on my to do list are ticked off as done. It's then that I most enjoy my "me-time".

Early on in our marriage we devised 'pink' and 'blue' jobs to divvy up household chores (I know - perhaps it seems outdated and a tad sexist in this day and age - but it works for us) To be fair, they could be any allocated colour- but for us, Mark has the blue jobs and I get the pink ones, and we're not changing our system in order to be politically correct now!

Mark's jobs (his choice) are the garden, putting out the bins, doing the lawns, fixing or building things, checking cars are functioning and general repairs around the house, painting etc. My pink jobs are writing lists/ allocating all household tasks (ie delegating LOL) ....and (yawn) indoor stuff eg. housework, ironing, cooking, cleaning, sewing, and generally being the taxi service for the non-driving teens. Our tasks seem to play to our strengths. I would much rather do housework and potter indoors than mow the lawn or garden.... I'm rubbish at gardening! My favourite pinkie is cooking or baking.

The kids are pretty competent at most Pink and Blue jobs now they are 15, 17, 19 and 21. More of our pink and blue lists gets delegated to the junior people of this house the older they get...we see both pink and blue jobs are important training.... otherwise how will they cope when they leave home?

So, knowing that a new, quieter era is around he corner as our kids grow up and face leaving the nest later in 2016, I have signed up to Wanderlust. It's an online course run by a long-standing PaperArtsy retailer, Artist Trading Post and I'm doing it just because I CAN ! I think I need a cue to share more pink jobs and enjoy more 'me-time'. Now that the kids are skilled up in all tasks, they can be the new pink-blue army! They can cook, clean, garden, sort the rubbish and do their own washing/ ironing, so that should free me/us up to do other things. Perfect!

Enjoy tonight's post curated by the ever so versatile Wanda Hentges and we hope you celebrate this evening, a very Happy New Year!!! 

{My taxi service is booked in for 3 New Year's Eve collections tonight apparently!}

Leandra


Hello Bloggers, Wanda Hentges here.  It has been a busy year at my place.  Our oldest son got married to a wonderful girl that we love and we "started" a huge house project - putting on an addition, new siding on the whole house, some foundation work, and we intend to gut and remodel the old part of the house.  I don't expect we will be completely done until next fall.  With all of this going on I have mostly made cards and tags this year with a bit of other things (journal pages, canvases, etc.) thrown in. 

Since being creative is something I "need" to be doing, lack of time just means simplifying or keeping to smaller projects like cards and tags.  I still love making my own backgrounds and enjoy trying new ideas or expanding on old ideas.  Another thing I've tried my hand at a few times is leaving white space.  I tend to make a full background and build upon it.  I see so many gorgeous projects out there that leave lots of open space and I've pushed myself at times to give this a try.  Other times... I'm just back in my box :-)


Topic 13: Time
Our first walk down memory lane tonight is Topic 13: Time.  We tend to think more about time at this time of the year but it effects us every day, every hour, every moment of the year.  

I really love Tracy Scott's Flower Clock!!!  It's bright and colorful making it fun to check the time throughout the day. I love, love, love that the butterfly is on the hand and moves around the clock and the words are a perfect reminder to be careful with our time as once it's gone, it's gone.


For a clock on the go, Clare Lloyd's Rag Time Charm project is perfect.  You could make several of these fabric bracelets in different colors and patterns to match outfits and use different timepieces and charms or just move the same one from bracelet to bracelet.    


Hazel Agnew's Elephant in the Room project is so much fun and sure to grab anyone's attention when they walk into the room.  It's important to remember the good times!!!  The black and white with a pop of color is wonderful!!!  If elephants aren't your thing, the techniques used to make this can be used on your favorite paper mache item.  


Time waits for no one, but just maybe this wonderful, full of texture triptych, Wait For Me by Liesbeth Fidder, could get it to change it's mind.  The texture, cascading images and metallic highlights combine for a fabulous project.  


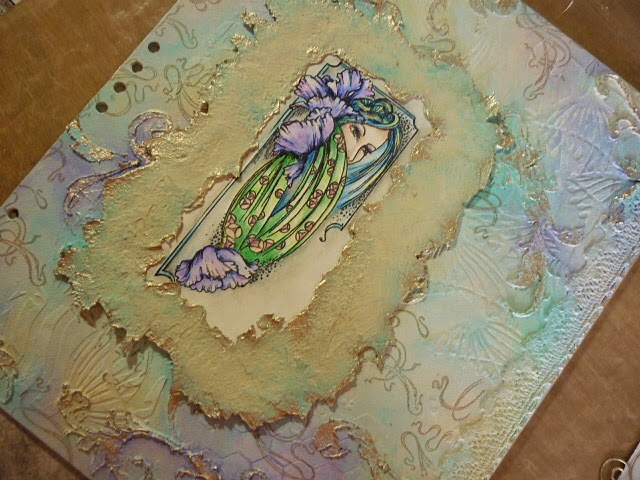
Lastly, I love these journal pages by Leandra.  There are clocks in my garden! is a fabulous spread!!!  The girl really looks like she's in a garden of clock flowers.  The colors, layout, and shading are fantastic!!!


Topic 14: Flowers
There are a few things that often make their way into what I create but none more than flowers.  I love flowers!!!  My home would probably be surrounded with them if I didn't hate weeding so much :-)  LOL  Besides I'd rather be stamping, painting, or getting inky instead of working outside.  So I create with flowers and fill the inside of our home with them!!

Lynne Moncrieff's Golden hours among the Flowers is a wonderful canvas!! Stamping into the clay is a fabulous idea that worked so well.  It's fabulous how she layered the pieces onto her canvas. 


Jenny Atkinson's scrapbook page is beautiful!!  I love how the colors in the photo are extended onto the page along with all that texture and beautiful white flowers that match the picture so well.


The Garden Slate Panel by Lauren Hatwell would be great to hang by any patio or deck.  I especially like how she used the acetate and glitter glue to give the piece some bling and can imagine how it catches the light out in the sun!!!


I love the beautiful, bright colors Anneke De Clerk has used on her Canvas.  I can't help but smile and feel the joy when I look at it!!


This Notebook Holder by Clare Charvill is wonderful!!!  All the fussy cutting and detail work really make it stand out!!


Topic 15: Gels and Mediums

I REALLY enjoyed the Gels and Mediums topic.  I LOVE the wonderful textures and effects you can get by using all the different mediums out there.  If learning more about this is something you want to do then you should definitely go back and read through every single post shared for this topic!!  They were all great!!! 
I love Liz Borer's Inspired by Fibre Paste project with all it's texture and beautiful, soft colors!!!  Her technique of putting the paste onto palette paper so you can take the pieces off and incorporate them into your project is fabulous!!!


I've always loved resist and Ellen Vargo's gel resist card is fabulous!!!  I really like the colors and use of maps.  The words are a great reminder of how today impacts tomorrow.  


Lets not forget the talented Debs Wainwright and her Syringed GP Tree.  I never would have thought to put GB in a syringe.. oh, the ideas... genius!!!


Sue Carrington's Drippage Canvas is beautiful!!!!!!!  The clear tar gel drips are fantastic and so is the way she "shadowed" flowers in the background topped with all the beautiful colored flowers.

My favorite technique shared for this topic was Lin Brown's Paua Shell Effect.  Totally Amazing!!!!  You have to go watch the video!!!


Also you should not miss Leandra's Masterclass chocked full of fabulous information about gels and mediums!!!!!!

And Finally from me....

How about an item that links all 3 of these topics - time, flowers, and mediums? I chose to make.... a card :-) I've stamped into a layer of grungepaste for my background. Over that I've painted, stenciled, and stamped including the word today and then used a wonderful JOFY flower and added a clock for my flower center. Sometimes life gets so busy that a little reminder to do more of what makes us happy is a good thing.


You can catch a bit more the texture in the background from this angle.  


I hope you are enjoying this week of roundups from the year as much as I am!!!!  There really is a wealth of information and learning to be had on the PaperArtsy Blog and on their You Tube channel.  

Thanks so much to PaperArtsy and to YOU, the readers!!!!!!!!  You are appreciated!!!!  Happy New Year!!!

~Wanda

THE PAPERARTSY SALE IS ON NOW !!

Once the SUB-TOTAL value of your order exceeds these thresholds
in the shopping cart your discount will automatically activate...

£50 order subtotal get 10% OFF
£100 order subtotal and get 20% OFF
£150 order subtotal and get 30% OFF

​We only do this once a year for a very short period across our entire online shop
so don't miss out!

Sale applies to all orders
We ship worldwide.

Saturday, 22 August 2015

2015 #15 Syringed GP Tree {By Debs Wainwright}

Topic 15: Gels and Mediums

Hello everyone, I'm Debs Wainwright.

When I was asked to make something for the theme this fortnight I jumped at the chance, what I didn't  expect was to have so much fun. So I do hope you will play along too.

This is what I created...


For the background, I started building paint on a White/Grey board (size 8x8") from PaperArtsy. 

Step One: I smooched  four colours of Fresco Chalk Acrylic paint on with my fingers until the whole board was covered. The colours were Cherry Red, Turquoise (both Limited Edition JOFY sets from 2014), Lavender and Autumn Fire. I dried the board and applied Petroleum Jelly in places  as I wanted it to look like peeled paint. Next I applied a coat of Crackle Glaze from PA. I let this dry, and then with a palette knife I gently applied Fresco Acrylic paint in Chalk over the background. The chalk layer cracked on top as it dried, and where the vaseline patches were, you could wipe away to see the layers protected beneath.


Step Two: I mixed Grunge Paste with Fresco Acrylic in Holly and filled a syringe. You can see above that I used the syringe to draw a tree, I also drew some flowers. While this was drying I stamped the tulip from ELB23 ...


onto Transluscent shrink plastic 5 times and cut them out. I painted them with  Fresco Acrylic in Claret, then heated them to shrink. I then darkened the tree by painting it with French Roast Fresco and let it dry.


Step Three: While the tulips cooled I gave the board a coat of Modge Podge in Vintage white. It's very translucent but provides a barrier between the layers as next I wanted to spray the tree with Lindy’s Stamp Gang sprays in several colours. I love these sprays as the glimmer looks fabulous. (NB. You could easily tint a PaperArtsy Satin or Gloss Glaze with Nougat or Chalk to achieve the same effect, or use a Gel as a more archival barrier)


Step Four: You will see from the photo that the background is made up of some script text in Watering Can Archival ink as well as some flowers from ELB 22...


...and ELB23 in  Olive Ink. The Lindy's spray from the tree just wiped off  the background because it was sealed. I then sprayed the lighter colours on the background and let them run and drip.


Step Five: Once it was all assembled I felt something was missing so transferred a vintage photo using Heavy Matt Medium from Golden onto the background. I added my sentiment and finishing touches, and then coated the whole background except  the tree in Gloss Gel.

I hope I have inspired you to have a go. You can see more of my work on these sites:
My blog, FaceBook, and  Pinterest. I also teach Journal Pages at Birds In the Barn. Please see my blog for next class. 

Bye for now, Hugs 

Debs xx

Wow, how fantastic that you have explained all the stages so well. I really love the vaseline resist, and the syringed tree is such an awesome texture! Love the metallic Treasure Gold Highlight on that too! Thanks Debs! ~Leandra
We would love you to join in with challenge #15: Gels If you are inspired by any of our guests who blog with us over the fortnight, then please join in and link up your creativity HERE

All links go in the draw to win a voucher to spend on products of your choice from the PaperArtsy online store. The Gels link will close 17:00 (London Time) Sunday, Aug 23rd winner will be announced 2 hours later at 19:00.

Wednesday, 19 August 2015

2015 #15 Acrylic Tag {by Lauren Hatwell}

Topic 15: Gels and Mediums

Hi everyone. Lauren here, joining you this evening with a project using a few of my favourite Gels and Mediums for a JOFY inspired acrylic tag. 


I love working with acrylic as you can build so many layers onto both sides and still see them all at the end. Gels and mediums add some great texture and sparkle for added interest. To me, they are the (non-surgical) enhancers of the art world. Think of an effect you want to create and there will be a raft of great gels and mediums to make it possible.

I've used JOFY37, JOFY38 for my project...


and Stencils PS007 and PS011


NB: Acrylic tags and ATC's usually come with a removable sheet of plastic on one side, which I left in place to protect the front of my tag while I worked on the background (I had my #10 tag cut for me at That's Crafty. They offer a range of acrylic items and will also cut bespoke items to order).

On the back of the tag I stenciled a layer in Snowflake using JOFY stencil 011. I then stencilled a layer in French Roast using JOFY Stencil 07 and 011. When it was dry I brayered over some acrylic gel medium to protect the stencilling before adding the background (because I'm going to move the paint around a bit and I don't want to smudge or remove what I've already done).


When everything was completely dry I mixed a pea sized amount of soft matte gel medium with about a dessert spoon of each Fresco paint colour to extend the drying time a bit and get better movement with the paint. The colours I used were Chalk, Nougat, Antarctic, South Pacific, Space Cadet and Blue Oyster. I dribbled several lines of each colour across my tag before tipping the tag to let the paint lines spread and merge together. I then used a cocktail stick to move the paint about a bit and create some lines. When I was happy with it I laid the tag flat and left it overnight to dry. Pretty cool but it bears no relation to the other side, which is the side you will be able to see...


When the tag was dry I turned it over to reveal the pattern on the reverse side and peeled off the protective sheet. It looks like one of those bottles you fill up with different layers of coloured sand doesn't it.


You can see that the two stenciled layers show through nicely against the backgound paint technique. Now to build up the layers on the front. I've used flock for an interesting but understated layer of texture. I made my own paste by mixing a teaspoon or so of Matte Medium with a half teaspoon of Snowflake Fresco Paint. I stenciled the mixture onto my tag using a palette knife and then sprinkled on the white flock powder (I used Fun Flock by Stampendous. It has a nice fine texture that doesn't clump).


One of my favourite gels is Glass Bead Glitter Gel by Faber Castell. Golden has glass bead gel too here. It adds a really beautiful sparkle and texture to a project. I've used it in its raw state here as I wanted it to dry clear, but as with all gels and mediums, you can add colour to them if you want to.


Last but not least I stamped the Bloom sentiment from JOFY37 and the gorgeous "paving stones" stamp from JOFY38 in white Archival ink and heat embossed using white fine detail embossing powder. It shows up really while still allowing the detail behind to show through.


I really enjoyed this project and I hope you can get a sense of how versatile the many gels and mediums on the market are. Maybe you could try this yourself mixing colour with the different mediums or using stamping rather than stencilling. It doesn't have to be on acrylic. You could easily translate this onto other substrates. Just have fun with it.


Ohhh, that's a really interesting idea Lauren. Funky double sided use of paint that can be awesome from both sides! I love how you don't exactly know what its going to really look like underneath until its dry and you peel back the protector (depending on how opaque the protector is). Thanks for another fascinating post! ~Leandra

We would love you to join in with challenge #15: Gels If you are inspired by any of our guests who blog with us over the fortnight, then please join in and link up your creativity HERE

All links go in the draw to win a voucher to spend on products of your choice from the PaperArtsy online store. The Gels link will close 17:00 (London Time) Sunday, Aug 23rd winner will be announced 2 hours later at 19:00.

Monday, 17 August 2015

2015 #15 Inspired By Fibre Paste {By Liz Borer}

Topic 15: Gels and Mediums


Hi there everyone, Liz here. Tonight I’m back again playing with something new to me! I went to Stamperama recently where I bought some Golden Fibre Paste on Leandra’s recommendation. I’ve not used this before so I started playing with it to see what I could do with it. I have to say that I love this paste because of the textured finish and the fact that it is very light when dry. It does take a while to dry even when helped with a heat gun but it’s worth the wait.


I decided to use the paste to make some embellishments and frames that I could then use on a book cover. When making these pieces I spread the paste onto some palette paper because this is non stick and could be put to one side while the paste is drying. Once dry run a palette knife under the edges of the paste to start to lift it off the paper – it will then peel off easily.


I spread the paste through two different flourish stencils. I didn’t try to get a smooth surface – I wanted texture and some depth. In fact when I removed the stencils I found that the paste was raised around the edges of the design adding texture. When dry slide a palette knife under the flourishes to remove them from the palette paper.


To create the Fibre Paste frames I drew an outline onto the palette paper that was slightly bigger than the stamp that I wanted to use. I used this as a guide when spreading the paste. I used a palette knife to spread the paste around the guide line to create a frame. This is fun because you can create and shape you want with as much texture as needed. After the paste had dried I removed it from the paper and painted it with Honeydew and a little Mermaid .


Here are some other ideas I had while playing with the paste. The top two pieces are fabric; on the right I just stamped into the paste to make a texture and on the left I used the end of a paintbrush to draw a design into the paste. The bottom two pieces are both on Grey Board and again I drew into them with a stylus this time. When the were dry I sanded the top to smooth it a little.


The book is made using two canvas covered boards as the covers. To start with I spread Grunge Paste as smoothly as I could through two different stencils. I wanted to create layers of texture on the covers. I stencilled Grunge Paste onto both of the covers. When this was dry I stuck some lace down the edges of both the covers.


I then stuck the FibrePaste flourishes onto the covers using a strong glue. When dry I painted everything with white Gesso .


To add some colour to the covers I painted small areas of different colour randomly onto the covers. While the paint was still wet  I blended the edges away from the main colour using a wet wipe and my fingers. I used Nougat, Honeydew, Mermaid and Wisteria. In between these colours I blended some Antarctic which seemed to ‘pull‘ all the colours together. I also used this colour around the edges of the covers. When adding the clours don’t forget to spread the paints over the lace.


I used some flourish stamps from EEB03 and EEB05 which I stamped around the edges using Mushroom Pigment Ink. I then rubbed White Fire Treasure Gold over the raised flourishes and around the edges of the cover. This is a picture of the back cover to show that I had not forgotten to decorate it as well!

EEB03

EEB05


The stamps that I had chosen when making the Fibre Paste frames where then stamped onto cream card and coloured with colours that toned with the background of the book covers. I rubbed the edges of the frames with more Treasure Gold and attached the stamped images behind the frames. I stuck the main image onto the front of the book using silicon (or similar) glue because the background is ‘lumpy’.


I painted the second frame with Wisteria and then rubbed Antarctic over it to catch the texture. Then I rubbed Treasure Gold around the edges before attaching the frame onto the stamped image. This picture was stuck on the inside front cover of the book, which I had lined with some patterned paper .


To finish the front cover of the book I die cut some ivy leaves and flourishes out of craft metal (I wanted the embellishments to be tough enough to be handled as this is not a decorative item). I painted the leaves with Honeydew and then washed some HeyPesto over this to get a variegated effect. Finally I rubbed Treasure Gold over the leaves and the flourishes. I painted two fabric flowers with Wisteria and Lavender and rubbed Treasure Gold over the paint and then attached the flowers, leaves and flourishes onto the front cover as shown.


This photo shows part of the top of the cover to show the layers of texture and the frame.


I made pages for the book using various materials. Some of the pages are heavy watercolour paper ready to be used. I also made a couple of large envelopes out of patterned paper. This picture shows a stamped and embossed piece of vellum and an embossed piece of acetate which I rubbed Staz On Ink over and then some Treasure Gold.


Finally I bound the book with all the pages inside it. I hope that you have enjoyed my adventure into book making! I really liked using the Fibre Paste and will go on experimenting with it. I’ll be back soon with more ideas.

What a fantastic experiment Liz, great to see the different contrasts using the two pastes. The fibre frames look like they have just literally been ripped from old paper adding so much depth to the centre focal image. The soft colour hues and Treasure Gold add the perfect finishing touches. Thank you for sharing your creativity with us.
We would love you to join in with challenge #15: Gels If you are inspired by any of our guests who blog with us over the fortnight, then please join in and link up your creativity HERE.

All links go in the draw to win a voucher to spend on products of your choice from the PaperArtsy online store. The Gels link will close 17:00 (London Time) Sunday, Aug 23rd winner will be announced 2 hours later at 19:00.