

A note from Leandra:
It seems this release has been a long time in the planning, and all the stars aligned to bring a series of products from both Raquel and PaperArtsy that combine perfectly with each other. Not only have we got a couple of stamps sets, but also some super cool mini designs and Printed Tissue those are 2 firsts for Raquel.
As you know, Raquel is a vintage, ephemera queen, so Printed Tissue was a logical new product to develop with her, and the new PaperArtsy Mattints (Matte Tints) are just PERFECT with her tissue, as is the 'Just Walnut' which can be used sprinkled, sprayed, splatted and more!
Don't forget Raquel will be along to share with you LIVE her new products and ideas over in our Facebook Group, PaperArtsy People shortly after this post publishes. I hope you can drop by for the live, or try to catch the replay. it's super-nice to hear direct from the designer about the new release and put the face to the name!
For the next few months, these stamps are available EXCLUSIVELY from our approved stockists. Please check the list at the foot of this post to find a retailer online or geographically near you, it makes sense to order within your country wherever possible.
Hi everyone, Raquel from scrapcosy here
I'm thrilled to be here today, it's my newest release for PaperArtsy! There's so much to share with you, so many new and different products coming out that it feels like Christmas day for me! Especially because some are Christmas related. Maybe it's time for you to get a tea, coffee or hot chocolate and enjoy the release with me!
I'm thrilled to be here today, it's my newest release for PaperArtsy! There's so much to share with you, so many new and different products coming out that it feels like Christmas day for me! Especially because some are Christmas related. Maybe it's time for you to get a tea, coffee or hot chocolate and enjoy the release with me!
The inspiration for this release comes from this time of the year, the upcoming celebrations, the end of autumn, the start of winter in the North hemisphere, some nature elements and vintage details that will be the perfect match for the upcoming season's projects or winter. You can use these for cards, art journals, advent calendars, book covers, handmade gift cards or wrapping paper, just to name a few.
All the products in the release will be the perfect stocking present for craft lovers! We have 2 large stamps, 8 minis and a new tissue paper, all under my Scrapcosy line.
... but that's not all, I'm thrilled and honoured that along with my release these new babies are revealed today ... The first set of Mattints (matt-tinted glazes): Shark (blue), Fern (green), Glow (yellow) and Nutty (brown) Mattints are just awesome fun, and I can't wait to show you why , and a final surprise 'Just Walnut' are crystals to add that Vintage touch, plus - Infusions 'Slime' is back, recently 'A Bit Jaded' infusions returned too!
Let's have a look at all of it below! I'll see you later at the Facebook Group PaperArtsy People, where I'll show you live all these samples and the inspiration behind!


Price: RRP €23.00 +VAT Size:5" x 6" (13 x16.5cm)
All stamps are individually trimmed onto cling foam, with a laminated storage/index sheet.
Winter botanicals (ESC46)

I love plants and flowers, so for this set I decided to draw some typical botanical Christmas plants, which would provide useful nature-style decorations for your Christmas projects: holly, mistletoe, and a beautiful poinsettia that you can stamp cut and layer for lots of dimension. The small holly stamp will be a very nice small piece for a corner and the two decorative elements can be the perfect sentiment for a card, a gift tag, an art Journal page and more.
Under the mistletoe
The
mistletoe is really easy and fun to use. Here I stamped it up and
upside down, masking the other half of the card on both cases and I
coloured the images with infusions and glaze (Olive tree and Golden
sands mixed with Satin glaze, for the leaves and the berries respectively). I could also have used the new Mattints: Fern and Glow, but since I wanted a vintage touch I went for the
infusions mix instead with the extra brown they offer.

For the background I used the new 'Just Walnut' powder, one smidget spoon dissolved in a spray bottle with water. I sprayed it onto the smoothy heavy paper surface. It looks beautifully vintage! I love those splotches!

A poinsettia card
I applied the same technique, but this time with the poinsettia stamp which can be layered to your preference. Just stamp a few of them and cut them in different sizes, then layer one on top of the other.

I love how much dimension this flower offers! You can bend the leaves up or down and mount the layers with pieces of foam or card in between so they stand out more. For the background I went and stamped the 'special delivery' sentiment and I love how it looks when combined with the Just Walnut spray.

Holly
I love how these stamps let me create a background of my own. This holly branch looks so beautiful when stamped all over the paper. You can create your own Christmas scrapbooking paper if you wish, following this technique on a larger surface.

The special delivery sentiment looks great in that middle space. Instead of a card, this could be a tag for a gift, where you could write the name of the person receiving the gift and hang it from the ribbon around the wrapped present. More ideas on that later...

Special delivery
The little holly branch had 3 leaves and 3 berries, but you can tweak it too. In this case I used 2 leaves and 2 berries to frame each side of the "Special Delivery" sentiment. I love how that looks. You could add glossy accents on the berries to make them stand out even more.

In this case I stamped the mistletoe from outside of the card towards the front. Again this plant could be used to create larger background xmas patterns. I absolutely love it!

A handmade gift bag
In the example below you can see how I made a gift bag, but the same idea can be applied to creating your own wrapping paper with craft paper.

You can see a sneak peek of a few of my new mini stamps in the background of these samples that will come later, EM86, EM87 and EM88. The mistletoe this time was painted using the Mattints Fern and Glow.

Botanical snowflakes and cross-stitch vintage (ESC47)

I also love snowflakes when it comes to a winter theme, but I thought to give them a twist and come up with something different and more up my alley. I hope you love these botanical and whimsical snowflakes as much as I do. And by way of contrast with the cold snowflakes, I decided to bring some warmth with the cross-stitch designs, which could be part of a winter jumper, scarf or hat that would keep you warm and cosy while it's cold outside.
That ties in with the sentiment, which is a sort of a poem. You can stamp it as a whole or you can use the sentences independently. My initial idea was to just have the first, third and fourth sentences individually but when I read them out loud it just made sense to add the "don't you know?" in the middle and present them in a poem shape instead.
It's cold outside
I'm in love with these cross-stitch patterns... of course you can use them in paper, but they would also look awesome stamped on fabric. Multiple options to combine them, as you can see here.

The first colour combination I tried is a classic Xmas one, the red and white. I love how warm this one looks! So simple and quick to make.

Look at that stitched reindeer! I find it so cute! I want a jumper of it! :)

For this one I chose blue as the colour to match the snowflakes, a colder (though still warm) version. I love this colour combination and again I love how simple and quick it is to get a Christmas card done!

And of course on this one, the "let it snow" was the perfect sentiment to add. I would love to see how these stitches look embossed with a super fine detail embossing powder. They would seem as if they were really sewn!

And these are also perfect to create small gift bags or envelopes. The idea again can be used to create your own wrapping paper.

Here the tag is supposed to be one envelope of an advent calendar, so I added the little number 17 from the mini EM87 that you will see later.

The mistletoe snowflake
Now we come to the botanical snowflakes. I think this may be my favourite sample in the release. This colour combination of blues and browns and the mistletoe snowflake combined with the other whimsical snowflake in gold embossing powder look great.

I'm not sure now if I used Sleight Blue, Royal Blood or Green Man infusions, because all of them were on my desk, but any of those blues combined with the splotches of Just Walnut powder dissolved in water made the most beautiful background.

I love how the heavily inked edges in Vintage Photo distress ink fade into the blue and create a beautiful vignette effect.

And depending on the light that comes, the blues turn green under the morning sun. It's magical! I love it!

It's winter time
I love the contrasting colours that I used in this card. It's basically the colour palette of the release. The botanical snowflakes are so big that they can become the focal point in a card. Here I combined the big holly snowflake with the small one in the middle.

For the background I went with the cross-stitched border stamped with infusions in the 3 blue-green colours I mentioned before. By adding the brown snowflake I find I get a gorgeous and interesting background where you can place any focal you want (if you want).

Under the morning sun, this sample also looked great. I wanted to show you this picture not only because of the colour shift but also because the holly snowflake looks so dimensional! The berries were done with glossy accents after they were painted in London Bus Fresco Paint. One berry glossed at a time.


Price: RRP €4.90 +VAT Size:approx credit card size images
All stamps are individually trimmed onto cling foam, with a laminated storage/index sheet.
All stamps are individually trimmed onto cling foam, with a laminated storage/index sheet.

And
now we come to meet my very first release of mini stamps. Eight little
pieces that will enhance your projects, with flourishes, Christmas
sentiments and beautiful background stamps. Great for all size projects, from small cards and tags, to large art journals or book cover decorations, just to mention a few ideas.
The flourishes EM81, EM82 and EM83
These can be used on their own, but I find them so cute and gorgeous when combined together! And when these are embossed in gold they look so luxurious.

The large flourish EM81
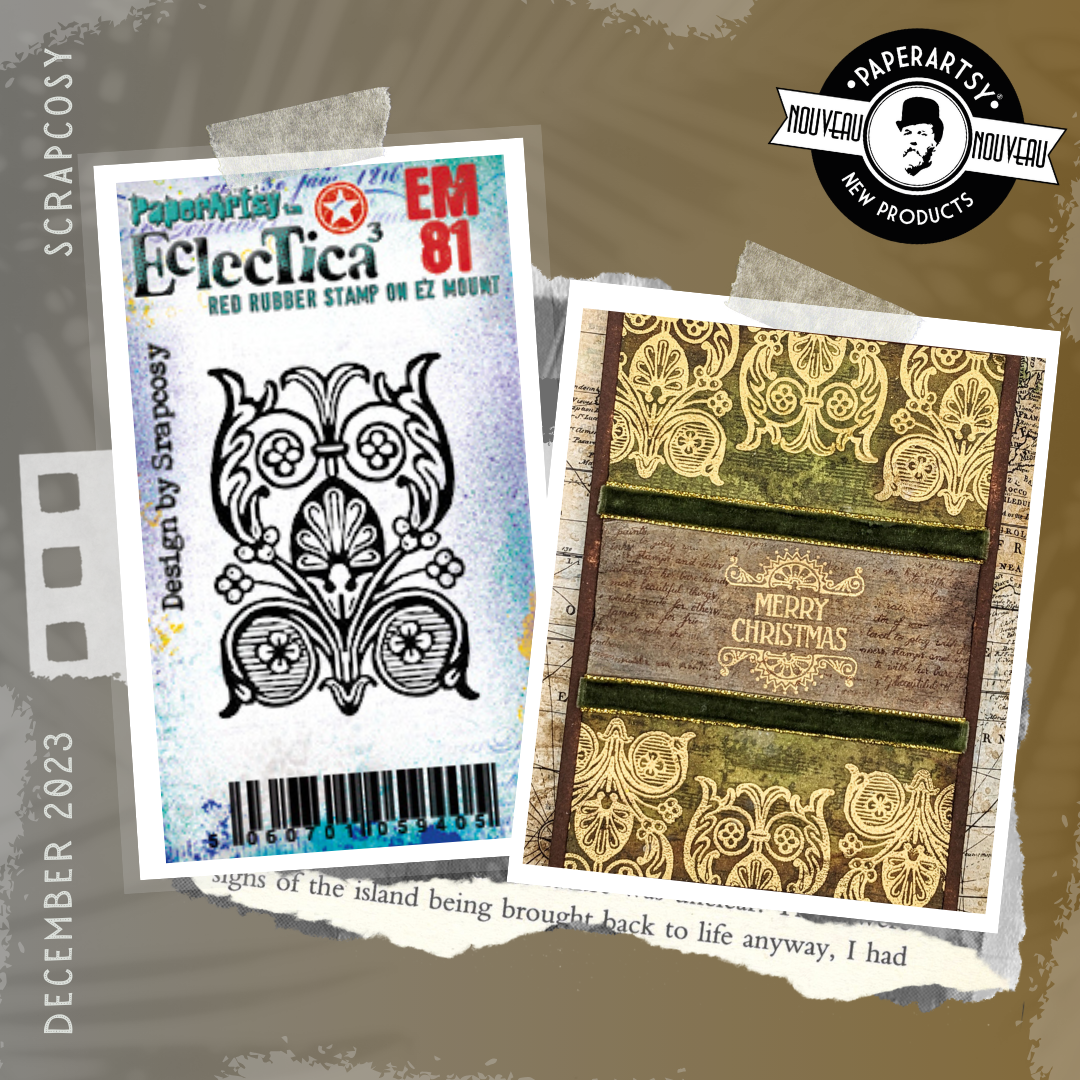
The large flourish EM81 is perfect for edges or to frame sentiments in a very bold way. It would be awesome embossed in gold as a spine in a book cover. It can be stamped in a row to create a lace-like decoration.

The peculiar flourish EM82

I could find 6, so I created a
choir with them, probably my most crazy piece ever! I had to share it,
LOL. Here I introduce you to...
...the Choir

The circles EM83

Vibrant Xmas
I just love how these look embossed in gold. So bold and striking, the perfect combination with this colour of infusions, do you recognise it? Also in this sample appear EM84 and EM88 that you will discover below.

A large flourish
This sample is just for you to see that although a mini is small, great big things can be made with them, specially when combined. Here the 3 flourishes together.

This is the perfect embellishment for a spine or for the cover of a journal, by way of latch. I'll show you what I mean in the Facebook live later. With this design in mind you could even create a bracelet in duralar or by applying some resin on it. Sara Nauman is an expert on that and I'm sure she will agree with me!

Advent envelope
A piece of the design above could also be used to create a quick and easy envelope in a craft paper.

I used it in combination with the mini holly snowflake in ESC47 and the advent circles on EM87 that you'll see later so it becomes the last envelope to open on the countdown to Christmas.

Season sentiments stamps EM84 and EM85
EM84 and EM85 are very useful Christmas sentiments. A focal sentiment and a little sentence that together can be used to create a mini xmas cards or mini tags. Cut the rubber in half if you want to stamp them independently (or mask them if you don't dare to cut). The focal can be used in larger projects and the sentence can also be stamped by way of background.
Christmas tags and mini cards
I love how cute these turned out. You can create your own stationary set (cards and tags) to add as a hanging element to your wrapped presents this year.

Merry Christmas - EM84

A gift tag and a mini card to wish a Merry Christmas to your loved ones. I'll show you the inside of the cards and the back of the tag in the Facebook live.

Happy New Year - EM85

Another mini card to wish a Happy New Year this time.

Music sheet (EM86)

This is a fantastic background stamp. I used it in different projects above. Probably this sample is the one that shows it more clearly. You will also see it when used in the sample I made for EM88 below.

The Advent Circles (EM87)

This stamp set can also be used as a background stamp, but my main idea for this design was to provide you with circles and numbers for a advent calendar, A mini advent calendar, that is. You can also stamp, cut and add each circle on each day of your Christmas diary, if you normally do one.

I don't know why but I found that using glossy accents on them was the perfect combination. I coloured them first with the new Mattints. They look beautiful! I also added Just Walnut at the end to the background, so the numbers stand out a lot.

The Artist Poem (EM88)

And the final stamp EM88 it's the most special one for me. It's not just a script that you can use as a background it's also a poem that I wrote with my pen, my own handwriting, for all of you. I'm not a poet, but I really enjoyed the whole process of creating it with that double purpose in mind.
And it reads:
Once upon a time
there was an incredible crafter,
or rather an artist,
a collector of many useful items.
She loved to play with paints,
papers, stamps and inks
to create with her bare hands
the most beautiful things.
She would create for others
for family or for friends
but deep inside she knew
she was creating for herself.
Just for fun or for a challenge
or just to mend
her broken heart in silence.
Time would not matter,
the tiniest desk space would do.
Do you recognize this crafter?
This artist is you.

Here you can see how well the EM86 plays as a background stamp too. The perfect pair for EM88.

All the brown splotches is the Just Walnut powders, that you will meet really shortly. I love how they decorate and enhance my poem.


Printed Tissue Paper by Scrapcosy (PT05)

Price: RRP €4.10 +VAT
4 sheets, presented in a clear bag.
4 sheets, presented in a clear bag.

The final product of my own release is this tissue paper! I've been wanting to create a tissue paper since well before the pandemic. In this design I incorporated many images from past stamps and some other images I have drawn (some of the mushrooms) combined with vintage images from my books and the beautiful world map. I love how eclectic and useful it is for all year round.
The Vintage Map
For this sample I just went simple, I stamped directly onto the tissue the ship from my stamp set ESC11, which is the perfect combination, and glued it with PaperArtsy Matte Glaze to my pages. The octopus in ESC12 would have also been a great option, to become the monster in the map.

Once
all was glued with Fresco Matte Glaze, I added some colour with the 4 New Mattints and I
applied some 'Just Walnut' crystals dissolved in water as a spray on top to get that super
vintage touch. I love how it looks! It looks a really old map found in a
pirate ship! I should have drawn an X somewhere, to mark where the
treasure is :)

A mushroom scene
Working with the tissue is easy, all you have to do is put glaze all over the paper or on the back side of the tissue, then quickly, but gently place the tissue on top of the paper and extend more glaze on the top. Just remember to be gentle with the brush, it is tissue paper, so it can break if you brush too harsh. The most difficult thing to do is to decide what parts if the tissue paper you want to add to your piece!

The
best way to cut the tissue for me is to wet a thin and clean brush with
clean water and trace with it the part of the tissue you want to cut,
then with your hands and fingers pull it out so the tissue fibers break organically. Once
you stick the tissue to the page, the edge seems to dissapear. You can always cut it with scissors, but then your cut
will be more obvious and it may be more difficult for it to blend into
the page.


Price: RRP €5.26 + VAT

Colouring a book
I love the new Mattints! These are a Matte TINT, the perfect paint to add colour into your images without obliterating them. They are 100% translucent. It's like working with a mix of matte glaze and Infusion colour (but no vintage brown) So convenient! Here are the four of them painted on one of the pages in my Art Journal Vol 1 by way of swatch. The more layers of Mattint you apply then more intense the Mattint will become.

In this page, also from my Art Journal Vol 1, I just decided to colour the flower with them and some few details. I also added some pieces of my tissue paper that you may recognise.

A final layer of Nutty on top gave it a more vintage look and on top of that I sprayed Just Walnut mixed with water.

Mitsletoe bag
This is another sample where I stamped the mistletoe from ESC46 and I coloured it with Mattints. It's really easy to do and you can build up the colour as much as you want with extra layers, even on craft paper!

Again a beautiful option for that special present you may want to wrap with extra love.


Price: RRP €2.58 + VAT

If
you've read all the post till here, you know I've been using Just
Walnut almost everywhere. These are the walnut crystals that are one of
the ingredients in Infusions. Water soluble, just the brown bits. I
love it's name, plain and simple. Here is a sample of it sprayed through
a stencil directly into a book.

You just need to add a very small amount into a water sprayer full with water, close it, shake it a few seconds and start spraying. In the page below I just did that. I love how it looks! It's an instant vintage look with close to zero effort involved.


Price: RRP €2.58 + VAT
Slime Infusions is back


Yay! I'm just so happy to write this! We have now 23 colours of Infusions, almost the entire original palette. Slime is back and I must admit is one of the colours that would totally nail the Christmas green. Let me show you the card that I made with it
A Merry Gold Christmas

The different shades of green you get are beautiful. It's a colour that takes some time to build, so you can go from very light to very dark in the same piece.

It looks beautiful when combined with brown. Welcome back, Slime!

A Bit Jaded Infusions is back


I think this is not new for this release, but just in case you missed it, the most wanted colour of Infusions back in the day, at least it was the case in Spain, is back too! I'm not a turquoise person but this colour is just mindblowing! And when combined with gold and a hint of brown is just goes to the next level!
Luxurious Christmas

This is a more summer vibe Christmas Card, perfect for those down under. We are so used to see in movies that Chistmas happens in winter with snow, that we forget that half the planet actually spends that time in summer!

That was all from me today! Thanks everyone for popping by! I would like to read you shortly in the Facebook Group live. I hope you liked all the new products in the release and that you found inspiration in all the samples I made. I wish you the best holiday season yet and I would be thrilled if some of these products made it into your Christmas presents. I would love to see what you do with all of this, so please tag me in social media, I don't want to miss it and would love to share it further.
Big hug!
Raquel
Instagram: https://instagram.com/scrapcosy/
YouTube: https://www.youtube.com/c/scrapcosy
Blog: https://scrapcosy.com/
Facebook: my profile https://www.facebook.com/raquel.burilloperez
And this is my Scrapcosy’s crafty party Facebook Group, for everything Scrapcosy. Come and join me! Share all your creations with everyone in the group! https://www.facebook.com/groups/scrapcosygroup/
You can find all my books here: https://scrapcosy.com/books/
And the Art Journal vol 1, which is the one I used in my samples, here:
Amazon UK: https://amzn.to/3XffJgH
Amazon US: https://amzn.to/3GgmWH3
Amazon Spain: https://amzn.to/3g3TMjF
Teaching Schedule:
I will be teaching an few online classes on infusions soon, so if you want to be the first one to know about it all, send me an email and I'll contact you when the first class is ready: scrapcosy@gmail.com
Below is a list of the retailers who have already got these new releases in stock ready for you to buy NOW!


3 comments:
Wonderful release. I especially love all the minis! Great samples too!
Amazing release! I love the new stamps and tissue and am so excited to get the minis and try the Mattint!
A fantastic release, Raquel - that tissue paper!! - and you knocked it out of the park with your samples as always. Love seeing the new toys in action...
Alison x
Post a Comment