Sunday, 3 December 2017

2017 #18 Torn, Ripped, Burnt: 'Imperfection' canvas with ETS {by Corrie Herriman}

2017 Topic 18: Torn, Ripped, Burnt


This is a gorgeous soft interpretation of this topic, I adore it! I hope you do too!


Hi everyone, it's Corrie from MadeByCHook with you today, and I'd like to share a canvas with you.The inspiration for this canvas came from one of the earlier topics: shades of white, combined with this one. I like bright colours but I also like vintage projects. The torn, ripped and burnt topic goes really well with vintage so for this one I went with light colours. I thought this was also a great idea as stamp designer Tracy always uses very bold colours with her stamps and this way I can show you that they look equally beautiful in light shades. 

To me it is a great joy to find 'things' in my craft room and sometimes around the house to use in my projects and that is just what I did for this one. 


Here you see some of the stuff I collected to use in my project. I enjoyed stamping Tracy's flowers, painting them with Fresco Finish Chalk Acrylics {Stone}, {Nougat}, {Chalk}, {Snowflake}, {Antarctic} and {Blue Oyster}. Of course all the stamp lines had gone after painting but because I stamped them with a stamping tool and left the stamps in, I could just re-stamp. I then cut them out, ready to use. I used Archival {Jet Black} ink. 


I added a crackle paste on the canvas first; I used one of Tracy's stencils for this {PS052}. I thought the crackles would go nicely with the vintage style ripped and worn theme. After it had dried I painted the whole canvas with Fresco Finish Chalk Acrylics {Chalk}. (tip: some crackle pastes have to be left to dry. The crackles will not or not as well develop when you use a heat tool)


To make the crackles stand out I used a Distress Oxide Ink {Walnut Stain}, a blending tool and a baby wipe. This was actually not as easy as it looks. It took a few attempts to get it how I liked it. Next time I shall probably use something like a glazing technique because that might just be easier.. also Distress Oxides are not waterproof so I had to fix them. I gave the canvas a quick spray with a fixative. 


On this little pile were some of the bits and pieces I collected. Some cardboard, painted with Fresco Finish Chalk Acrylics {Snowflake} and {Chalk} and ripped into a rough square, some ripped fabric which I sewed back together with embroidery floss, some burned paper... 


In this detail photo you can see part of the cluster of 'things' I found around the house and my room to use for my project. I had a great time putting it all together to make it look pleasing to the eye. Sometimes this takes longer than preparing the separate elements but I do enjoy it.

Eclectica³ Tracy Scott: Set 09 (ETS09)

PaperArtsy Stencil 052 (PS052)


And here is the whole thing finished. I added some stamping using Distress Oxides {Walnut Stain} and {Broken China} and fixative. I also edged the canvas with the same ink. 


A lot of layers in this project and that is what I like. I also added some gauze and some thread to make it look even more interesting. 

I hope I gave you inspiration to come and join us in this topic. I also hope you really enjoy finding and preparing stuff from around the house and your craft room to use in your project. I love the end result but would try a different technique to add the colour to the crackle background. It might also be nice to do this in bright colours to get a totally different look ! But whatever you decide to make, remember to enjoy the process ! 

Thank you so very much for stopping by today ! I hope you'll visit me over at my blog and my other locations too ! 


I love how this turned out, these colours are exactly what I had in mind for another project, and you have reflected what I had in my mind perfectly here! I love how all the elements look so beautiful together! Great idea using the distress oxide over the crackle too! I wondered if you could have used re-inker mixed with a Fresco clear glaze (satin?) into the cracks, then dab off the excess, in theory that would then get into the cracks, and dry permanent! One to try! Thanks Corrie ~ Leandra 


We always hope that you  learn something interesting from our blog. 

Our creative team love to read your comments so much, so please take time to let them know you've been inspired!  

Why not join our 2-weekly challenge by blogging your create response to the current topic and link it here?

The current topic link Topic 18: Torn, Ripped, Burnt will close 17:00 (London Time) Sunday, 10th December 2017, and the winner will be announced 2 hours later at 19:00.

All links go in the draw to win a £50 voucher to spend on products of your choice from the PaperArtsy online store.

Saturday, 2 December 2017

2017 #18 Torn, Ripped, Burnt: Boho Journal with EEA {by Kate Yetter}

2017 Topic 18: Torn, Ripped, Burnt


We have an assembly of stunning layers tonight from Kate. She creates such gorgeous journal covers, many of the materials she uses are recycled found objects that become coveted treasures! Fantastic!


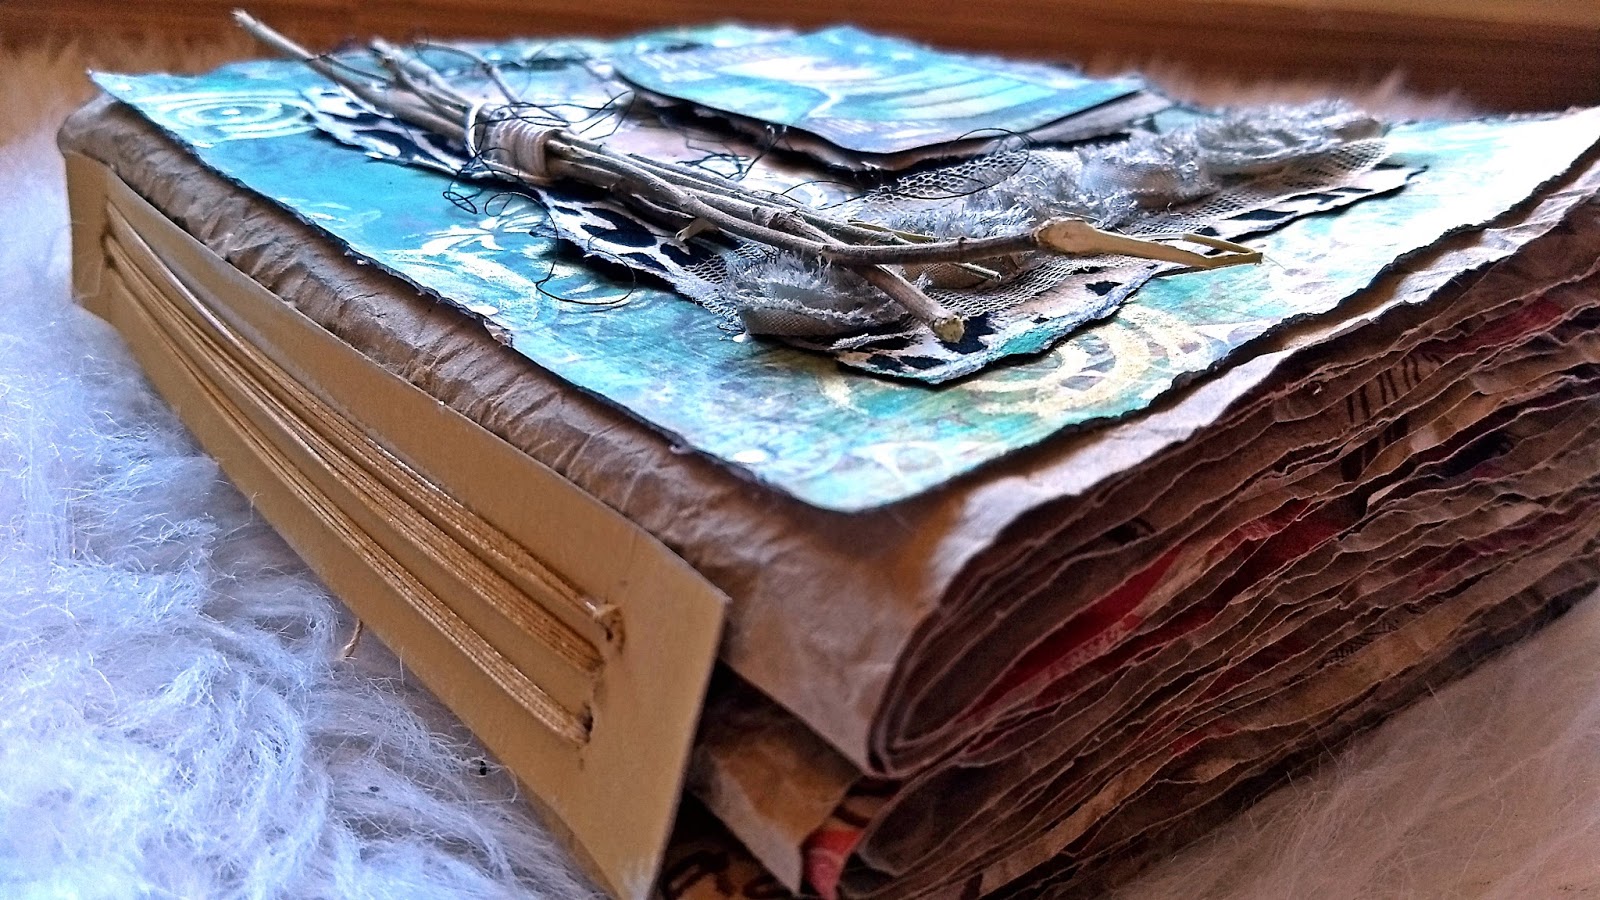
Hello. Kate here today and I am sharing an Altered Art Journal Cover for our theme: Torn. This theme is perfect for all styles because it adds a bit of texture and vintage flair.


I started by making an art journal from brown paper grocery bags. After cutting, wetting, drying and ironing I made three signatures using an online tutorial. After the journal was bound, I started altering the cover using patterned paper from my stash. 


I am going for the boho look on the cover because my art journal theme will be global. As a result I tried to layer patterns as best as I could. I spread some Fresco Finish Green Patina and allowed it to dry. After stenciling with Distress ink over top of my painted patterned paper I went back and added more stenciling with gold ink. I stamped in gold over top with the circle stamp from Eclectica³ {Everything Art} 01...


I chose a few more patterns and as you can see, I tore the edges. The smaller rectangle has been painted with a bit of Fresco Finish Haystack, stamped and then stenciled with 051 PA Stencil {by Scrapcosy}.


This dried twig had been sitting on my table for ages so I tore it into multiple pieces, tied it together with string and used it as an embellishment.


Overall, I think my favorite part about this project was adding the details such as doodling around stamped images, adding liquid pearls and watching the gold ink shimmer depending upon the paper angle.


Not only did I try a new technique for me (layering patterns) but I was also able to use a few things that had been floating around on my table for a while.


My focal image was stamped, painted and mounted on top of a piece of torn paper bag. I decided to doodle on my image in black because I love adding my own touch. I even brought out my white out pen to see if I could add more contrast. I like how it turned out!

Layering patterns on each piece of paper was a lot of fun but I was a bit skeptical about putting them all together. I thought it might be too busy or that they wouldn’t jive together. Thankfully I was wrong. I hope that you are inspired to layer up patterns and to tear up paper and sticks. Thank you for stopping by the blog and taking the time to read today.

Kate Yetter
 

Blog: https://scrapyardthe.wordpress.com
Pinterest: https://www.pinterest.com/katesscrapyard/
Facebook:  https://www.facebook.com/katesscrapyard/
Twitter: https://twitter.com/katesscrapyard

OK, I have serious background envy over that gorgeous boho background with the gorgeous stencilling and distress ink and the gold paint! OMG amazing!!! Fabulous!! ~ Leandra


We always hope that you  learn something interesting from our blog. 

Our creative team love to read your comments so much, so please take time to let them know you've been inspired!  

Why not join our 2-weekly challenge by blogging your create response to the current topic and link it here?

The current topic link Topic 18: Torn, Ripped, Burnt will close 17:00 (London Time) Sunday, 10th December 2017, and the winner will be announced 2 hours later at 19:00.

All links go in the draw to win a £50 voucher to spend on products of your choice from the PaperArtsy online store.

Friday, 1 December 2017

2017 #18 Torn, Ripped, Burnt: Organic Art with ELB {by Claire Snowdon}

2017 Topic 18: Torn, Ripped, Burnt


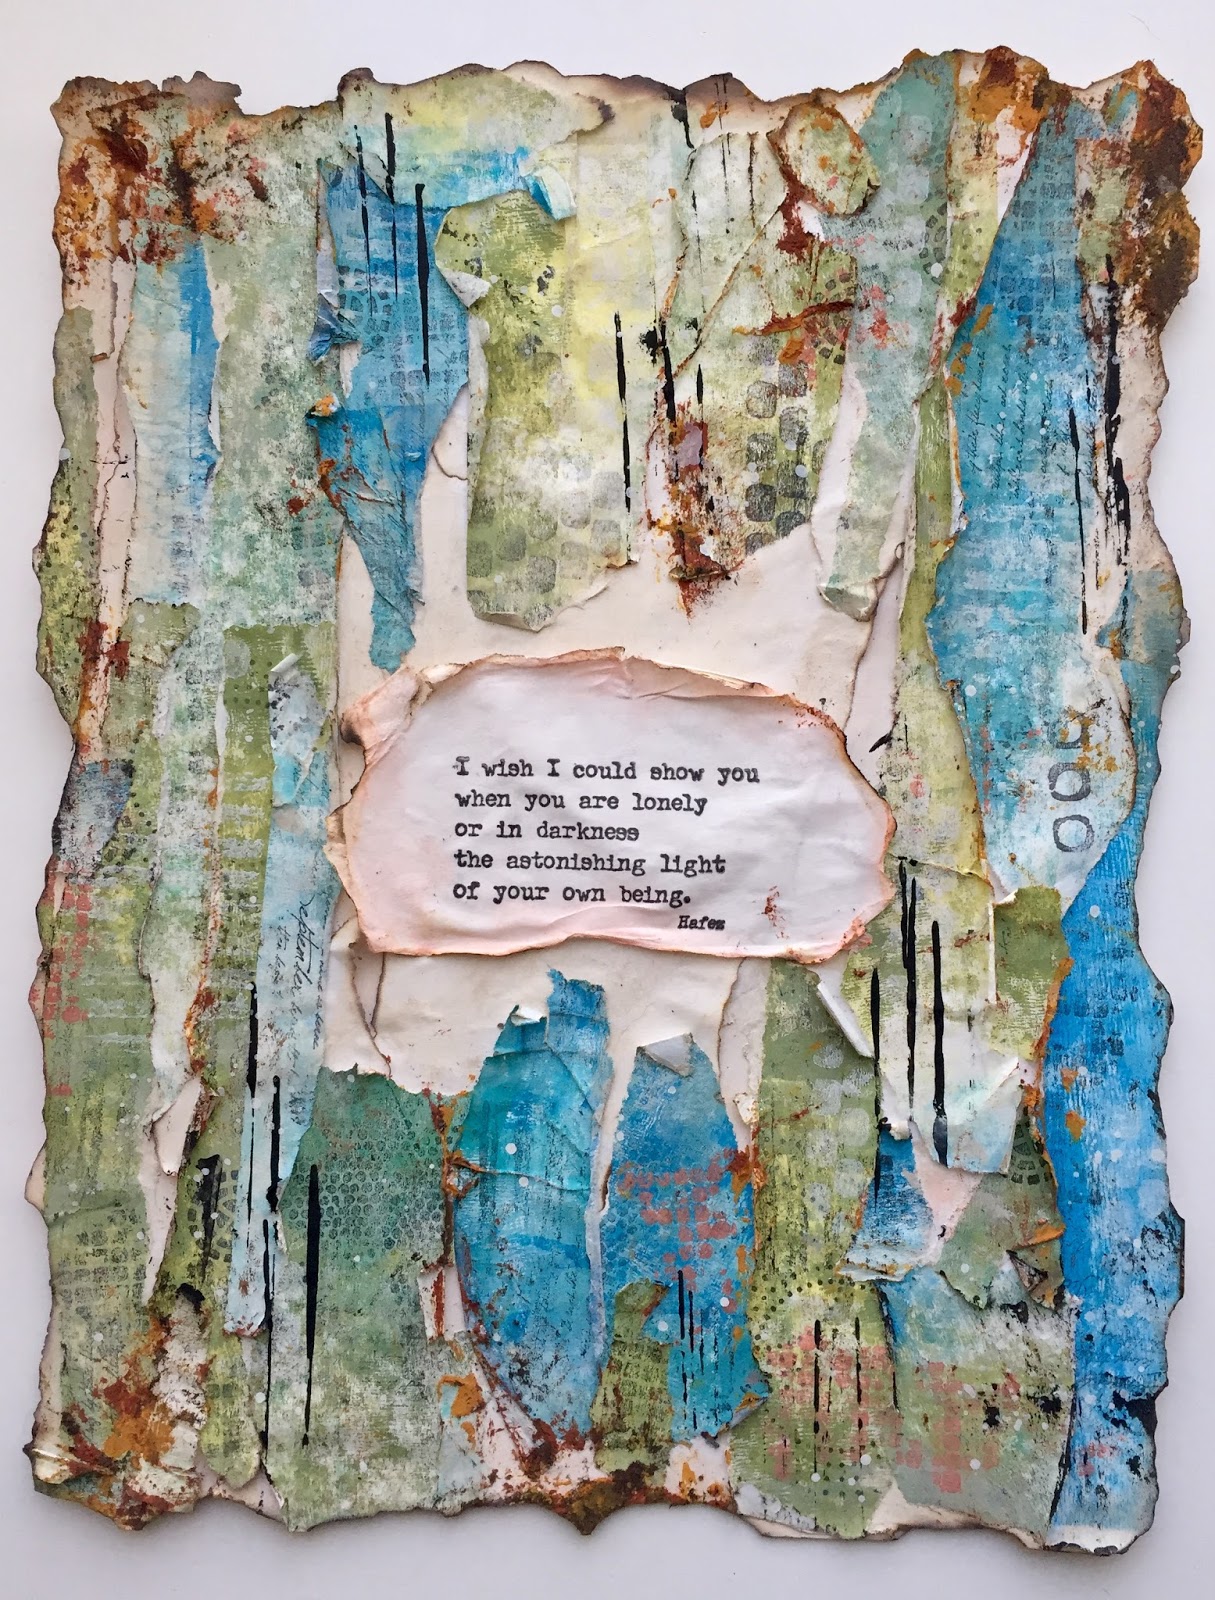
If you are unsure about tearing up things, then in this post Claire shows you how step by step and the results speak for themselves! Let's do this!


Hi everyone, it's Claire Snowdon here on the blog with you today, and I'd like to share my torn, ripped and burnt loose leaf journal page.

I decided to create a journal page....and quickly decided that a loose one might be a good idea as I was planning to burn it and I didn't want to end up setting fire to my whole art journal!


I loved creating this page as it has so much texture and feels very organic due to all the burnt edges and the colours I selected for it.


I decided to use an A4 manilla cardstock base and use deli paper for the ripped textures.  I created a type of masterboard on the deli paper and used a whole variety of stamps from the Lin Brown stamp plates Eclectica {Lin Brown{ Set 29 (ELB29)


 ELB30 

and ELB31 ...

along with Paperartsy Fresco paints Zucchini, Tinned Peas, Green Patina, Key Lime, China, Blue Oyster, Glass Blue, Beach Hut, Bora Bora and Chalk.


I started by ripping and burning some plain deli paper to create the first layer before moving on to ripping and tearing up pieces of the masterboard, burning the edges as I went.


I spent a long time burning the edges of both the cardstock and also the loose edges of the torn deli paper before using a quote from Eclectica³ {Alison Bomber} Set 02 (EAB02) as the  focal point.


Some extra stamping, splattering and mark-making was added after the piece was all together to create a further sense of depth. Also some Prima Finnabair rust paste added at the end aged the page further.


This was a really fun page to create - I did do my burning outside (just in case!) but I love the irregular shape it gives my page.  I would like to try to create another page in a similar vein using a much brighter palette to see if that organic feeling would also be present.  I also have plenty my deli paper master-board left over to be used up in future projects!

Hope you enjoyed my post today and will join in with the challenge!  

Claire

Blog:  Claire's Crafty Makes
Twitter: @Claires10
Instagram: Claires10
Pinterest: MrsSno

This looks like it came together perfectly! The colours are very 'Forest Floor' Don't put it in a journal! Hang it on the wall!! Fabulous!!! Thank you ~ Leandra


We always hope that you  learn something interesting from our blog. 

Our creative team love to read your comments so much, so please take time to let them know you've been inspired!  

Why not join our 2-weekly challenge by blogging your create response to the current topic and link it here?

The current topic link Topic 18: Torn, Ripped, Burnt will close 17:00 (London Time) Sunday, 10th December 2017, and the winner will be announced 2 hours later at 19:00.

All links go in the draw to win a £50 voucher to spend on products of your choice from the PaperArtsy online store.


Wednesday, 29 November 2017

2017 #18 Torn, Ripped, Burnt: Torn Memories with VID {by Lynne Moncrieff}

2017 Topic 18: Torn, Ripped, Burnt

It's always a treat when one of our bloggers lets you inside their head; explains how they think, how they create, how they arrange... and it's super-fun when that head belongs to Lynne Moncrieff!


Hi everyone, it's Lynne Moncrieff, Adorn, with you today, and I'd like to share with you a project which found me immersed in my comfort zone where I dipped into many of my tried and trusted favourites to achieve a torn, ripped appearance.  I will throw my hands up in the air, I did not actually burn any items!  In my defence, I hope that some of the  elements have a burnt appearance even though I did not set light to anything. 


The beauty of such a project, items can be hunted and gathered from around the home and garden, a perfect project for re-cycling textiles, found papers and all manner of goodies.  Investing some preparation time in tea/coffee staining and placing bundles of gathered items outside to weather/rust will pay you in dividends. When moving onto creating the project, there is a wealth of stained and weathered items to select from.

I worked with the wonderful PaperArtsy Vintage Ink and the Dog Collection: set 06, the woman on tag stamp being the central figure in the narrative, the other stamps playing an important supportive role in her story. The high quality of PaperArtsy stamps ensured that I had confidence they would stamp onto a variety of collected surfaces:


I will happily while away time preparing bundles.  Vintage tart tins, wrapped with a mixture of textiles and papers, alongside vintage keys, crochet lace, safety pins.... laid outside, either doused in vinegar, tea or coffee with Mother Nature bringing rain and wind to distress the various items.


Patiently waiting for the items to be weathered, broken down, rusted, a little bit battered and torn, before bringing indoors to dry thoroughly. A beautiful tactile collection of textures in a variety of colour tones which will sit side by side harmoniously.


The pleasure in rooting around home and garden, discovering items to incorporate into projects, items which might appear insignificant at first sight but the magic is, they will soon become part of the story that is woven into the artwork. 


I never tire of tea and/or coffee baths. I used them in two ways, to stain virgin items as above but also placing some of the items that had already been outside, playing around with items which have been weathered and then dipping them into the baths, lots of interesting variations can take place, sometimes producing a very dark, almost black/grey colour. 

Vintage ID06


Having a plethora of prepared papers, textiles and extras to stamp onto is in itself inspirational especially when the stamp designs are so in tune with the aged appearance of the papers and textiles, as though each fragment has been unearthed from the past.


When working on such a multi-layered project, I have learned that there is a moment of restraint required from wanting to stamp everything in sight, ultimately there is a fine line, a balancing act of placing stamped elements alongside elements which are allowed to breathe, with no addition of stamping as they paint the narrative as much as stamped pieces.


Sometimes with layers, whether paint, stamping or textiles, they might not be evident to a viewer but that does not make them any less worthy of being included in a project.  For me, layers bring intrigue and in this project the layers symbolize the layers of her life, as though she might be flicking through the pages of her mind, looking at her past.


A wooden vintage clothes peg and craft peg, given a slightly burnt appearance from being weathered with the addition of dipped into a coffee bath. The clothes peg brings visual weight to the top of the assemblage, layered onto a variety of textiles all with torn, raggedy edges, including the fragment of lace which tops of the focal images.


When editing photos, my eye was caught by the fact that this element could be a mini assemblage, ideas already circulating in my head for future projects. . 


Torn, ripped edges of found papers, cardboard paper, calico, all previously stained and weathered with the addition of some of the edges being dipped into coffee or tea, with loose hand-stitched threads adding to the overall distressed appearance, as though memories that are fragile, about to be whisked off in a passing breeze as she desperately tries to grasp hold of those fading memories.


When you take the time to stain, rust, weather, it connects you even moreso with your project. Although ultimately, you cannot control the outcome of any of those processes, you are invested as you patiently wait for the result to unfold.

Try, if possible to re-cycle items or utilize found items as it is so rewarding when those items are transformed into a project.  When sourcing items, keep in mind that a variety of surfaces will not only bring more visual interest to your project, it also heightens the pleasure of stamping and can sometimes result in viewing a stamp with new eyes.

For me, such projects are layers of joy.  From the moment I begin gathering items to the  staining and weathering,I treasure those times as they are meditative, a time when the creative brain is on a different frequency, allowing ideas to brew.  It is also a time to simply experiment, play around with different textures, notice how some tear/rip differently creating different torn edges, some might not stain, rust as successfully as others.  

As for the tea baths, add a dash of Infusions. There is no right or wrong so long as you ensure you are not working with fumes, anything which could be toxic and be careful when handling rusted items, in other words, be creative and play but keep safety in mind.
My mind is already brewing with project ideas and yes, next time I will be burning something up!

Blog: Adorn  https://lynnesbowsandbelles.wordpress.com/
Facebook: https://www.facebook.com/lynne.moncrieff
Instagram: https://www.instagram.com/stampingandbeyond/
Pinterest:https://www.pinterest.co.uk/lynnemoncrieff/

You do this beautifully! I love the loosely gathered and gently stitched elements, dangling thread, frayed lace, newly stamped papers that look old and weathered. It all comes together with your attention to detail in such a thoughtful manner! Taking time to enjoy the process certainly reaps rewards!Thank you for such an insightful post! ~Leandra


We always hope that you  learn something interesting from our blog. 

Our creative team love to read your comments so much, so please take time to let them know you've been inspired!  

Why not join our 2-weekly challenge by blogging your create response to the current topic and link it here?

The current topic link Topic 18: Torn, Ripped, Burnt will close 17:00 (London Time) Sunday, 10th December 2017, and the winner will be announced 2 hours later at 19:00.

All links go in the draw to win a £50 voucher to spend on products of your choice from the PaperArtsy online store.
Monday, 27 November 2017

2017 #18 Torn, Ripped, Burnt: Lutradur with JoFy {by Chris Dark}

2017 Topic 18: Torn, Ripped, Burnt


I love it when we get a technique pop up outside of the usual - this is one of those! Enjoy!

Hi everyone, it's Chris with you today, and I'd like to share with you a couple of items I've made for this fortnights topic, Torn, ripped, burnt; all topics that appeal to me because they create texture and an extra level of interest to a project. 

Lutradur fabric came to mind as perfect to incorporate the techniques and create fantastic texture for my backgrounds. Lutradur is a spun bound non woven stabiliser often used in quilting and dimensional free style embroidered art, qualities of the fabric are that it can be dyed, stamped, die cut, painted with water based paint or acrylic and heated with a heat gun or soldering iron to give bubbled texture, holes and lacing. I decided to try painting it this time with acrylic paint as previously I've only used water based mediums. I've also had fun with the gorgeous JOFY winter stamp set JOFY58


I found a great little frame with a layered mount allowing room for the dimensional fabric and the fussy cut JOFY Snowman that I watercoloured with Inktense pencils.


This is how the Lutradur looks before the painting and heating is done, if you sew you may be familiar with the appearance of it as it is similar to iron on interfacing. You can embroider the fabric and then paint it and the stitching becomes a resist during the heating process.


I've painted the a Lutradur to see how it would affect the heating process. I used a gorgeous combination of Fresco Finish Chalk Paints in Lavender, South Pacific, Stone and Chalk.


When the paint was completely dry I applied heat with a heat gun and after a few seconds the fabric starts to pucker and lace into tiny or larger holes depending how close the heat gun is to the fabric and for how long. You can see all the lovely texture above. Take care as the fabric can disintegrate if the heat is applied for too long. Use a heat gun with care, it will become very hot and I recommend using a tool to hold the fabric down as it's lightweight and this will protect your fingers too.


I also made a Christmas card with the baubles stamp, watercolouring as before and this time leaving the Lutradur unpainted. I also die cut the stars that you can see in the framed piece from this piece of fabric.


You can see here how I've manipulated the heating of the Lutradur to create larger holes in some places and a ripped style edging by allowing the fabric to curl. I have a dual speed heat gun and I kept it on the lower setting and about one centimetre above the fabric.


Here's a closer look at the texture on the painted Lutradur where I went over it with gilding wax to highlight it, I backed the Lutradur with white paper to show through where there were holes.

This was the first time I had painted Lutradur with acrylic paint and I liked how the process turned out. I've learned that keeping the paint to one layer and thinned down gave the best results for the lacey holes effect, when the paint was thicker I got more of a puckering effect. I also like that you can choose which side of the fabric to use as you get a positive and negative from the heating, it's great that the paint goes right through to the other side too. It's an enjoyable learning curve finding the optimum time to heat the fabric and how close to hold the heat gun and you pretty much have to be accepting of what you get but that is the fun of creating so I hope you will have a go and join us in the challenge.

Thanks for joining me and I hope you have a creative week.
Chris x

Blog: www.sketchingstamper.blogspot.co.uk
Facebook: https://www.facebook.com/christine.dark.7:
Instgram: @chrisd999
Pinterest: https://uk.pinterest.com/cdark4163/

Find my classes at The Craft Barn

Fantastic backgrounds Chris - you have certainly mastered the controlling of the fabric with heat! Beaautiful

We always hope that you learn something interesting from our blog.

Our creative team love to read your comments so much, so please take time to let them know you've been inspired!

Why not join our 2-weekly challenge by blogging your create response to the current topic and link it here? 

The current topic link Topic 18: Torn, Ripped, Burnt will close 17:00 (London Time) Sunday, 10th December 2017, and the winner will be announced 2 hours later at 19:00.

All links go in the draw to win a £50 voucher to spend on products of your choice from the PaperArtsy online store.