Showing posts with label kraft. Show all posts

Monday, 23 April 2018

2018 #7 Kraft card: Vintage sewing cards with Hot Picks {by Florence Adam}

2018 Topic 7: Kraft Card


Wow it is pretty obvious that Florence got super carried away stamping with her sewing stamps! But wow they look amazing on kraft card, and she tries all kind of inks too - she made several cards she was on such a roll! Enjoy, the results are beautiful!

Hi everyone, it's Florence Adam here, and I'd like to share these lovely cards with a vintage sewing theme.

I like kraft (and craft!), because I really like the look of it, it goes so well with black and white but with any colour really. This theme was made for me then! Except the faux leather technique (I will share with you later). This project is not really technical, so instead of a step-by-step, I will share all the cards I made with you.


Usually when I start a project, I have no idea in which direction I am going with it. I started to stamp randomly on kraft paper and white paper with Jet Black, Plum Archival Ink & Vintage Photo Oxide Ink. Here are the Hot Pick stamps I have used:


For this card, I wanted to create a faux leather background. I watched a few YouTube tutorials about this subject, and they were talking about mixing glycerine and water to soften the kraft paper. The problem was I didn't have glycerine. I found lip balm at home, so I tried to apply it to the kraft paper, then a miracle happened: It worked perfectly! It softens the fiber, so it creases easily. I added some ink, some spray to add interest to it. The oily aspect on the kraft makes it even more real. 


Look how it looks great with blue jeans ink!


Just a little bit of inking with cut and dry, and I looks so good. Especially on kraft, I like to do faux stitching, and draw line between each hole with white gel pen.


This was a little crazy, but I did it, look, I hand sew all the hooks on the stamp.


By the way, don't even try to ink with Stazon over the lip balm, the result is not good, let say disappointing.

I thought I'd make 2 or 3 and ended-up making 7 of them! Give it a try for your own ones and you will see how addicted it is. I love these cards!

Blog: mlledantan.canalblog.com
Facebook: Florence Adam
Instagram: Florence Adam
Pinterest: Florence Adam


We always hope that you  learn something interesting from our blog. 

Our creative team love to read your comments so much, so please take time to let them know you've been inspired!  

You must complete step 1 AND 2 to be entered into the draw. 

To join our challenge:
1. Leave a comment on the Topic Introduction Post and go in the draw to win a PaperArtsy Apron. 
2. Make something arty relevant to the topic, and link your creation from any social URL (eg. Instagram, Pinterest, Blog Post etc) sharing your original make to this challenge page.

The current topic link Topic 7: Kraft Card will close 17:00 (London Time) Sunday, April 29th 2018, and the winner will be announced 2 hours later at 19:00.


All links go in the draw to win a PaperArtsy creative apron. Please make sure we can contact you as a prize winner - it helps if you share your contact info from the platform you opt to use.

Good Luck! If you have any questions, don't hesitate to ask!

Wednesday, 2 December 2015

2015 #22 Xmas Giftwrap Masterplan {by Alison Bomber}

 2015 Topic 22: Masterboards

Hello all, it's Alison here from Words and Pictures to share my Christmas masterboard master plan. I'm a masterboard first timer.  When I saw the theme I thought I'd challenge myself to something new and sign up for it.

There are any number of ways to build the layers of a masterboard - so I decided to stick to my favourite things.  No, not raindrops on roses and whiskers on kittens, but certainly brown paper packages tied up with strings.  That's been my Christmas habit for a couple of decades now... brown parcel paper zhuzhed up in a variety of ways (different decoration for each recipient so I can tell which parcel is for whom).  This time around, I'm zhuzhing for one recipient with a masterboard.


And since we're on my favourite things, I built my layers with some more of them - crackle, book pages, the colours blue and brown, stencilling, wrinkle-free-distress technique, heat embossing, white spatter and of course stamping, stamping, stamping.


In another first, I've yielded to the need for collage photos to give you a quick rundown of the layers:

i) strips of book page, whitewashed with a wash of Snowflake Fresco Finish paint

ii) rough areas of Blueberry applied with a wide brush, and Crackle Glaze added to the Blueberry bits with a palette knife

iii) rough coat of Snowflake over the Crackle Glaze; stencilling holly with Blueberry
iv) wrinkle free distress technique using Chipped Sapphire and Pumice Stone, followed by stamping the checkered tree from Hot Picks Xmas 08 (HPXM08) in the same two colours

v) stencilling the holly again, this time in Snowflake; stamping the swirly tree from the same set in Coffee Archival and clear-embossing it

vi) stamping the swirly tree in Versamark and embossing with Vanilla White; stencilling Harlequins in Pumice Stone


The final two layers - stamping the lovely greetings stamp (same set again, HPXM08) in Potting Soil Archival and then plenty of spatter in a mixture of Snowflake and Chalk.


For once I have the perfect excuse for as much spatter as I like... it's snowing of course!  I love that wherever you look you have so many different things going on.


Once I had the masterboard done, then the rest happened very quickly.  I always knew I wanted to cut some pillow boxes.  I did them two ways, masterboard with a kraft label, and kraft with masterboard labels.  The additional decoration comes in the form of pine cones, tiny wooden stars and some thick white twine.


I had a few other gifts ready for wrapping (I'm not usually this organised, I promise!), so I did my usual brown parcel paper and then cut wide strips of the masterboard to decorate each parcel.  Again the pine cones and white twine finish off the look.


I'm not ready with all my Christmas shopping for this person yet, but I still have two sheets of the masterboard left to play with, so I'm sure it will run the course.  I've already cut some tiny tabs and tags as you saw, and it occurred to me as I photographed them that those round and oval ones in the foreground would make great baubles on a simple Christmas card too. 


I really enjoyed myself with the masterboard - and I just love how the ideas come bubbling up once you have the thing ready for cutting and playing with.  If you've never done it before then why not give it a go?  Do as I did... grab some of your favourite things and layer, layer, layer.  With luck, you end up with some really stylish co-ordinated gift wrapping (and cards!).

Thanks so much for stopping by today - it's always fantastic to hear what you think, and I hope you'll be able to drop in again soon both here and over at Words and Pictures.

Alison x

Ho Ho Ho ..... Wow are you looking on top of things thing Christmas Alison! Adore how you have pulled this all together so perfectly! Cunning masterplan indeed! Love your very competent collage photos (impressive) showing so magnificently the steps! And brilliant how the kraft, twine, pine cones and masterboard wrap into a whole lot of pretty parcels! And I've hummed that Julie Andrews song the whole way through your post! LOL ~Leandra

We would love you to join in with challenge #22: Masterboards If you are inspired by any of our guests who blog with us over the fortnight, then please join in and link up your creativity HERE. 

All links go in the draw to win a voucher to spend on products of your choice from the PaperArtsy online store. The Masterboards link will close 17:00 (London Time) Sunday, Dec 6th winner will be announced 2 hours later at 19:00.

Sunday, 21 September 2014

Home Sweet Home {by JOFY designer Jo Firth-Young}

Hi everyone, Jo here with my monthly project... and this month its three for the price of one!  I like to make triptychs in one format or another - and this month its a street of 3 little houses... a mini housing development JoFY stylee.


The houses are decorated using JOFY images 'old' and new, showing how easy it is to use all the stamps sets together... and coloured with Fresco Finish paints including the new JOFY Limited Edition colours.
Limited Edition JOFY Paint (Autumn 2014)

The houses started off as frames bought in the sale at a high street shop (went in for clothes came out with future art/craft projects - sound familiar to any of you?), they came as a set of four but for reasons given above I chose to use only 3 (but don't worry I'm sure the remaining one will be used at a later date!).


The frames are a really nice size - 9.5cm wide by 13cm high and 2cm deep. I particularly liked the depth of them as it means they can stand on a shelf (as well as be hung on a wall).

When I first started thinking about how to alter them I didn't plan to cover the apertures, but the more I thought about the design I realised the apertures needed to be covered (too restrictive) as it would give me a more versatile area to work on.

I wanted each of the houses to be different but have common elements to create a set, so to achieve this each house would have:

* a fence (created with the Sizzix 'Garden Gate' die), all of which mounted on 3d foam to give depth and layering.
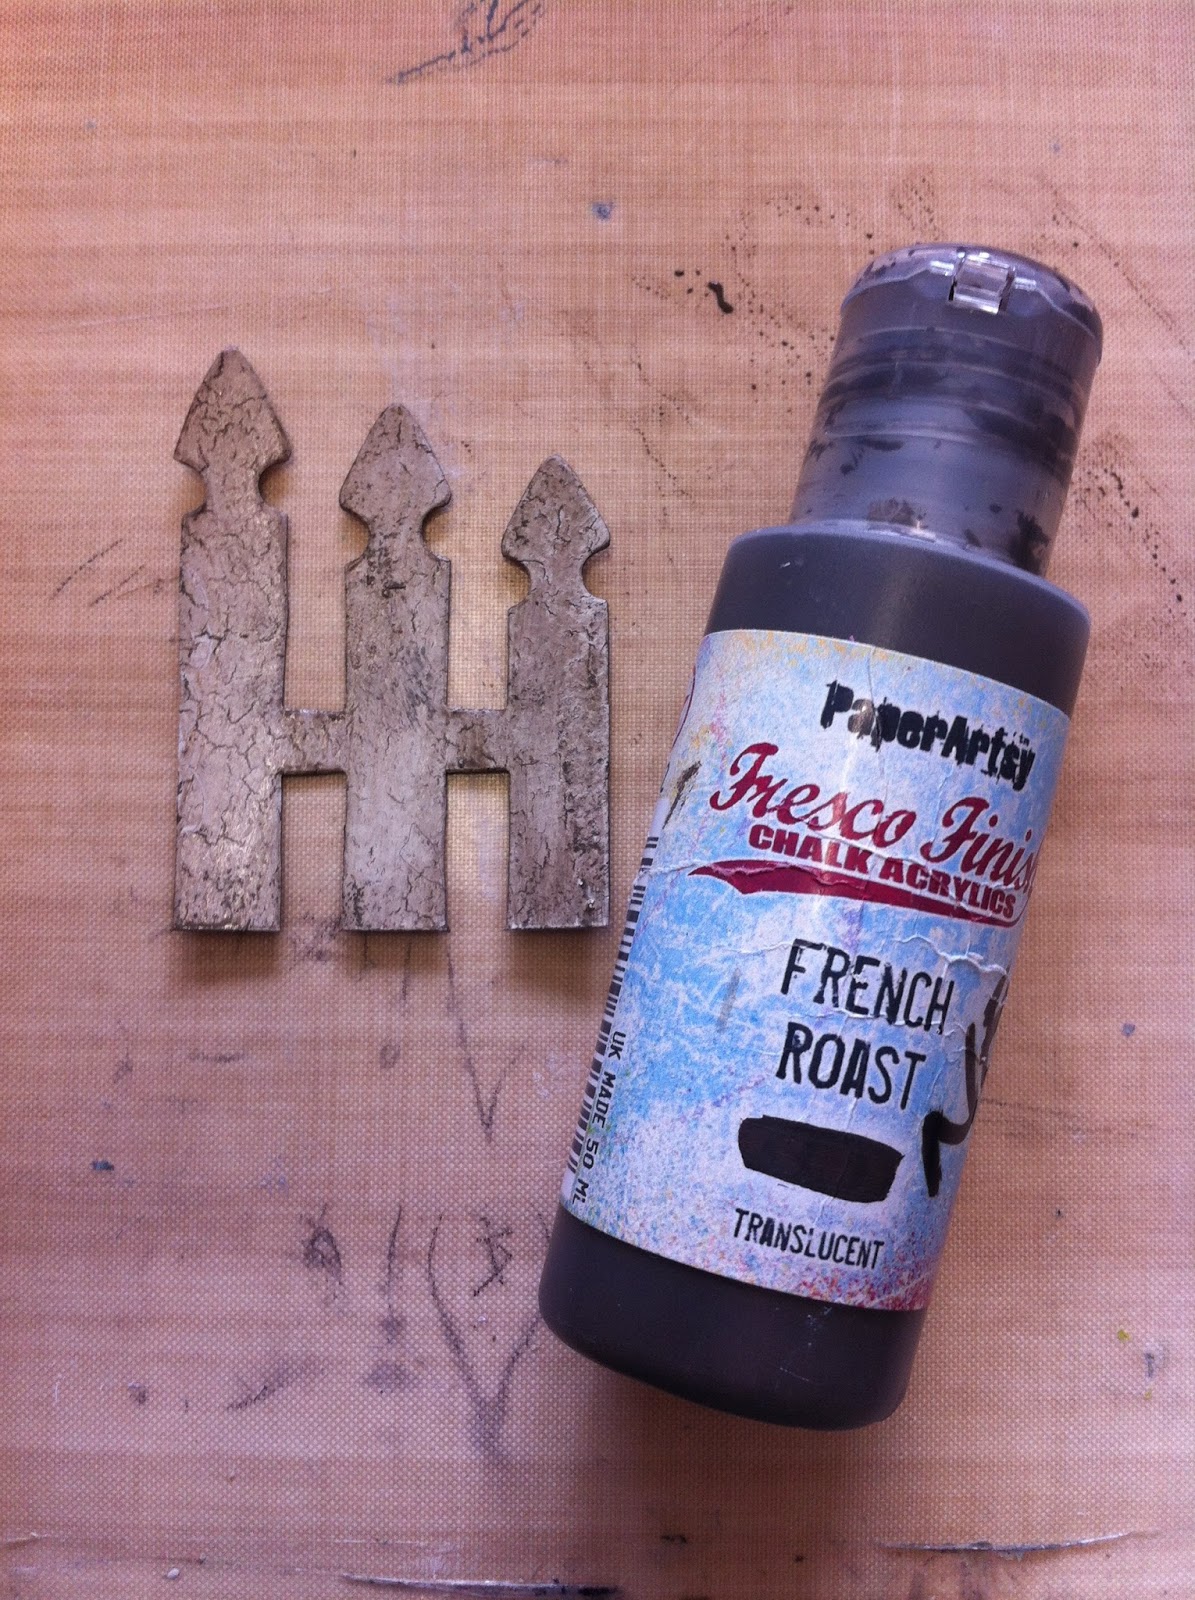
* a common colour scheme - Slate, Chalk, French Roast, Tinned Peas, Cherry Red, Turquoise,
* a door (created with the 'Artful Dwelling' Sizzix/Tim Holtz die)
* JOFY stamps
* same feature papers - such as kraft (there had to be some kraft!) and a crackle effect - the door, wall, fence
* button for a door knob


The houses were an easy shape to cut around and so I used them as the template for their base paper/card (needed to cover the aperture).  I used Matte Medium to glue the base layer to be frame - this allows for 'wiggle time' and lining up the edges.

I used 2 panels of kraft card for the crackle layers because it is sturdy enough to take paint, crackle glaze and die cutting.  I painted it with a layer of Mud splat and Slate, crackleglazed it and added a Chalk top layer - nice and neutral so it would be easy to add accent colours.  (nb I applied the top layer (Chalk) with a sponge on one panel which gives smaller cracks and cut the fences from this (photo below), and on the second sheet I used a brush so the cracks are more linear - I used this panel for the house base (shown above).)  I also cut a door from the crackled card.

House One

This house has a crackled surface, a corrugated door - horizontal corrugations completely exposed - painted Slate with the ridges highlighted with Chalk and Turquoise paint... and a button for a door knob (another common theme on the houses).

I stamped a row of grass/leaves (JOFY21) along the bottom edge and painted them with Tinned Peas, along with an additional few leaves. (I redrew the detail once the paint had dried.)  The grass and leaves will be covered by the garden fence but its nice to have the detail and images layering up to create detail.  The additional leaves are attached as if they are growing through the fence.

The tree is created with stamps from JOFY15 

JOFY15 
I stamped the tree onto Chatsworth paper that I had darkened with French Roast Fresco paint.
The flowers on this stamp set can be a bit tricky/fiddly to cut out individually and so cut around all three, leave the centre intact and paint it the colour of the tree as shown below:


The 'Chalk' coloured fence wouln't show against the house (same colour) and so I painted it with a diluted coat or two of French Roast... as this is a Translucent paint the cracks still show through (I also used the same colour on House 3).


House 2


The stamps sets I used for this house were JOFY22, JOFY24, JM12
   
JOFY22
JOFY24,
JM12
The base of the house is a brown page of Chatsworth papers, with small flowers stems stamped in 'Chalk' along the bottom edge (detail painted in Cherry Red & Turquoise), and a long stem flower stamped separately onto white card, painted and attached.


The door on this house is also corrugated cardboard but to make it different to House One's door I only peeled some of the smooth layer off & die cut the door so the corrugations were vertical.
Leaves were attached 'growing' through the crackled glazed fence.

House 3


Corrugated card is used for the main house, a lovely piece of crackled card for the front door, a nice brown fence and a button for a door knob!

The stamp set I used for this house is JOFY26

Behind the fence I stamped a row of bud stems directly onto the corrugated cardboard, along with the taller large flower stems - I also stamped this image onto white card and painted both.  Once the door was in place I 3d mounted some of the large flowers overlapping the door and the corresponding image. 


I used the 'Words Plate 2' alphabet from Ink & the Dog - this is a favourite alphabet from older PaperArtsy collection - really useful... I have several versions - one that I leave complete and use as a background and another that I've cut up to use for words etc (and another.. just in case! lol)
 'Words Plate 2'
I used the  alphabet to create 3 banners - one for each house - saying 'home' 'sweet' 'home'.  I stuck them onto the houses and was 'quite' happy with everything, and so I left them.  Here they are in situ:


I looked at them afresh a day later and decided they looked wrong, a bit heavy, clumsy and after a 'lightbulb' moment decided to simply stamp them directly onto the houses... simple.


I love these little houses!  They make me smile... and want to make more - I thought I was over my 'house' phase but maybe not.

To create these houses I upcyled/altered frames but you could easily create something similar with other substrates- there are some lovely wood houses in the Wood Substrates section of the PaperArtsy online shop.

A huge thanks to Jo from PaperArtsy HQ, we hope you never get over your 'house phase' as these are so delightful. A project that you cannnot help but smile at. The exposed corrugate is such a great touch, the perfect compliment to the stamped images. 

We would love you to join in with our monthly challenge. If you are inspired by any of this month's guests who have blogged between Sept 1st 2014 and Sept 30th 2014 then join in and link up your creativity HERE. You will go in the draw to win a voucher to spend on products of your choice from the PaperArtsy online store. You need to add your link by 19:00 (London time) Sept 30th 2014

Thursday, 17 April 2014
Masterboard Makes {with JoFY Stamps by Designer Jo Firth Young}

Hi everyone, Jo here with the second part of my Masterboard project.  Last month I created this:
...and it was great to see so many of you join in and create your own masterboards I hope you had fun- & apologies to those who found it slightly addictive!  Printing and colouring are relaxing ways to spend time don't you think!
EDIT: If you'd like to see the original post showing how to create the board and which stamps sets were used you can find it HERE.

When I created my masterboard I also made a colour index of all the coloured pencils I'd used.


I created 'embellishments' by stamping lots of spare flowers onto PaperArtsy Smoothy Card and coloured them matching the same colours as the masterboard.


So now we've created our masterboards we need to create with them.  I scan and save my masterboards onto the computer, and I also photocopy them - I have to admit cutting into the finished board for the first time is a little bit scary so I feel better if I have a copy..(or 2...) of the original.

On the masterboard I coloured each type of flower the same which, I feel, makes the board look like a printed piece of fabric and that became my inspiration for the projects.

The first project I created was a scrapbook page. I lean towards the 'less is more/clean & simple' when it comes to scrapbooking. This page is taken from one of the versatile 12x12 Kraft albums that PaperArtsy sells - I LOVE THESE!!


Great weight of paper pages - perfect for big messy journaling or for neat & tidy.  The ringbinding makes them easy to take apart to remove pages to work on and then replace when finished.
They're not available on the PaperArtsy website but give them a call if you'd like one.


I die cut lots of hexagons from various papers that coordinated with the masterboard: booktext, the green/white spotted paper, painted pieces and papers from the stash) & of course the masterboard. I played around the the layout of the hexagons making sure that no two the same were side by side and when happy I secured them with a glue stick.
Then came the fun part - I sewed round all the pieces with the sewing machine (nb. paper/card can blunt needles so keep a needle to use solely for sewing these substrates).

It was fun sewing around all those shapes - I had to go over a couple of lines twice to keep the line going but that's not a problem- adds to the handcreated effect.
to finish the page I hand sewed some of the individual flowers onto the page along with few buttons and die cut leaves.  I also wrote brief notes on the notepaper hexagons.

The back of the page looked like this and as much as I like it I do prefer for my pages to have a clean back and so I sewed this and another matching page together around the edges.
Sewing the two pages together added to the sewing theme and, more importantly, reinforced and flattened the original page which had to be bent to get it through/under the arm of the sewing machine.

The first page used a lot of sewing machine work and so while I was on a bit of a roll with the masterboard, sewing, patchwork, hexagon theme I created another one this time using only 'faux' stitching - I like adding faux stitching to projects and its useful if you don't have a sewing machine but still want to achieve the the 'sewn' look:

I die cut more hexagons - this time in several different sizes - and arranged them to suit on the page - overlapping the elements: the photo, the hexagons the flowers so that everything is connected.  All pieces were adhered with either doublesided tape, 3d foam (small hexagons) and glossy accents (buttons and flowers).

The bigger buttons had cotton sewn through them and then were glued to the page to avoid sewing into the page itself.
I like continuing the line of stitching over the edge of the patterned piece - it helps to 'tie' the piece to the background.

I've used hexagons for my shapes but different shapes could be used - square and rectangles for example which would create a nice tiled effect.. or circles for a fun layout.

I created a few cards with the remaining masterboard - these are simple cards - mat & layering with simple embellishments (once again I'm a bit of a less is more with card design.)

This first card is almost completely covered with the masterboard - I've matted it on black as it makes the panel pop.

I also added a separate flower (one created at the start of this blog post) and left the petals raised - it gives the panel movement - this could be done with any of the flowers - or raise part of the flower such as the star in the centre of the pink flower.

Stem images was stamped on black with Chalk Fresco Finish - I painted some of the flowers and then added colour with pencils to tie in the masterboard circle.

Finally this card is very clean and simple - masterboard was cut and matted with kraft, gems and buttons added... and a simple tag (JOFY23)added on very fine string.

Phew this feels like a long blog post!  I hope I've inspired you to cut up your masterboard and create with it.  I still have some pieces of masterboard left and I'll be blogging some more ideas on my blog over the next few days.

Take care.


If you would like to join in this week's challenge and play along with Jo's techniques, then do link up your creativity here, and go in the draw to win some PA stamps of your choice! You need to link your entry by 17:00, Sunday April 20th 2014