Showing posts with label PaperArtsy. Show all posts

Friday, 18 July 2025

July 2025 - With 3 Things - Altered Vintage Bobbin {by Mi Mii}


Grande bobine vintage altérée / Altered Vintage Bobbin

Bonjour à tous, c'est Mi Mii (@themy32) ici avec vous pour un nouveau challenge "With 3 Things".

Je vous rappelle le principe de cet article du blog PaperArtsy : trois produits identiques sont envoyés à trois membres de l'équipe du blog de PaperArtsy. Nous recevons généralement un set de tampons, un pochoir et quelques peintures ou infusions PaperArtsy.  Nous n'avons aucune idée de ce que le siège de PaperArtsy va nous envoyer. L'idée de ce défi est de réaliser un projet créatif à notre image avec ces trois articles.
Voyons donc ce que j'ai reçu cette fois-ci...

Hello everyone, it’s Mi Mii (@themy32) here with you for a new “With 3 Things” challenge!

Let me just remind you how this works – it’s a fun feature over on the PaperArtsy blog where three of us from the blog team are sent the exact same trio of products. Usually it’s a stamp set, a stencil, and a couple of PaperArtsy paints or Infusions. We have no idea what they’re going to send us – it’s a complete surprise. The aim is to create something that reflects our own style, using just those three items.
So, let’s see what I received this time...


Il s'agit de la planche (ESN52) de Sara Naumann (j'adore son univers), magnifique set de tampons au design vintage qui m'inspire déjà beaucoup ! Il y a également, le pochoir coordonné au set de tampons, le (PS090)  avec de jolis motifs graphiques, et pour terminer une peinture PaperArtsy Fresco Finish Nougat (FF39), une couleur opaque tirant sur les beiges rosés ainsi qu'une infusion PaperArtsy Black Night (CS12) . Trop contente de cette sélection, elle colle parfaitement à un projet que j'avais envie de réaliser depuis un petit moment.

I got the Sara Naumann stamp set ESN52 (I love her creative world!), which is absolutely gorgeous – vintagey and full of character, and already buzzing with inspiration. Alongside that, there’s the matching stencil PS090, full of lovely graphic elements, and then two colour products: PaperArtsy Fresco Finish paint in Nougat (FF39), a beautifully opaque soft pinky-beige, and a PaperArtsy Infusion in Black Night (CS12). I couldn’t be happier – this combo is absolutely perfect for a project I’ve been wanting to make for ages.


Voici un petit aperçu de ce que j'ai réalisé:
Il faut savoir que je suis une chineuse compulsive ! lol ! Si, si, je vous assure, j'adore fouiner et dénicher des pépites sur les vide-greniers, dans des ressourceries ou sites de seconde main ! Dernièrement, j'ai chiné un lot de 6 anciennes grandes bobines en bois... Achat inutile me direz-vous ? Eh bien, non ! Je savais bien qu'elles me serviraient un jour ! hahaha !

Here’s a little preview of what I ended up creating:
Confession time: I’m a total vintage junkie! LOL! Honestly, I can’t resist a good rummage through brocantes, charity shops, or second-hand treasure troves. My latest find? A set of six old, oversized wooden bobbins / spools. Useless, you might think? Not at all! I knew I’d find a use for them someday – ha!


Pour ce projet j'ai utilisé des chutes de tissu, qui forment la base et le support de ma créa.

For this project, I worked with scraps of fabric – they’re the base and the structure for the whole piece.


J'ai déchiré des bandes, dans ma chute de coton blanc, aux dimensions de ma bobine.

I tore strips from a leftover piece of white cotton, cut to fit the size of my spool.


J'ai oublié de vous préciser qu'avant toute chose, j'ai testé tout un tas de combinaisons avec la peinture Fresco Finish Nougat de PaperArtsy (FF39) et l'infusion PaperArtsy Black Night (CS12). J'ai obtenu un joli nuancier avec une bonne gamme de couleur adaptée à mon projet. Je reproduis également ce nuancier sur une bande de coton blanc que je viendrai intégrer dans ma création.

Oh – and I forgot to mention: before diving in, I did a bit of colour play with the PaperArtsy Fresco Finish Nougat Paint (FF39) and the Black Night Infusion (CS12). I came up with a gorgeous colour chart – loads of tones that work really well together and fit perfectly with my idea. I also reproduced that palette on a strip of cotton fabric, which I then integrated into the project.


J'ai commencé par étaler au pinceau, ma peinture Fresco Finish nougat de PaperArtsy (FF39) sur ma bande de tissus, j'y ai ensuite ajouté des touches de gris, avec les différents mélanges que j'ai obtenus avec l'infusion PaperArtsy Black Night (CS12). Je rajoute également directement de l'infusion sur la base. Cela crée  des fusions dans mon tissu que j'aime beaucoup.

To begin, I brushed the Nougat paint onto the fabric strip, then added hints of grey using various mixes I’d created with the Black Night Infusion. I even sprinkled a bit of Infusion directly onto the fabric – it created these lovely bleeding effects that I just adore.


Je procède ensuite au tamponnage de mon fond. Pour cette étape je ne vais pas utiliser de pad d'encre mais je vais me servir de la peinture Fresco Finish nougat de PaperArtsy (FF39) et de l'infusion PaperArtsy Black Night (CS12). Pour se faire, je viens étaler, à l'aide d'un rouleau, un peu de peinture sur ma palette, que je mélange à mon infusion afin d'obtenir une nuance de gris.

Next up: stamping the background. Instead of using a regular ink pad, I went for the paint and Infusion combo again. I spread a little Nougat paint onto my palette using a brayer, added some of the Infusion, and mixed it up to get a nice muted grey.
  

Je répète l'opération avec les différents tampons PaperArtsy de la planche de Sara Naumann.  J'aime beaucoup le fait que les tamponnages ne soient pas nets et bien définis, cela donne un l'effet grunge que j'affectionne particulièrement.

I repeated this technique with the different stamps from Sara Naumann’s set. I love how the prints come out a bit imperfect and smudgy – it gives that grungy effect I’m always drawn to.


Mon fond commence à prendre forme, mais il est loin du résultat que j'ai en tête. Je décide d'apporter des impressions avec le pochoir de Sara Naumann 
(PS090), coordonné au set de tampons (ESN52). J'obtiens une superposition de matières et de motifs qui enrichissent mon fond.

The background was coming along, but I wasn’t quite there yet. Time to bring in the stencil – Sara Naumann’s PS090, the one that matches the stamp set. I layered it over the background and started adding pattern and texture – all those layers really start to build up something interesting.


Je rajoute quelques "splash" de peinture Nougat diluée... Petit à petit les choses se mettent en place et la base de mon projet prend forme et je dois avouer que cela me plait !

A few splashes of diluted Nougat paint later... and it’s all coming together. The base is finally starting to look the way I’d imagined – and I have to say, I’m loving it!


Il est temps de rajouter du contraste avec des tamponnages à l'encre noire. J'utilise notamment ce magnifique grand motif oiseau de la planche (ESN52) de Sara Naumann. Je superpose, j'enrichis, de-ci, de-là, au gré de mes envies jusqu'à obtenir un résultat qui me convienne. bref je m'amuse ! lol !

Time to add some contrast with crisp black stamping. I couldn’t resist using that beautiful large bird image from the ESN52 set. I added bits here and there, layering and playing until I was happy with the balance. Basically, I was having so much fun!


Il est temps de passer à la mise en place de tous les éléments décoratifs que j'ai préparé à côté, à savoir, des bandes de tissus tamponnées avec les textes de la planche de tampons de Sara Naumann (ESN52), des étiquettes papiers, le nuanciers sur tissu...etc.

Now for the finishing touches – I pulled out all the decorative elements I’d prepped on the side: stamped fabric strips with the text stamps from the ESN52 set, some little paper labels, the colour palette on fabric, and so on.


Et comme sur chacun de mes projets, de la couture ! main et machine. J'ai rajouté des coutures avec un fil épais rouge. cela souligne quelques détails que je voulais mettre en évidence.

And of course, no project of mine is complete without stitching – both hand and machine! I used thick red thread in places to highlight certain details I wanted to draw attention to.


J'ai préparé une petite série de tags sur papier 'Craft' qui viennent se glisser dans les pochettes que j'ai cousues sur la bande de tissus de fond. J'ai utilisé différentes techniques pour les décorer... ici peinture Fresco Finish nougat de PaperArtsy (FF39) appliquée sur tout le tag, j'ai ensuite appliqué le pochoir de Sara Naumann (PS090), et avec une lingette j'ai retiré la peinture pour révéler le motif du pochoir.

I also created a little series of craft paper tags, which tuck into pockets I’d sewn onto the fabric strip background. I used a few different techniques to decorate them – on one, I applied the Nougat paint all over, then laid the stencil (PS090) on top and wiped away some of the paint with a baby wipe to reveal the pattern underneath.


Là,  pochoir de Sara Naumann (PS090) et infusion PaperArtsy Black Night (CS12).

Another one was done with the stencil and the Black Night Infusion – really dramatic and moody!


Et pour terminer j'ai estampé certains d'entre eux.

And to finish them off, I stamped a few as well.


Et tadam !! voilà le résultat ! j'avoue adorer ce projet ! un Art Journal sur bobine !

And ta-da!! Here’s the final result! I have to say – I love this project! A spool-based art journal – how fun is that?


Je vous le fais découvrir plus en détail avec quelques photos ...

Let me give you a closer look with some photos...


Des personnages de Tim Holtz, des mots, citations et autres... afin de créer et raconter une histoire.

I added some of Tim Holtz’s paper dolls, quotes, and other bits and bobs to build up a little story.


avec les petits tags craft dans les pochettes....

The craft tags are tucked into the pockets...


Une vue de la bobine avec la bande de tissu enroulée autour.

And a view of the spool itself, with the fabric strip all wrapped around.


J'espère sincèrement que tout autant que moi vous apprécierez ce projet. Sachez que pour ma part, j'ai pris beaucoup de plaisir et mis énormément de cœur à le réaliser. Il foisonne de détails et a ce rendu vintage que j'aime ! la sélection de produits envoyée  par PaperAtrsy ne pouvaient pas mieux coller à mon projet. Merci encore !

Merci à vous d'être passé par ici et d'avoir lu cet article. Je vous souhaite plein d'aventures créatives et de plaisir à les réaliser !

A bientôt !
Mi Mii xx


I really hope you’ll love this project as much as I do. I poured a lot of heart and joy into it – it’s full of tiny details and that vintage feel I adore! The selection from PaperArtsy couldn’t have suited my vision any better – thank you again!

Thanks so much for stopping by and reading. Wishing you lots of creative adventures and loads of joy as you make!

See you soon,
Mi Mii xx


Facebook :  Mi Mii
Instagram : @themy32

Monday, 29 November 2021

2021 Topic 15: Journalling Gratitude New Topic Introduction

 2020 Topic  15 - Journalling Gratitude


Hi everyone, Keren here. Do you ever feel frustrated or discontented - in life, or creatively too? Is there a remedy? Well this next quote is worth thinking about..

"Thankfulness is the beginning of gratitude. Gratitude is the completion of thankfulness. Thankfulness may consist merely of words. Gratitude is shown in acts". 
Henri Frederic Amiel

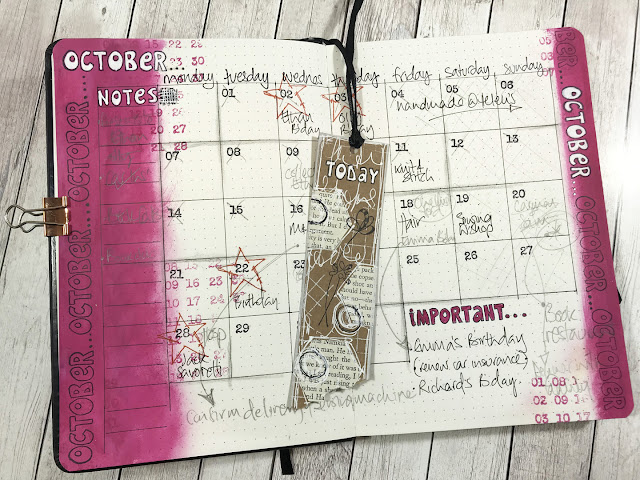
Journalling our thankfulness can be done in so many ways. It might also inspire us to thankful acts too. Years ago they might just have called it writing a diary ;-) now we have art journals, bullet journals, calendar journalling, food, video and more! We tend towards being grateful for different things, often it might depend on our geographic location or our financial state, but isn't a thankful life one to be emulated?
This topic of journalling gratitude should be one where we reflect upon what we're grateful for, but doing so in a myriad of creative ways. If someone told you to show your gratitude...how would you do it? 

Our PaperArtsy bloggers are here to kickstart the process.
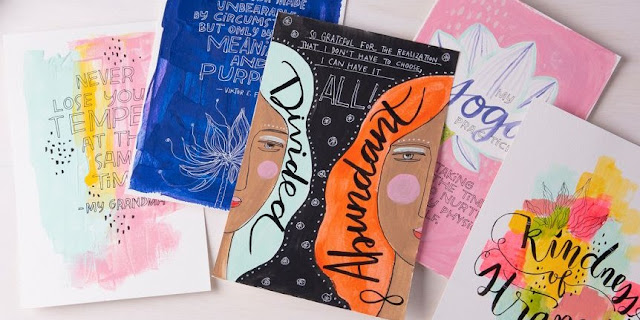
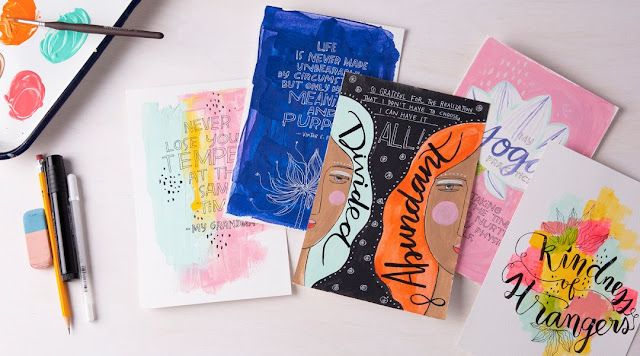
Firstly we're starting with Seth Apter who is known for his thoughtful art and this wonderful phrase is a stamp from his recent collection and would make the perfect central focus for a journal page.


Our next designer is Jo Firth-Young and she designed some stamps especially for journallers. I wonder how she'd incorporate her stamps into this topic?


Whilst it's tempting to think that journalling involves a swathe of words, sometimes fewer is perfect. Alison Bomber created this journal page and the simple solitary phrase is thought provoking.


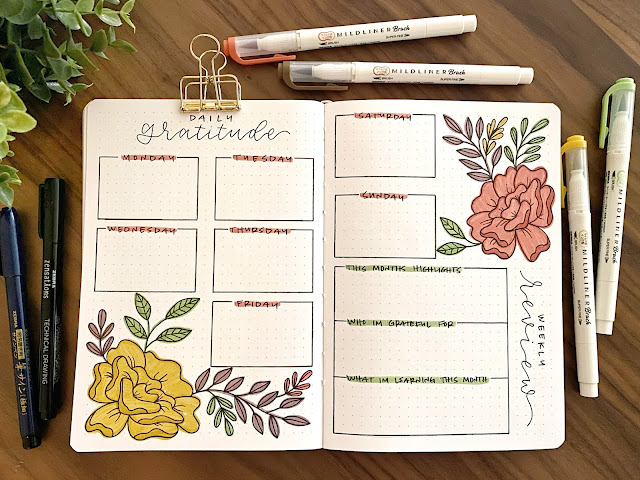
Andrea (the artist) has compiled a really helpful article on how to start gratitude journalling and I love how artistic she's been. Those beautifully drawn flowers could be replaced with stamped images if you used a similar layout for your pages.


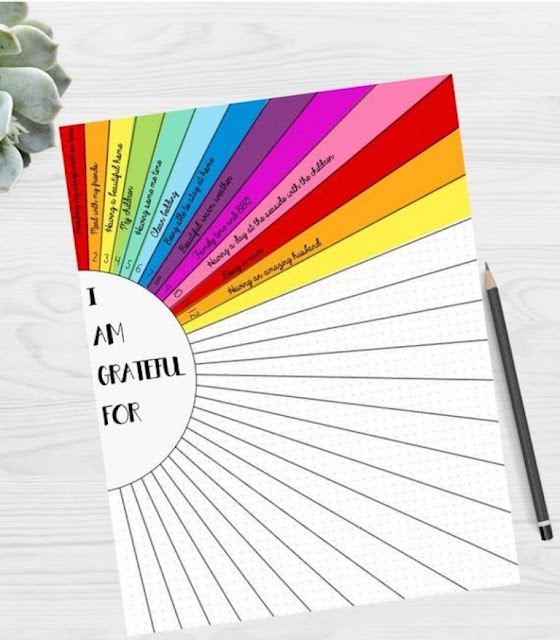
Being creative and thankful is an awesome combo. I thought this was a really clever design that ends up being something beautiful to look at too.


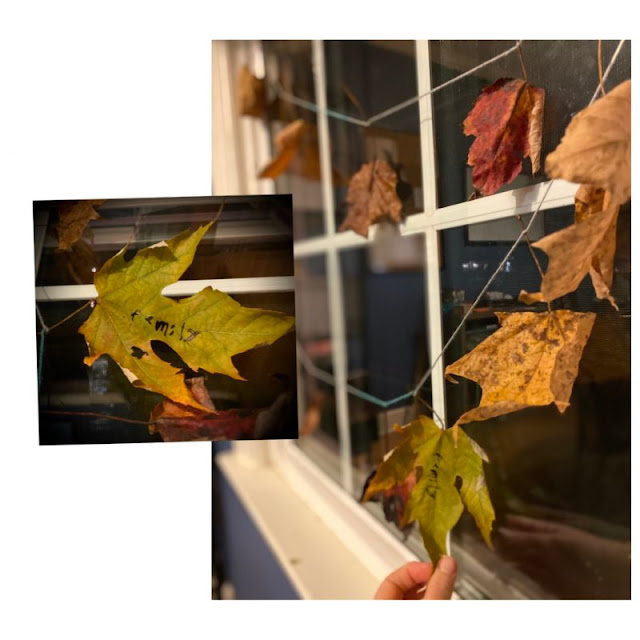
But does gratitude journalling have to be in book format? No! I thought this was an excellent idea (roping in others to help) and is also going to adorn your home too.

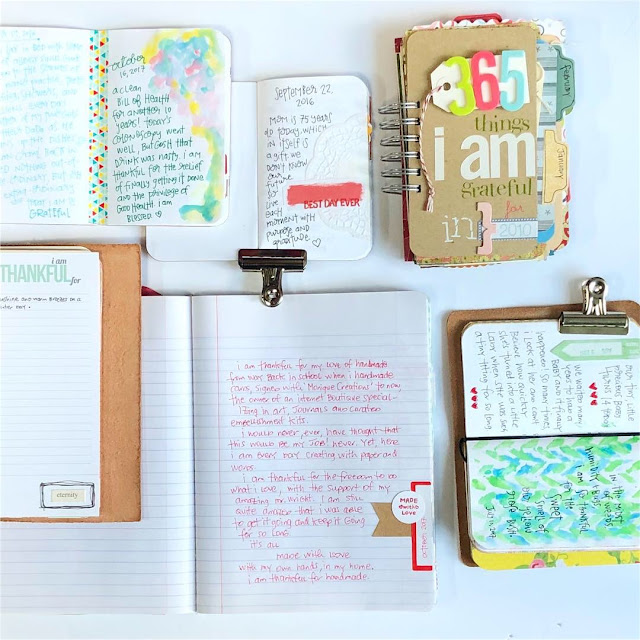
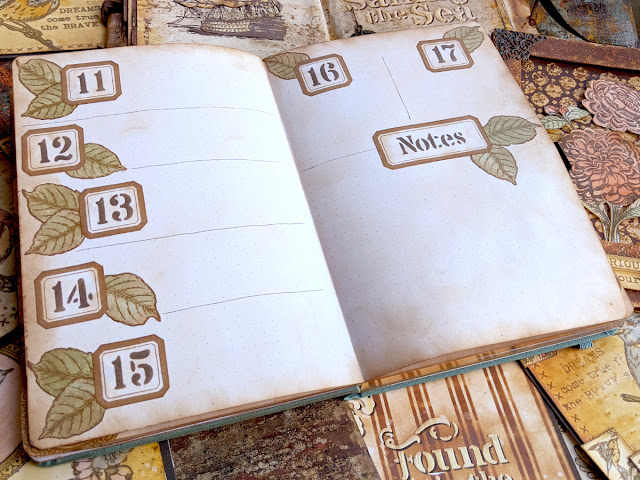
Wanting to improve being grateful? It seems that having whatever you want to record your thoughts in sorted ahead of time will aid the process. It doesn't need to be fancy. Grab some sturdy panels for the back and front, add in some pages and throw in a few tabs for starters.


Perhaps you need prompts to set you on your way to a more thankful future. There are lots of classes and collaborative schemes. I thought this mixed media artist's class looked like the perfect starting place.


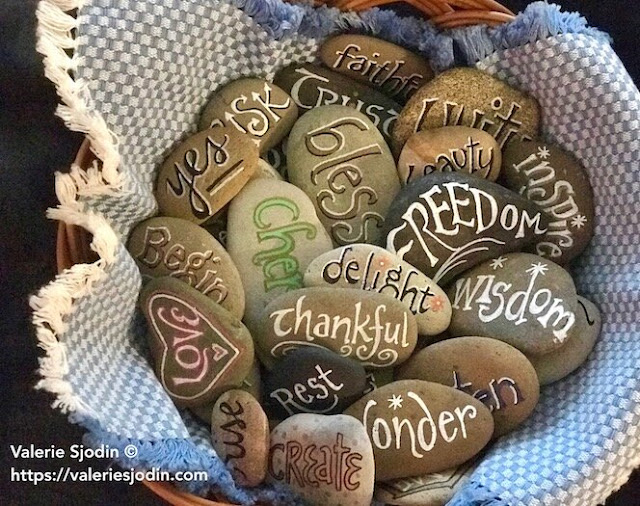
Valeria Sjodin is known for journalling about thankfulness and for a previous Thanksgiving (US holiday) she created these word stones to give to her guests to spark conversations and a thankful heart. Having prompts to encourage gratitude could be useful in your day.


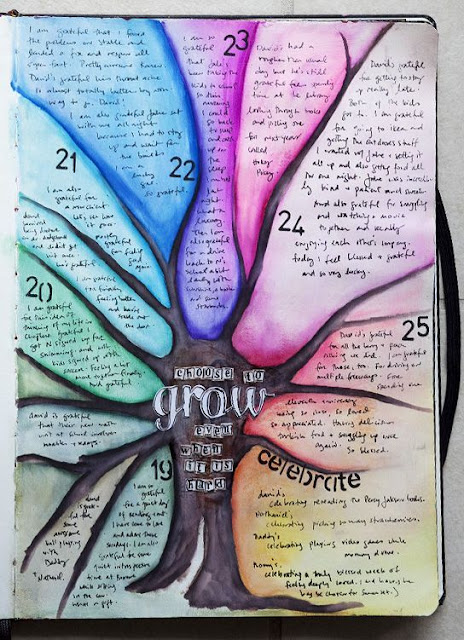
If you love your paints, what about this watercoloured beauty? Creating a page first and enjoying the process of the painting whilst you muse about what you have to be grateful for.


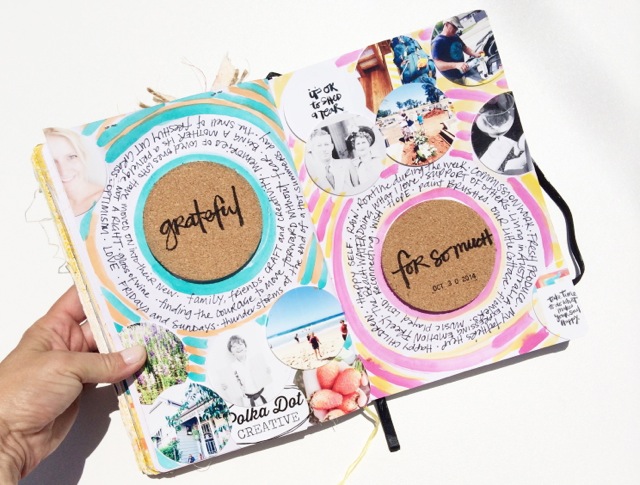
When I was still living with my parents, I did send lots of letters and one of my favourite ways to send letters was using circular writing. I loved it but I think it sent the readers a little loopy! . Jodie York has used circular journalling to great effect, highlighting her gratitude.


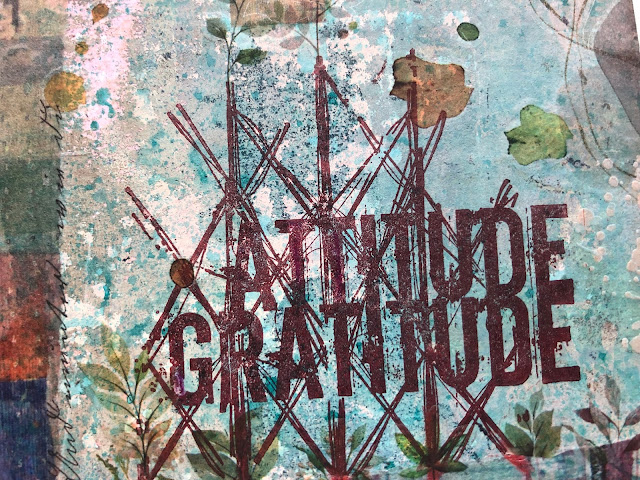
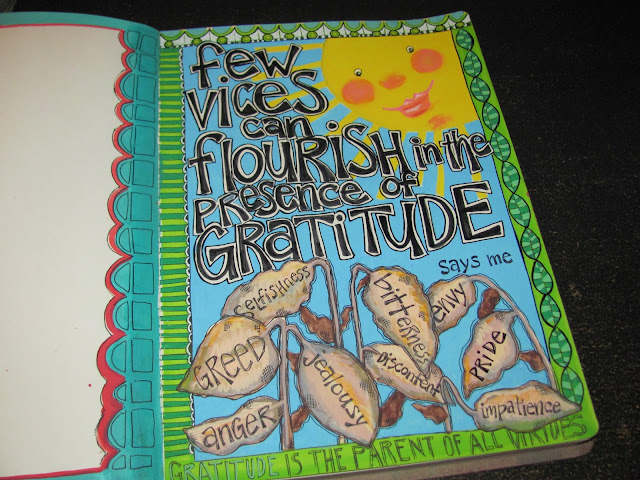
Having the right attitude can change our perspective. This artist has created a page to remind her and it made me pause and reflect; 'Gratitude is the parent of all virtues'.


Heading back towards our PaperArtsy roots, Scrapcosy has so many ideas for creating journal pages and if you need inspiration for using your stamps, look no further! Search Scrapcosy in the search bar on the PaperArtsy blog and you'll have a whole catalogue of ideas.


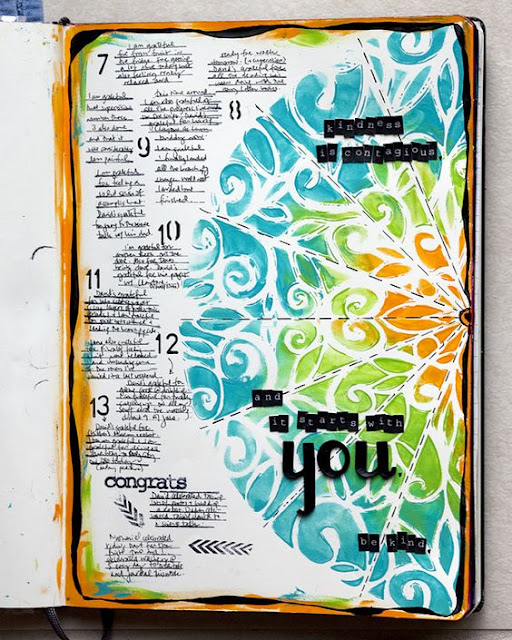
We've already seen an example by this artist, Karenika, but I thought that this tied into something we've been seeing a fair bit of (I'm talking about Mandalas; check out Tracy Scott and Jo Firth-Young for more ideas). You can create something similar with individual stamps/stencils or some of the mandala inspired stamps by JOFY.


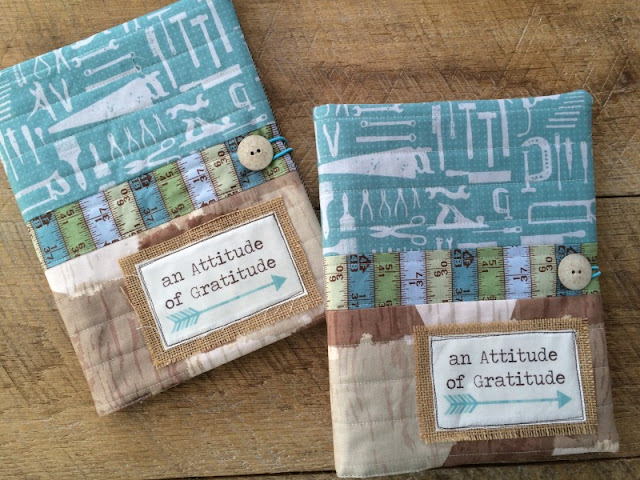
Christmas is coming and maybe you like making personal gifts? How about a fabric gratitude journal to encourage thankfulness in your friends and family? For the sewers amongst you, this one is a great idea and would be perfect to keep for a while, changing out the inner notebooks once they're filled with grateful scribblings.


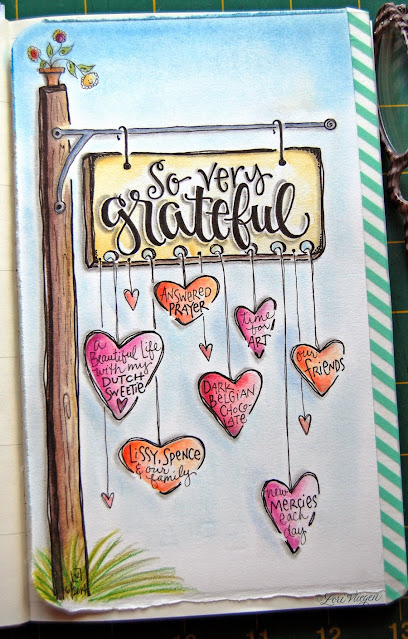
Lori Vliegen has some really creative ideas for expressing her gratitude. I thought this might give us some ideas about presenting your ideas on a page.


Before we wrap this topic introduction up, I'll leave you with a fabric journal wrap. We've focused so much on the inside of the journal that we've not even concentrated on the outside. Here's a fun and bright journal cover that would encourage me to open up and get journalling. Grab your Fresco Finish Chalk Acrylics and get painting!

I've certainly been grateful for such a wealth of grateful artists worldwide, that has made compiling this introduction such a straightforward process. I'm grateful for being part of the wonderful PaperArtsy family that's so welcoming, supportive and inspiring. What are you thankful for? Let's make our days much more grateful ones.

If you want to create along with us while we explore this topic, please share your makes on our social feeds so we can follow along. Instagram @paperartsy or why not join us and post in the PaperArtsy People Group on Facebook. Make sure you tag us in your contributions, we love to see what you get up to in your creative world!


Monday, 27 September 2021

2021 Topic 12: Sustainable Crafting TOPIC INTRODUCTION

2020 Topic  12 - Sustainable Crafting

Hi everyone, Keren here with a topic that's becoming increasingly relevant and for lots of you reading it, perhaps it's already a way of life. 
But is sustainable crafting more than just using a few more recycled products in your creative time? Is it something that we can all do better ? Thinking about the crafting products that we source - are there more sustainable options? Can the items we purchase, consume and recycle actually reduce our environmental impact ?

My Poppet ( how to make twine from leftover fabric strips)

We'll take an inside peek at PaperArtsy HQ and hear about the reasoning for their original decision to use red rubber and also look at other Creative's projects re-using and up-cycling. We're hoping that this topic will not only inspire us all creatively but that we'll reflect on our own purchasing, usage and disposal decisions and try and do more to preserve the world that we're stewards of.
We would love to hear about positive crafting changes you're making for the environment - do let us know about them in the comments so we can garner ideas from each other.


To start off with, here's PaperArtsy explaining how it all began....
 
'We chose 20 years ago to produce stamps in rubber primarily because it is a natural, renewable resource. It is also a safer environment for our workers to be in, compared to clear production, which involves a lot of chemical reaction and emissions. The positive features of rubber chimed from the outset with the vintage genre and design style and the benefits were many. We have never regretted this decision to choose to manufacture with a natural resource: rubber.
  • Rubber is durable, produces a crisp image and can handle lots of detail (particularly important for vintage-style stamp imagery). It copes with these challenges significantly better than the chemical polymer or silicone composition that clear stamps are made from. 
  • Rubber can handle extremes of temperature, so it can be stamped into a puddle of molten embossing powders with no detrimental consequences or you can iron other products onto your stamps to melt .... remember the days of ironing velvet onto a rubber stamp or Angelina Fibres??? So rubber is durable, for life, you will not need to dispose of a rubber stamp, you will always be able to gift it to a friend or sell it on secondhand.
  • The depth of an image is sharp and deep which is wonderful for stamping into clay or texture pastes and UTEE as mentioned above. 
  • Rubber accepts and holds all varieties of ink onto the surface more readily than polymersilicone  stamps. This is most noticeable with thinner, non permanent, water-based inks. An archival dye ink has oil in it, and that thicker viscosity helps the ink grab to the image, as do pigment inks, also thicker (so that they stay open longer for you to apply embossing powder). 
  • Solvent inks like StazOn, those are fast drying inks and will not damage a red rubber stamp, but the solvent can eat into polymer stamps if you don't clean up fast. And who likes cleaning up!? 
So for PaperArtsy, and the vintage genre stamps, knee deep into messy crafting, rubber was ticking a lot of boxes offering maximum versatility and durability for the consumer. We like to say a rubber stamp is for keeps.
 

There are other aspects of working with rubber that appealed to us from a production point of view. For example, a rubber stamp mould is re-useable over and over, we really liked that! We also liked that there are significant rubber recycling initiatives in operation, these are mainly pitched at recycling car tyres, as that is the most common rubber waste. But it is good there are established systems in place to create different products from all waste rubber: playground turf, rubberised asphalt, and all manner of floorings. If you are interested in understanding how rubber is a natural resource see this article and also, this one on how rubber is reused.'
 
Here at PaperArtsy, as we make everything on site, we have found increased efficiency in that we only need to manufacture what we need for orders. Most of our orders we ship out daily go to the shops we supply. Sure, of course we hold some stock, but generally we manufacture stencils and stamps to order. Infusions and paint we always have plenty in stock, and we bottle up a new batch when the shelf is almost empty. This means we waste less time, energy and product by meeting demand without unnecessary waste. And we do not end up with any 'end of line' stock unsold, as we only press what is required. We just don't have any excess or an oversupply of stock. It is astonishing how many manufacturers will dump stock because they over-ordered, and often they do this into a different territory to their home base. It's almost like they hope people won't notice. We are not outsourcing product, so we do not have any of those air miles, or oversupply issues to contend with, we try to be smart about all aspects of our on site production to be as efficient as we possibly can be."
 

Leandra continues.. "At PaperArtsy we are in control of all stages of production on site. The rubber is moulded under heat and pressure, in the stamp presses, it then gets trimmed (see above), then the cling-foam liner is peeled off the back and the stamps are arranged on the index sheet which has one side laminated. That means the index/packaging sheet is also a storage sheet for the stamps. The plastic bags are biodegradable, this is a new product that only became available to us in 2021, and we are thrilled to shift to this packaging. We find that many customers like to cut off the 'hanging strip' at the top of the bag, and use the bag itself as the 'pocket' to keep the stamps in, so it can double up as a storage solution too".


As Leandra mentioned, all the PaperArtsy products are produced on site. The infusions are blended, bottled and labelled by hand...


The stencils are cut by laser and packaged on site. There is a small amount of plastic waste in this process. All PaperArtsy waste is sorted into different types of plastic plus rubber, paper, card etc. Once sorted, it is taken to the local commercial recycling centre, where it is all weighed, and they are charged for disposal by weight. Another incentive to repurpose and minimise waste. It is important to PaperArtsy to engage with those local services to ensure waste is dealt with correctly within the local and regional commercial recycling ecosystem.
 
 
This is the wonderful Willy Wonka paint bottling machine, it is a bespoke machine made just for PaperArtsy. It drops the right amount of paint into each bottle. It was designed like this to minimise product waste.  Most commercial bottling options you can loose a lot of product in the clean up between colours, and disposing of those fluids is also something that needs planning and thought to ensure it is appropriate for the environment and your specific location. Be it town or country - you can't just dump paint into any water system! At PaperArtsy they developed a machine to get every drop in the bottles with very little waste.
 

The paint is labelled on site too. No all those caps are not screwed on by hand there is a machine that whizzes the lids on - much easier! They just drop the lids on then zap with the lid whizmo gadget to tighten them!


Unfortunately these infusions lids are a bit too small for the automatic whizzy-lid thing, so they are lovingly applied one by one! And the labels too,  as they are also a bit tiny for the automatic label machine! But these are the lengths team PaperArtsy will go to to make something a bit different and unique.

As far as packaging is concerned, PaperArtsy will re-purpose, reuse and recycle all the packaging that comes their way as much as is possible. In addition to the eco-friendly bags mentioned above, they wrap their products in reusable tissue paper and the free postcard that comes with it can be used as a postcard or as Kate Yetter shows you below, can also become part of your next piece of art.


The latest news is that PA HQ are looking at their outer bags (which have to be tamper proof / waterproof etc.) for a better option and are in the throes of getting small cardboard boxes produced to replace these bags. It's great that you can buy PaperArtsy projects knowing that the company are making decisions about production, packaging and disposal sensitively and with the environmental impact in mind.


So to the wider topic of Sustainability. Where do we begin? There's so much we can say on the topic? Starting with the super basic; nearly every single project I've made has used glue. Have you checked the contents of your bottles recently? Most white glue is non-toxic thankfully but have you ever tried making your own with natural ingredients? Here's 5 natural glue recipes in case you'd like a go (including a lickable envelope glue).


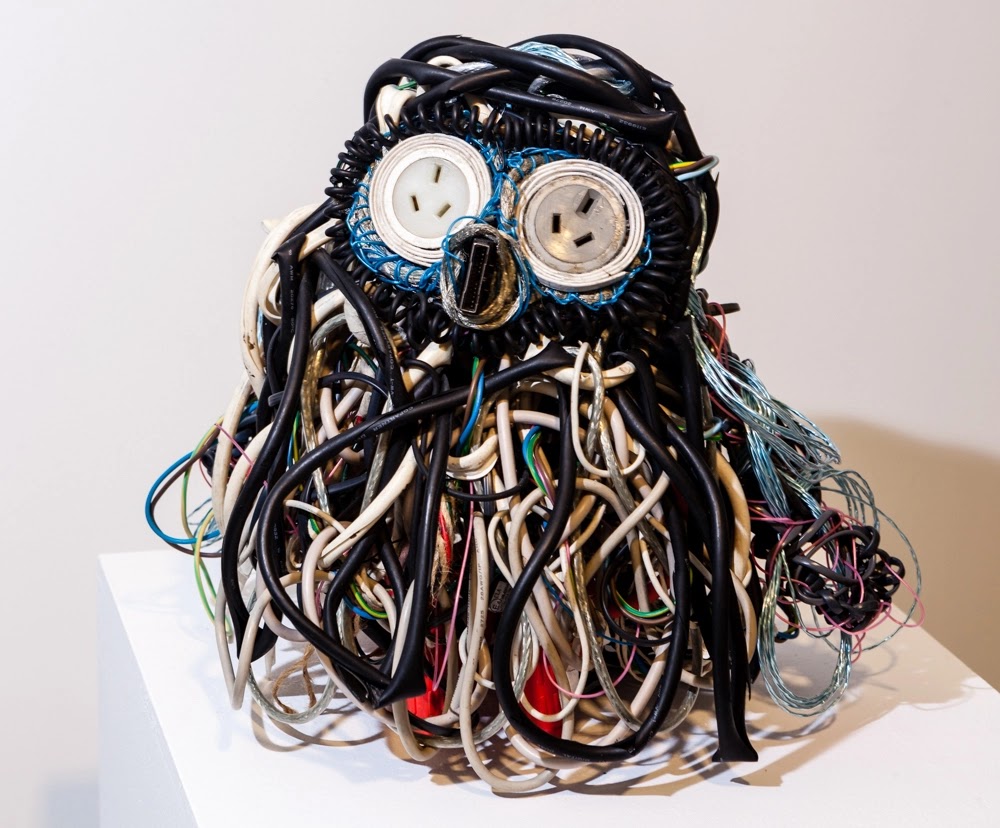
We all know about trying to reuse items we'd normally discard. The dangers of plastic bottles in the oceans is something that the United Nations wanted to highlight so they commissioned this structure made entirely out of plastic bottles.

There are various artists who create in order to start a conversation, some make thought provoking art, and others like Ruth Waldren do all 3; creating structures that are both beautiful and help solve environmental issues. This is definitely a case of sustainable crafting as the woven sculpture is designed to catch fog. Fog harvesting has the potential to provide a valuable source of water in arid mountainous coastal regions.

Queensland College of Art partnered with a neighbouring Flight Centre and produced artwork using the Flight Centre's recyclable waste. Using ordinary 'waste' items not thought of for art pieces can really become something spectacular.


This next project from Etsuko Noguchi uses an old cardboard box, that you'd never guess was so humble in its origin.

But is sustainable crafting simply using leftover items? That's not always practical is it. Surely it's to do with our mindset and decision making and to quote Maya Angelou 'Do the best you can until you know better. Then when you know better, do better'.
How can we be more sustainable? Is it to do with making choices. What are we to look out for when deciding where to spend our hard earned cash. 

We're coming back to PaperArtsy - because it's lovely to hear about how the products that we know and love are some of the safest in the world.
Did you know that Smoothy Cardstock and the boxes used to ship orders are using paper made from approved managed forest papers and with vegetable dye inks (for the printing on the boxes). When they made Scrapbooking papers back in the day, vegetable inks were used on those too.That was a conscious choice.


If we move to everyone's favourite paint; Fresco Finish Chalk Acrylics, these are 'Low VOC' paints (Volatile Organic Compounds) so no nasty smells and headaches. 


As they are chalk paints they have a shorter drying time anyway but they're not extended artificially by adding more VOCs.  If having a longer (wet) open time is important to you (particularly if you're doing gel printing) you can use PaperArtsy's environmentally friendly Drying Retarder. Just one drip is all you need in a blob of paint.


Small steps like choosing cardstock can be part of the process of thinking more consciously. If you need something other than Smoothy, kraft cardstock is a good option. Miriam Grazier designed this lovely kraft trio with Sara Naumann stamps.


..and Florence Adams who had a ball with kraft card and sewing themed Hot Picks.

Lots of artists love junk journalling and there's so much to be admired by reusing packaging and everyday items. A recent project from Sara Naumann saw here creating a junk journal with serviettes, left over bits and adding in some resin for longevity.


Lucy Edmondson brought joy to her leftover wooden stamp mounts along with other upcycled treasures.


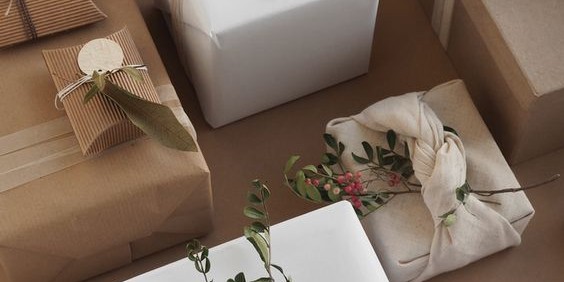
We can take being creatively sustainable in lots of areas of our lives. How about wrapping presents? You can even see a gift wrapped inspired by  the Japanese art of Furoshiki.


There are lots of tips about being environmentally sustainable in our creating. From how much water we use to turning our machines off after using them. From consuming less to reimagining our supplies a little more. 
Could we creatively think about reducing the waste we produce with creating. What do we do with leftover scraps- can we reuse them or transform them into something else?

If you've a box of papers, junk mail, envelopes and scraps of watercolour cardstock etc, why not try making your own paper? Here's a fabulous tutorial complete with a DIY for the mould and deckle frames.


Trying to be sustainable and environmentally conscious also requires some thinking about the issues. I enjoyed reading this article by The Little Castle On Mercury who has started me thinking about the way I'm both choosing to create and purchase.

Hopefully this introduction will begin a conversation. We would love to continue it on PaperArtsy People (our Facebook group for PaperArtsy fans). 

If you want to create along with us while we explore this topic, please share your makes on our social feeds so we can follow along. Instagram @paperartsy or why not join us and post in the PaperArtsy People Group on Facebook. Make sure you tag us in your contributions, we love to see what you get up to in your creative world!