Showing posts with label PS329. Show all posts

Monday, 30 March 2026

Rhythm of Circles with EPA {by Nikki Acton}


Hi everyone, Nikki here with you today sharing a journal page (or maybe wall art) using the new mini stamps from the Eclectica³ PaperArtsy stamp collection (EPA). These mini stamps are designed to be ideal under-layers complimenting other designer lines, but I decided to make them the focal point too.


There are eight new mini stamps - Eclectica PaperArtsy EM153 - EM160. (Available from PaperArtsy Stockists). I used seven of them today.

I needed two contrasting colourways for my project so selected Fresco Chalk Acrylics in Cerise (FF136), Sunshine (FF223), Persimmon (FF209) and Electric Violet (FF201) for my warmer colours and Aquamarine (FF153) and Sargasso (FF135) for the cooler ones. It's rare I don't include some black and white in my projects, my go to colours being Little Black Dress (FF19) and Chalk (FF83).

To build up my background I also used one stencil - PaperArtsy stencil PS329 - by JOFY.


To begin I took three of the red / warm colours and loosely added to my page. No need for precision or blending here - lots more layers to go!


Next I used the stencil to add some Chalk acrylic randomly over my page followed by some stamping of the bubble wrap stamp (EM156) with Electric Violet paint.


More stamping - this time with Ranger Archival inks. I used Plum, Watering Can, Orange Blossom and Jet Black. When adding to a background like this I do not use a block but just hold the stamp into the ink and transfer to the page. I am happy if I only get half the image!


I created two of these backgrounds - and as with any process like this they are slightly different. I used black ink on one for the branches but the more subtle Orange Blossom ink on the other. On one I added some additional stencilling using Sunshine.


For my blue/green background I used my gel plate. This technique gives you the mirror image of the stamp you are using. First I add some paint to my gel plate.


Next I begin stamping off the gel plate - i.e. using the paint on the gel plate to stamp onto another piece of paper. You need to work relatively quickly (to prevent paint drying on the plate).


Once complete I use what is left on the gel plate to create the print. You can see below the gel print alongside where I have 'stamped off' the gel plate onto card.


I also used this technique for some of my focal imagery. While the gel print version doesn't give the perfect image that you get stamping with ink and PaperArtsy stamps, it does give you a wonderful, grungy version!


The blue flecks of paints on the black print were leftovers from the previous print - cool effect!


To build my focus I stamped and punched or fussy cut different images. I mainly used the half circle from EM153 and the full circle from EM157. I stamped on both the warm (reds) and cooler (blue/greens) backgrounds and also used the gel print black circles.


I cut other parts of the background to form the layers. As I was using square backgrounds but circles as the focus I made sure I softened the edges with a corner punch. 
 

Each layer was mounted onto black card (or card painted black). 


I created a little cluster of stamped elements and added one of the word stamps.


I love how the stamped semi circles look over the busy multicoloured background.

I hope you like my journal page. I look forward to seeing what you do with this fabulous collection of Mini's.

Happy crafting, Nikki.


Instagram: @a2a.craft
Pinterest: nikacton
YouTube: @nikkiacton797


Thursday, 6 April 2023

2023 Topic 4 : Mail Art {by Nikki Acton} with Jo Firth-Young stamps


Hi everyone
Nikki (@a2a.craft) here with you today.

My recent crafting pursuits have been quite bright and colourful, but I have been intending to rediscover a bit more of the vintage/distressed look. This project gave me the perfect opportunity. I decided to re-purpose an Amazon delivery cardboard envelope for this Mail Art topic - I hope you like it!


Along with our Mail Art topic, our theme is Texture - so I had fun building some textured layers to decorate my recycled envelope. I used crackle glaze, embossing powder and folded card to create the different effects you can see.


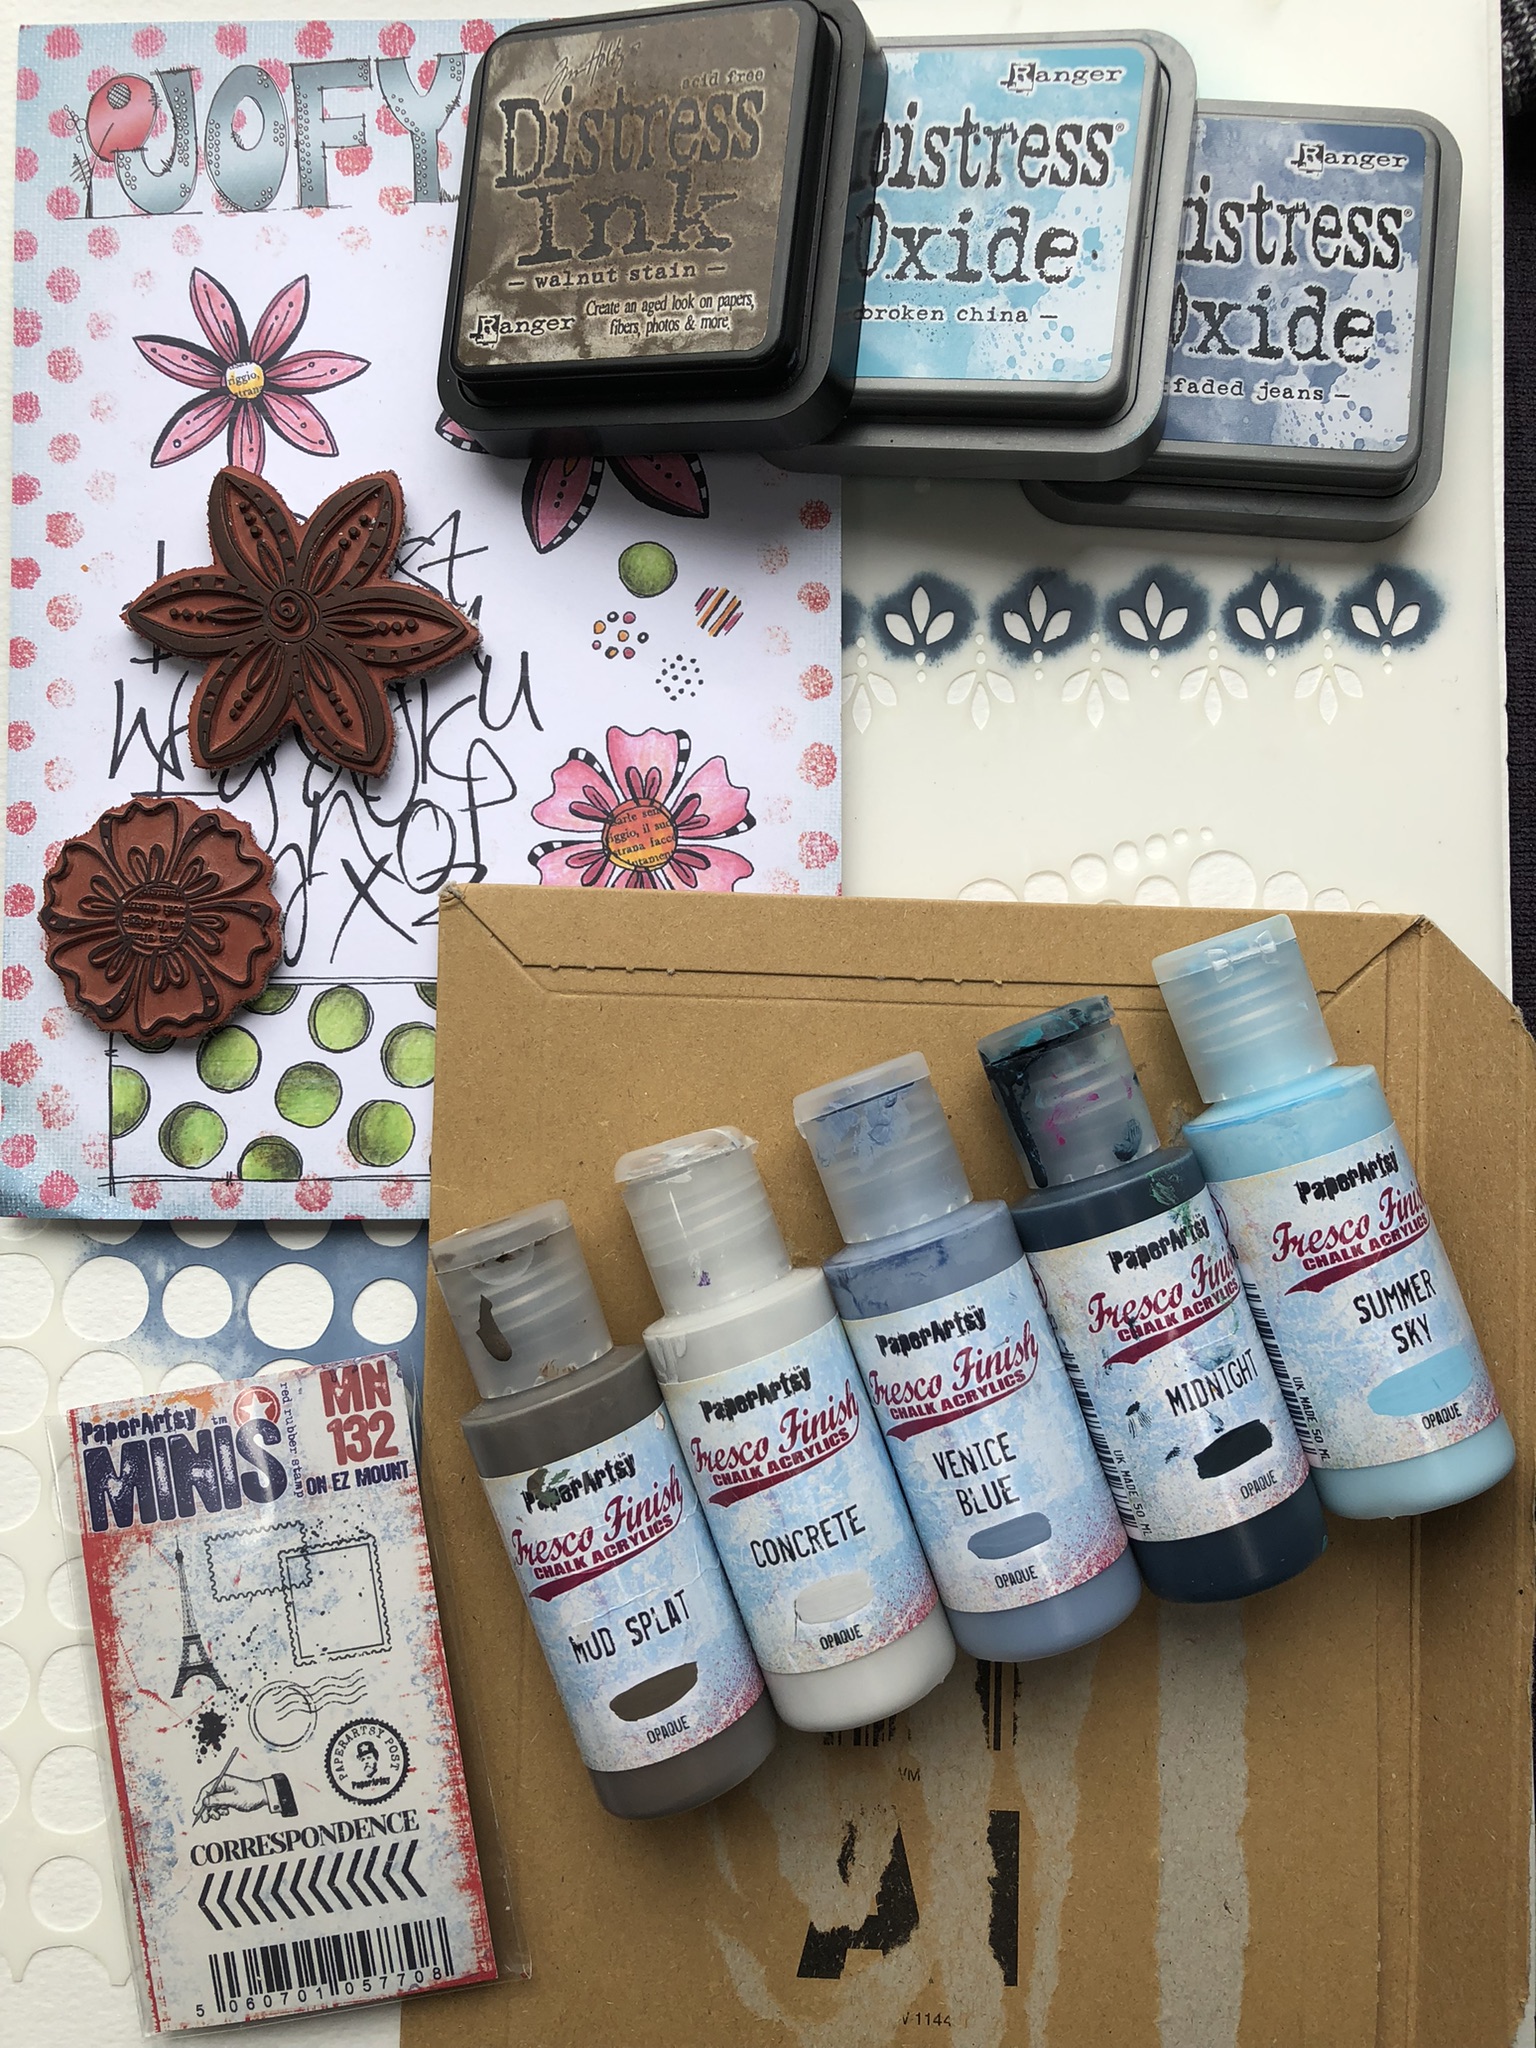
I had a good idea of the design / layout of the project I was planning, but wasn't sure how the layers would come together. I gathered my chosen stamp set, stencil, paints and inks plus the recycled envelope of course.


I kept my colour selection quite simple - blues and browns! I find it is too tempting to reach for too many colours sometimes. With a layered project, with different patterns or textures it is important to have something that brings them all together - in this case, the colours.


My starting point was to paint over the text / torn card on the envelope, so I reached for PaperArtsy Fresco Finish Chalk Acrylic - Mud Splat (FF61). As an opaque paint this covered most of it easily. Once dry I added a thin layer of PaperArtsy Fresco Finish Chalk Acrylic - Crackle Glaze (FF22) using an old credit card.


Once dry I added PaperArtsy Fresco Finish Chalk Acrylic - Concrete (FF63). If you haven't used Crackle Glaze before - you need to add your top layer of paint quite quickly and generously as it reacts very quickly giving wonderful crackle!!


While I was waiting for the Crackle Glaze to dry I started making some quick backgrounds for my flowers. I wasn't sure how these would be used at this point - but I knew I would use them somewhere!

The first is paint brayered randomly and the letters stamp stamped in Ranger Distress Oxide - Faded Jeans. I used PaperArtsy Fresco Finish Chalk Acrylic - Venice Blue (FF133). The flowers and letter stamp are from my chosen set - JOFY stamp set 101 (JOFY101).


The second background used PaperArtsy Fresco Finish Chalk Acrylic - Summer Sky (FF150) and Ranger Distress Oxide - Broken China. This time I stencilled with the ink using PaperArtsy Stencil by JOFY (PS373)


Having completed my crackled envelope base layer and some backgrounds for my flowers I then needed to build some layers and my mini envelopes.
 

A simple but effective way to create a bit of grungy texture is to score some cardboard - to give the effect of wooden or painted panels. Having cut some card to size I dipped it into 2 colours of ink - Ranger Distress Ink - Walnut Stain and Ranger Distress Oxide - Faded Jeans. Once dry I highlighted the scored lines and edges with the brown ink.


Next I created my mini envelopes using an envelope scoreboard. These are about 2.25 x 1.5 inches or 5.7 x 4cm. Some more ink dips and edging around the folds and edges. I added a few stamped images from Stamp Set Mini 132 (MN132).


Now I needed to finish the Amazon envelope. I added more PaperArtsy Fresco Finish Chalk Acrylic - Mud Splat (FF61) to the edges and stencilled some PaperArtsy Fresco Finish Chalk Acrylic - Venice Blue (FF133) using PaperArtsy Stencil by JOFY (PS329).


Now to put it all together and see what was working and what needed a bit extra. I noticed I needed an added layer between the panels and the stencilled circles so just added a paint sponged layer - distressed at the edges with my scissors. You might also see the white embossing powder around the edge of the stencilled circles.


I added some brads and velcro to the envelopes so they open and close; somewhere to hide little notes maybe!
 
 
Finally I needed some words and what better than this quote from Alison Bomber stamp set 01 (EAB01).


I love that I have gone back to a bit of distressed vintage! I think the fun part of this project was building up the textured layers - not everything worked - there is one sitting on my desk waiting for a new home!

Nikki