Showing posts with label PS124. Show all posts

Sunday, 15 March 2020

2020 #5 Mark Making: Into Africa with Hot Picks {by Carol Fox}

2020 Topic 5: Mark Making


Mark making on fabric requires different techniques and Carol has some great tips. I love her experimentation with clay in a Melt Pot and the finished bag has a fantastic safari vibe!

Hi everyone, it's Carol with you today, and I'd like to share with you a project bag I have made for my knitting. I added a little tab on the side to hold a couple of stitch markers. I chose my fabric and zip to match the paints I would be using and the Cayenne which I matched my zip and tab to give it all nice pop of colour against the shades of green.


I treated my blank fabric panel just as I would a journal page,just remembering that the very edge would be lost in the sewing up, so I took 
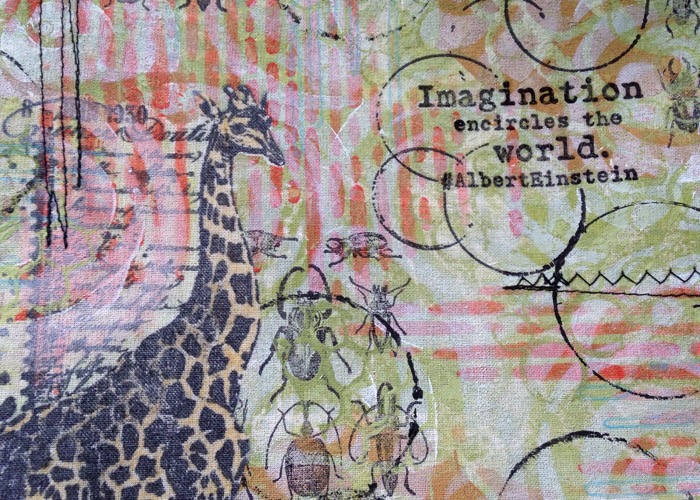
this into account when placing the Giraffe.


Using bIack Archival in I stamped and masked the Giraffe from HP2002 onto my fabric.


I found the Shades Guacamole, Zucchini and Granny Smith were a near perfect match for my printed fabric so I used these as a base for the background.


I used Guacamole, Zucchini, Granny Smith, Cayenne and Caramel with stencils PS124 and PS036 to add marks and detail to my background. I then used PS136 and Snowflake to knock it back and to blend it all together.


I used the bug stamp from the new HP2002  to add detail on my background.


I used a die cut, that I cut from funky foam with paints Zucchini and Guacamole mixed on my mat to bring the green background to the front a little bit more.


My quote is from stamp set ESN28.


I followed on the theme of circles on the quote and used an old lid and Little Black Dress paint to add them to my background.


I coloured the Giraffe with pencils. I used Caran d'Ache and I have found a blunter pencil works better on fabric.


I used Stencil PS036 again here with a blue pencil to draw in between the lines to just add a light pop of blue.


Using a sewing machine I added stitching to the fabric panel.


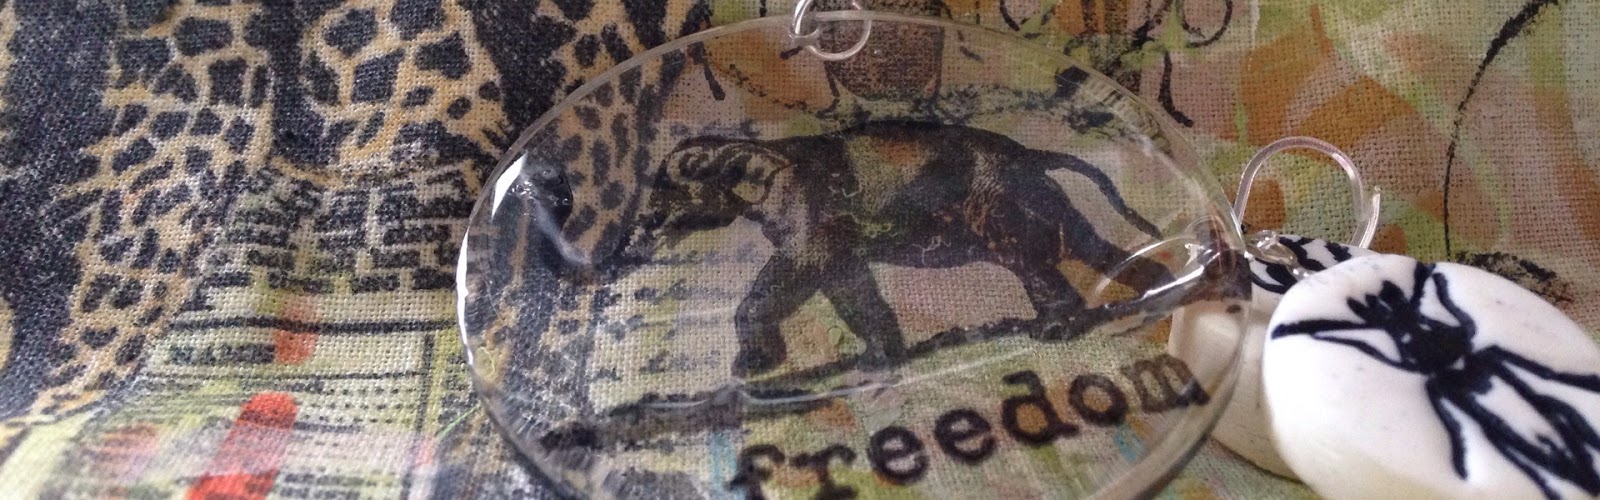
I stamped the elephant from HP2002 onto an acrylic circle to add to my zipper pull and two of the bugs I stamped onto clay, I pressed quite hard and it made a nice imprint into the clay.I added jewellery findings to the top to use as stitch Markers.

I like making little bags like this. I find them handy to keep odd knitting projects together or this size (which is just under A4 sized) is a nice size to take a smaller journal and odd pens and bits out in if going to a class or to journal with friends. 
I have used an unbleached calico fabric but I also used odd scraps or a pillowcase for my main stamped part; a pair of plain white pillowcases are very cheap and work fine. I also baked my clay in my Melt pot for the first time. I did get a little discoloration on the back where it sat on the pan, but apart from that it worked great. Next time I will find something heatproof to sit it on to allow the heat to pass under it. I think a bit of metal mesh or similar will work fine.

Thank you for reading and I can be found at the places below.

Carol xx

Wednesday, 6 March 2019

2019 #3 Mail Art: Envelopes with EEA {by Carol Fox}

2019 Topic 3: Mail Art


Carol's gel plate mail art is stunning. So many images on one envelope yet the result is  cool not cluttered. Her clever pulls with added stamping and stencilling create an almost pop art look in places and make me want to get out my gel plate straight away!

Hi everyone, it's Carol with you today, and I'd like to share with you some Mail Art envelopes. I used a Gelli plate to get my paint onto my envelopes on as a base for my other mediums and then basically had a lovely time playing with my stamps, paint and ink. I found this project very relaxing as it was really just stamping, colouring and a bit of doodling once I had  my paint on the envelopes, just what crafting should be, no angst just fun.


I left the centre blank for the address by masking it off before I put the envelope onto the Gel Plate.


I layered up my stencils onto the Gelli Plate using Freso Paint in Venice BlueCherry RedZesty Zing and Little Black Dress. I added a final layer of Butter and then pulled the whole print in one go.


I used Stencils PS001PS075 and PS124


The envelope I just pulled from the above Gel Plate Layout.


The envelopes I coloured using the Gelli Plate. I had a nice selection to choose from and a few spare in case of stamping errors.


The print shown above is the before and after pulled stage. I have added a collage image, some stamping using Stamp Set EEA02. A  few dots of colour with my pencils and a bit of outline with paint pens was all I felt this one needed.


On this one I used the stencil PS092 with fresco paint Seaglass and the stencil PS054 with Cherry Red on the gelli plate before I pulled my envelope print. After  I added stamping with Stamp Sets EEA02 and EEA03, again finishing with pops of colour with my pencils and drawn lines with a paint pen.


This my favourite one. Just pulled on the Gelli Plate using Coral and Butter Paints, and then lots of stamping using Sets EEA04 and EEA02. Stamping the stars with the coral Paint kept the colours very tone on tone. 

I gave it a bit of lift with stencil PS001 and fresco snowflake paint. Adding additional colour with stencils PS052 and PS053 using Cherry red paint. I finished with coloured pencils and some paint pens.


 As I said in my opening paragraph I thoroughly enjoyed this project and once the colour was on the envelopes it was nice to just play with the images to get a nice layout. I have done this type of envelope in the past to give Christmas money in; a smaller decorated envelope inside a main card or just popped on the tree looks so much nicer than just a couple of notes loose in a card. Or perhaps a Wedding envelope for the Bride and Groom, it gives a personal touch to a cash gift that a bought card can't.

Thank you for your visit today and you can find me at the following places.
Carol x

Blog: http://www.gingernonutsbits.blogspot.co.uk/
Facebook: https://www.facebook.com/GingersAlteredBits
Instagram: https://www.instagram.com/gingernonuts/
Pinterest: https://www.pinterest.co.uk/gingernonuts/
Youtube: https://www.youtube.com/channel/UCn4c4HqW1kIVvWDBssF_YQg