Hi everyone, it's Amanda Pink (ink-a-pink) with you today, and I'm here to share with you the project I have made for the current topic 'Pattern Play'.
Every New Year I say I am going to start a 'Happy' Jar/ box that I will fill with happy moments, memories, events (no matter how big or small) that happen throughout my year which at the end of the year (or at certain times throughout the year) I will have a jar/box full of 'happy's' to look back and reflect on. 'Saying' is as far as I've ever got though so this pattern play topic gave me the perfect opportunity to turn my words into actions and finally make myself a 'Happy Box' for 2022!

I thought I would make a box rather than a jar so I could create patterned panels for the sides and top of the box. I'd also create some patterned cards, leaving one side of the card blank to record my happy moments/ memories/ events on the reverse. For both I'd use Ellen Vargo stamps, maybe the odd stencil and what I think of as 'happy' uplifting colours. I had no preconceived ideas of what patterns I would create I simply had fun 'pattern playing' as the topic suggests and I actually ended up with 7 different patterns one of which I 'm sure will make you smile-it did me! :D
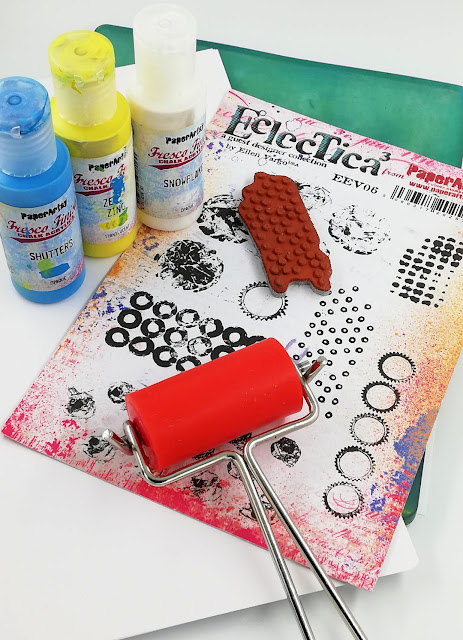
My creativity began by selecting my 'happy' colours -Blue and Yellow or more precisely PaperArtsy Fresco Finish Chalk Acrylic - Shutters (FF207) and Zesty Zing (FF47). Blue is my favourite colour so I guess its almost a given it makes me happy and yellow, well its bright , uplifting and makes me think 'sunshine' and who doesn't love a bit of sunshine and all those happy endorphins it releases within us. I also gathered together a few other supplies, tools I thought I'd need to kick start my creativity.
I knew I had quite a lot of square panels to make for both the box and the cards so a real speedy way to make these was to pull lots of 'painty' gel prints in my chosen fresco colours.
Of course when blue and yellow blend/ mix together they create green and I was happy to see this happening on my prints and what a lovely shade of green it is too! So although I started out with just the 2 colours I now had a third colour creeping in here and there all playing so effortlessly together.
The tiny open circles stamp from Ellen Vargo stamp set 6 (EEV06) stamped randomly on the coloured panels in PaperArtsy Fresco Finish Chalk Acrylic- Snowflake (FF15) was a great stamp to introduce a subtle background pattern in preparation for the full on 'Pattern Play' that came next.
Now for the full on 'Pattern Play'....
Initially, I thought I'd create one pattern that would feature on all the panels of the box but that changed along the way. Once I got into the 'pattern playing' zone using Ellen Vargo Stamps sets 3 and 6 (EEV03, EEV06) I realised there were many possibilities so my one pattern idea went out the window and I made two different patterned panels for the box, (All the other patterns I created were used for the cards). I wanted the patterns to be really bold and striking so for me it was a given they would all be black.
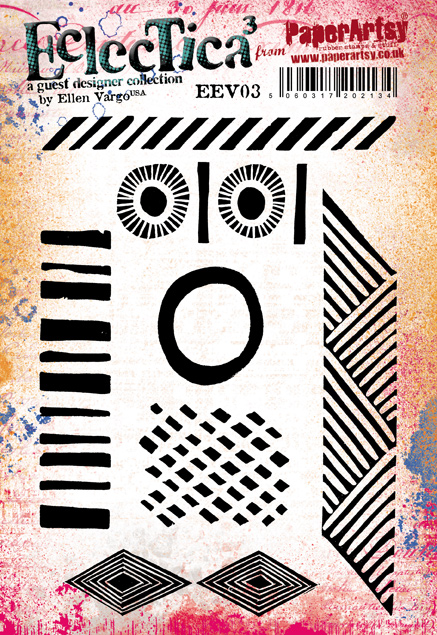
For the first pattern panels I created (for the box) I used three Ellen Vargo stamps from the sets mentioned above. This pattern would probably be considered a 'repeat pattern'. It also required some accurate alignment of the stamps to improve the overall appearance of the pattern.
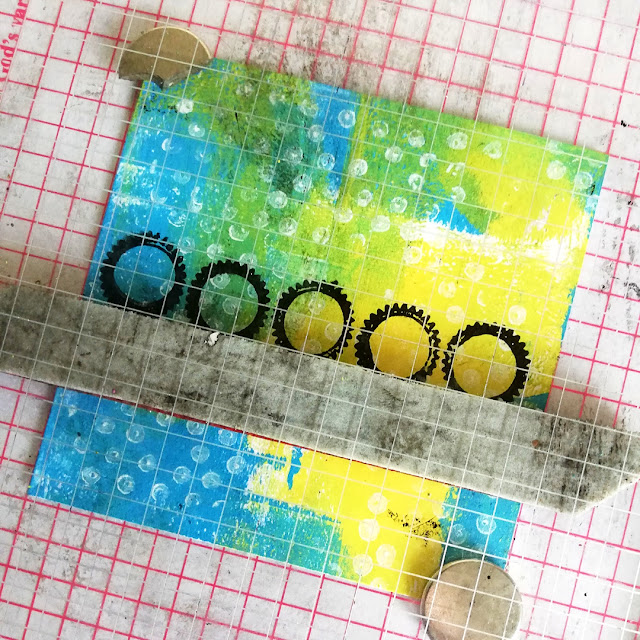
I stamped from the centre out starting with the '5 cog' stamp. Using a gridded stamping platform enabled me to find the centre point of this stamp with ease and therefore position and align the stamp with more accuracy. Then, using this stamp as my guide along with the grids on the platform I stamped the 'chevron' stamp either side, finally repeating the process with the 'thick/ thin block line' stamp.
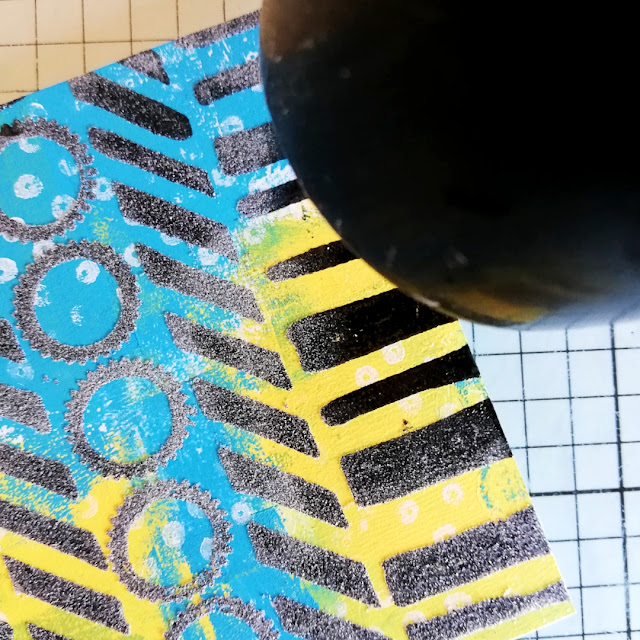
Although the black stamping was bold and striking I thought embossing the black ink with clear embossing powder would make it even more so. I also liked the idea that it would add a touch of sheen to the otherwise matt finish of the panels. I doubt I'll ever tire of watching the embossing process happen! Are you the same?
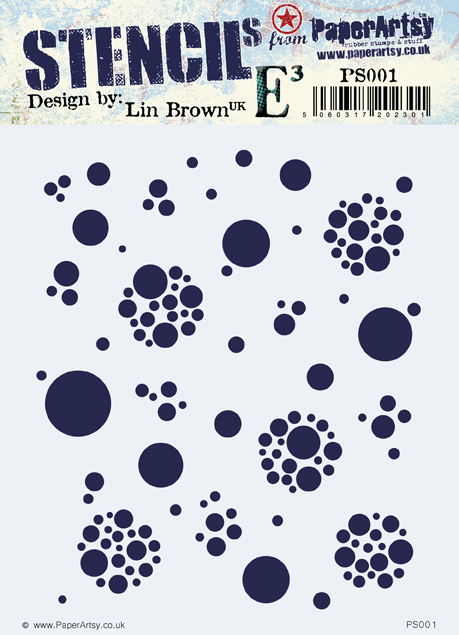
PaperArtsy Stencil by Lin Brown (PS001) proved to be a great stencil to assist me in drawing some appropriately sized circles inside each of the 'cogs' and in the gaps between the 'cogs' to add some extra detail to otherwise quite open areas.
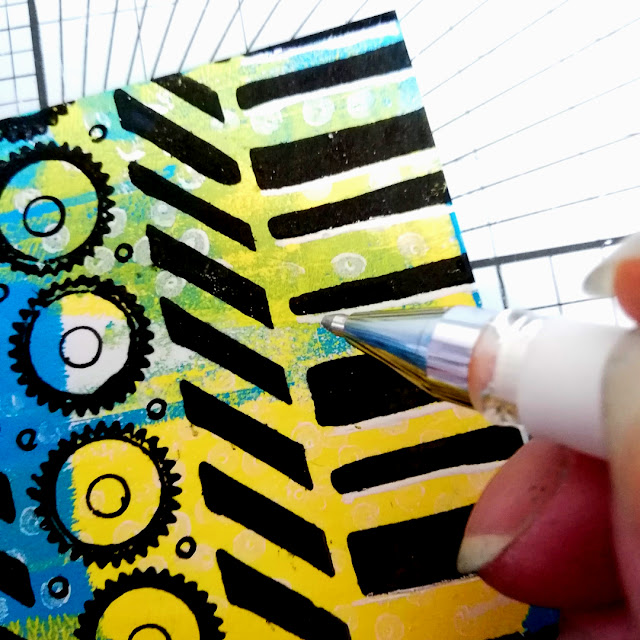
To finish this pattern (and indeed all the patterns I created) I added some white pen marks/ highlights to help the embossed stamping really pop.
The second patterned panels I created ( for the box) were more 'freestyle' patterns, kind of funky too! They are an example of how you can create patterns by using full stamp designs along with single elements/ parts of full stamp designs. Again I used stamps from Ellen Vargo stampsets 03 and 06 (EEV03, EEV06).
These were fun to create so much that I neglected to take any process photos at the time (oops). No worries, I made a sample panel later (and had more fun) to show you my stamping steps.
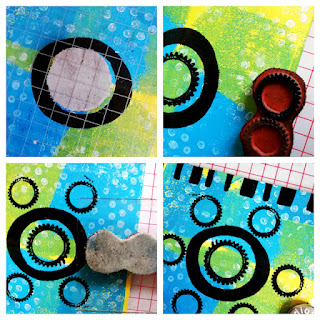
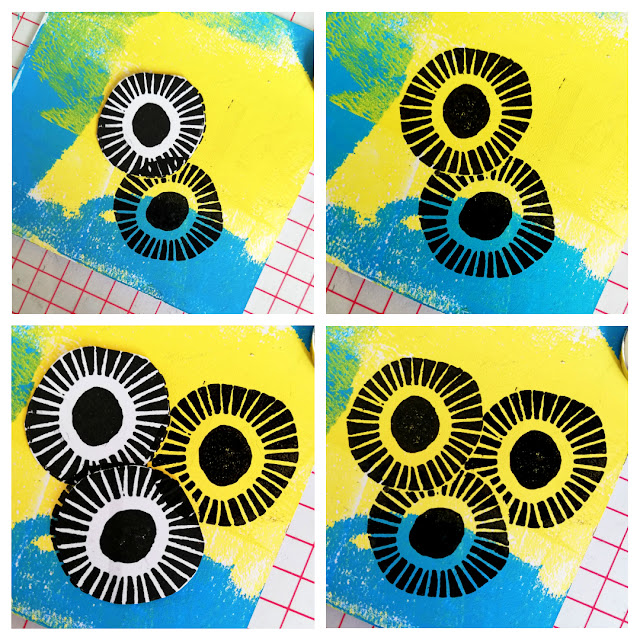
The top left photo shows how I started by stamping two of the stamp designs in full - the 'large open circle' stamp with the 'single cog' stamped in the centre of it. The top right photo shows just one of the 'cogs' on the '5 cog' stamp inked up ready to stamp and in the bottom left photo you can see it being stamped around the large circle The photo bottom right shows how I stamped just part of the 'thick/ thin block line' stamp to create a border around the sides of the panel.
Just like the first patterned panels, the stamping was embossed with clear powder and the patterns were treated to some circle stencilling using the PaperArtsy Stencil by Lin Brown (PS001) and white pen mark making/ highlights.
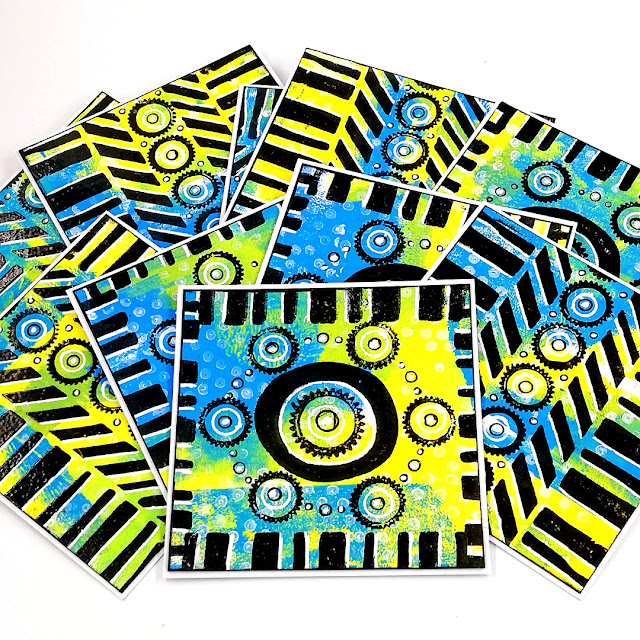
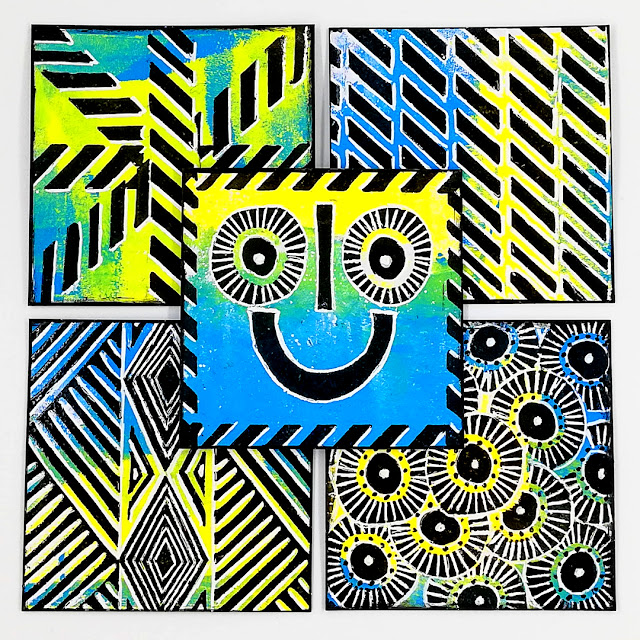
Here they are all gathered together in a blanket spread?
Now it was time for the patterned cards that I would be writing my 'happy's' on...
Creating patterns with stamp designs really is one of those activities that once you start it's hard to stop. The more you play the more ideas you have. I ended up with 5 different patterns to those featured on the box, and that was just using stamps from Ellen Vargo stamp set 3 (EEV03).
The patterns on the cards were created in much the same way as the patterned panels I created for the box so I'll spare you a repeat rendition of the creativity. Probably the only thing that differed is that these patterns didn't included any stencilling.
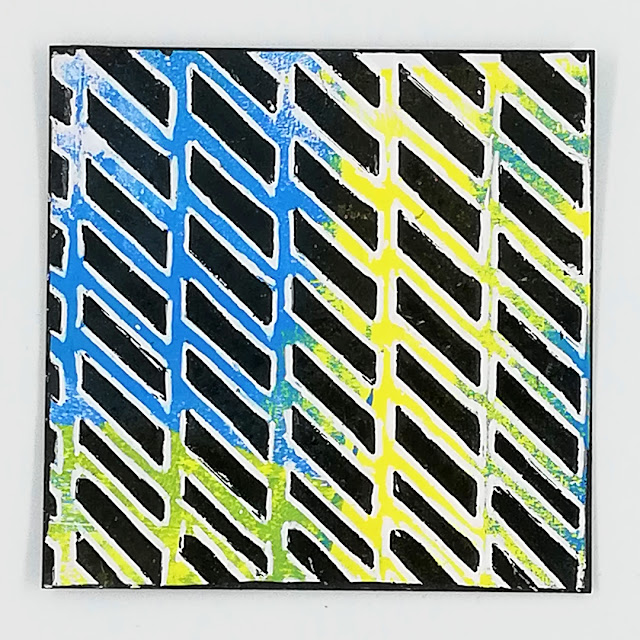
Some of the patterns (like the the first patterned panel I created for the box) benefitted from more accurate stamp alignment each time it was stamped. The chevron pattern being one of them. Again, this is where a stamping platform came in handy as it allowed me to butt the 'chevron' stamp up against the top rule bar of the platform, each time I stamped it.
I didn't achieve 100% accuracy all through the pattern but there were areas were it was pretty close. I'll take that!
Other patterns involved 'masking off' stamped elements while creating the pattern which allowed for me to layer up the stamped 'elements to give the impression once stamped that they appeared to be in front/ behind each other which ultimately gave the overall pattern a sense of depth.
The 'multi 'circle' patterned card that I created using just one of the 'circles' from the 'double circle/ bar' stamp on Ellen Vargo set 3 (EEV03) was one of those patterns.
I made 3 or 4 paper masks of the 'circle' stamp and then used them to cover the relevant stamped 'circles' as I worked.
Starting in the centre of the card I stamped a 'circle', covered it with one of the masks and stamped a second circle to the side of the masked one. I then covered both the stamped circles with masks and stamped a third circle close to both. I continued in this way, moving the masks around to cover the two or three circles closest to the one I was about to stamp until the card was covered.
If I were to add photos of all the pattern cards individually it would make this post much longer than it already is so I hope you will be able to appreciate them 'all in one'.
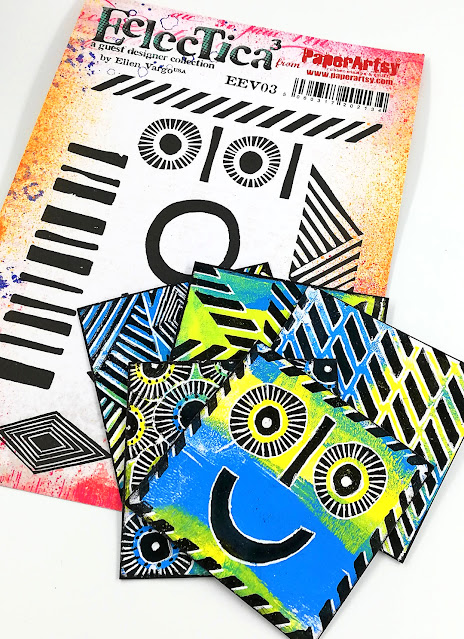
I'm sure you'll spot the one that I said in my intro would make you smile! :D.
Ok, it may not be deemed a 'pattern' as such but these are 'happy cards' to write my 'happy thoughts/ memories on so I couldn't resist!
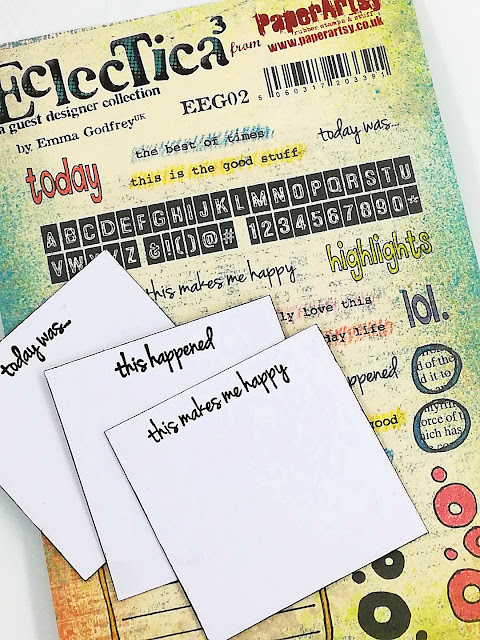
I had thought I'd leave the reverse of the patterned cards blank as that's where I would be writing all my 'happy's' but then Emma Godfrey stamp set 2 (EEG02) caught my eye and some of the single line sentiments/statements jumped out at me.
It was liked they were waiting to be 'prompts' stamped on the back of the cards especially 'This makes me happy'. It couldn't have been a more ideal fit!

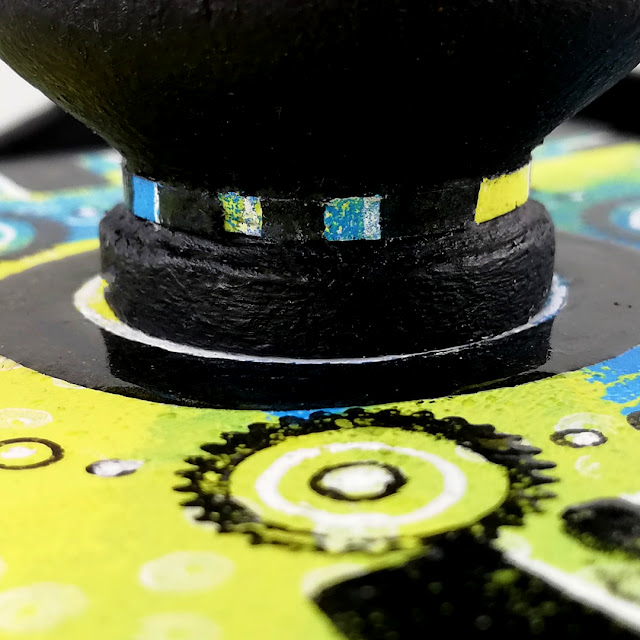
All that remained was to paint my box (a That's Crafty! MDF ATB) with PaperArtsy Fresco Finish Chalk Acrylic - Little Black Dress (FF19) and adhere the chosen patterned panels to the sides and top of the box. I also dug out a old wooden door knob that was hiding in the back of a drawer (you know THAT drawer you meant to clean out ages ago), painted it like the box and adhered it to the box lid. From door knob to box handle with just a quick lick of paint!
To break up the solid black of the box handle and to compliment the patterned panels of the box I decorated its neck with a thin patterned band.
The top with a 'patterned circle' cut from one of the cards.
The patterned 'happy' cards will be kept in the box (for now)...
As the box becomes full of cards holding recorded happy moments/memories/ events the blank cards will probably then sit at the side of the box to keep me focused on seeing, recognising and noting the 'happy's' throughout the year, however big or small they may be.
Every 'Happy' counts!
I had a lot of fun 'Pattern Playing' that's for sure. I was surprised with how many patterns I created from just a few stamps, a stencil and a couple of pens. Definitely not what I envisaged when I began playing and I'm betting I haven't really touched the surface of endless possibilities. I found it made me look that bit closer at the stamps and get to 'know them' more than I might otherwise have done as I thought about how they may or may not work together.
If creating your own patterns, playing around with existing patterns isn't something you've ever tried I'd encourage you to give it a go sometime.
Hey, what about this for an idea? How about hosting a 'Pattern Play' party/ get together with some of your creative friends. You could either create your own patterns or join forces and make one large pattern all together! Now that would be impressive to see especially if there's a range of creative styles contributing!
This topic draws to a close later this week but be sure to check out all the other 'Pattern Play' projects the other bloggers have created and shared over the duration of the topic. I'm sure you will agree they are all absolutely fabulous and so inspiring.
Thanks for spending time with me today/ this afternoon/ tonight depending where you are are in this big wide world.
Have a lovely week
Creative wishes
Amanda
x