2015 Topic 22: Masterboards
Hi everyone Leandra here with a sneaky treat for you. Think of it as an early Christmas present!
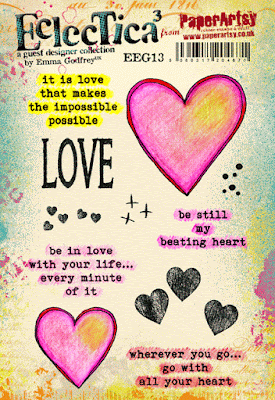
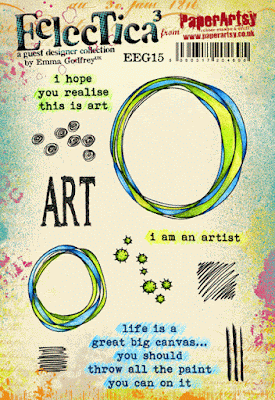
Emma Godfrey has designed some new stamps which we have released last week to retailers. Perfect for journalling, cards, mixed media and scrap-booking, these stamps are sure to impress!
Emma has been hooked on bright colours, and doing journal pages that 'pop' all year, so she decided to increase the size of her stamps to suit what she is doing right now, and we think they are awesome! We hope you do too, these would make a great stocking filler!
EEG13
EEG15
So Congratulations Emma, and I'll hand over to Em so she can show you a masterboard idea with these new beauties...
Hi Everyone, Emma here, joining you this evening with a post about turning a masterboard into bookmarks (a great idea if you want to give a small handmade Christmas present).
I love masterboards, but I usually cut them up to use on cards, and for this blog post I thought it would be fun to try something different. The only thing you need to remember is that you want to keep your masterboard flat (if you add texture then your laminator might not like you very much!) ... but that doesn't mean you can't have plenty of painty layers!
Step One:
I covered a sheet of A4 Heavy Smoothy with Gesso, then applied Pumpkin Soup, Beach Hut, Eggplant and Bougainvillea Fresco Finish paints with a big wet paint brush. These translucent paints produce lovely bright layers.
You need to be aware you will create new colours where the translucents meet each other...for example, where Pumpkin crosses Beach Hut you will get green, Beach Hut and Bougainvillea will create a plum purple, and you get a blue purple where the Eggplant and Beach Hut mix.
Step Two: Cover the A4 sheet with some Snowflake Fresco Finish mixed with a little bit of water. Make the paint thinner and thicker in some areas - you want it to look messy.
Step Three: Now to start stamping and stenciling. I randomly stamped the large circle from my brand new set EEG15 ...
I then stenciled Archival Ink Magenta Hue
through The Crafters Workshop Mini Circle Grid stencil ...
and Archival Ink Jet Black...
through The Crafters Workshop Mini Believe Script...
and this is how it ends up once all of that was done!
Step Four: More layers ... I stenciled through The Crafters Workshop Mini Chevron Arrows
and stamped the paintbrush strokes from EEG15 using Snowflake Fresco Finish.
I stamped MN72...
... in Archival Ink Jet Black, and added some lines with the edge of a credit card using a mixture of Pumpkin Soup and Haystack Fresco Finish (Pumpkin Soup is a translucent paint, so adding Haystack makes it more opaque without losing the colour).
Step Five: I stamped the spiky dots from EEG15 using Archival Ink Jet Black, and coloured the centers in with a White Sharpie Extra Fine Paint pen. I then put some Snowflake Fresco Finish into a small bottle with a micro nozzle and drew squiggly circles and some swirly lines with it. (I love how the lines came out with a stitching texture ... I didn't want to take a chance that I'd get a big blob of paint, so I wasn't squeezing the bottle very hard).
Step Six: Once everything was dry, I cut the sheet into seven strips - each 4.2cm wide. and then cut the strips down to 15cm (choosing the area I liked best from each strip).
I'd printed some quotes earlier onto some white paper, which I cut up and stuck on, before outlining them with a black pen. To add a bit of sparkle I used a Tombow glue stick to add some...
I'd printed some quotes earlier onto some white paper, which I cut up and stuck on, before outlining them with a black pen. To add a bit of sparkle I used a Tombow glue stick to add some...
Step Seven: I laminated the bookmarks (leaving plenty of room at the top of each one). I trimmed around each one leaving a small border on three sides and an extra 3/4 inch piece at the top. I rounded the top corners and set an eyelet in each one. To finish I just added some string through the eyelet.
Here's a close up of my favourite...
I was so pleased with how these came out ... except for one thing. On turning them over to admire my handy work I realised all my bookmarks had very messy backs! Next time I make some, I will try to remember to either paint, or cover, the back of each one.
I hope you enjoyed this project ... and that it's inspired you to have a go. If you want to see more of my ideas, you can find me on my blog, facebook and twitter.
I hope you enjoyed this project ... and that it's inspired you to have a go. If you want to see more of my ideas, you can find me on my blog, facebook and twitter.
Wow, not only functional, but very pretty too! These are awesome to pop in with Christmas cards as a cute gift too. That foil on the upper and lower edges looks amazing! ~Leandra
We would love you to join in with challenge #22: Masterboards If you are inspired by any of our guests who blog with us over the fortnight, then please join in and link up your creativity HERE.
All links go in the draw to win a voucher to spend on products of your choice from the PaperArtsy online store. The Masterboards link will close 17:00 (London Time) Sunday, Dec 6th winner will be announced 2 hours later at 19:00.


.png)

