Showing posts with label Foxglove. Show all posts

Saturday, 24 May 2025

Page Layout with Kate Crane Products {by Martha Ponsanesi}

Hi everyone, nice to be back with you again it's Martha (@CraftingMarthahere with you today.

This year on the blog, we have free rein to do a deep dive into a PaperArtsy product ranges of our choosing. For this post I have been exploring Kate Crane's products. She is one of my favourite artist and she is a relatively new member of the PaperArtsy family, this is why all of her products aren't yet available on the PaperArtsy website but you can find a PaperArtsy Stockist here.

It had been a long time since I last created a Layout, so I decided to unleash my desire for colour by making my own paper and embellishments, starting with water-color paper.


This time, however, I 'betrayed' the Fresco Finish paints and used only Mattints and Infusions.
Stay with me and I’ll show you the different ways I used them.


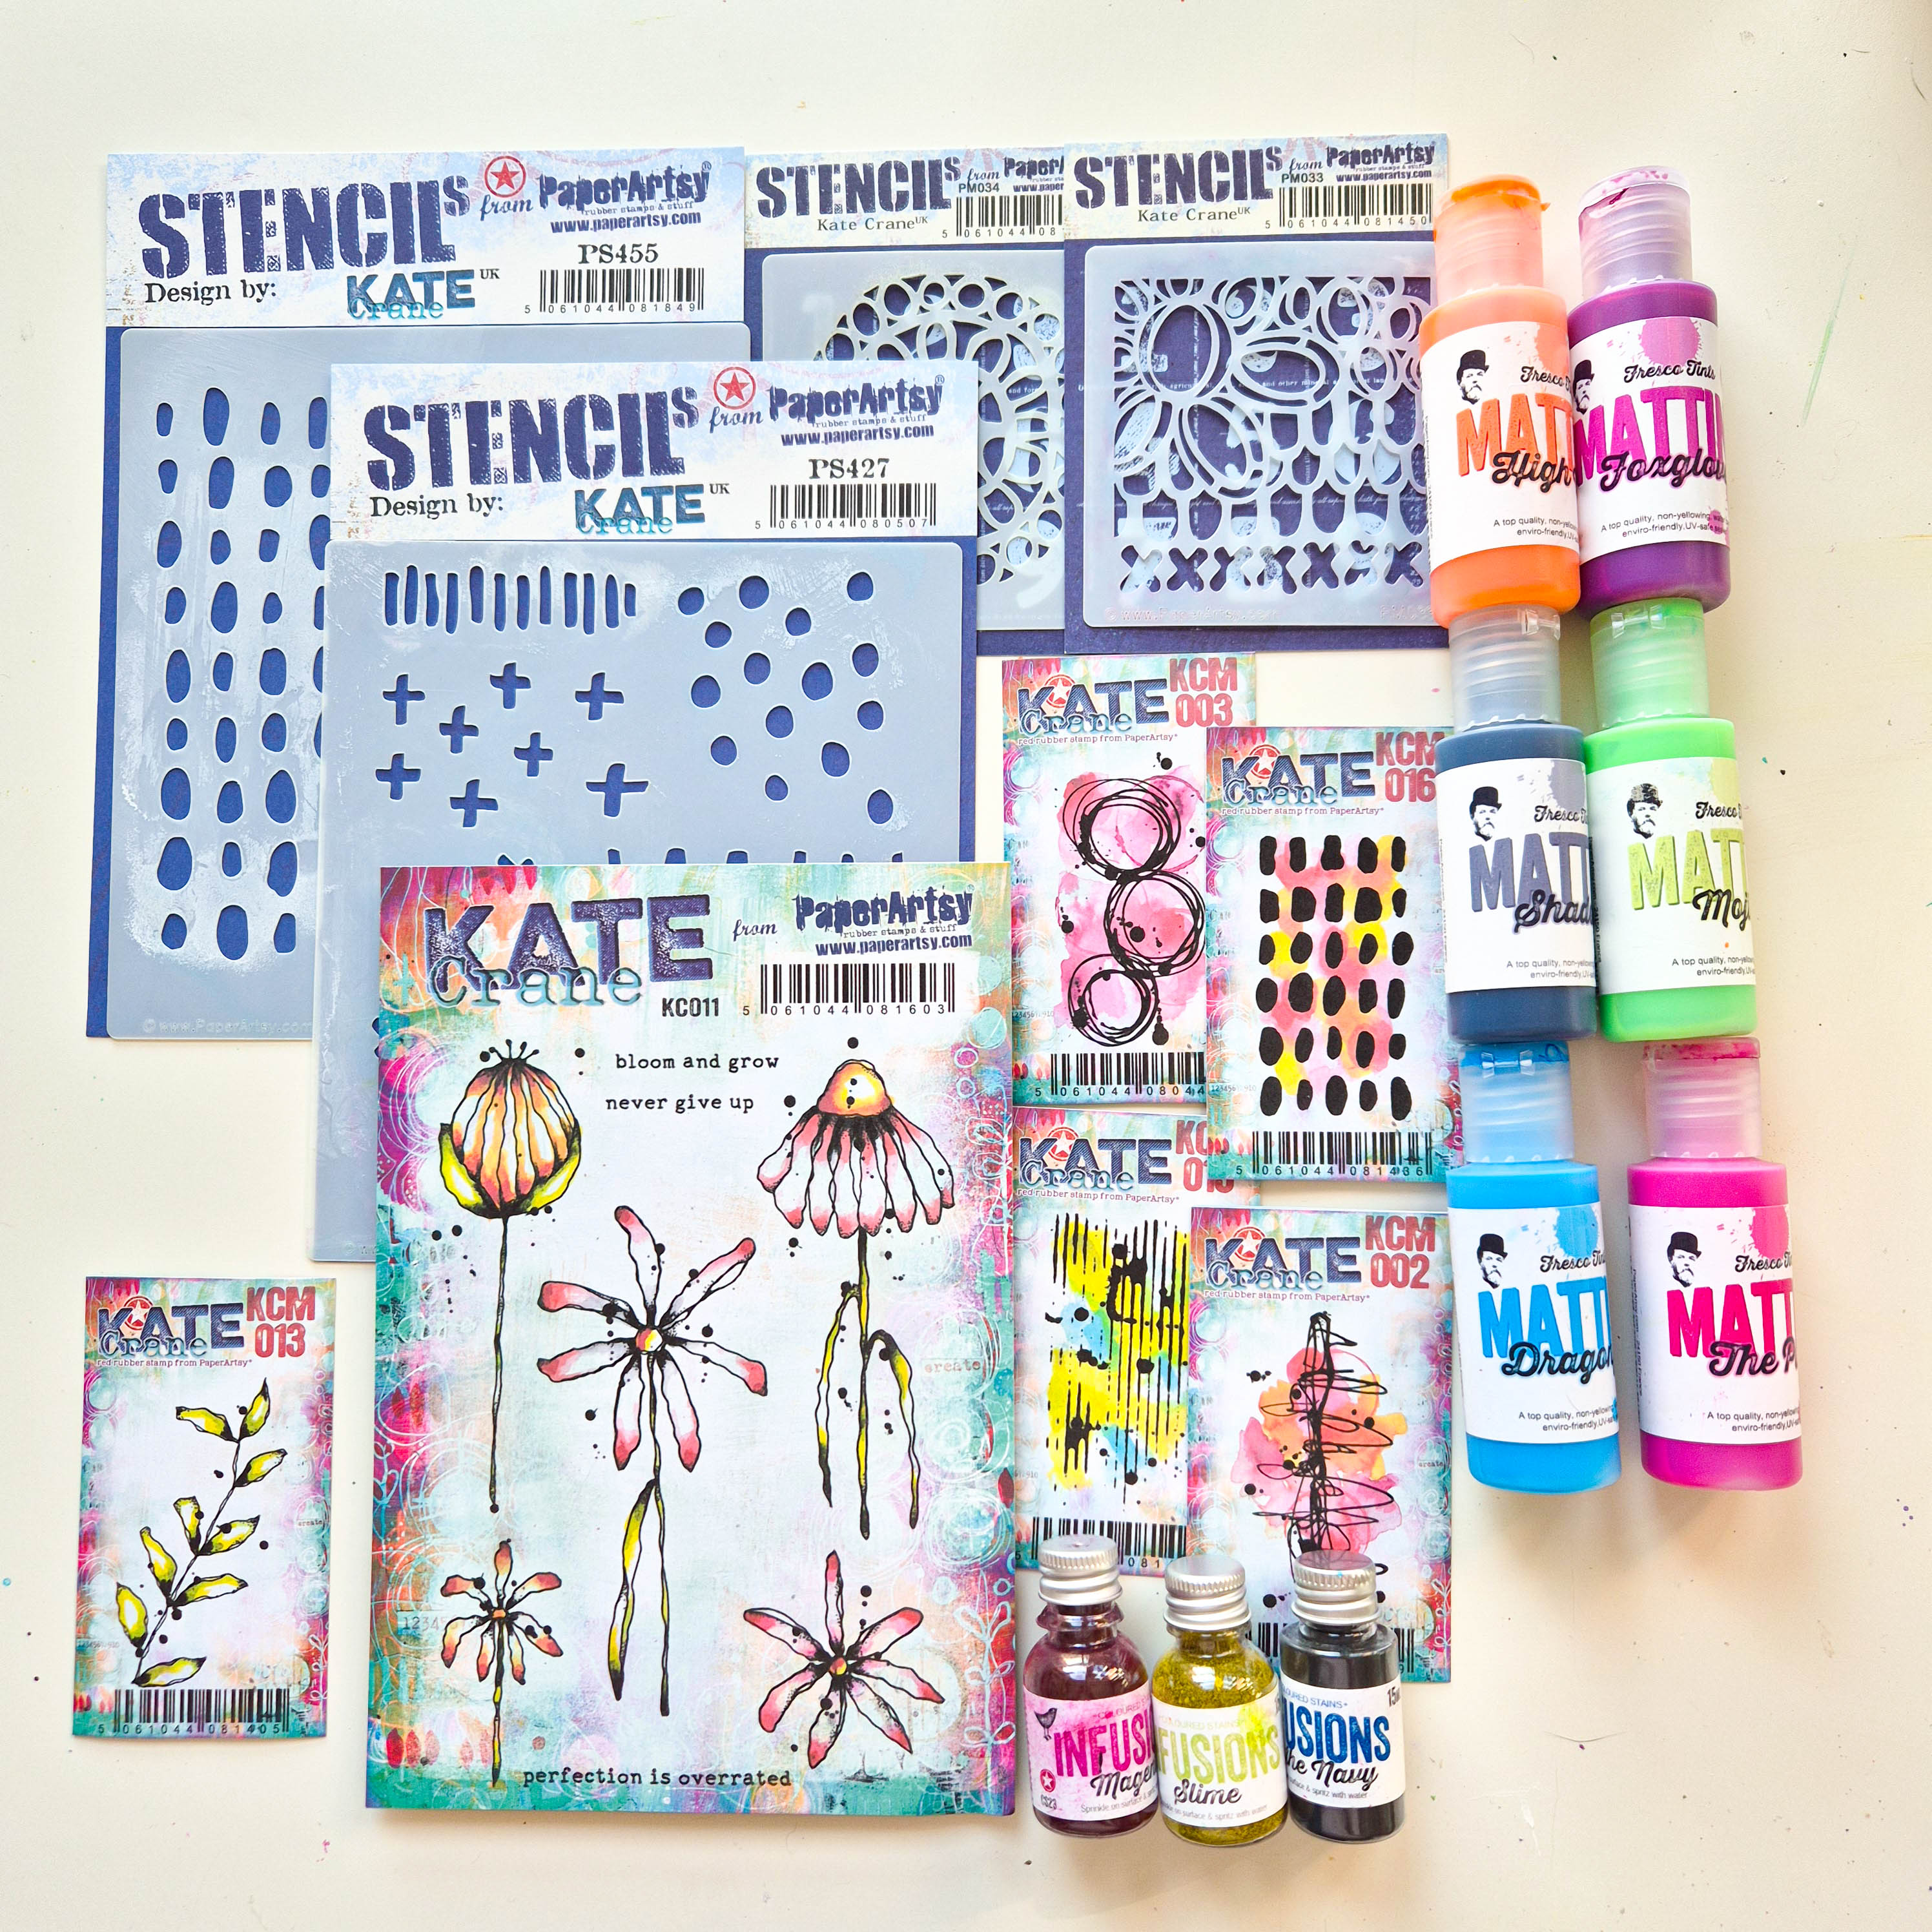
Here it is my selection of products, I particularly love the mini stamps and stencils.


7), I put some Infusions - In The Navy (CS15).


Then I brushed on a bit more Mattint to create this streaked effect.


In each quadrant, I used different colors, in the other three quadrants I used Mattint in High Viz (MT15) with Infusions in Magenta (CS23), Mattint in Mojito (MT13) with Infusions in Slime (CS13) and Mattint in Foxglove (MT18) with Infusions in In The Navy (CS15). Some Mattints are from the most recent release, as usual you can find them from a PaperArtsy Stockist here.


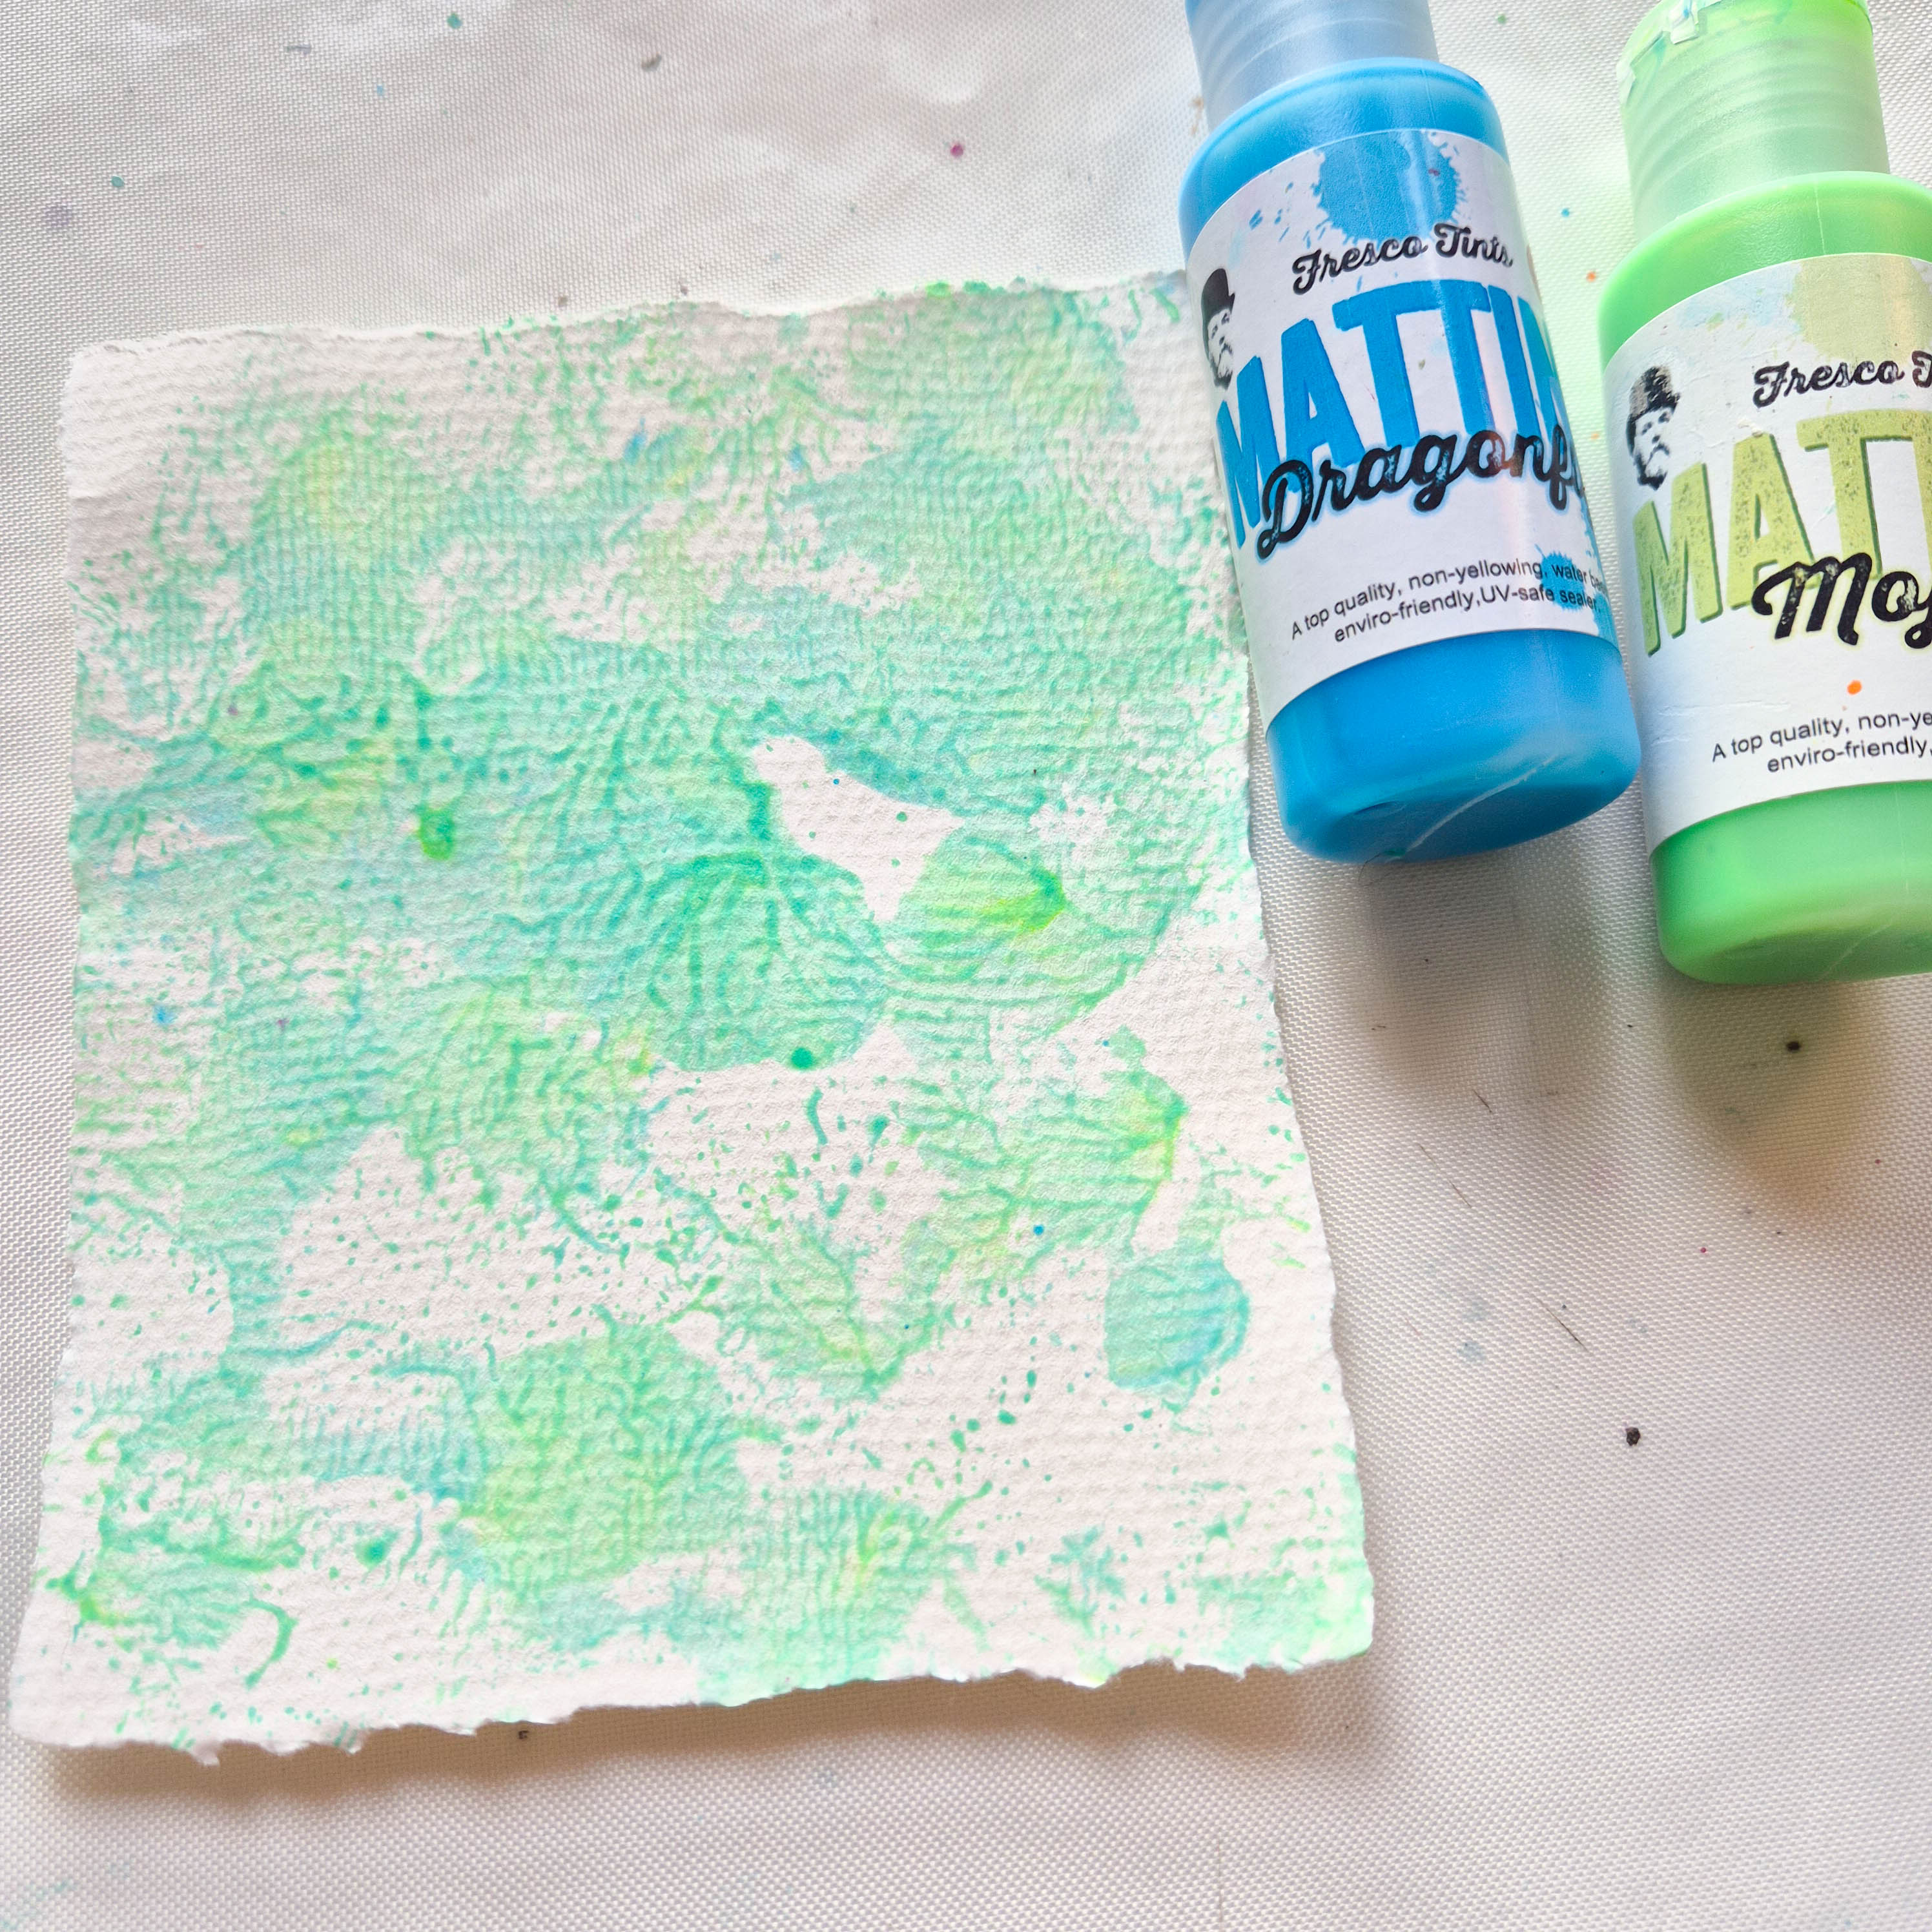
Mattints in Dragonfly and Mojito are one of my favourite combo and mixed together create a wonderful turquoise colour ( maybe a suggestion for an upcoming colour ? ;) )


I coloured a piece of watercolour paper smushing several times directly on a craft sheet.


And this is the result with a nuance that I love.


On another piece of watercolour paper I used in the same way Mattint in High Viz and The Pink (MT08). Once dry I stencilled with a sponge trough PS427 and PM033 with Mattint in The Pink and I like so much the translucent effect of the Mattints, that provides a cohesive look to the work.


The last touch was some stamping with Minis, in this case I used KCM002, KCM003 and KCM015.


With Infusions in Slime (CS13) and in In The Navy I create some other paper, sprinkling and spritzing water directly through the stencil PM034, and 'stamping' with the remaining colour on the stencil.


To create another layer I sponged through PM034 stencil Mattint in Fern (MT03).


On another piece of watercolour paper I simply sponged several colours of Mattint through stencil PM033, PM034 and PS455, overlapping colours even the 'new' Mattint: the mix of Dragonfly and Mojito ;).


How cool is that? Once dry, if you go over the stencilled images, even if the top colour is darker (here I used Mattint in Shadow, MT16), you can see the first colour clearly. This is because Mattints are a glaze/sealant, so the underlayer is acting like a resist on this absorbent paper. Good to know!
 

So far, playing with Mattints and Infusions I created a lot of paper that I can use to build layers in my Layout, even though I'm not actually done yet, I like having a lot of material to choose from.


To make embellishments I stamped some flowers from the Kate Crane Stamp Set KC011 on pieces of watercolour paper created previously in the different colours.


And then I dedicated myself to fussy cutting the flowers.


I created a pattern on a dark background with the Kate Crane PS455 stencil ...


I love this pattern and I'm glad that Kate designed both a stencil and a Mini Stamp KCM016 that when stamped multiple times create the matting that I used for my photo.


Ok, now I'm quite satisfied with the amount of stuff to play with to create my Layout, and I started with the photo as a focal element to build layers around it.


In contrast to fussy cutting, I chose to tear all the edges of the various paper pieces I had previously created.


Even the smallest pieces that might seem like scraps help create a cohesive whole by balancing colours and contrasts.

Now it’s all a game of combining pieces and colours to bring my Layout to life.


I'm pretty happy with the way my layout came together, colourful, messy and far away from perfection as I am :)


Some details and closeups that make me smile.


This is my favourite part, with the quote and that tiny leftover at the bottom, bursting with colour.


I have so many yummy pieces of paper leftover, that it will be a shame not to use, it will probably turn into a mini album.

Kate Crane products both stamps and stencils are such a pleasure to play with, and ... spoiler alert... there are more coming soon.

Have fun.
Martha xxx


Friday, 9 May 2025

Travel Journal with NEW Mattints {by Jenny Marples}


Hi everyone, Jenny (Pushing The Right Buttons) here with you today; nice to be back with you again.

This year on the blog, we have free reign to do a deep dive into a PaperArtsy product range of our choosing. For this post I have been exploring PaperArtsy's own products, in particular the 'Backgrounds' Printed Tissue and some NEW Mattints colours.


For this post I made a journal, filling the pages with the results of my Mattints experiments, and I'm looking forward to sharing these with you.


The basic supplies used throughout this journal include the new Mattint colours - 'Foxglove', 'Bellflower' and 'Shadow' - and a sheet of PaperArtsy 'Backgrounds' Printed Tissue. I'll show you the other PA Mini Stamps and Masks that were chosen to compliment them as we go.


When playing with a new product I usually go on the hunt for helpful tutorials that will guide and inspire me. So first stop was to a video tutorial from Alison Bomber who showed how she used a brayer, gel plate and Mattints to create beautiful, graduated backgrounds.


Here you can see how 'Foxglove' and 'Bellflower' Mattints combined with 'Ladybug' Mattint on white paper. The 'waste' off-white paper I used to clean off my brayer after each pass also proved invaluable.


Adding the 'Backgrounds' PaperArtsy Printed Tissue over the top of the gel printed paper gives you colourful and interesting backgrounds for journal pages.


Here you can see how more of the tissue over the waste paper creates a focal point. 


Yet more tissue and some stamping with PaperArtsy Minis MN45, MN94 and MN114 starts to tell a story of travels through France.


Keeping things simple on this page I combined some of the images with stamping using PaperArtsy Mini MN29.


I loved the slightly vintage look the off-white waste paper had produced so used more of it for the next experiment. After applying 'Cloud 9' Fresco Finish Chalk Acrylic Paint through PaperArtsy Mini Mask PM023 I brushed and blended the 'Foxglove' and 'Bellflower' Mattints over the paper. The paint acts as a resist.


Adding more PaperArtsy 'Backgrounds' Printed Tissue over the top you can see how another journal page was created.


Here I decided to use 'Bellflower' Mattint to apply more Printed Tissue direct to a journal page. The base colour on the page came from an old gel printed background created with 'Scottish Salmon' Fresco Finish Chalk Acrylic Paint; see how the colour shifts as the Mattint is applied.


Here the same technique has been used with less 'Bellflower' Mattint and more stamping/ephemera. This includes a postage stamp shape from PaperArtsy Mini MN129; these have been added throughout the journal and have been made less stark with smudges of 'Shadow' Mattint.


For me it's always good to include a variety of pages in a journal, providing a visual 'break' between some of the colourful pages. So I kept it simple with this one, using only a small splodge of 'Foxglove' Mattint and a delicate touch of stamping to help elevate a focal point. The stamped car comes from PaperArtsy Mini MN85 and continues the travel theme.


Don't be afraid to partially obscure your colourful backgrounds either, again adding that visual contrast.


With the pages developing I searched for more ideas and found this clever video tutorial from Mags Woodcock who uses recycled cardboard to create grungy layers. Mine are less grungy and I used more of the 'Cloud 9' Fresco Finish Chalk Acrylic Paint to dry brush the surface.


I slightly flattened the cardboard before layering it up with some of the stamped images and Infusions dyed muslin.


Feeling more confident with how these new Mattints colours worked I did some experimenting of my own, introducing the 'Shadow' PaperArtsy Mattint into the mix a lot more.


These small image transfers from photos I'd taken on a trip to France needed finishing. Adding PaperArtsy Grunge Paste around the edges helped to blend them onto the background surface. I then extended the lines on the original photos with a pencil before using delicate touches of 'Nutty' and 'Shadow Mattints to match in the colours, adding shade and depth.


To finish them I stamped over the edges with PaperArtsy Mini MN62 (originally in a pale grey ink as a shadow and then with black ink).


This script stamp also came in handy for another page; the 'Bellflower' Mattint was again used to apply tissue to the background.


Now it was time to try something new with a couple of my favourite architectural PaperArtsy Mini Masks PM017 and PM020. I started by spreading Grunge Paste through the stencils and when dry brushed over with 'Nutty' Mattint, avoiding the central window portions. Those parts needed a blend of the 'Foxglove' and 'Bellflower' Mattints applied over them.


I painted over the window frames with 'Shadow' Mattint and when dry sand over the raised areas to reveal the Grunge Paste surface again, this time with added shadows and extra definition.


To finish, I drew in some basic brick shapes and coloured with the 'Nutty' and 'Shadow' Mattints, re-painting the raised Grunge Paste with the 'Nutty' to help it blend in with the background.


These could then be mounted onto some of those colourful backgrounds created earlier, in this case slightly obscured again with more sheer muslin fabric.


I used what was left from my experiments to decorate the front cover, providing a nod to the overall theme and a suggestion of what lies inside.

So let's take a walk through the finished pages;


I've really enjoyed testing out how these new Mattints work with some of the other colours and with other PaperArtsy products. It's been fun to test out techniques from other designers and try a couple of my own, creating a mix of colourful backgrounds and focal points along the way.