Showing posts with label EA2. Show all posts

Saturday, 17 April 2021

2021 Topic 4 Free to Fly with LPC {by Kate Yetter}

 2021 Topic 4: Free to Fly


Clearing up and decluttering has never been so creative. Kate has an artistic idea for using up all all those lovely bits and pieces on your desk. In true Kate form, she's created something fabulously eclectic and classy. 
~ Keren.

Hi everyone, it's Kate with you today, and I'd like to share with you my mini junk journal.

I decided to make a journal with this theme because it was a project with which I could be creative and because I thought it would be a great way to display my stamps, as well as use up the mountain of scraps on my desk.

I never tire of making journals because they are in a book format. Flipping through and seeing all the stamps, ephemera and journaling makes me happy.


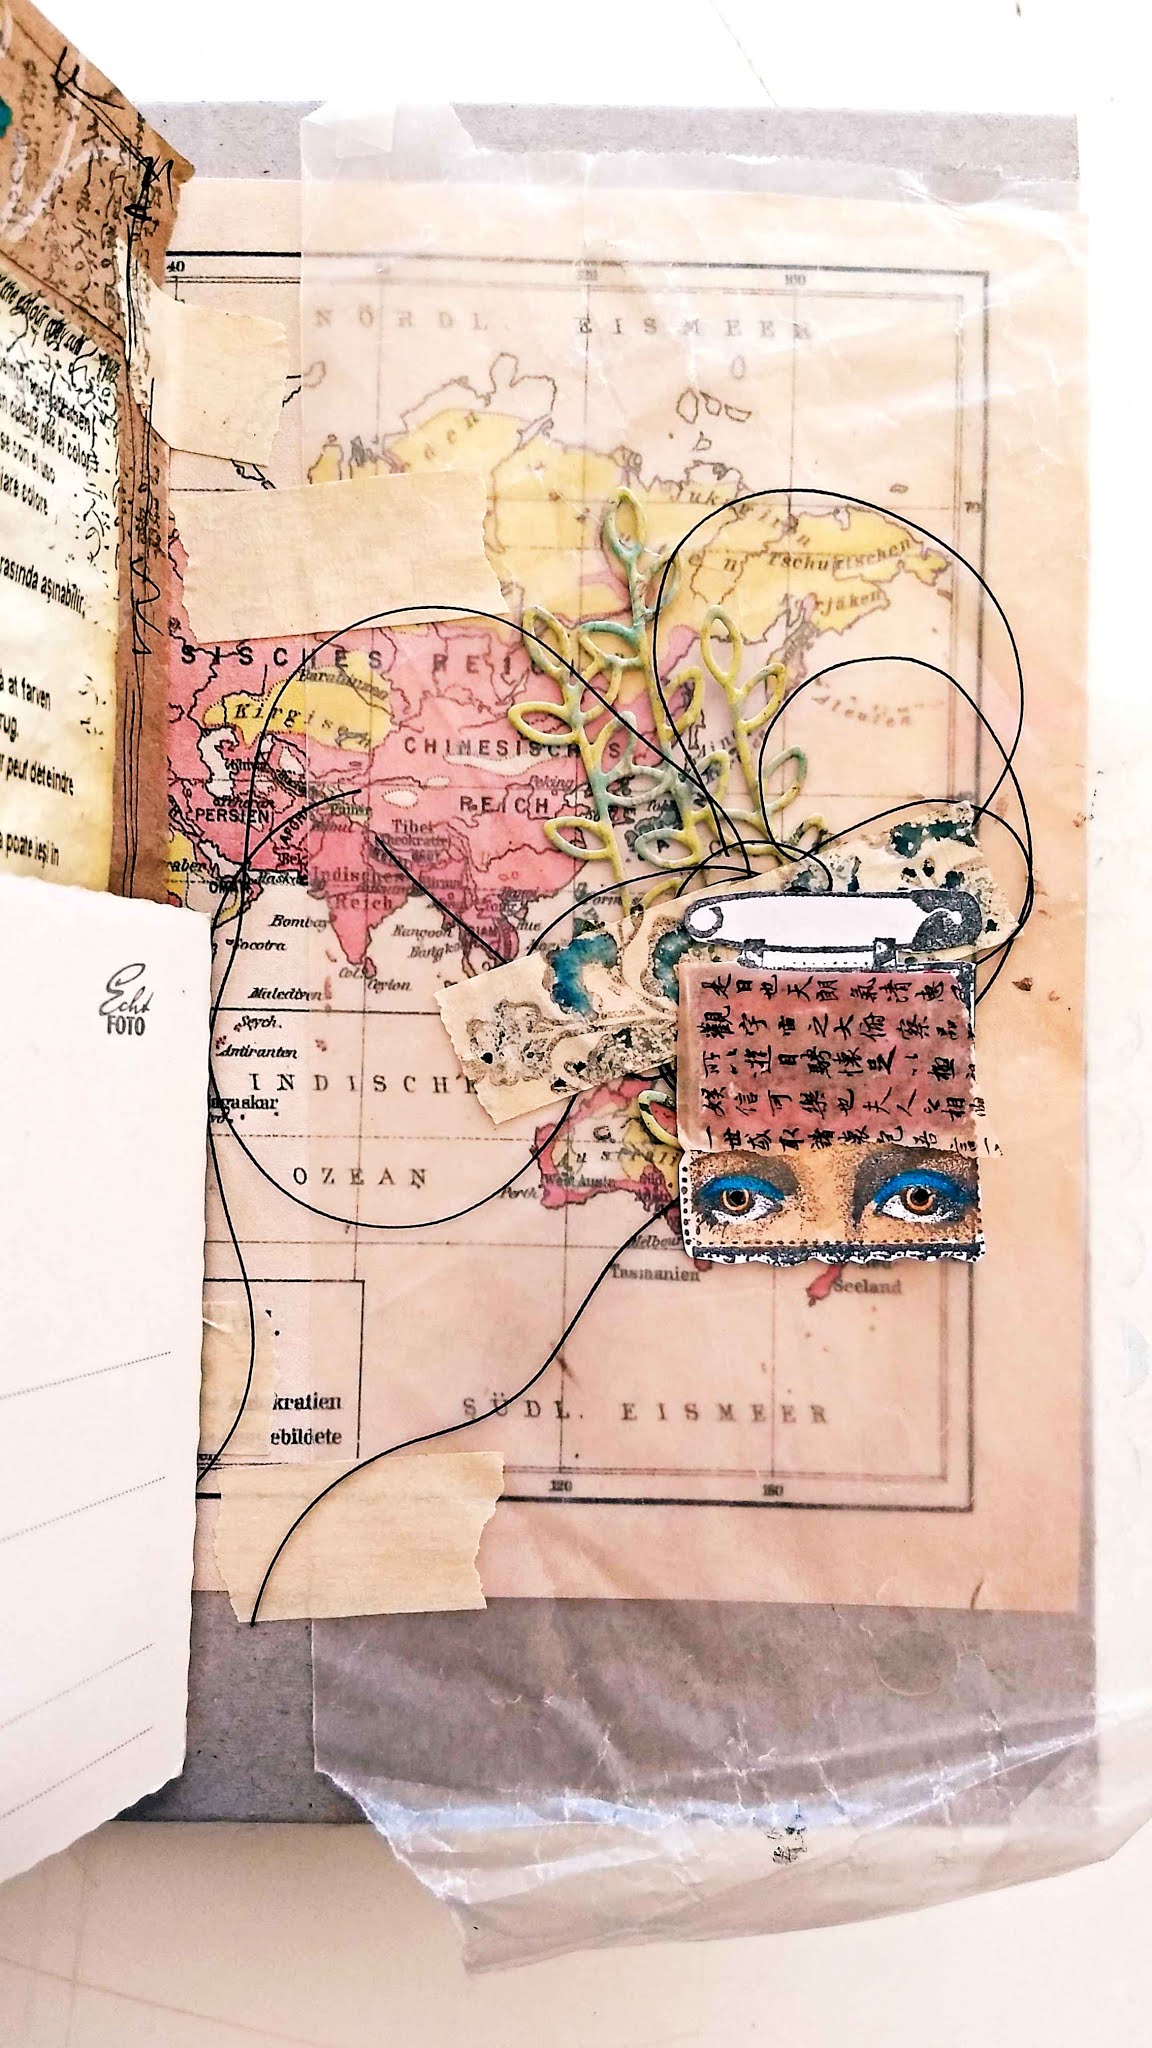
The base of my journal is a piece of cardboard that was sitting in my scrap bin.


 I collected a bunch of scraps and put them all within reach.


I stamped this Lynne Perrella image, colored it with Fresco Finish Chalk Paints and then added some doodling.


All sorts of bits and bobs were added including postcards, book paper, vintage maps, envelopes, wax paper etc... every thing was connected using masking tape.


Using some stencils and black gesso, I created a background for stamped embellishments.


Pockets and envelopes are a great place to hide little treasures.


Even old palettes can be incorporated in a journal. I love the pop of color.


The perfect place to practice my doodling.

This Asian script stamp is one of my favorites to use in backgrounds.


I used infusions and a stencil to create this page. The watercolor effect from the Infusions is lovely.


I had this postcard covered in old tea bags and embossing sitting on my desk for years. I took it out, embellished it with stamps and covered the tea bag tags in stamps. It ended up being the perfect last page to my journal.


Neatly tied up in a bow.

If you have extra scraps (I know you do), compile them together and make a journal. All you need is some tape to attach everything together. I hope you will give this a try. Don't forget to have fun and be creative. 

Until next time,

Kate Yetter

Blog: https://kateyetter.com/
Facebook:
Twitter:
Instagram:https://www.instagram.com/kateeyetter/

Pinterest:https://www.pinterest.com/katesscrapyard/ 

Wednesday, 20 February 2019

2019 #2 Brayers: Friendship with EAB {by Jennie Atkinson}

2019 Topic 2: Brayers


Ohhh delicious colours from Jennie tonight, and such a delight to see how she pulls the layers togehter so thoughtfully!. Lots of old school stamps in the mix plus of course the newest from Alison finishes everything perfectly! ~Leandra

Hi everyone, Jennie (Live The Dream) with you today with a (colourful for me!) journal page celebrating friendship.

As our theme is brayers I just had to get out the Gelli Plate and use one of the fabulous new PaperArtsy brayers. I have been experimenting a lot with the Gelli Plate since the New Year as I was leading a session using one here in Shetland. I was a bit rusty and so have been seriously addicted to Gelli Plate Videos on Youtube. There are so many wonderful techniques that one doesn't really know where to start. So I have kept this simple ......


Alison's fabulous Friends and Friendship stamp collection (EAB10) was my main focus for the double spread journal page. There are so many wonderful quotes in this set it is very difficult to pick just one .... I feel a mini book coming on at some point!


I picked my PaperArtsy Fresco's quite randomly and it was only afterwards that I realised I had a mixture of transluscent and opaque which I think has worked really well in terms of the lighter yellow showing through.


I wasn't too sure whether these would work together, but after all it's only a bit of paper! I have used the single layer transfer technique (ie multiple pulls) rather than layering all my colours onto the Gelli Plate (single pull).


I started with Pumpkin Soup over the whole page. For the next pull I used Bora Bora, but keeping some lighter gaps. It was this layer that I used some old impression stamps to create a bit of texture. The next layer was Teresa Green very lightly here and there and the final layer was Hint of Mint around the outside edges. I also got a very nice ghost sheet too, although the paint dried quite quickly.


I also used my brayer to get an even layer of paint onto a flourish stamp. 


I used Chalk for this layer and the wider, larger brayer meant a good even layer of paint with no "blobbing" !


A stamping layer came next and I decided to keep the circular elements going with a clock and more some paint circles.


Most of the stamps you see here are my all time "go to" stamps for highlighting background papers.  There are so many wonderful elements in C1 for backgrounds and the two small bookplate stamps in Scrapcosy's set appear on just about everything I make!


My other go to stamp set is Ephemera 2, this time for collage pieces. In fact the Carte stamp has it's on acrylic block and doesn't leave my craft desk!


I have used the same ink throughout in terms of stamping and blending (Ranger Archival Ink Potting Soil). I feel this keeps everything balanced with the focus on the colours of the background rather than the foreground inking.


The collage is perfectly sized to sit in the lower corner without dominating the background pages.


The quote I wished to use was quite wide and only just fitted the width of my journal, so I tried to keep the design on this page more horizontal.


It seemed appropriate to leave a clear area of stamping at the bottom of the page.


I did add a few watery paint splatters as I felt the double page needed something to tie it all together.

When I started this journal page I was unsure as to whether the background colours would work together, and indeed whether they would compliment the vintage theme I had in mind. Limiting myself to one ink pad both for stamping, blending and colouring the embellishments has I think allowed it all to work together. This is really quite colourful for me! but I love that the Gelli Plate and Brayer allow me to blend out the colours and add different layers on top of each other to soften the look. 

As always thank you for joining me and I hope that our current theme inspires you all to get out your brayers!

Jennie x

Blog: Live The Dream