Showing posts with label Cards. Show all posts

Friday, 1 November 2024

2024 Topic 9 : Alison Bomber {by Victoria Wilding)


Hi everyone

Victoria here with you today.

It’s that rusty time of year, when all of the autumn colours are in their full glory and naturally spill over into our makes. And no-one does rust better than Alison Bomber, so taking a leaf from her book (see what I did there!), I was inspired to do my own paired back take on combining some of the stamps from her collection with some rusty autumn colours.

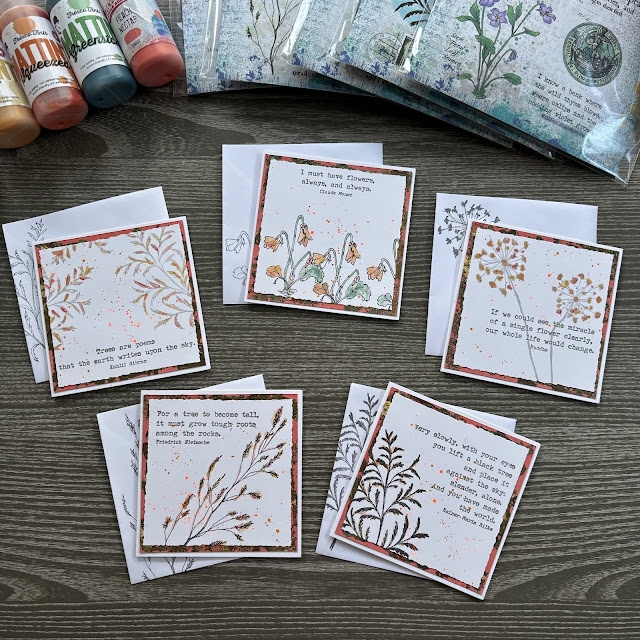
Embracing nature in words and pictures, lies at the very heart of Alison’s creative practice and forms the basis for her stamp collections. So it wasn’t too big of a stretch to incorporate this quarter’s theme of nature into my project. I decided to create a set of notelets, which can be bundled together to gift a friend. Combined with a few other elements, this handmade gift will be a one-of-a-kind package, crafted with love.


I’m not usually a hot colour fan, so lots of white space in the finished project, balances the strong colours which I used sparingly. This really helps to lead the eye to the details, whilst also giving space to rest whilst looking.


I started off by gathering my supplies. Firstly I selected some Alison Bomber stamp sets for my imagery. I knew I wanted words to be a particular focus on the notelets, so I went right back to the beginning and chose EAB01 Trees and Flowers, as the nature theme would tie in with the floral images. I am lucky to have a collection of Alison’s stamp sets, so I also chose EAB30 Violets Edition, EAB39 Pressed Foliage Edition, EAB40 Pressed Grasses Edition, EAB41 Pressed Umbels Edition, to use for the floral images, giving me a different floral for each notelet. If you don’t have as many sets, you could easily use just one set and have matching images on all the notelets.


I also selected some autumn colours from the Mattints range, picking out Ladybug, Greenstone Glow (MT01) and Squeezed (MT06). I also selected a Fresco Finish Chalk Acrylic in Peach Nectar (FF144).


I picked out five, 4” square card blanks and envelopes, and cut five, 3.5” squares from Smoothy Card (SCA4) using my deckle edge trimmer for an uneven edge.


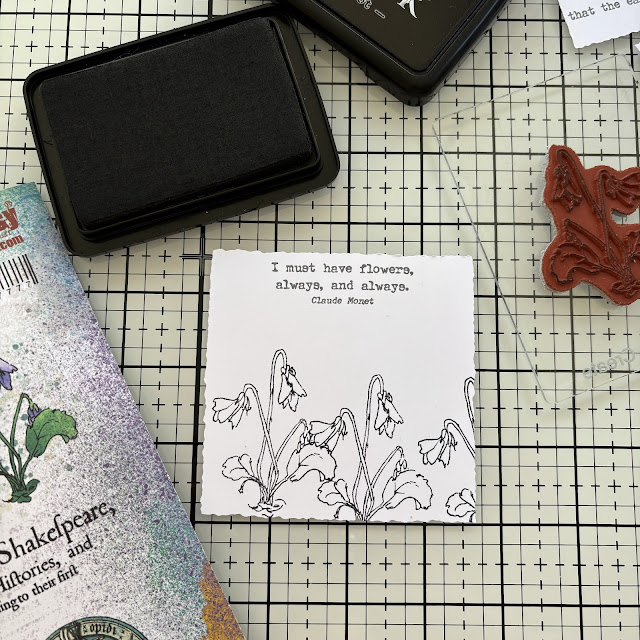
Then I started to create the main focal points for the notelets, stamping out quotes from EAB01 Trees and Flowers.


Next I stamped a floral on each of the cards.


Using a mix of black and grey Archival Ink, to create the illusion of depth between the images and words.


With the stamping complete, it was time to add some colour to the project.


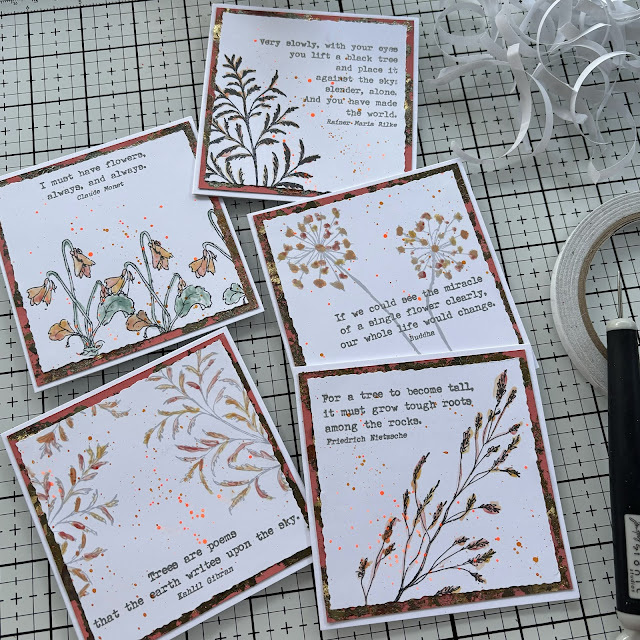
I put out a small blob of each of the Mattints onto my craft mat, and using a small paint brush started to roughly apply the colour, not bothering to stay too closely in the lines.


This allowed me to create a halo of colour around the solid stamp designs, creating unity in all the cards as a collection.


Then I added some orange watercolour splatters and set aside to dry.


Next I created the base layers, to put the focal points on. Using scrap card, I cut five 3.75” squares and applied Fresco Finish Chalk Acrylic in Peach Nectar (FF144around the edge using a sponge. This is a great way to use up patterned card from your stash that you might not like that much.


Once dry I applied a rough, thin coat of glue on top of the paint.


And applied guilding flakes on top, removing the excess with a brush.


With the main elements for the notelets complete, it was time to start building the layers, using double sided tape.


Including attaching them to card blanks.


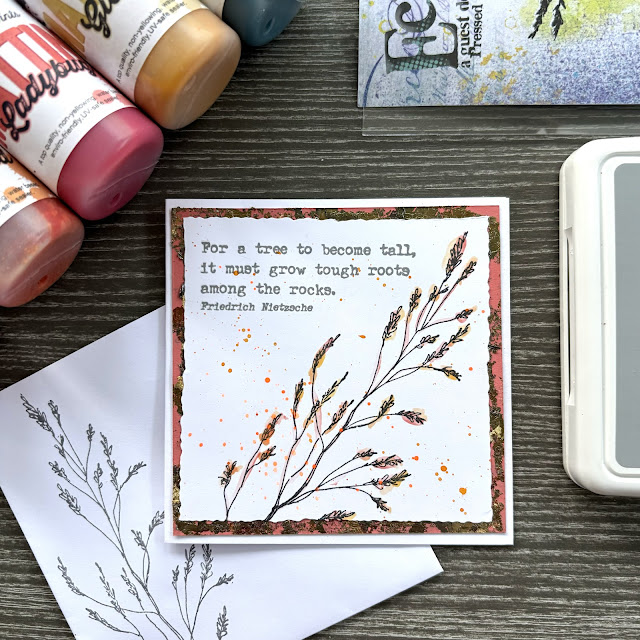
The patchy metallic highlight, look really effective against the bright peach of the paint, creating a real burst of autumn colour behind the main focal point.


To finish I stamped matching florals on the envelopes for the notelets, before bundling them all together with twine.


The finished notelets have a flush of autumn rust, that isn’t too overpowering and they look really great together as a set.


With five unique designs in the finished set, these will make a great gift for the recipient to use for sending handwritten messages or greetings, or for journaling/reflective writing.


I hope you feel inspired to make your own set of nature inspired notelets.

.
Until next time, wishing you a happy creative week!

Victoria 

Saturday, 9 March 2024

2024 With 3 things: Crunchy Cards {by Ann Barnes}


Hello everyone,  Ann (aksbarchitect Creates)  here with you today; sharing some cards that I made for the "with 3 things" challenge. I was so excited to be able to participate in this new feature, especially to be able to stretch my imagination and creativity using the wonderful PaperArtsy products.


When my package arrived, I was looking forward to seeing which three products were chosen for me to create something with. I was certainly not disappointed! These new PaperArtsy Hot Picks stamps (
HP2401) drew me in from the moment I watched the release video. This set contains wonderful small graphics, perfect for backgrounds as well as some bolder sentiments that could work in journals or on cards, even layered into a mixed media piece. 

Just as exciting is the package of Crunchy - Waxed Kraft Paper (WKPA5), oh the possibilities! I love the natural brown color of this paper and the waxed coating that gives way when the paper is scrunched up creating a web-like effect is simply divine. I have always wanted to experiment with just how much this crunchy waxed paper could handle and this was my chance! 

The final product included was a jar of PaperArtsy Infusions Just Walnut. Now this was a treat! The infusions line is so interesting and creates such beautiful finishes where each color includes some of these walnut crystals, but to have a jar of simply walnut crystals, it is pure joy.


Now, I must tell you, once I unpackaged these "3 things" my imagination went into overdrive. so many ideas came to mind. I may even have a little pile of experiments, as well as need to finish pieces, stacked on the corner of my table.

My first experiments involved the PaperArtsy Crunchy - Waxed Kraft Paper. I wadded it up and flattened it out again; heated it with my heat gun, making it crispy; stamped, inked, and dyed it; I even embossed and die cut with it. Each experiment fueled my imagination even more. If you are ever at a crossroads and not sure what to do, playing with products and experimentation is the key to unlocking your creativity. Here are a few of the results from my Crunchy - Waxed Kraft Paper experiments. I love the way that ups get the color variation when the paper is crumpled. and the dry embossed design is gorgeous on the PaperArtsy Crunchy Waxed Kraft Paper.


I also tried some different techniques with the PaperArtsy Infusions (Just Walnut). As you may know, I love working with inks; I sprinkled some of the crystals into one of my palette wells and added drops of water to create a walnut ink. Depending on the ratio of water to crystals, the ink color can range from a deep dark brown to a light almost tea color. These work so well as washes on paper. You can use the ink to dye ribbons and twine as well. Next, I added the crystals to PaperArtsy Fresco Tints - Mattint Glow, I chose to work with Mattint Glow, a wonderful transparent yellow, that when mixed with the Infusions Just Walnut, creates a gorgeous yellow ochre color.


When these papers were dry I knew that I would be creating some cards with the pieces. I have a feeling that if something made with this beautiful, cheerful color would arrive in someone's mailbox, it would make their day. Considering these were to become backgrounds, I wanted to add a bit of interest, using the more ephemeral stamps in the PaperArtsy Hot Pics 2401 stamp set, I lightly inked up the stamps and randomly added them to the papers. I did not use the entire images, just some sections of the stamps. This is easier to you when you do not use a stamp block.


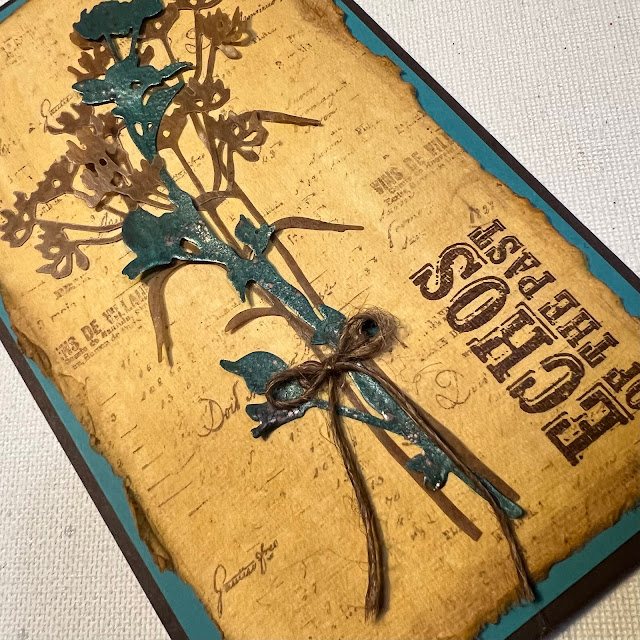
I thought it would be fun to create a selection of cards. Spring is in the air where I live, so I decided to create some layered flowers for one of the cards. I stamped a piece of vellum with two of the PaperArtsy Hot Pics 2401 stamps, then painted the back side of the vellum with PaperArtsy Fresco Finish Chalk Acrylic Gold (FF20). When the paint was dry, I die cut some layered flowers from the vellum as well as from the Crunchy Waxed Kraft Paper and created the flowers.


The flowers were glued onto the background. I painted stems and leaves using some very concentrated Infusions Just Walnut "ink" that I created by mixing the crystals with a little bit of water.


The "aged to perfection" stamp from Hot Picks 2401 seems perfect for a birthday card! 
The other two cards I made were put together in a similar manner, but one uses simple die cut wildflowers. These were cut from the PaperArtsy Crunchy Waxed Kraft Paper, and layered onto the background. 


For the third card, I burned the edge of a piece of the PaperArtsy Crunchy Waxed Kraft paper and used it as a wrap around one of the golden paper bases. I tied it closed with a piece of jute that I dyed with the Infusions Just Walnut. The inside features the "Light your fire" stamp and above the closure there is a wax seal that I created by stamping into the hot wax with a section of one of the stamps included in the PaperArtsy Hot Picks 2401 Stamp set.


I can't wait to send out my cards! I loved being able to take part in this new feature on the PaperArtsy Blog. I hope that maybe you have been inspired to pull out a few supplies and spark your own imagination. Thanks so much for stopping by today, Ann   xx


Saturday, 4 May 2019

2019 #6 Fish: Snap! with Hot Picks {by Miriam Grazier}

2019 Topic 6: Fish


This is a fabulous idea for the school holidays! Get the kids involved making their own 'snap' cards. Miriam has used fish and Alphabet stamps for this, but think of the themes and fun you could have with this! 'Suits' in various colour ways. A wonderful kids party idea too! Let's go FISH! ~ Leandra

Hi everyone, it's Miriam with you today, and I'd like to share with you a game of Snap! that I created using Hot Picks stamps.

I wanted to create something a little different (for me).  Hot Picks stamps are wonderful for collage projects and I had an idea to collage them onto ATCs.  This then evolved into creating a game of Snap! and a matching box that they can be stored in.


These were so fun to make.  I used both Opaque and Transparent Fresco acrylic paints and these worked amazingly together.  My colour scheme was chosen by thinking about both the sea and the vintage style of the Hot Picks stamps. 

  
I used Pea Coat, Stone, Mermaid and Gold.


I wanted to still see the Kraft card showing through and so used the scraped paint technique using the tool that comes with the new PaperArtsy brayer (it's a transparent scraper, you can see it in the photo below) - the brayer and scraper are by far my most used products at the moment! 


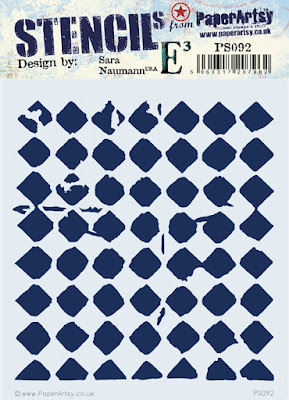
I really loved the texture on my playing cards and yet there is only a small amount of dimension created by the stencilled Grunge Paste.Both stencils are by Sara Naumann PS092, PS112.


I love the gold splatters, I felt it really lifts the colours in the project.  This teamed with Kraft card stock and white Grunge Paste worked really well as an added texture.

Next up was stamping the images, again onto kraft card, a mix of fish and letters.


Hot Picks Collection: HP1201, HP1202 
 
Eclectica: Everything Art Set 05 (EEA05)


I was worried that I would mess the project up by inking over stamped images in different colours of Archival ink but these stamps work so well together and they collage amazingly.


One thing that I loved about these stamps is the detail that they show - being able to see the texture and scales on the fish is amazing and they stamp so well.  


I really hope that I have encouraged you to have a go yourselves.  Step out of your comfort zone and create something that you haven't created before!  I loved creating something for fun using products that I adore.  I would like to try this with Artist Trading Coins too.

Thanks for joining me this evening.

Miriam

Blog: Miriam's Creative Dreams
Facebook: Miriam's Creative Dreams