Showing posts with label Baked Texture. Show all posts

Friday, 10 May 2019

2019 #7: Turquoise & Purples with ESA [By Amanda Pink}

2019 Topic 7: Turquoise


It's always lovely to welcome a new face to our pool of fabulous bloggers, and today we have Amanda Pink here to share some painterly fun with Seth's stamps and Fresco Paints. This stamp set of vintage circular items seems to have wide appeal sine its launch earlier in the year, and Amanda pairs them beautifully with shades of turquoise and purples and plenty of texture too! ~ Leandra

Hi everyone, it's Amanda (ink-a-pink) here with you today, and I'd like to share with you my project for the current topic: Turquoise. 
I have created an 'art panel' that has colour, texture, layers and dimension. It can be multi- purposed - either displayed as a piece of art, used as a book/ journal cover or as I often like to do be given instead of a card - what I call an 'art card'.


I wanted the Art panel to have some sturdiness so a PaperArtsy 5"x7" Heavy Grey/ Whiteboard panel provided the ideal substrate. I covered it with strips of tissue tape, as I find covering a blank surface with something, be it pen marks, doodling, text, tissue tape etc is a good way to kick starting creativity and lessens the chance of 'white fright', 'blank page' syndrome.


The print on the tissue tape was a little bold so I reached for the gesso, stippling to create texture and tooth...


... before introducing some grungy texture here and there courtesy of PaperArtsy Grunge Paste.


I combined the topic colour Turquoise with Purple!! Now Purple is not ordinarily a 'go to' colour for me but I thought it would be good to step out my comfort zone and although a little hesitant I was encouraged the combo would work ok when I recalled seeing the two colours looking good together at a wedding reception I attended some years ago. 


I also added a couple more colours to the mix to compliment and accent. The full palette of PaperArtsy Fresco Chalk Acrylic Paints I worked with was Turquoise, Eggplant, Hint of Mint, Snowflake.


I love painting with a palette knife as I find it allows for a more random application as well as a gradual build up of colour which results in some interesting layers of colour and texture. 


I used some of the stamps from Eclectica (Seth Apter) Collection ESA02, ESA04 and Eclectica (Courtney Franich) ECF04 with Ranger Archival inks (Green Patina, Blue Violet, Cobalt) to add further detail and interest.


The rectangular text stamp from ESA04 was ideal as the words that make up the stamps are all colour names- two of which are 'turquoise' and 'purple'! What are the chances?? Some careful placement of the stamp ensured 'purple' made an appearance!
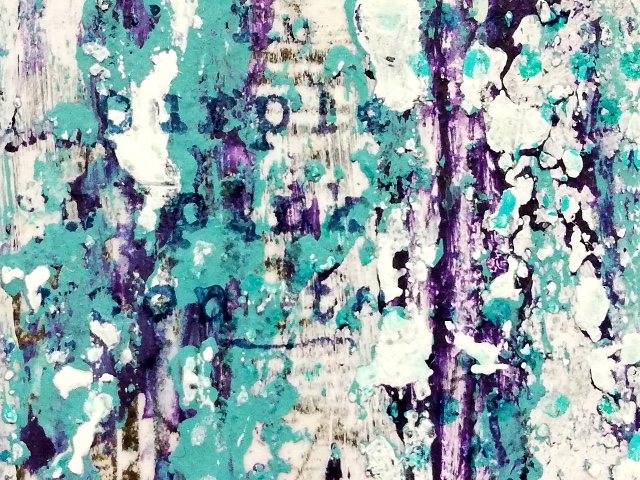

However 'turquoise' got lost in the midst (upper left) but I know its there and hopefully you will trust my word!


There are also some dots and lines using stamps from both ESA02 and ECF04


I used Eclectica (Seth Apter) collection ESA12 to create all the elements for the focal feature.

6 of the 9 stamp designs were stamped multiple times on PaperArtsy Smoothy Super Smooth card using Turquoise and Eggplant fresco chalk acrylic paint. I chose to stamp the elements with paint as oppose to ink as I wanted to carry the true background colours through to the fore to compliment and enhance not distract. So lots of stamping, cleaning stamps throughout and then lots of fussy cutting!! Please note, if you are stamping with paint it's advisable to clean the stamp immediately after use. 

All of the focal feature elements are double or triple layered to give some rigidity. Some are adhered flat to the background, whilst others are raised to give dimension...


... and some sense of movement with the rise and fall. 


The elements are embellished with either eyelets or brads.


Additional features to help balance and bring the overall design together are a Spellbinder/Seth Apter Steering Wheel die that frames the stamped gauge.


Some side accents, all of which are stamped with the small stamp from ECF04 and embossed with Emerald Creek/ Seth Apter Baked Textures( White Blizzard). 


After finishing the art panel I had some of the stamped images from ESA12 hanging around so created a couple of CAS cards. They were super quick to make thanks to all the 'project excess' I had lying around my desk. 

Stamps used are from ESA12 and ESA02.


Fresco Chalk Acrylic paints used are Turquoise and Eggplant


I enjoyed stepping out of my 'colour palette' comfort zone to create my 'Art Panel' and I loved creating and building up all the layers, texture and dimension be they from the mediums, the paints or the stamps I worked with. I'm looking forward to playing around with the stamps some more and trying out some of the 'sparks of inspiration' I had (and there were quite a few) whilst I was creating with them this time and I'm sure I'll be mixing up the colour combinations too. 

Thanks for joining me today/ tonight
Keep on Creating
Amanda x

Blog: ink-a-pink
Instagram: @kynapi10
Pinterest: PinkArt

Wednesday, 8 May 2019

2019 #7: Turquoise with ESA 'Experiment' [By Etsuko Noguchi}

2019 Topic 7: Turquoise


In this wonderfully layered post, Etsuko creates some stunning layers, all of which she explains so clearly for you below. I love to see how she brings her pieces together, she makes such a wide variety of crafty creations, a very talented lady! ~Leandra

Hi everyone, it's Etsuko My Favorite Things with you today, and I'd like to share with you Topic Turquoise using fabulous Seth Apter's stamps, paints and Baked Textures.

I love Seth's mixed media fine art, his unique work of art always fascinates me and it is amazing to see that the materials the deals with will magically transform. Today I tried the mixed media configuration using his stamps and so on.


First, I made turquoise color background.


I collaged pieces of book paper and painted them with white gesso. Then I painted them with Turquoise, Green Patina and Hey Pesto.

Also I used EM35, EM36 and some Seth's stamp with his Baked Textures: Chunky Rust, Rocky Road and Ancient Amber, this made the background a bit thicker with the lovely texture from the embossing powders.


And repeatedly I also added Neocolor pastels and Fresco Paints to get a satisfying turquoise color.

This is the finished background work.


Next I made three pieces for layers. 


First I painted mixed Mud Splat, Mahogany and Buff on White Smoothy Heavy Card then I randomly splatted Turquoise and Green Patina. And I embossed ESA07 stamp with DeepSea Baked Texture.


This photo is focal point, I stamped ESA06 by Sepia Archival on Smoothy White Card. Then I made the SEEK EYE watch frame using Rocky Road and Beeswax Baked Textures with ESA11 and EM39.


Finally I made word Experiment from ESA08 and third piece of layer from ESA06. The word Experiment embossed by Rocky Road on tissue paper and embossed ESA06 item with Chunky Rust on another black painted paper. Both of them cut and pasted to the place shown in the photo. I embossed by Patina Oxide Baked Texture with some splat stamp the overall. And I painted by London Bus Fresco on the book paper then rip it thinly and stuck it vertically to be the point.


I made the combination of turquoise and brown, but the brown tone was difficult. I thought that it would be fun if I tried various colours to be the medium, and I put the word 'EXPERIMENT'. I think the combination of colours is a very enjoyable task and turquoise is a very attractive color. Please try and challenge it everyone.

Thank you so much for visiting.
Etsuko xxx

Blog: My Favorite Things
Facebook: Etsko Noguchi 
Instagram: Pixienest
Pinterest: Etsuko N.

Saturday, 13 April 2019

2019 #5 Maps & Plans: Adventure Notebook with ESA {by Jenny Marples}

2019 Topic 5: Maps & Plans


Adventures come in all sorts of shapes and sizes, and having a notebook to record them is the perfect start. Jenny has created a beautiful textural binder for all her plans using Seth Apter's stamps to the max plus echoing the circles in the stamp set with some die-cut vintage map pieces.

Hi everyone, it's Jenny Marples with you today, and I'd like to share with you a notebook, designed to help document the adventures to be had when using maps and making plans.

The idea of creating a notebook came in part from one of Seth Apter's fun and informative online courses. The part I enjoy most is decorating them; the measuring and cutting of covers less so. Thankfully Eileen Hull has just released a new Notebook die that does all the cutting and scoring with just one pass through a die cutting machine.


And so I began this book by die cutting a cover from mount board, painting along the spine and edges with Midnight Fresco Finish paint; both inside and out.


Layers of BuffChalkLake Wanaka and Moonlight Fresco Finish paint were brayered onto a Gel Plate before being applied to Smoothy Regular White Stamping Card to create the mottled background.


Some of the images from Seth Apter's ESA12 stamp set were then stamped onto the background using Smoked PaprikaMidnight and Chalk Fresco Finish paint.


This 'masterboard' was then used to cover the exterior of the notebook covers with circles cut from the leftovers.


Those circles were added to the covers along with more circles cut from a vintage map before being highlighted around the edges with a white gel pen. The additional die cut rings on the front and back covers were covered with Seth Apter's Chunky Rust Embossing Powder before being glued in place.


For inside the pages, they were painted with dilute Vintage Lace Fresco Finish paint and then stamped on the edges to match the cover with more Smoked Paprika and Lake Wanaka Fresco Finish paint. You'll see more of those circles of vintage map were added and edged with white gel pen.


By opening the book fully you can see how the design that was created on the front cover was replicated on the back cover as well.


With the painted pages bound inside, the book was completed and ready for use.


Whether you create a book from scratch or choose to alter an existing one, giving them a makeover with paints and stamps is so much fun. Plus you get to enjoy using the end results!