2019 Topic 5: Maps & Plans
Adventures come in all sorts of shapes and sizes, and having a notebook to record them is the perfect start. Jenny has created a beautiful textural binder for all her plans using Seth Apter's stamps to the max plus echoing the circles in the stamp set with some die-cut vintage map pieces.
Hi everyone, it's Jenny Marples with you today, and I'd like to share with you a notebook, designed to help document the adventures to be had when using maps and making plans.
The idea of creating a notebook came in part from one of Seth Apter's fun and informative online courses. The part I enjoy most is decorating them; the measuring and cutting of covers less so. Thankfully Eileen Hull has just released a new Notebook die that does all the cutting and scoring with just one pass through a die cutting machine.
And so I began this book by die cutting a cover from mount board, painting along the spine and edges with Midnight Fresco Finish paint; both inside and out.
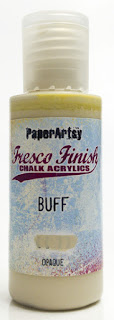
Layers of Buff, Chalk, Lake Wanaka and Moonlight Fresco Finish paint were brayered onto a Gel Plate before being applied to Smoothy Regular White Stamping Card to create the mottled background.
Some of the images from Seth Apter's ESA12 stamp set were then stamped onto the background using Smoked Paprika, Midnight and Chalk Fresco Finish paint.
This 'masterboard' was then used to cover the exterior of the notebook covers with circles cut from the leftovers.
Those circles were added to the covers along with more circles cut from a vintage map before being highlighted around the edges with a white gel pen. The additional die cut rings on the front and back covers were covered with Seth Apter's Chunky Rust Embossing Powder before being glued in place.
For inside the pages, they were painted with dilute Vintage Lace Fresco Finish paint and then stamped on the edges to match the cover with more Smoked Paprika and Lake Wanaka Fresco Finish paint. You'll see more of those circles of vintage map were added and edged with white gel pen.
By opening the book fully you can see how the design that was created on the front cover was replicated on the back cover as well.
With the painted pages bound inside, the book was completed and ready for use.
Whether you create a book from scratch or choose to alter an existing one, giving them a makeover with paints and stamps is so much fun. Plus you get to enjoy using the end results!


15 comments:
that's beautiful, Jenny!
This is stunning Jenny.
Love this Jenny. Such great layering!!
This is absolutely brilliant, Jennie, and so beautiful! Xx
This is absolutely brilliant, Jennie, and so beautiful! Xx
Very beautiful!
Fabulous Jenny! X love the stamping and textured die cuts. Tempted with the new notebook die X
Totally stunning book, Jenny!! The cover is gorgeous and I adore the colour mix!! x
Gorgeous ! xx
What a great inspiration. We are just finishing a wonderful adventure and my plan is to make a book from my daily journal pages when we get home. I’m curious how you bound the pages to the cover.....
Such a gorgeous book Jenny, I love the colours too! x
Absolutely fab , Jenny . Ove how ou used maps and Seth's stamps to create this . Useful too- always a bonus in my book
Absolutely fab , Jenny . Ove how ou used maps and Seth's stamps to create this . Useful too- always a bonus in my book
Absolutely fab , Jenny . Ove how ou used maps and Seth's stamps to create this . Useful too- always a bonus in my book
Absolutely fab , Jenny . Ove how ou used maps and Seth's stamps to create this . Useful too- always a bonus in my book
Post a Comment