Showing posts with label 2017 Topic 3. Show all posts

Monday, 25 December 2017

PA 2017: Blog Year in review: Topics 1-4


Hello and a very Merry Christmas from PaperArtsy HQ!

The next few days ahead are the time of year that we reminisce and look back on the topics this blog has explored during 2017. 

Did you learn something new this year? Did you achieve a personal goal, or tick something off the bucket-list? Were you challenged in ways you least expected? 

I think for all of us there have been numerous unexpected twists and turns in international terms for us to absorb throughout 2017, lets hope for calmer waters in the year ahead! I'd love for us all to move towards a more fulfilled and content future!


We've all been provided with the highest quality and widest variety of artistic styles on the PaperArtsy blog this year. We deliberately strive to bring you bloggers with different styles, strengths and experiences and this melting pot suits the equally broad array of products available from the PaperArtsy brand.


Tonight I'm sharing a few reminders from 2017 Topics 1-4. Read on to find out more. 


Leandra.


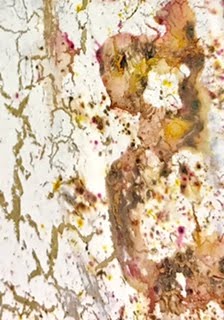
Topic 1: Pink and Orange

In 2017 we decided to add a subtle structure to our topics. Each round of 4 topics started with a colour theme, and the first of these colours was based on the True Colours Publication, curated by Lynne Perrella.


My favourite and a real turning point for me, was the chapter on Pink and Orange by Teesha Moore. And, so it naturally followed that this would be the first topic of 2017, a burst of enthusiasm and boldness!

Wendy Malls kicked off her year with this perfect representation of those zingylicious colours and made a Book of Pockets


We have come to rely on Keren pulling rabbits out of hats. On this occasion she was on a clever transparent kick, which was sublime ....


or is that subpink (and orange)!


Honestly, I could show you every post for this topic - they were all astonishing, which really is the story of the entire year on this blog! Here, Chris Dark lobbed Kay Carley's stamps out of the park...look at this in-progress shot!! Stunning!


OK Just one more...Jennie Atkinson interpreted the colour theme as led by Infusions. Her palette was soft and subdued, as is her style... I love that any colour combination can be re-worked to suit personal preference. So now you know,  Pink and Orange certainly doesn't have to be HOT! It can be dusky too!


Topic 2 : Masks

Do you know the difference between stencils and masks? Well, it is fascinating how the lines have blurred. But a mask hides things right !? So let me leave that with you and you figure it out!

Anneke is a masking guru. Layer upon layer of soft and delicate paints with a poweeee-pop of orange! I love how she uses colour in such an effortless way. And I love how this picture links the last topic to this topic!!!

OK, I'll admit it, sometimes you feel like you have to turn your brain inside out to understand how stancils and masks can be used. And our own, very lovely Missy Jo is very good at turning my head inside out on an annual basis! This post fascinated me, and the stencil she created to do this is ACE!!!


Another of our talented in house designers, in fact a newbie 2017 PaperArtsy designer, is Alison Bomber. I think we are all a bit scared of white, but look at how masks make this box pop!


Sue's canvas used masks in several ways...can you count the ways??? There's 3 very obvious techniques, on 3 separate layers....


Topic 3 : Paints and Infusions

We all know the basics of using infusions now ...well if you don't yet, just use the search bar on the sidebar of this blog and you'll be bombarded with posts from the past 2 years! Our Fresco paints are chalk, so this can inherently provide a really good tooth for infusions to grab onto, it can also offer up other creative options too, let me share a few with you now!

Take a deep breath those 'cleanies' out there...infusions WILL stain your fingers, but that's part of the fun right?!! Hey it scrubs off, so don't panic....Xmas parties are O-V-E-R you're allowed to get messy!! Helen used bleach! Not to clean up (sheesh! silly!!) noooo... to knock back her infusions in the most stunning way....Look!! You know you want to sprinkle just like her!!!


I think this is one of my fave's from Hazel. She got so excited when she was layering up this book of Seth's newest products: wood, paint, rusting powder, and of course infusions all feature within the covers. It's a bit like those interactive books you buy for kids to poke and prod...except it's for us grown ups!!


I adored how Clare Messenger made this piece ready for the wall, how cool would 4 of these look for a fabulous statement piece in your house!

Boy are we lucky that Kay Carley is getting out and about in 2018 teaching her skills to us all! Check this out!! An amazing amount of detail to bring this sample together, lucky for you she shares the steps in great detail too in her blog post! Go and check it out!


Ok, how about this! Ruth Mescall is also an infusions guru! I adore this post too...I love them all, how can you choose just a few to share !!??.... this is torture!...but look, it's so lovely!!! On the back of this I was demoing Lin's flora stamps with infusions all year at the shows we do! Love love, love. If you haven't yet tried infusions, take a minute to absorb the colours, the tones, and the depth. They make you feel awesome!


Topic 4 : Doors and Windows

I have a secret fascination with doors. Every time we head over to the fabulous continent of Europe, my first photo is ALWAYS a door, or wrought iron covering a window, or gates...all those elements always look more romantic on the continent than here, in the generally dull, grey-skied Britain! Who wants a shiny red or black or cream spick and span door, not me! Give me a rusty peeling hardy old well-loved door any day!!!

Julie Ann has been creating astonishing miniature hinged art blocks and they are a delight! My first pick to remember is this, she writes gorgeous back stories to them too!


I think this was the best thing from Emma Godfrey with her stamps! Not only has she created windows, she's also used infusions as 'pops' of colour - you know you want to sprinkle those things ... yes you doooo....(I digress - I'm under the spell of infusions). Where were we, oh yes, Emma's super-cool frame. Go take a look!


So this next sample not only do I love, but the colour follows on perfectly from Emma's sample above!! Yup, it's Seth with one of his original doorways...he makes a lot of interactive art! Love the pop of color inside the doors, and his masterful painty layering ideas.


It is so much fun to look back on what our genius bloggers have shared with us over the course of a year. This year seems to have zapped by in a blink, but at least the blog remains as the perfect reference tool Don't forget to save the posts that float your boat on pinterest. No excuse now, you'll hit the New Year with a dozen ideas to crack on with!


See you again tomorrow with more!

Leandra

Saturday, 11 March 2017

2017 #3 Framed Botanical Print {by Ruth Mescall}

2017 Topic 3: Paint and Infusions


It's always a joy to see what Ruth creates with infusions. She is incredibly experimental, and yet retains a striking ability to almost 'hold back' and not throw the kitchen sink at it! She always manages to thoughtfully allow some the white space to create a breathing zone. For those of us for who operate on a more-is-more ethos, it certainly is fascinating to observe Ruth's methods, particularly with a product like infusions which can be somewhat awkward to guide or control.
 
Hi everyone Ruth from 'a love to create' here.

Lovely to be here on the PA blog tonight sharing another project using Lin Brown's latest releases with luscious infusions and paint...what could be better? Infusions are so versatile and there are so many techniques to try with them that I originally thought of making a technique tag book, still not sure how it turned into a faux botanical print but then that's the fun in experimenting and following the 'what if?' path. 

In the process I've used 


ELB29

ELB33

ELB34

PS043

If you wish to purchase these products, you will find a list of current PaperArtsy stockists here. They will not be available direct from PaperArtsy until end of April/ May 2017.


I was originally just going to alter the frame but then thought I really need to put something in it and so it developed into a home decor item that fits very well in my dining room.


One of the things I love about Fresco acrylic paint is their coverage, even over dark wood one coat is enough.


Sprinkling infusions onto wet paint helps seal them in, loving the new 'Sleight Blue' and 'In the Navy' with their little pops of pink and could have watched all day as the colours ran into all the nooks and crannies.

Bit of a mishap in further sealing them in as I picked up matte medium instead of matt varnish and when I came to sand back the Grunge paste the matte medium started to peel off, however I discovered that you can stencil with grunge paste...so can you tell where I 'patched' it?


I've used this technique from Kim Dellow's video using infusions....


And I chose to work with Olive Tree, Emerald Isle and a touch of Green Man, all lovely colours from the 2017 Infusions release. (see here for more info/ stockists).


Spray with water and the result was magical, I almost felt like a water colour artist, the subtle specks of colour and Lin's stamps, I'll definitely be trying this again.


Even the blobs of water from a faulty water spray bottle on the right added to the effect and further stamping with fresco paint mixed with a little sprinkle of infusions worked a treat.

To finish, it needed a small focal point and I was originally going to make some 'Magenta and Violetta infusion flowers to echo the pink specks in the frame but opted for green shaded flowers made from card that I'd painted with pearl glaze and infusions.


I particularly like this close up as it shows the variety in infusion colours in both the picture and the frame and the walnut crystals that haven't quite dissolved add to the texture as they are highlighted by Pewter Treasure Gold.

I feel like I will be friends with Infusions for a long time and I'm really only just exploring how they combine with paint and other products. I hope you might try Kim's technique, it is so, so easy to get beautiful results. Not sure I'd do anything differently but next I will definitely be using the pink infusion stained card in some handmade flowers. Ruth 

Blog: 'a love to create'
Twitter: @argeum1
Instgram: @argeum1
Pinterest: Ruth Mescall

This is a fantastic interpretation of Kim's technique, and all your extra touches make it super special - what a brilliant way to recycle that frame, I hope you have found a special place to hang it! It's gorgeous! ~ Leandra


We always hope that you  learn something interesting from our blog. Our bloggers deeply appreciate your comments so much, so please take time to let them know you've been inspired! I know time is short, but you have 1 more day to join our challenge for this topic by blogging your interpretation of the current topic and link it here.

The current topic link will close 17:00 (London Time) Sunday March 12th 2017, and the winner will be announced 2 hours later at 19:00.

All links go in the draw to win a £50 voucher to spend on products of your choice from the PaperArtsy online store.

Friday, 10 March 2017

2017 #3 Buddleia & Butterflies {by Kay Carley}


2017 Topic 3: Paint and Infusions


In this post Kay Carley offers a detailed insight into how she works on one layer. Smooth transitions between Fresco Paints and Dye Infusions allow her to juggle the effects until she is happy with the balance. Don't forget the white pen at the end, and you'll have a masterpiece too! 
Hi everyone Kay Carley here.

Lovely to be here on the PA blog tonight. I've chosen to share with you a technique of combining Infusions with Fresco Finish paint to give beautiful textured effects for bold, open type flowers. 

I first experimented with this combination about a year ago using my EKC02 stamp set as this gave my allium flowers (contained in this set) a fab background to build upon. So when I was designing EKC05 I was already picturing using this technique again as I feel that it works best when you don't have a constricting outside line. 

The additional use of Infusions as my 'first layer' over the paint to begin building up the colours and texture of my flowers, is an interesting way to start to build these flowers as the Infusions give a beautiful textured and multi-coloured first layer without any harsh edges due to the dye stain contained within these fabulous bottles.

I came out of my 'comfort zone' for this card as I tend to stick mainly with tone-on-tone colouring when combining Infusions with Fresco Finish paint but as you can see I decided to go with a vibrant colour scheme in order to challenge myself!


As I began my panel I still chose to go with tone on tone (using my BRAND NEW stencil that will be available soon) as I didn't want my background to become overpowering.


This is what I had in mind when I designed the sprigs of leaves on this stamp set - being able to join them up to make different leafy compositions depending on the size of project.


By sponging rough flower head shapes in the area where I'm going to stamp the flower heads enables me to begin the building up of the multi-layered flower. Here I chose to go with a dark colour first (Space Cadet) as a 'shadow' to stand the flower out from the background and then sponged Snowflake in the middle.


Once you start to add some stamping it begins to make a bit more sense. If the stems of the flowers aren't long enough just take a black multi-liner and elongate them! You can see that I also stamped some of those swirls joining some of them up to give a different look.


This was the scary bit for me as I so wanted to go with Sleight Blue Infusions as this would have kept it tone-on-tone but instead I went with Raspberry - eeeeeekkkkkk!!! The method I used was to sprinkle the Infusions, spritz with water, very lightly dab up excess water with kitchen towel and dry with a heat gun.


Of course the beauty of using Fresco Finish paints with the Infusions is that the paints are opaque so once you start to add different colours over the top it totally changes the look of the flower heads. I used Lake Wanaka, Dolly Mix, Orchid and Snowflake for the flower heads and Chartreuse, Hey Pesto, Space Cadet and Beach Hut for the stems and leaves.


I often like to add white into my projects and you will find that when painting over the Infusions that the dye pigment will run into the acrylic paint and tint it which I really like as it gives a beautiful soft appearance. You can always add a second layer of Snowflake to make it a little whiter if you so wish.


Adding white pen makes such a difference as it can really make things pop. I had felt that the leaves and stems were too dark but adding some detail with white pen totally transformed them.


For me the real beauty of using Infusions with Fresco Finish acrylic paint is that you can simply wipe away any of the Infusion colour that you don't want or make it softer! 3D'ing the butterflies also adds some dimension to the card. These were painted with Zesty Zing, Snowflake, Beach Hut, Space Cadet, Bougainvillea and French Roast.


You might have noticed that upon completing my card I had decided that I didn't like the 'word panel' being the same as the flower heads with the shadow and a lighter centre so I took the decision to block out the word panel with Antarctic (the background colour) and re-stamp the words which I liked better! As well as wiping away some of the Raspberry Infusions from the background area I also very lightly sponged some Antarctic Fresco Finish around the flowers just to soften the transition between the flower heads themselves and the background as I felt that the shadowing that I had previously created with Space Cadet was too harsh! Me being me, I am NEVER satisfied and can tweak things for hours!!!! However I hope that this has made you want to try combining Infusions and Fresco Finish paint to create textured flowers in this way. I'd love to see what colour schemes you come up with!!

Love Kay xx

It is fabulous to see your tweaking though Kay, often those final finishing touches are what bring a piece into its final glorious state, and your bold us of colour really offers some depth to the flowers. I really enjoyed watching this come together! ~ Leandra


We always hope that you  learn something interesting from our blog. Our bloggers deeply appreciate your comments so much, so please take time to let them know you've been inspired! Why not join our challenge by blogging your interpretation of the current topic and link it HERE

The current topic link will close 17:00 (London Time) Sunday March 12th 2017, and the winner will be announced 2 hours later at 19:00.

All links go in the draw to win a £50 voucher to spend on products of your choice from the PaperArtsy online store.

Wednesday, 8 March 2017

2017 #3 Among the Flowers {by Debs Wainwright}

2017 Topic 3 Infusions and Paint


We have a lovely method from Debs. Here she has mixed infusions into paint to alter the colour to a soft, chalk-infusion. Not only will this make the paint permanent, but also allows you to work on what might be more comfortable territory than using them in their raw, more unpredictable manner.

Hi everyone Debs here from the ArtZone, I'm so happy to be here this evening as I've been playing with some of the new colours of Infusions as well as some stamps that I have had a while but not used for some time. I love looking through my stamps until I get the pull towards a set and then create something with them, as in this small wall hanging.


As soon I saw the new Rusty Car Infusions I knew I wanted to use it to create a rusty effect; I do love a touch of rust! To activate the crystals I used Paint Drying Retarder as it gave me more control over the drips.


So many beautiful colours as it dried onto the crackle background. I really liked how the dribbles run into the cracks in some places and not in others giving a random effect.


More dribbles, but this time I used them to form stems of the flowers, again I used the Retarder to activate the Infusions to give that control I needed to form stems. If I had spritzed them the colour would have disperse further.


I love the way the colours changed by mixing with the paint, in this case 
Chalk Fresco Finish Paint, which worked well for the leaves.


Repeating the process for the flower, produced a pretty pink but I was keen to darken the value, yet didn't want to loose the details of the stamp, so I used  a tiny brush inside the thicker lines.

Outlining around the flower and leaves, felt right to me as it gave more definition, and provided good contrast to make them pop of the board. The leaves  are from EEV04


The light it slightly better in this photo as you can see much of the texture created by the crackle background. I do love watching the process of Crackle Glaze as the heat dries the paint and the cracks appear, like magic.


Getting to the end I couldn't think of a better sentiment than those from Zinski Art plate no, ZA08 which sums it lovely! The New Infusions and New Releases  from Zinski Art can be found at stockist now!


I hope you will try this out yourselves, there are so many ways to use Infusions that the possibilities are endless. Myself, I will be trying out the Retarder more with Infusions as I loved the effects it creates, especially over the painted background, and the colour stays on the surface rather than soaking in.

I'll say goodbye for now, as always take care and stay creative!

Hugs xx
Debs


blog: dawainwright.blogspot.co.uk
Facebook: www.facebook.com/deborah.wainwright.98
Pinterest: uk.pinterest.com/Lylacsparkle
Instagram: instagram.com/lylacsparkle/
Twitter: twitter.com/lilacsparkles

This is super pretty Debs, and what a nice way to use infusions 2 ways in the same project! Love the rusty drips, but also works well with the paint too! Perfect! ~ Leandra


We always hope that you  learn something interesting from our blog. Our bloggers deeply appreciate your comments so much, so please take time to let them know you've been inspired! Why not join our challenge by blogging your interpretation of the current topic and link it here?

The current topic link will close 17:00 (London Time) Sunday March 12th 2017, and the winner will be announced 2 hours later at 19:00.


All links go in the draw to win a £50 voucher to spend on products of your choice from the PaperArtsy online store.