


Hi everyone, it's Peley Renata with you today, and I'm here to share with you a rather simple but fun and interesting idea of how to use your paper leftovers.

I suppose, the same as many of you, I don’t like wasting anything while crafting. I might go to some extremes and save the tiniest bits of paper, ribbons and paint. You can never know when those might come in handy. Soon I will show you a photo, so you can see that I even organize my paper strips by size. But I won’t show you a baggie with the tiniest pieces of paper that I have…that might be just a bit embarrassing. 😊
Anyway, my idea was to put some of those paper pieces to good use and make my art journal page paper base out of them. And to be honest, I enjoyed doing this so much that I made multiple paper bases for some future projects as well.


I like to make art journal pages in various sizes and formats. I make my own artist trading card bases and tags as well. Sometimes I even make circle shaped art journal pages. And since I like to use diverse types of papers, that leaves me with a bunch of various paper remains. So, for the start of this project I gathered all of those and laid them out in front of me. I had some cold pressed, rough textured watercolor paper, smooth and textured mixed media paper, canvas grain paper, paper for oil paints, some embossed paper and who knows what else.

For some fun background texture, my goal was to use as many different types of paper as possible. When I had my pick, I took out a sewing machine (even though sewing is not my forte), and sewed my chosen pieces together to make a background for my art journal page.
First, I went simple and just vertically sewed together my papers, but soon I got more brave and spiced it up a bit. For the next three backgrounds, I was sewing in various directions, different paper shapes and I even added some lace pieces for two of them. And I must say, at the end I was quite pleased with my little sewing success.


Since some of the papers I chose don’t handle paint that well, I gave my background a thin layer of clear gesso. I chose clear gesso because I wanted my papers to preserve their original various shades of white, instead of them being uniformly white. When that was dry, I brought in PaperArtsy Fresco Finish Chalk Acrylics in Aqua Duck Egg and Smurf colors. I mixed the colors directly on the paper because I like those brush strokes to be visible. Sadly, this did cover some of the papers’ textures but if you take a closer look, they can still be seen.


While my background was drying, I started to work on my focal images. I chose to work with two gorgeous stamp sets by Kay Carley: EKC01 and EKC36.


This time I decided to color my images with alcohol markers. When choosing this coloring medium, always keep in mind to use alcohol marker-friendly stamping ink and paper for best results. Since my background was made in subtle and mild colors, I chose some bolder ones for my focal images.

When the images were done, I went back to work some more on my background. I chose stamp EM31 and some stamps from the EKC01 set and stamped them on the page in the ink colors that don’t stand out too much from the background color.

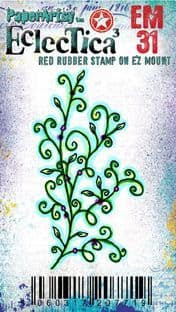
As you might have guessed, I planned to do some paper piecing here. When fussy cutting the images, sometimes we can’t really cut out some little details. The way to remedy that is that we stamp those missing elements on the page and then glue the image over it within the stamped lines. You can see what I mean on the image below. Here I really wanted those pretty flower stems, but they are too delicate to be nicely cut out, so I just stamped them and then later just quickly colored them with an acrylic marker.

After I glued the images to the background, I felt like I needed some more grass, to tuck in my mushrooms and flowers. I went back to my scrap paper collection and chose a few smaller, random pieces with different textures. I colored them with PaperArtsy Fresco Finish Chalk Acrylics in colors: Limelight, Granny Smith and Caribbean Sea. Once again, I mixed the colors directly on the paper and when the paint was dry, I used the mini stamp EM31 in the same ink colors as before for this project.


If you read my blog posts before, you will know that my finishing touches would be adding some white or black splatters, darker color frame and adding a quote. Well, for this project I haven’t steered away from my habits either. I did add some splatters (PaperArtsy Fresco Finish Chalk Acrylic paints Snowflake and Little Black Dress), I also added a thin black edged frame (PaperArtsy Fresco Finish Chalk Acrylic paint Little Black Dress) and of course I added a sentiment (from the EKC36 stamp set). This time I also did something I generally hate doing. I chopped my stamp to pieces. Don’t know why I always feel bad doing it, but this time I felt it necessary, so I can more freely place the words where I want them, while avoiding more heavily textured areas. Also, for the same reason I decided to use a stamping platform, to be able to re-stamp the words if they didn’t turn out well in the first try.


With my sentiment stamped, I felt that my art journal page was nearly done. I just added a few highlights with a gel pen and that was it.


This project was really fun for me. It gives me a feeling of satisfaction when I manage to use some leftovers and scraps that I have been keeping forever. Oh, and even though the sewing machine and I did get in a fight for a bit there, I am really happy with how my simple sewing turned out. Besides, I won’t be taking it out for a while now since I made a few more paper bases as well. Also, if you dislike sewing as much as I do, you can always try to glue the paper pieces together.
Anyway, I hope you had fun reading about my crafty process and that you will give your paper scraps a new life as well.
Renata 💜

Facebook: Peley Renata


5 comments:
Thanks for your inspiring blog. I’m off to sort my scraps right now, cause mine are sooooo very mixed up in size - it’ll keep me busy for yonks🫢 Hugs, Sue 🥰
Fabulous idea for using scraps and leftovers! xx
A lovely little fairytale scene - and great use of the scraps!
Alison x
This is a delightful project with some fav. PA stamps! I've got a huge stash of strips of watercolor paper and can't wait to try stitching them together! Such a great idea and will definitely be used by me! :) Hugs, Autumn
Thank you Sue, Jennie, Alison and Autumn for your lovely comments. It always feels amazing when I see that I managed to inspire other creative souls. Hugs,
Renata :)
Post a Comment