Showing posts with label EKC36. Show all posts

Tuesday, 14 June 2022

2022 Topic 09: Leftovers {by Renata Peley} with Kay Carley stamps


Hi everyone, it's Peley Renata with you today, and I'm here to share with you a rather simple but fun and interesting idea of how to use your paper leftovers.


I suppose, the same as many of you, I don’t like wasting anything while crafting. I might go to some extremes and save the tiniest bits of paper, ribbons and paint. You can never know when those might come in handy. Soon I will show you a photo, so you can see that I even organize my paper strips by size. But I won’t show you a baggie with the tiniest pieces of paper that I have…that might be just a bit embarrassing. 😊

Anyway, my idea was to put some of those paper pieces to good use and make my art journal page paper base out of them. And to be honest, I enjoyed doing this so much that I made multiple paper bases for some future projects as well.


I like to make art journal pages in various sizes and formats. I make my own artist trading card bases and tags as well. Sometimes I even make circle shaped art journal pages. And since I like to use diverse types of papers, that leaves me with a bunch of various paper remains. So, for the start of this project I gathered all of those and laid them out in front of me. I had some cold pressed, rough textured watercolor paper, smooth and textured mixed media paper, canvas grain paper, paper for oil paints, some embossed paper and who knows what else.


For some fun background texture, my goal was to use as many different types of paper as possible. When I had my pick, I took out a sewing machine (even though sewing is not my forte), and sewed my chosen pieces together to make a background for my art journal page.

First, I went simple and just vertically sewed together my papers, but soon I got more brave and spiced it up a bit. For the next three backgrounds, I was sewing in various directions, different paper shapes and I even added some lace pieces for two of them. And I must say, at the end I was quite pleased with my little sewing success.


Since some of the papers I chose don’t handle paint that well, I gave my background a thin layer of clear gesso. I chose clear gesso because I wanted my papers to preserve their original various shades of white, instead of them being uniformly white. When that was dry, I brought in PaperArtsy Fresco Finish Chalk Acrylics in Aqua Duck Egg and Smurf colors. I mixed the colors directly on the paper because I like those brush strokes to be visible. Sadly, this did cover some of the papers’ textures but if you take a closer look, they can still be seen.


While my background was drying, I started to work on my focal images. I chose to work with two gorgeous stamp sets by Kay Carley: EKC01 and EKC36.


This time I decided to color my images with alcohol markers. When choosing this coloring medium, always keep in mind to use alcohol marker-friendly stamping ink and paper for best results. Since my background was made in subtle and mild colors, I chose some bolder ones for my focal images.


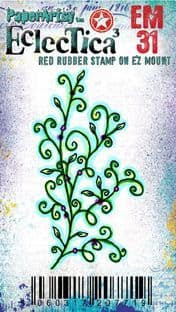
When the images were done, I went back to work some more on my background. I chose stamp EM31 and some stamps from the EKC01 set and stamped them on the page in the ink colors that don’t stand out too much from the background color.


As you might have guessed, I planned to do some paper piecing here. When fussy cutting the images, sometimes we can’t really cut out some little details. The way to remedy that is that we stamp those missing elements on the page and then glue the image over it within the stamped lines. You can see what I mean on the image below. Here I really wanted those pretty flower stems, but they are too delicate to be nicely cut out, so I just stamped them and then later just quickly colored them with an acrylic marker.


After I glued the images to the background, I felt like I needed some more grass, to tuck in my mushrooms and flowers. I went back to my scrap paper collection and chose a few smaller, random pieces with different textures.  I colored them with PaperArtsy Fresco Finish Chalk Acrylics in colors: Limelight, Granny Smith and Caribbean Sea. Once again, I mixed the colors directly on the paper and when the paint was dry, I used the mini stamp EM31 in the same ink colors as before for this project.


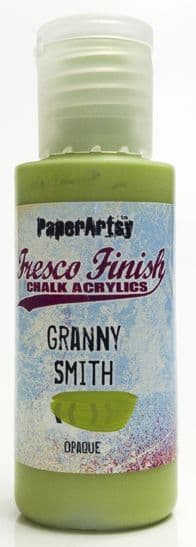

If you read my blog posts before, you will know that my finishing touches would be adding some white or black splatters, darker color frame and adding a quote. Well, for this project I haven’t steered away from my habits either. I did add some splatters (PaperArtsy Fresco Finish Chalk Acrylic paints Snowflake and Little Black Dress), I also added a thin black edged frame (PaperArtsy Fresco Finish Chalk Acrylic paint Little Black Dress) and of course I added a sentiment (from the EKC36 stamp set). This time I also did something I generally hate doing. I chopped my stamp to pieces. Don’t know why I always feel bad doing it, but this time I felt it necessary, so I can more freely place the words where I want them, while avoiding more heavily textured areas. Also, for the same reason I decided to use a stamping platform, to be able to re-stamp the words if they didn’t turn out well in the first try.


With my sentiment stamped, I felt that my art journal page was nearly done. I just added a few highlights with a gel pen and that was it.



This project was really fun for me. It gives me a feeling of satisfaction when I manage to use some leftovers and scraps that I have been keeping forever. Oh, and even though the sewing machine and I did get in a fight for a bit there, I am really happy with how my simple sewing turned out. Besides, I won’t be taking it out for a while now since I made a few more paper bases as well. Also, if you dislike sewing as much as I do, you can always try to glue the paper pieces together.

Anyway, I hope you had fun reading about my crafty process and that you will give your paper scraps a new life as well.

Renata 💜


Facebook: Peley Renata
Instagram: @renata_artjournaling 

Thursday, 2 July 2020

2020 #11 Book Cover with EKC {by Ellie Knol}

2020 Topic 11: Calming Colours 


It's a filed of house-mushrooms sprouting tonight for the calming colour topic. Ellie's created a very pretty and serene soft-blue village with these stamps by Kay Carley.
~ Leandra

Hi everyone, it's Ellie Knol from PAPER-STAMPS-COLOR again with you today, and I'd like to share with you the joy I had creating a cover for a colouring book in which I stamped images to color. 

Of course we all expect these toadstools to be red with white dots, but to be honest, I like the blue, and in nature there are also blue mushrooms .... really.. ..... and they're beautiful!  A green-blue ..
These are calming colors to me... the blue from the sky, green from plants and the terra from the soil.
Nature-inspired colors are my favorites...  


This is the front, spine, and back cover of the book; left the back, and right the front cover of course. I chose to photograph it before assembling the book itself. 


This is the gelliprint I've used to adhere to the book cover, first adhering it to cotton to make it more sturdy. 


After it had dried I added a layer of matte medium to give it some protection. You can see hints of the dragonflies from stamp set EKC24 in the background. 


I've also used EKC36 stamp set from Kay Carley.


 aWith Fresco Finish Paint in the following colors: Beanstalk, Brown Shed, Snowflake, Smurf, Mermaid and Magic Moss.  


The front cover has the big toad stool and some of the other sizes from the set, stamped with Versafine Onyx black and heat embossed in clear.
I painted all the toadstools with Fresco Finish 
Snowflake and the door with Bean Stalk.
I hesitated to use any (brown)reds first as it might not be a calming color for some, but I decided I needed to use what is a calming color to me.
I needed shadows to the toadstools; I used water-diluted Brown Shed Fresco Finish for that, and stamped the text with a terra brown ink.  


The clouds and 'roofs' were (stamped) and fussy cut from another piece of gel-printed cardstock in just blues (Smurf and Mermaid Fresco Finish) ... and adhered in a paper-piecing way. The die-cuts of the flowers in green are functioning as a fence around these 'Fungus Flats'.


A close up picture of the back cover..


... and last but not least a close up picture of the front cover, it being my favorite part of the project.. 

I found myself doing the covers in a child-like way and therefore this book grew as a colouring book with stamped images as the project came along, from sets from PaperArtsy of course... for my grandson to colour himself.  I think he will be so glad.. he is still so happy with any present, luckily for me..
I hope you got some inspiration; maybe to make a book yourself as a gift to someone... ?? .. maybe a lonely person or young one or a friend...??  

I LOVE giving handmade books to others... do you? 

Friday, 7 February 2020

NEW PaperArtsy Products: Kay Carley {February 2020}

 Eclectica³ Collection {Kay Carley}
February 2020 New Product Announcement


A note from Leandra:
Kay never ceases to amaze us with her attention to detail. The series of stamps and stencils she has created for this release really allows you to build up scenes, reminiscent of woodland fairytales. She is so clever at building up delicate backgrounds, then filling in the focal point detail. you must read this post closely to get a strong sense of how you can achieve it all too with the assistance of staged step-by step stencil guides to build colour layers. She can then use paint to add detail and textures so easily. Enjoy!

Hi everyone, Kay here.

I am very excited to share with you my newest release for PaperArtsy of 4 stamps and 8 coordinating stencils especially as t
his release is a bit different for me! 

I have been wanting to do some 'quirky, fantasy' type of houses for sometime now. As a child it really captured my imagination that fairies, pixies, elves etc all lived 'in secret' in our garden so this is my take on the sort of residences that I think they might live in! 

For this release I have designed 3 main stamp sets and 1 accessory stamp set that I believe is really useful to add to your scenes. The stamps on the accessory set have been sized accordingly but some of my earlier designs will work with these too - in particular EKC07 and EKC17. (Below)


This release is very much 'mix and match' - the 4 medium sized stencils can be used with any of the stamp sets but the large 'layered stencils' have been designed to perfectly match their stamped counterparts. I'll explain more about these later!

Ok let's get to it!


  New Stamps
Price: RRP £18.74 +VAT
Size:5" x 6" (13 x16.5cm)
All stamps are individually trimmed onto cling foam, presented in a clear hanging bag
with a laminated storage/index sheet.

  
Eclectica³ Kay Carley Set 34 (EKC34)


With this set I have included a little brick stamp that you can pop anywhere you like on the house or of course you can leave it plain. The separate small flower head on this set was included to make it easy to stamp several flowers onto scrap cardstock, cut out and add to the roof for dimension.


Eclectica³ Kay Carley Set 35 (EKC35)


I wanted this house to feel as if it was part of a 'daisy flower' hence the name on the door, and my choice of roof! I nearly always paint the main part of the house green to simulate the stem of the daisy too but that's just me!


As you can see (above) I chose to add dimension to the roof by cutting out and layering another image on top - not too much fussy cutting with this one!

Eclectica³ Kay Carley Set 36 (EKC36)


You can see from the panel above how well the tree stencil (coming up!) and the accessory stamp set (also coming up) work with the toadstools making it really easy to achieve a woodland setting but the toadstools also look great combined with the flowers from the accessory stamp set as you will see a bit later on... The smaller toadstools were sized so that they will fit underneath the overhang on Fungus Flats. 

A closer look at part of the panel for you.

Eclectica³ Kay Carley Set 37 (EKC37)


As I've already mentioned this 'accessory set' was really designed as an 'add on' to the three house based stamp sets but of course you can use it by itself plus you will no doubt find that it will work really well with other imagery that you already have. I don't think that there has been a sample that I've created with this release where I haven't used at least one of the stamps contained in this set. 

The grass in particular is really useful to add interest around the base of flowers, toadstools, houses etc... (By the way this set doesn't have any words on it - I nabbed these from EKC35!) The tiny little white flowers on the ground have been stamped from the tip of one of the hanging flowers.


The flowers and the squiggly border type of stamp were initially designed to be 'hanging' as per the main card sample and the close up above.


However both of these stamps work either way - up or down! Keep a look out for them in the samples shown and you will see what I mean :).

New Stencils
Regular Size: 6.5" x 7" (16 x 18cm) Price: RRP £4.60 + VAT
Large Size: 6.25" x 9.5" (16 x 24cm) Price: RRP £5.40 +VAT

As you will see below, Kay has created some large stencils to go with her house stamps to assist you when adding layers of paint to the stamp more easily by using them as masks. Inside the stencil packet you will receive step-by-step instructions, with pictures.

Stamp Set EKC34 matches PaperArtsy Stencil PS180

PaperArtsy Stencil 180 (PS180)


Oooohhhhh!! We are now onto what I am calling my 'layered stencils'! These have been designed for those of you who have really liked my other stencils that have perfectly matched some of my previous stamp designs. However these take that idea a step further and allow you to stencil paint, ink etc...quickly and easily by masking off other parts of the image. The photo above shows that I have already completed 'step 1' of applying colour to the main part of the house and am now applying my choice of colours to the flower roof. The absolute beauty of having this 'layered concept' is that at any point you can add Grunge Paste to your image to either create texture or dimension ;).

Stamp Set EKC35 matches PaperArtsy Stencil PS181

PaperArtsy Stencil 181 (PS181)


As you can see above I have worked my way through steps 1-5 on this stencil and am now onto step 6 which masks off everything else and allows me to add colour to the windows and the daisy accents. When working with the layered stencils I tend to use small domed stencil brushes as this gives me the best result and allows me to apply different colours of paint very precisely.

Stamp Set EKC36 matches PaperArtsy Stencils PS182 & PS183

PaperArtsy Stencil PS182 & PS183 (PS182/ PS183)

Let's look at these a bit closer...


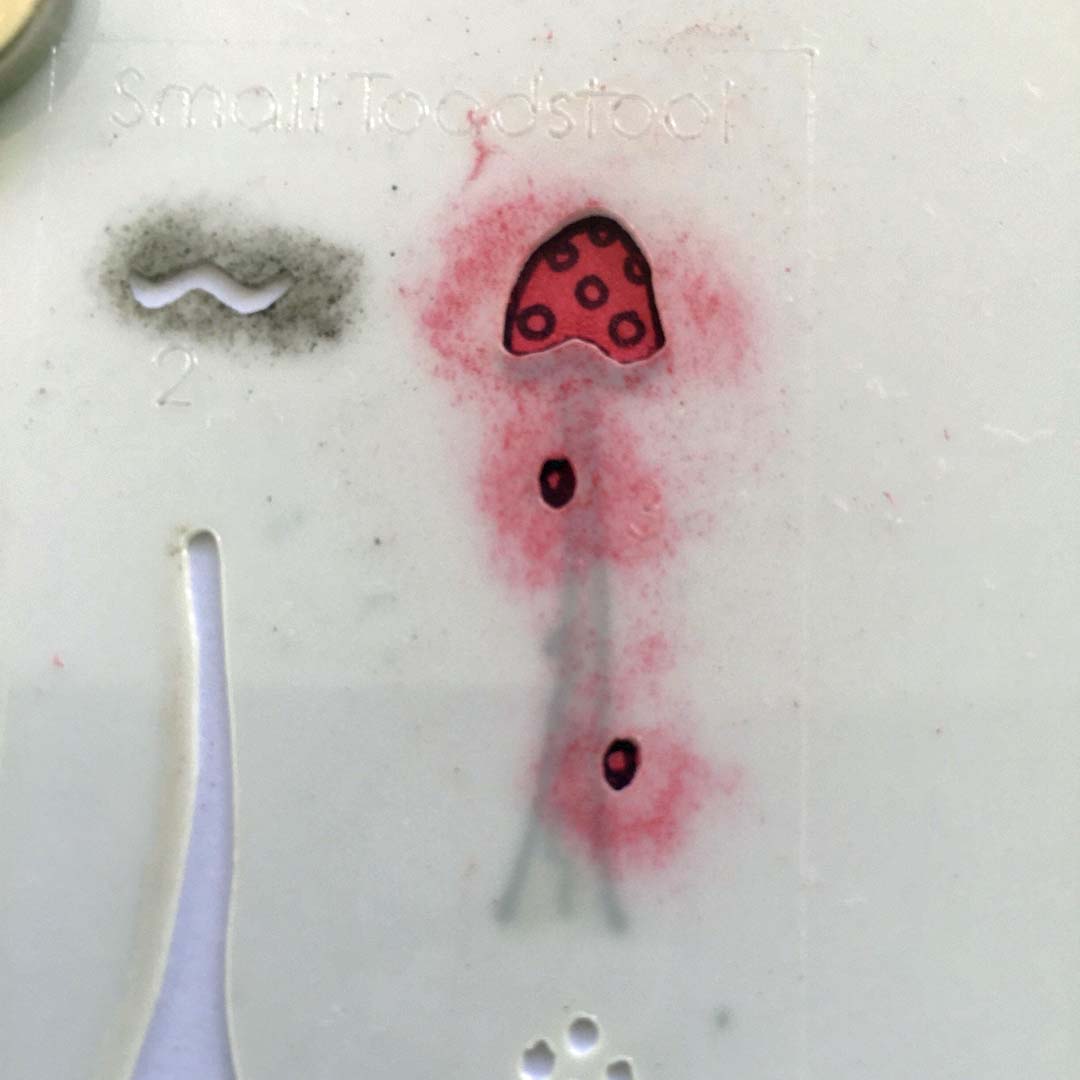
This stencil is dedicated to the Fungus Flats image and the two sizes of toadstools. As you can see from the above picture, I only add paint where it is needed. In this case I was colouring the frames of the windows with French Roast Fresco paint so I was concentrating my application of paint just to those areas rather than across the whole window. This allows me to see better when lining up the next step which would be to add colour to the windows themselves.


The photo above shows that I have just completed step 1 for the larger of the two toadstools, my next step would be to bring 'step 2' and line it up with the underside of the mushroom and apply my chosen colour before moving onto step 3 etc...


Here I have just completed step 3 for the smaller toadstool and as you can see I have simply applied red paint through the stencil. My next step is to line up the small circles with the spots on the toadstool and apply my chosen colour. When colouring images in this way I often choose to do it all in a stamping platform so once my image has been stencilled with colour I can go back and re-stamp all the detail. You do have detailed step by steps included within the packet of each of the layered stencils explaining and showing each step :)

PaperArtsy Stencil 183 (PS183)


This time, in the image above, I have reached my last step for the house. Next I make sure all the layers of paint are thoroughly dry before re-stamping  the detail back in. Alternatively you can use a black pen and hand draw/trace it back in if you haven't been too heavy handed with your paint! You will see that I simply stencilled Snowflake Fresco for the spots on my house but at this stage instead of applying white paint try stamping the detail back  into the image using the coordinating stamp (which should still be in-situ within the stamping platform) and then applying Grunge Paste (you might even tint it) to create raised spots ;).

In addition to the large stencils above, Kay also has created 4 regular size stencils. These are going to be useful for building up other elements in the backgrounds of your artworks.

PaperArtsy Stencil 170 (PS170)


Now we are onto my mix and match stencils! I thought it would be super useful to have some trees to add into a scene as either a background to the houses or as a foreground element hence the two different sizes contained on this stencil. The picture above shows how I have used the smaller tree several times to create a backdrop. Keep your eyes peeled as you will see later how they added background interest to my main imagery ;).


This picture is of 'a work in progress' but you can see how this time I have utilised both sizes of trees and have purposely positioned the larger one slightly over the smaller one.

PaperArtsy Stencil 171 (PS171)


I wanted to make this stencil as versatile as possible therefore I designed it so that it can be used either in it's entirety or you can pick out parts of it. The photo above shows how I can create smaller hanging flowers by only applying paint to the lower parts of the flowers.


Here the whole stencil has been used to create a subtle backdrop. By designing the stencil as a complete hanging flower scene it would be easy to add dimension to it using Grunge Paste. The stencil can be used to create upright flowers too - just like the accessory stamp set it will work either way!


A closer look at the flowers so you can see in some areas I purposely stencilled the paint a little more thickly to create some texture to the flowers.

PaperArtsy Stencil 172 (PS172)


Ok........so this is a bit of a weird looking stencil compared to the others but it is SO useful!
I wanted different sized grass clumps that I could add in front of toadstools, houses, trees, flowers etc hence the 3 different sizes so that you have smaller clumps for things that are further away/smaller in stature and bigger clumps for nearer/larger imagery and yes I'm going to mention GP again as having these little stencil clumps makes it SO easy to add raised grass clumps :).


These stones were designed to be able to add a pathway up to a house. I purposely designed them like this so that you can ring the changes of the 'pathways' by using different parts of the 'stencil stones' i.e. you can have a curved path to the left, a curved path to the right, a straight path etc... plus try using the bigger stones individually to create 'stepping stones'.


I have designed the stencil so that it can be used as a repeat if you want but when I apply paint or paste through this I only tend to use a portion of it as you can see above.


This large leafy branch is just fabulous to add interest in a vacant area above the houses (like I've done above) or it is great to use it slightly overlapping the houses to create depth to your scene.

PaperArtsy Stencil (PS179)


Here's another stencil that I thought would be useful and versatile. I chose to design two small borders on here but with the thought of being able to just use parts of the border if I wanted to. Above I was creating clumps of white daisies randomly on my panel rather than using it as a continuous border.


You can see one of my stencilled white clumps of daisies above.


As well as having the two borders on this stencil I really wanted some smaller clumps of toadstools/mushrooms of different types/height etc... thus enabling me to create a field or woodland scene full of them. They are sized  smaller than the stamps on EKC36 in order to create depth to a scene.


Plus you have the toadstool border on here - again designed so that you can easily just use part of the border if you want to create a 'clump'!


You can see above how using those smaller stencilled toadstools creates interest and depth and the white spots are very easy to add just with a white gel pen or white acrylic marker.


The small toadstools also work well with the flowers from the accessory stamp set.


Project One: Fungus Fields


Throughout this post I have been showing you snippets of this large scene that I created using stamp set EKC36 along with elements from EKC37 and several of the stencils!


I used the toadstool stencil repeatedly throughout the panel and you can also see how I used the grass stamp from the accessory set around the base of the toadstools. Sometimes I only ink the stamp halfway up to create smaller tufts.


To me the roofs on these houses are just itching to be decoupaged or Grunge'd Paste'd!


I used the matching 'layered stencils' to paint both this house and Fungus Flats and opted to not stamp the detail back in - instead I used a black pencil to create some shaded areas and to accentuate some of the original detail. 


And finally (above) you can see the complete picture where I have attempted to create a woodland village for my fairy folk to live in!


Project Two: The Fungus Field


I wanted to show you how using the same stamp set from Project One can look so very different when adding in flowers and using a different colour scheme.


I had bought a new plain white cover for my phone which I thought would be ideal to decorate! However as you can see the spine is already 'cracking' which wasn't ideal - think I should have bought a leather one!


As you can see I changed the colour of the cover to a pale lilac using Periwinkle Fresco Finish before embarking on my stencilling and stamping.


I even added some imagery to the little tab - the tiny toadstools were just the perfect size for this :). Below is the finished article. As you can see this has given the Fungus Flats toadstool a completely different feel to the previous project.


Finally, below are a couple of photos of two of my workshops that I will be teaching for the first part of the year. On Sunday 9th February I will be teaching the Daisy Dwelling one at Amelia's Creative Crafts in Studley and Saturday 15th February sees me teaching The Flower Tower one at LoobiCrafts in Leighton Buzzard. If any other PA stockist would like to book me to teach either of these please do get in contact with me via my social media.


I really hope that you like this latest release especially as it is a little different for me. If any of you create anything using my new products do please tag me as I would love to see your 'take' on them too. Meanwhile happy crafting and if any of you have any questions on this release feel free to message me. As I write this I am planning on doing a few posts on my blog (within a few days of this launch) showing how to use each of the layered stencils to help you so feel free to check that out.

Love Kay xxx

Socials...
Facebook: kaycarley.designer
Instagram: kay.carley
Pinterest: Kay Carley
Twitter: @carleycards
YouTube: Kay Carley
Website: www.kaycarley.com

Teaching Schedule:
9th Feb, Amelia's Creative Crafts,  link to booking info
15th Feb, LoobiCrafts,  link to booking info
16th Feb, M&T for Stampers Grove at Stamperama, Stevenage


PaperArtsy Stockist List

Due to the proliferation of counterfeit products affecting the craft sector globally, we want to help you identify our brand with ease.

1. We ONLY manufacture RED RUBBER STAMPS (not clear, polymer, silicone).  
2. We manufacture ALL our red rubber stamps and stencils on site in Essex, UK. 
3. We do not outsource any of our stamp or stencil manufacturing.
4. Purchase from a supplier on the list below, then you know you are buying authentic PA products.

Products sourced from anywhere other than the stockists below are likely to be counterfeit manufactured illegally without our consent, in direct breach of our Intellectual Property protections. Please take care to buy from an approved stockist on the list below.

Australia
Art and Soul Studio, Burrum Heads, Queensland www.artandsoulstudio.com.au
Arts and Craft Supply, Frenchs Forest, NSW https://artsandcraftsupply.shop 
Bella Paperie, 
Brendale, Queensland, www.bellapaperie.net.au
Bev's Cross Crafts, Spreyton, Tasmania https://www.bevscrosscrafts.com.au/
Crafters Cupboard, Berwick, Victoria www.crafterscupboard.com.au
Scrap Matrix, Port Elliot, South Australia http://scrapmatrix.com/
Scrapbook Superstore & More South Penrith, NSW https://www.scrapbooksuperstore.com.au/
The Thread Studio, 6 Smith Street, Perth http://www.thethreadstudio.com/
The Scrapbook Store, North Perth,WA http://thescrapbookstore.com.au/
Time To Create, Modanville, NSW www.timetocreate.com.au

Austria
CP Marketingservices Gmbh, Wilhering, Upper Austria,office@cpmarketing.at

Belgium
Cart N Scrap Art, Antwerp, cartnscrap@gmail.com
Cotrain, Kontich, www.cotrain.be
Expression Hobby, Marcinelle www.expressionhobby.be

Canada
Clipper Street Scrapbook Company, Langley, BC. www.clipperstreet.com
Scrapbook Centrale, Dollard Des Ormeaux, Quebec www.scrapbookcentrale.ca
Treasured Memories, Duncan,BC www.treasuredmemoriesscrapbooking.ca
Simply Scrapbooking, Prince George, BC https://www.facebook.com/simplyscrapbooking/
Scrap Addicts, Edmonton, Alberta https://www.scrapaddicts.ca/
Scrap and Bean, Edmonton, Alberta http://scrapandbean.com/ 
Scrapbooking Fairies, Drayton Valley, Alberta https://www.scrapbookingfairies.com/
The Paper & ink Boutique, Calgary, Alberta https://www.paperandinkboutique.com/

Czech Republic
Hurapapir, Brno https://www.hurapapir.cz/

Denmark
Hobbyboden Scrapworld Samso www.hobbyboden.dk
Papir Ulven, Lejre www.papirulven.dk
Three Scoops Design, Frederiksberg, www.threescoops.dk

Finland
Käsitellen, Lempäälä, https://www.kasitellen.fi/
Piia Takalo, Kittila, www.piiapaper.com/fi

France
Eirl Bancon Cartoscrap, Midi Pyrenees, https://www.cartoscrap.com/blog/
Horizon Creatif, Ste Jalle h.creatif@gmail.com
Katzelkraft, Ingwiller http://www.katzelkraft.fr/en/
Kerglaz, Basse Goulaine, https://www.kerglaz.com/  
Kerudoc Creation, St Yvi www.kerudoccreation.com
Quartier Serre Teston, Ste Jalle, hcreatif@gmail.com
Scrap by Nini,  Uzerche, Limousin https://scrapbynini.fr/ 
Scrapo'naturel, Tourville La Riviere, www.scraponaturel.fr/livraison 
Toutencolle, Dun sur Avon www.toutencolle.fr

Germany
Paperbasics, Hessen, www.paperbasics.de
Stempelbar, Berlin, www.stempelbar.de
Stempeloase Munich, Munich www.stempeloase.de
Stempelfee Shop, Hilden www.stempelfee-shop.de
Stempellaedle, Stuttgart, www.stempellaedle.de/shop

Greece
Scraps N Pieces, Kallithea www.scrapsnpieces.gr

Italy
Immagine SAS di Rapaccini, Rome, www.immaginelab.com
Il Negozio Della Mamma Di Cle, Torino, clelia27@liberio.it
L'artistica Glo, Cinisello B (Mi), www.artisticaglo.it
Marte Savona, Savona, www.martesavona.it
Piccole Passioni, Siena, www.piccolepassioni.it
Scrap it Easy, Rome, https://www.scrapiteasy.com/it/

Japan
Tiny Dots, Funabashi-shi, Chiba www.facebook.com/TinyDots

Netherlands
Doe@ding,Spijkenisse https://doeading.nl/
Hobbycompleet de Duif, Leeuwarden www.hobbycompleet.nl
Stampingcorner, Capelle Aan Den Ijssel www.stampingcorner.nl

Norway
Hobbygarasjen, Kopervik, www.Hobbygarasjen.no
Hobbykunst, Rasta, www.hobbykunst-norge.no
Scrapbookengros AS, Kleppe www.hobbylageret.no

Spain
Arts & Crafts, Barcelona, pebdesign@hotmail.es
Cien por Cien Manualidades, S.L., Bizkaia, Catalunya,  www.100x100manualidades.es
Endulze & Crista S.L, Pampalona, Navarra,  www.endulze.com
Ideas 10 Manualidades Y Scrapbook, Bilbao https://ideas10manualidades.com/
Marakiscrap, Tarragona, www.marakiscrap.com
MundoMint, Sabadell, Barcelona, www.mundomint.es
Scrap & Papers Experiences, Barcelona, Info@casonadequintana.com
Scraphouse S.L. Barcelona www.scraphouseshop.es
The Paradise Corner, Barcelona, www.facebook.com/theparadisecorner 

South Africa
Kcraft Imports Ltd, Centurion, www.kcraft.co.za
Stencil Art, Gauteng, www.stencil-art.co.za 

Sweden
Butik Elva, Staffanstorp, https://www.butikelva.se/
HC Design, Svedala, www.hcdesign.nu

Taiwan
Mandy's Cards, Taipei www.facebook.com/mandy.card

United Kingdom
A Trip Down Memory Lane, Ipswich, Suffolk, http://www.atripdownmemorylane.co.uk
Abermaw Quilting & Crafting, Gwynedd, Wales ph 07818556758
Aldridge Crafts, Attleborough, Norfolk www.aldridgecrafts.co.uk
Amelia's Creative Crafts, Studley, Warwickshire  www.ameliascreativecrafts.co.uk
Art from the Heart, Harrogate, Yorkshire www.afth.co.uk
Bellacrafts, Eastleigh, hampshire www.bellacrafts.co.uk
Blade Rubber Stamps, London www.bladerubberstamps.co.uk
Charlottes Crafty Corner, Suffolk, http://www.craftycorner.suffolkcraftshop.co.uk/
Clacton Art Craft Model Centre, Clacton on Sea,  Essex, http://www.clactoncrafts.co.uk/
Countryview Crafts, Potton, Bedfordshire www.countryviewcrafts.co.uk
Craft Your Art Out, Ballynahinch, County Down, craftyourartout@outlook.com
Crafty Bunch, Telford, Shropshire, http://craftybunch.co.uk/
Crafty Snippets, Billingshurst West Sussex www.craftysnippets.co.uk
Crafts & Candlelight, Ipswich, Suffolk www.craftsandcandlelight.co.uk
Crafts @themalthouse, Herstmonceux,  East Sussex, http://www.themalthouse.co.uk/
Craftrange, Burnley, Lancs, https://www.craftrange.com/
Handmade at Helen's, Dumfries, Scotland, https://www.handmadeathelens.co.uk/
I Love Mixed Media, Cromhall, Gloucestershire, https://www.ilovemixedmedia.co.uk/
Imagine, Design, Create, Seaton, Exeter http://imaginedesigncreate.co.uk/shoponline/
Kay CarleyDesigns http://www.kaycarley.com
Kraft Crazy, Amesbury, Wiltshire https://www.facebook.com/KraftCrazy/
Lisa B Designs, Maidstone, Kent, http://www.lisabdesigns.co.uk/
Lets Create, Lincoln, Lincolnshire, http://www.letscreateartandcrafts.co.uk/
Loobi Crafts, Leighton Buzzard, Bedfordshire, www.loobicrafts.co.uk
Papermaze, Ipswich, Suffolk www.papermaze.co.uk
Paperstory
, Norfolk www.paperstory.bigcartel.com
Poppycraft,
 Wallingford,  https://poppycraft.co.uk/

Fave Rave
, Stourbridge, West Midlands www.shabbychicstencils.co.uk
Scrapbook Magic, 
Mullion Helston, Cornwall, www.scrapbookmagic.co.uk
Shed Load of Crafts, Enfield, Middlesex, www.shedloadofcrafts.com
Simply Crafts, Cardiff, www.simplycraft.com
Snazzy's
, Swindon, Wiltshire. https://www.facebook.com/snazzystampingandscrapbooking/
Stampers Grove, Springbank, Lilliesleaf, Melrose,Scotland www.stampersgrove.co.uk
That's Crafty
, Romford, essex www.thatscrafty.co.uk
The Artistic Stamper Craft Store, Faversham, Kent www.theartisticstamper.com
The Craft Box
, Barnsley, South Yorkshire www.thecraftbox.biz
The Crafty Cabin,
Rolleston-on-Dove, Staffordshire, https://www.facebook.com/Rollestoncraft/

The Craft Room
, Newcastle-Under-Lyme, Staffs https://www.garnersgardencentre.co.uk/crafts/
The Craft Studio, St Austell, Cornwall https://www.facebook.com/thecraftstudio/
The Forget me not Kraft Kabin www.facebook.com/TheForgetMeNotKraftKabin
The Stamp Pad, Saddleworth, stamp-pad.blogspot.com
Whichcraft, Wallasey, Merseyside

USA
Artistic Artifacts, Alexandria, VA https://www.artisticartifacts.com/
Artistic Studio Creations, Fayetteville, Georgia www.facebook.com/ASCbyCrystal
Artistree Workshops, Fulton, New York, www.facebook.com/artistreeworkshops
Big Mouth Scrappers, Forney, Texas, https://www.bigmouthscrapperstx.com/ 
Creative Designs by Debbie Castle Rock, Colorado debbie.knight@centurylink.net
Creative Inkling, Hatnboro, PA https://www.creativeinkling.com/
Creek Bank Creations, Indiana www.creekbankcreations.com
Ephemera Paducah, Paducah, Kentucky www.ephemerapaducah.com
Everything Scrapbook & Stamps, Lake Worth, Florida www.everythingscrapbook.com
Frantic Stamper, Oregon www.franticstamper.com
Free Heart LLC, Denver, Colarado, http://www.freeheartllc.com/
Golden Hills PaperCrafts, Fairfax Station, Virginia, https://www.goldenshillpapercrafts.com/
Guadalupe's Fun Rubber Stamps, Santa Fe, New Mexico www.santafe.com
Joggles, West Warwick, Rhode Island, www.joggles.com 
My Rusty Crown, Escondido, California, https://myrustycrown.com/
PaperCraft Clubhouse, Westbrook, Connecticut, http://papercraftclubhouse.com/
Paper Parachute Art Design Co., Beaverton, Oregon www.paperparachute.com
Runaway, Art & Craft Studio, NE Salem, Oregon http://www.runawayart.com/
Sherries's Stuff, Warrenton, Virginia, https://www.facebook.com/sherriesstuff.va/
Simon Says Stamp, Columbus, Ohio www. simonsaysstamp.com
Stamplistic, Cleveland, Ohio www.stamplistic.com
The Artistic Palette Studio, Eugene, OR, http://www.artistspalette.com/studio/
The Crafty Scrapper, Waxahachie, TX http://www.thecraftyscrapper.com/
The Doodlebug Inc, Jasper, IN, https://www.thedoodlebuginc.com/
The Ink Pad, New York, www.theinkpadnyc.com
The Queen's Ink Savage, Maryland www.queensink.com
Topflight Stamps, Irmo, South Carolina https://topflightstamps.com/
Seth Apter, New York www.sethapter.com
Stamp Fever, Orange, California www.stpstamp.com

Our brand is only available from established stockists who are VAT/ GST/ sales tax registered and for whom product education is a core principle. We would rather supply a few hand selected stockists, than the greater masses. If you would like to apply to be a stockist, you can find our more about our supply criteria here

PaperArtsy Links
Facebook Group (NEW) PaperArtsy People
Facebook Page PaperArtsy