

Hi everyone, it's Etsuko (My favorite things) with you today, and I'm here to share with you lovely wall hanging for ways to use fabulous artist stamps by Nicci Battilana.

My original plan was to just put a doll inside the cloche/dome, but it was not fun enough from a movement perspective for what I had in mind, so I decided to make it as a more interactive wall hanging that someone could 'swing' from time to time.
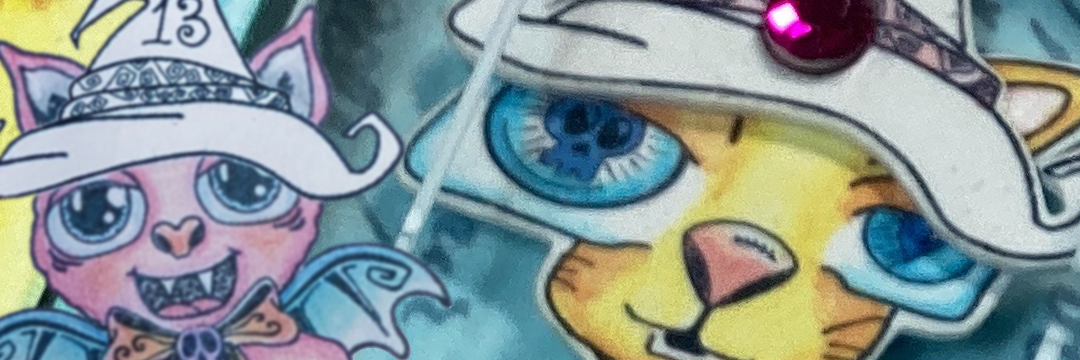
I took a very fun Stephanie Rubiano workshop on shrink plastic a while back. I made these using that technique as a reference. This is the swinging wall hanging. The cute Nicci's stamped image was a little big to swing around inside the dome, I then decided to use shrink plastic material. Let me show you the process of making it.


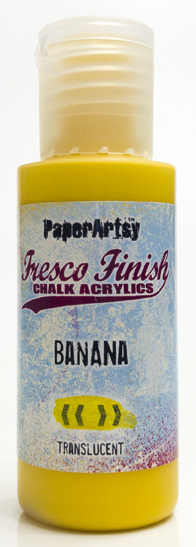
These are stamps and paints used in my project. Nicci stamp set 01,07 (ENB01, ENB07) , PaperArtsy Fresco Finish chalk Acrylic Red Lipstick (FF160), Cerulean(FF200) and Banana (FF91).

This time I used shrink plastic for inkjet printers. At the beginning, I stamped images on the Smoothy (Heavyweight) A4 white card by Ranger Archival Ink jet Black and painted it with a light colour diluted with water.(The finish on the shrink plastic will be darker than the original colours) The images are then scanned into the computer, saved as a .jag file extension, and printed on the shrink plastic using image printing software. I then cut out these images. Remember to also punch the holes before you shrink your pieces, it is a good idea to test different size punches first!
If you don't have shrink plastic for inkjet printers, you can use regular shrink plastic. (1) the reverse side is sanded with a fine sander - I used PaperArtsy Sanding Blocks. (2) an image stamped on the surface. (3) apply the colours as thinly as possible to the sanded reverse side with colored pencils. (4) The piece is then cut and baked in toaster oven (or with a gentle heat gun) until it shrinks, then removed and flattened with a tile or a flat object. (5) Once the piece is cool, finish by applying white paint to the reverse side.


The plastic will shrink by about 40% after heat treatment, and the colours will be darker than the original as you can see as shown in the photo below. Now that the cute kitty doll is done, I move on to the next step.


This blog topic is Specimen Jar, so I decided to use the new Gwen stamp set 26 (EGL26) cloche/dome stamp and put Nicci's cat in it. I painted with PaperArtsy Fresco Finish Chalk Acrylic Banana (FF196) from the cloche/dome shape outward on the Smoothy (Heavyweight) A4 white card in gradient tones. On the surface of that card I decorated Nicci's stamp set 07 (ENB07) skulls with Ranger Distress Oxide in fossilized amber around the cloche/dome.


PaperArtsy Fresco Finish Chalk Acrylic, Slimed (FF137) and Teresa Green (FF107) were applied to the Smoothy (Heavyweight) A4 white card and the top of the ENB01 bones was stamped in Ranger Archival emerald green and cut to create the side decoration.

For the wall framing, tear off pieces of the PaperArtsy Printed Tissue and apply the surface of the Smoothy (Heavyweight) A4 white card. I then painted with a diluted layer gesso.


I applied PaperArtsy Fresco Finish Chalk Acrylic Bleu Lagoon (FF131) and Midnight (FF123) randomly on the Smoothy (Heavyweight) A4 white card for a little variety.

The frame is trimmed with white gel pen and red posca to create a slightly fun feel.

The top of the frame is embossed with red embossing powder in VersaMark on the tissue with (ENB07) quote.

The background of the box for the swing cat doll was painted with a watered-down coat of Bleu Lagoon (FF131) on paper pasted with the same PaperArtsy Printed Tissue for the frame. This Tissue is a useful that will have many uses in the future.

The swinging cat was suspended in the upper box using a T-pin, and acetate was used for the glass surface of the cloche/dome.


I added a few embellishments to complete it, here using the spider from ENB01.


I had so much fun making this project that I made the pendant using small cloche/dome. Instructions for making this cute miniature doll in cloche/dome can be found on Stephanie Rubiano's Freebies site.

The baby batman made with ENB01 and ENB07 was the perfect size for this small cloche/dome.

Compare the size to these coins. The left side is 10 pence-UK and the right side is 1 dollar-US.


Shrink plastic material was not too difficult to produce, as I am sure many are familiar with using it. It was so fun to use the Nicci stamps to create a swinging cat, and there are two other sets ENB08 and ENB09 of paper dolls stamps that can be combined to make them dance in a Journals or tags.
Thank you so much for stopping by today.
Etsuko xxx

Blog: My favorite things
Facebook: Etsuko Noguchi
Instagram: Pixienest
Pinterest: Etsuko N


5 comments:
Fabulous project
Amazing projects Etsuko - love the way the cat moves and how you used the bone stamp.
Brilliant! X
Really a fabulous project (as usual!) Etsuko!!!! You're a brilliant artist. xoxo
What a wonderful and whimsical project! I love the cat-faced art doll you created and the way it moves inside the glass cloche.
Thank you for a great tutorial!
Post a Comment