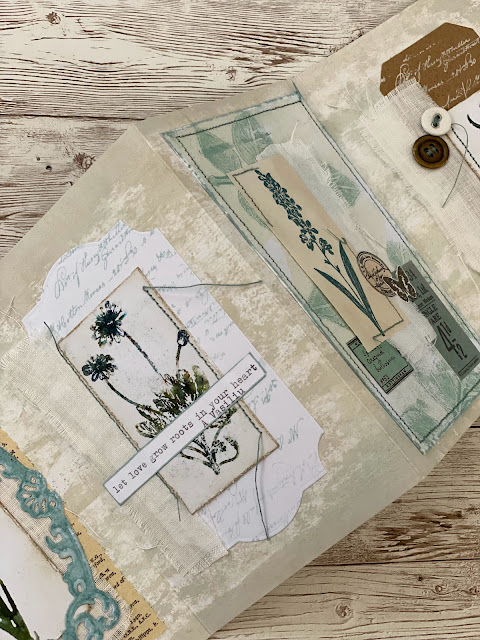
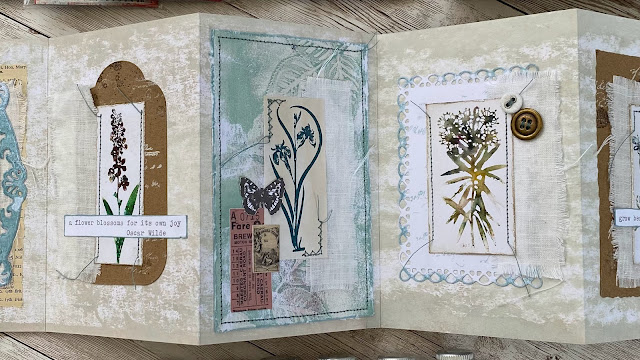
Hi everyone, it's Victoria Wilding with you today, and I'm here to share with you an accordion book project which delves into your paper stash, older stamps and gives a second life to old fabrics, buttons and even leaves collected from the garden.
This project is all about the layers and is a really good way of using up some of those bits and pieces cluttering up your creative space. I love projects like this, that allow you to use up leftovers and just play with your supplies, techniques and mediums. There's no limit to what you include, so the great thing is that you really can just use what you have to hand and disappear down the creative rabbit hole for a few hours as you fiddle around with all the different elements. The satisfaction of flipping through the finished pages at the end and seeing all the pretty things you made out of leftover scraps really is thrilling.
I find it helpful to plan out a project in three stages: the background initial layer, the middle ground interest layers and the foreground focal point layer. Deciding on what each of those stages consists of, helps me to focus and break my creating down into manageable chunks as I rarely complete a project in a single sitting.

I wanted to create a project which offered the most opportunity to use up a variety of items in my creative stash and around the house, and an accordion book was perfect for this due to the multiple pages to work on. To keep things a bit more organised and cohesive, I decided to work with a neutral, earthy colour palette sticking to creams, browns, blues and greens so that the finished product had a pretty, elegant, vintage vibe as, well, this is just my thing!
Flowers are a go to subject in my art and where it all began for me, so it was a no brainer to use PaperAtsy Ink & the Dog Minis stamps (MN67, MN69, MN70 and MN71) for their gorgeous floral imagery and I just had to use some watercolour goodness with these; enter PaperArtsy Infusions. I also wanted to use a technique which would give me a subtle texture to the base of the book and decided to use a brayer technique with PaperArtsy Fresco Finish Acrylics to achieve this.


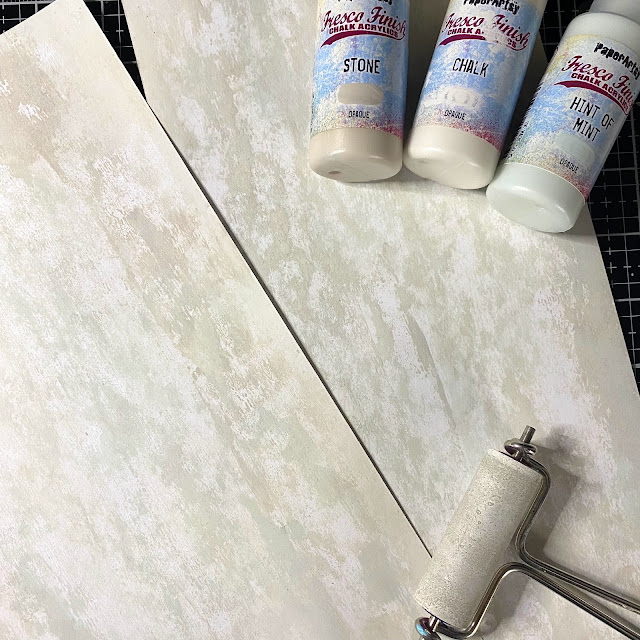
I started off by creating the background layer, the accordion book itself. I used two pieces of Smoothy card stock and marked 6 inches from the top on the shortest side, to give me two pieces of card measuring 11.5 x 6 inches. Then using a brayer, I added layers of Fresco Finish Chalk Acrylics in the colours Chalk, Stone and Hint of Mint, rolling from the outside of each edge to the centre of the card. I repeated this as needed until I had a layer of colour I was happy with. Once dry I turned over the card and repeated on the opposite side.
Once the paint was dry I used a scoreboard to score down the short side of the card at 4 inch intervals to create the pages. I then used a bone folder to press along each fold, folding each strip into an accordion effect. Once folded each strip of card gives you two 6x4" pages and one slightly shorter page. I adhered the shorter page on each strip of card together, taking care to make sure that the overall width of this joined page was 4" wide (the same as the other pages). Once stuck together I had one long sheet of card (measuring 20x6") which folded into a total of five pages (ten if you count the front and the back side). I then set this part of the book aside whilst I created all the layered elements for each page.

Next up was making the middle ground, interest layers, that I would be using. I love to use fabric from old clothes in my projects, usually using items that just wouldn't meet the requirement for resale at the charity shop. The fabric I used for this project was from an old white linen shirt, that had started to go the colour of old chewing gum! After cutting the shirt into sections at the seems, I used the back section of the shirt to cut out six rectangles (measuring 4 x 2 1/2 "). As you can see from the image below, I used a card template and a charcoal pencil to mark the rectangles out on the fabric before cutting them out with fabric scissors. Once cut out, I set them aside and moved onto the next step.

Now I moved onto creating other interest layers for the middle ground. I knew I wanted several elements that all worked together whilst ensuring that there was some variety to the pages, to keep the viewer's interest. I also needed to consider what to do about the middle page of the book where there was the ugly join to contend with, that ran straight down the page from joining the two pieces of card together. I decided to cover the majority of this with a rectangle of card. To make it less obvious that this choice was borne from disguising the join, I decided to use the same on the front cover of the book.
From my scrap box, I cut three pieces of white card (5 1/2 x 3 1/2") and created a gel print background on each one. I wanted to keep to the botanical theme so I cut some leaf stems from a miniature rose plant to use (you could also use stamps or stencils if you'd prefer). I then gathered my gel plate, brayer, paint, leaves and card on my desk.
To create the gel print, I applied a thin layer of the Fresco Finish Chalk Acrylics (Niagra Falls) to the gel plate with my brayer. I placed the leaves on top of the paint layer and then used a scrap piece of paper to remove the paint from the open spaces, leaving behind paint just where the leaves had been.
I then removed the leaves and layered on a thin coat of Fresco Finish Chalk Acrylics (Chalk) before placing my card on top of the gel plate and pulling the print. These were then set aside to dry.
With nine pages still requiring middle layers, I once again turned to my scraps box and selected some old book paper, Kraft paper tags and white card die cuts to use. Using a deckle edge ruler I tore two pages of old book paper (measuring 5x3") and set them aside. I then selected the three pieces of Kraft paper below and did some background stamping using the PaperArtsy Minis stamp (MN62) and Fresco Finish Chalk Acrylics (Chalk). I applied the paint to the stamp using some cut and dry foam and once done, quickly cleaned the paint off the stamp using my water spray and an old toothbrush. Once the paper was dry, I dropped some water onto the paper and poured embossing glitter on the top, so that it would cling to the water droplets. I removed the excess powder and heat set with my embossing gun.

The white card die cut frames were next on the list of layers to prep. Another note here, as I was using up items from my paper stash, you don't need to use the exact same shaped pieces in your project. The whole point is that you use what you have and failing that, hand cut rectangles of varying sizes from your paper scraps; you'll still get a great end result! Using the PaperArsty Ink & the Dog
Minis stamp (MN62) once again, but this time using some Ranger Distress Ink (Speckled Egg), I added some stamping to the white card. I also added some embossing powder to the scalloped lace edge of the bottom piece in the image and the intricate frame (not shown here).

The final layer I prepared was the focal point using PaperArtsy Minis Stamps (MN67, MN69, MN70 and MN71)
and this was my favourite bit of the project! Now I feel this next bit needs to come with a warning as I used six different PaperArtsy Infusion colours since I already had them in my stash and after all, I am a colour junkie, however, if I was to make the project again, I liked the effect of the Rocky Road, Sleight Blue and The Sage colours the most, so would limit myself to just these three.
My first art love was watercolour and you can achieve a really nice watercolour effect by stamping with infusions, a technique I first learned in a class with Raquel Burillo Perez. You simply sprinkle the infusions onto your stamp and lightly spritz with a water spray and stamp on your card. You can continue to spray more water and do multiple stampings for 2nd, 3rd and even 4th generation stampings. The first images I stamped out were a bit patchy as I found that the pigment was pooling in the dips of the stamp, rather than sticking to the image itself (see bottom right of the image below) and whilst I wanted them to look a bit grungy, I wanted to clearly see the flowers.

To solve this issue, I cleaned the stamp and re-stamped, but this time for my initial step I stamped with a VersaMark Watermark Stamp Pad (which is a very sticky ink) and then sprinkled the infusions on top, spritzed with water and stamped onto white card. I used this technique with each of the four flower minis stamps (MN67, MN69, MN70 and MN71).


Next I trimmed the images into individual, small rectangles and used a paper distresser to distress the edges. To give them a bit more of a vintage vibe, I used a sponge and a light hand to apply some Ranger Distress Ink (Frayed Burlap and Walnut Stain) to the white outside edges.

In the final book I use seven of these florals and I also use three flowers that I stamped on some scraps of tea dyed paper in Ranger Archival Ink (Cornflower Blue).
With all the main layers now ready, the final step of the project was assembling all the layers together on each page.
I like to audition the different pieces next to each other and look for a variety of shape and colour on each page. I started by taking all of my layer elements and creating ten bundles (one for each page of the book), ensuring that each one contained a large middle element (tag, book paper, die cut) strip of fabric and a floral topper.
Looking at the elements together in this way led me to making some last minute changes to my intended compositions for each page, to create more interest in the overall project and make each page a bit more unique. The first tweak I made was to the size of the fabric strip. I found that the rectangle of linen was too large and covered too much of the underlying layers on most of the pages, the exception being the open frame which you can see through (bottom left on the image below). I therefore decided to use just two of the original rectangle strips on the pages with the open frames and cut the other four rectangles in half down the short side to create 8 strips of linen (measuring 1 1/4 x 4") for the remaining pages. Once I was happy with the size of the fabric strips, I texturised them by pulling along each edge to pull loose some threads.

I keep a stash of small ephemera items such as small tickets, flowers and butterflies in little pots on my shelf, so I rummaged through these and also selected some additional items for those pages that needed a bit more going on. If you don’t have items like these, you could easily cut some printed paper into small ticket shapes instead and add writing or doodles for extra interest.
I then stitched the large middle element, the fabric and the floral focal point together on my sewing machine. I like that extra little detail and texture that stitching gives to the finished project.
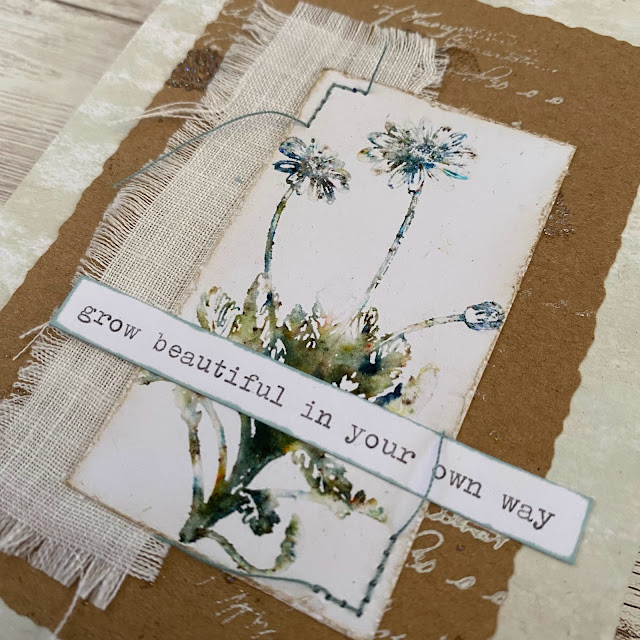
The very final step was gluing everything down onto each page of the accordion book. I started by gluing a layered piece onto the centre of each page and finished off by adding any little tickets, butterflies, buttons and sentiments I'd chosen. Here are some close up images of the individual pages.


9 comments:
Wow! This truly is the most beautiful work of art!
This is totally gorgeous Victoria! I love these soft colors and your gorgeous Infusions stamping. What a beautiful way to showcase these minis! xx, Autumn
the accordion book is beautiful and worth the effort with the flower images and infusions - I love it!!
Wow, this is fabulous, I love love love this, you are so talented!
Wonderful blog post and project. Great to see explained so wonderfully the creative process and the use of all the different elements. Thank you!
Gorgeous stamping effects with the Infusions, and such a delicate, elegant folded album - it's beautiful.
Alison x
Oh WoW ! Thank you for this very inspirational post. I love all the wonderful photos and your finished pieces are truly lovely. I've had a stack in wonderment (even the accordion book!) sitting, waiting and now can be made into some fun. I feel I've been isolated, from not knowing about these MINI'S !! I love them. The best part of my day ! Thank You Victoria
Absolutely beautiful and so delicate. Also a very engaging post with some great techniques shared. Who would have thought leaves would stamp like that! and a great tip about the embossing ink before the Infusions as this is also my favourite way of using them. A lovely post, thank you xxx
For some reason the computer gremlins won’t let me respond to your individual comments. Thank you all for your very kind and lovely words 🥰 Those minis are definitely small but mighty!
Post a Comment