Showing posts with label Fresco Paints. Show all posts

Wednesday, 1 October 2025

Art "Zine" Booklet with NEW Seth Apter minis {by Ann Barnes}

Hi everyone, it is Ann (@aksbarchitect) here with you today and I am so excited to share this art booklet I created with the newest Seth Apter Minis for PaperArtsy.

I was thrilled to learn that I would be creating something with the newly released mini stamps from Seth Apter for so many reasons; the main one being that I am a huge fan of Seth's art and style, which is always evident in his stamp designs. When I received the set of eight mini stamps, I was not disappointed! They are perfect for incorporating into backgrounds as well as becoming focal images in your artwork.

Today I'm looking forward to sharing with you what I created when I allowed myself to simply play and experiment with these stamps.


I have so many ideas for creating with these stamps, and wanted to create a sort of art reference book for how they each initially inspired me. Something that I could refer back to as well as expand upon.

I created the entire booklet as one large (albeit divided) page, and it was so cool to see how all of these stamps worked together. When the page was folded into the booklet form, seeing each stamp image highlighted on its own was the crowning glory.


The main supplies required for this project are a sheet of heavyweight drawing paper, as well as all eight of the new PaperArtsy Seth Apter Mini Stamps (EM137, EM138, EM139, EM140, EM141, EM142, EM143, EM144). I thought it would be fun to also use a few of the newest PaperArtsy Fresco Finish Chalk Acrylics by Seth Apter: Admiral (FF233), Kiln (FF234), and Castleton (FF231), as well as one of my all time favorites, Heavy Cream). You can find the newest products at a PaperArtsy Stockist.

Once you begin to play with the stamps and envision different ways to embellish them, you can grab your favorite go-to supplies. I used some coordinating embroidery thread, some jute and also some weathered gold mixed media embossing powder inspired by Seth Apter for WOW!


To make the zine booklet you only need one piece of paper. The overall size will depend on how large or small you want each of the individual pages to be once it is folded as well as the number of pages. For this booklet I wanted to create ATC sized (2.5" x 4.25") pages. I found some tutorials online for creating a 14 page zine and adapted to accommodate for size. A 10"x17" piece of paper worked perfectly.


I begin by folding and tearing the paper to become the zine; however, I do not create the actual booklet until I have all of my pages completed. This allows the sheet to remain fairly flat for ease of stitching and embellishing.


I add my first layers of color with a brayer along each of the fold lines. Working with one color at a time I add thin layers of color randomly across the page to build a background. I also use a sea sponge to add dabs of opaque color. You can add as much or as little paint as you like, and if there are areas that you are not happy with, you can always add a layer of heavy cream to soften what you have, then build up once again.


The beauty of using the PaperArtsy Fresco Finish chalk acrylics is that they are fast drying, meaning creating layered backgrounds does not mean you spend all day waiting for the paint to dry. 
I love the look of the background I have created, and can't wait to begin working with the stamps on it.


Before working on each individual "page" it is a good idea to fold the zine back into booklet form and mark the covers and each page in the bottom corner. Once they have all been marked, flatten the page back out. You will notice that each row of pages falls in the opposite direction. This means that as you design your pages, especially if you are adding any words or directional images you want to pay attention to where the top and bottom of that page is located to ensure everything is positioned properly.


At first glance, many of the new mini stamp images had me envisioning textiles, stitching, and even mesh. This vision was the basis for my cover. I mask off areas of mini stamp EM137 and then stamp onto a scrap piece of specialty paper. Once the ink is dry, I use a dark green embroidery floss to mimic the stamp marks. Before adding this stitched piece to the cover, I dip the stamp into Fresco Finish Chalk Acrylic Castleton (FF231) and add partial stamping randomly onto the background.


When the stitched piece is added in place, the imagery from the partial stamping and the stitched piece play off one another, drawing your eye around the page.


The next pages focus on mini stamp EM138, which gives the appearance of linen cloth. I love the subtle diagonal pattern that evolves when you repeat the stamp pattern. For these pages, I brayer Fresco Finish Chalk Acrylic Castleton (FF231) onto the rubber stamp and stamp onto the background, repeating the process, eyeballing where the repeating pattern should occur. The pattern and texture it creates reminds me of a piece of linen fabric I have.


I cut a diamond shape out of the cloth and add it in place of one of the stamped diamonds. A piece of deep red floss accentuates the diagonal lines created by the repeat stamping.


Throughout the pages I have used mini stamp EM144. On some pages I have heat embossed it directly on the background, on other pages I have stamped it separately and cut out a rectangular section then collaged it onto the page. I think this stamp would also make a great edge detail when stamped partially down the side of a page, or even as a color swatching chart.
 I can see myself using this stamp often.


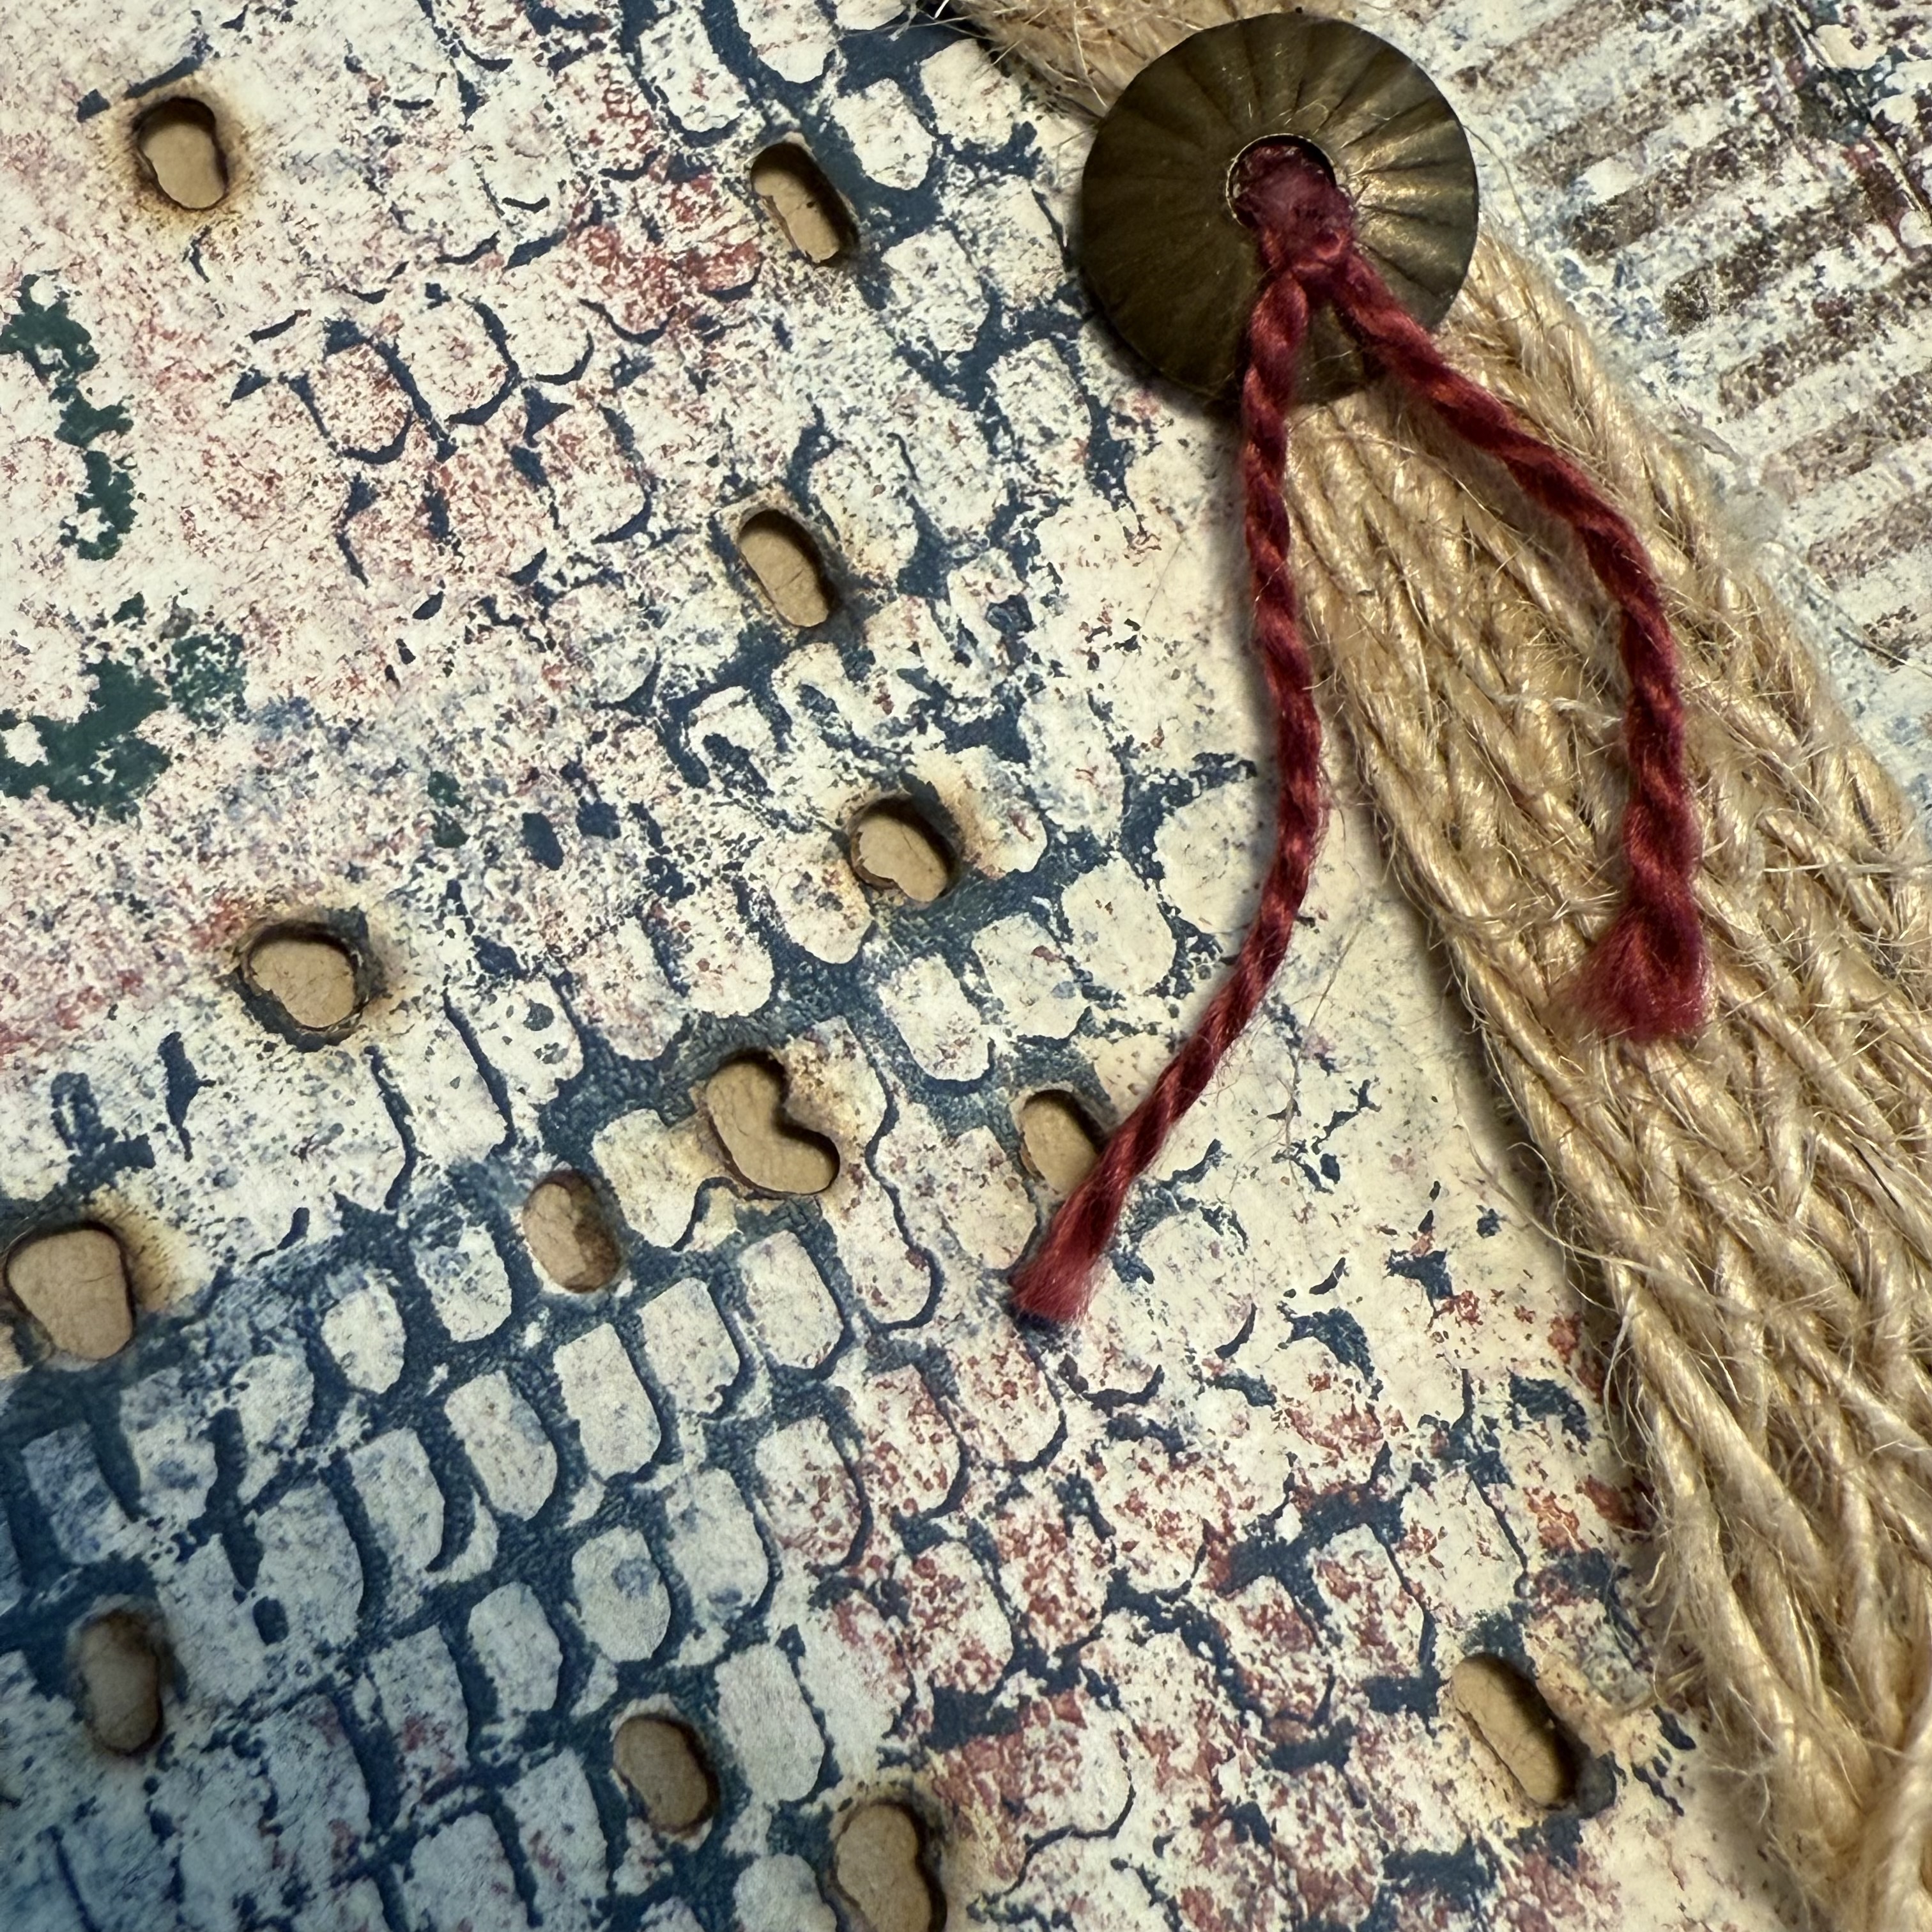
The next set of pages focus on mini stamp EM139, and all I can say is that this image sets my imagination into overdrive, I love it! Using Fresco Finish Chalk Acrylic in Admiral (FF233) I randomly stamp across both pages and allow it to dry. Then I use my wood burning tool to burn some holes keeping within the pattern.


I keep the number of burnt holes to a minimum, but I can foresee a time where I attempt to create this entire mesh pattern. To allow the holes to be more noticeable when the booklet is folded, I painted the back side of the pages they would be up against. There are also sections of the stamped pattern that were heat embossed onto a different paper then torn into strips and collaged onto the page.


Mini stamp EM140 looks to me like the perfect structure for weaving. I heat emboss the entire stamp image onto the background and then use an Exacto knife to cut out openings in the two larger middle sections. This allows me to weave embroidery floss, jute, linen thread and a piece of selvedge through the slots.


It is so cool to see my vision for this stamp become a reality. Probably my only regret is not adding color to the pages that it backs up to so that the openings where there was no weaving would be more noticeable. On the facing page, I stamp little bits of the image randomly to add some interest to the background. I also collage one of the embossed rectangles from EM144.


On the next two pages, the focus is on mini stamp EM141. This image with its numbers and fine lines is what I consider classic Seth Apter imagery. I think this stamp would be fun using each of the numerals separately (with masking), or even highlighting a specific number by circling it once stamped... the possibilities for this stamp really are endless. On these pages, I first stamp the image onto the background with Ranger Archival ink in Faded Jeans. I also stamp the image on a piece of tracing paper using the same ink. I flip the tracing paper over and collage it onto the left page, creating the mirror image. Using a fine detail brush, I cover the number four on both pages with embossing ink and then heat emboss. I also trace some of the horizontal lines and emboss those as well. Adding details and marks to make stamped images more of your own is definitely something I try to do often and encourage you to also, it makes the art and images more personal and unique.


At the page fold, I have used mini stamp EM144 to create a vertical line of boxes. Inking up two rows of the stamp and turning it ninety degrees, I stamp and emboss, then add the third row by only inking the first two boxes and stamping then embossing. I stitch red X's into three of the rectangles and cut pieces of my linen cloth to fit into the remaining ones.


Each time I look at mini stamp EM142 I see it as a three dimensional piece, so I thought it would be fun to try to make it into one. This is not as difficult as you would think. Stamp the image with embossing ink and add a heavy coating of embossing powder to it. After heating it and allowing it to cool, use an Exacto knife to carefully cut out around the edges. Next, turn the cut piece over, add embossing ink, coat that side in powder and heat set it. Voila!


The piece is held in place on the page with a few stitches. I can imagine myself using this stamp and technique to make a buckle for a strap to keep an art journal closed, or maybe even in some sort of jewellery piece.


On the opposing page, I ink up only the central section of the stamp and create bold lines These are embellished with marks and French knots. I also add a few more pieces of the collage paper from EM139.


The final pages of the booklet are all about mini stamp EM143. The focal point is a piece of linen that has the image stamped in its entirety. This piece is attached to the background and then I use different threads to stitch the pattern. At the top right and bottom left corners of the pages I mask the opposing directional section and stamp an "L" shaped portion of the image using Fresco Finish Chalk Acrylic Kiln (FF234).


While both corners are stamped using the same paint, one is much bolder than the other. This creates a very different look even though it is the exact same stamped image. 
With all of the pages complete, it is time to fold this Zine into a booklet and glue the pages together as needed.


I am thrilled with how the booklet turned out. This will be a wonderful reference for inspiration and ideas when I use these mini stamps in my art. Here are a few additional detail pictures:



Using your art supplies to make a Zine is an easy way to have some fun and experiment with different techniques. Since it is simply made with a single sheet of paper, there is not a lot of pressure or expectations for a masterpiece. I have always found that some of my favorite work has been the result of enjoying the process and letting my creativity express itself.

I hope that maybe this has inspired you to get out some of your favorite PaperArtsy stamps and play, perhaps even grab a few of Seth's new mini stamps, they are all pretty amazing! You can find all the details for this release of Seth's mini stamps on the PaperArtsy blog here. The new stamps are available worldwide at a PaperArtsy stockist near you.

Friday, 19 September 2025

Art journalling with JoFY products {by Renata Peley}

Hi everyone! It’s Renata here, and I’m excited to share a super fun and cheerful project featuring some of Jo Firth-Young’s really cute and quirky designs. 

When I was first assigned this blog, I had planned to do anything but an art journal page—thinking I’d focus on making tags or cards. But, as often happens, I got a little side tracked and naturally found myself falling back into my favorite thing: art journaling!


As you can probably tell, getting back to art journaling wasn’t the only thing I returned to. I also decided to work with some of my favorite mediums - PaperArtsy acrylic paints for the background, and for coloring, a mix of alcohol markers and, of course, colored pencils. I guess I just can’t seem to shake some of my mixed media habits—but more on that in the next chapter!


As for supplies… well, I’ll admit, I went a little overboard this time! I’ve been crafting less frequently this past year, so when the mood struck, I really went all out. But don’t worry—you definitely don’t need all this stuff to make a fun project, and most of it can easily be swapped out for something you already have on hand.

 
As you can see in the image, some of the most important ingredients for my project were a bunch of PaperArtsy goodies. I’ll list them here for anyone who’s curious! Starting with Jo Firth-Young products: the stencil I used is JOFY PS310, the big stamp sets are JOFY139 and JOFY140, and for the minis, JM82 and JM86. For the PaperArtsy Fresco Finish Acrylic paints, I went with Vanilla, Khaki, Aquamarine, Aqua Duck Egg, Blue Oyster, Surfs Up, and Little Black Dress. I also added one from the Mattint range—Squeezed.
Quite the long list, as I warned you! But like I said, you can get brilliant results with half as many products. To keep things from feeling overwhelming, I’ll mention several of the other supplies as I use them in the upcoming chapters of the blog.


Once again, I ended up switching up the usual blog structure. Instead of starting with the background, I began by adding the first layers of color directly onto the stamped images. Somehow, creating the images first always makes so much more sense to me. The best way to describe it is that I imagine the main characters of a story and then build a world for them to live in. There’s also a practical side to it—it really helps me figure out the size of my substrate and how to arrange the composition. And honestly, at this point, I was still thinking I’d make a set of cards or tags.


Since I planned to color with alcohol markers, I used an alcohol marker-friendly pad for stamping (in this case, the one from Spectrum Noir) along with a dye ink pad—Memento in Tuxedo Black. Just to be on the safe side, I used a stamping platform, but that’s really optional.

Now onto the coloring part! I was mostly inspired by Jo’s color scheme, though I did switch it up a bit. To help me choose colors and experiment with combinations, I brought out my color swatch of all my alcohol markers. I actually have a folder like this for all my coloring mediums, and I find it incredibly helpful—especially on days when ideas and inspiration are running a bit low.


Now you can see all my images—after at least half an hour of coloring and fussy cutting (though I’m pretty sure it took even longer!). Later, during the mini breaks while layers of my background were drying, I touched up my colored images a bit more using colored pencils and a white Posca pen. You’ll probably notice those final touches in the photo of my finished project.
 

Believe me, the name of this section of the blog couldn’t be more accurate—I was totally in the zone, going mixed media crazy! But I’ll do my best to break down my creative chaos into a step-by-step process. First, I once again reached for my swatch folder and grabbed a whole bunch of PaperArtsy Fresco Finish Chalk Acrylic Paints. You’ve probably already spotted the full list of paints at the start of my post, so I won’t go over it again.

And here’s the moment where, without even realizing it and completely forgetting my original plans, I picked up a bigger piece of mixed media paper and started measuring my substrate to fit the images I had already prepared. Okay, okay—honestly, the idea of making cards, tags, or even a banner did flash through my mind for a second… but it was quickly suppressed, and before I knew it, an art journal page was coming to life.


For applying the paint, I decided to use an old card. To avoid creating too much busyness in my background—since I’d be using a lot of color on both the background and the focal images—I stuck to horizontal strokes. I find that too much color doesn’t always play nicely with too much texture. I also applied the paints without any particular order, just going with my gut, and made sure to dry the layers between every one or two colors at most.


At this point, I felt like something was just missing… it looked pretty, but… you know that feeling, right? I realized the solution was just to add a touch of Squeezed Mattint here and there—and suddenly, it was perfect.


Now it was time to put that gorgeous JOFY PS310 stencil to use. It’s such a lovely design with a big, bold pattern, and since my background was already pretty busy, I decided the best way to use it was with either black or white. I went with black—PaperArtsy Little Black Dress acrylic paint—and in my case, it was definitely the right choice. To make sure the stencil didn’t move and the paint stayed exactly where I wanted, I secured it with some masking tape.


I admit, it didn’t look great at this stage… but abracadabra…


Much better, right? And now just a few details here and there…


To give my background a little extra love, I added some small touches that made a big difference. First, I used an old, half-dry ink pad to go around the edges of my substrate, giving it a nice framed look. Then, I added tiny details to the stenciled pattern with a white Posca pen. But I didn’t stop there—I grabbed my Prisma Premier colored pencils and added highlights and shadows to the stenciled design. This step is totally optional, but it was such a fun little touch for me, and it really added some extra dimension to the background. And if you compare the last two photos side by side, I'm pretty sure you'll spot the difference right away!

Now since my colored pencils were already out, I went ahead and touched up my colored images too, adding a bit more depth and personality to those funny little monsters.


Now the things were mostly ready for assembling—I just needed to figure out a sentiment and plan out my composition.

The sentiment was a bit tricky this time… it was hard to find something that would fit my pre-planned composition. In the end, I decided to stamp two sentiments from JOFY139. To make them match a bit better, I hand-drew the circular pattern around the larger one to echo the smaller sentiment, and then colored them both with alcohol markers.


I also used another technique I love for my art journal pages—adhering my substrate to black cardstock, which gives it a really nice frame. In the image below, you can see all the elements I had prepared. Now it was just a matter of arranging them into a composition.


By the way, did you notice that funny tall monster guy? His arms and legs were, well… ridiculously tricky to fussy cut! So, I decided to stamp them instead and just adhere the head, hands, and shoes on top. Bonus: it made it a lot easier to add some shading with colored pencils around the stamped outlines.


Aaaaand yes… that was about it! All the elements were adhered—some with liquid glue, others with thin foam tape—shading added, and done. I think I managed to balance all the colors on the background and stamped images without making the project feel too busy. Sure, I got a bit carried away with the mediums, supplies, and techniques, but honestly, I had so much fun creating this page. I’m pretty sure many of you know exactly that feeling!


Thank you all for sticking with me through this a bit longer-than-usual blog post! I hope I managed to explain my creative chaos clearly, and even more, I hope I’ve inspired you to try some of these mediums, techniques, and those fun, crazy monsters designed for us by Jo Firth-Young and PaperArtsy.

Have a great day and stay crafty!

Renata ðŸ’œ