
"Hi, It's Pam again, back with another scrapbook page using the gorgeous Chatsworth 12 x 12 papers. For
this layout I decided to limit myself to the brown toned papers in the
Chatsworth collection, and I wanted a fresh, modern feel to the layout,
I decided to use white cardstock and blue paint. Blue and brown are
always a winning combination in my eyes! I actually used smooth water
colour paper for my background as I knew I was going to use watered down
paint, and needed a surface that could handle the wetness".
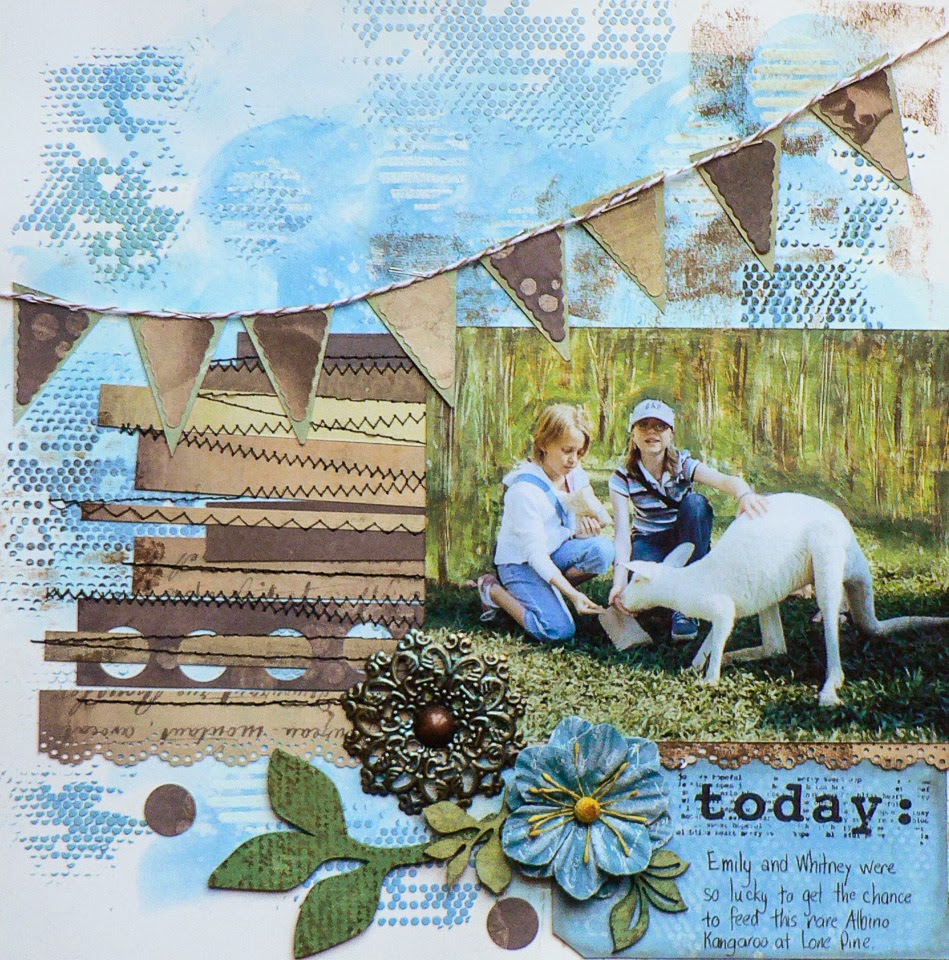
Here's my layout:

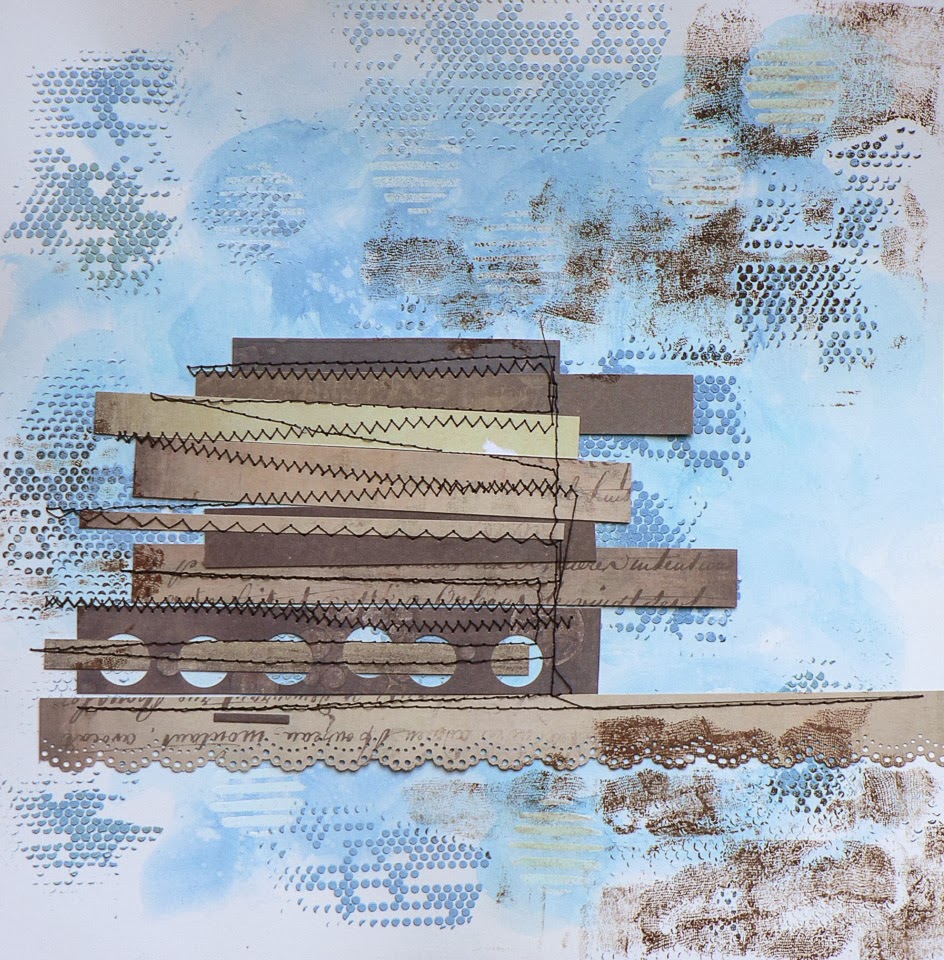
So, here's how I went about making this layout. I wanted to add some colour and texture to the background.
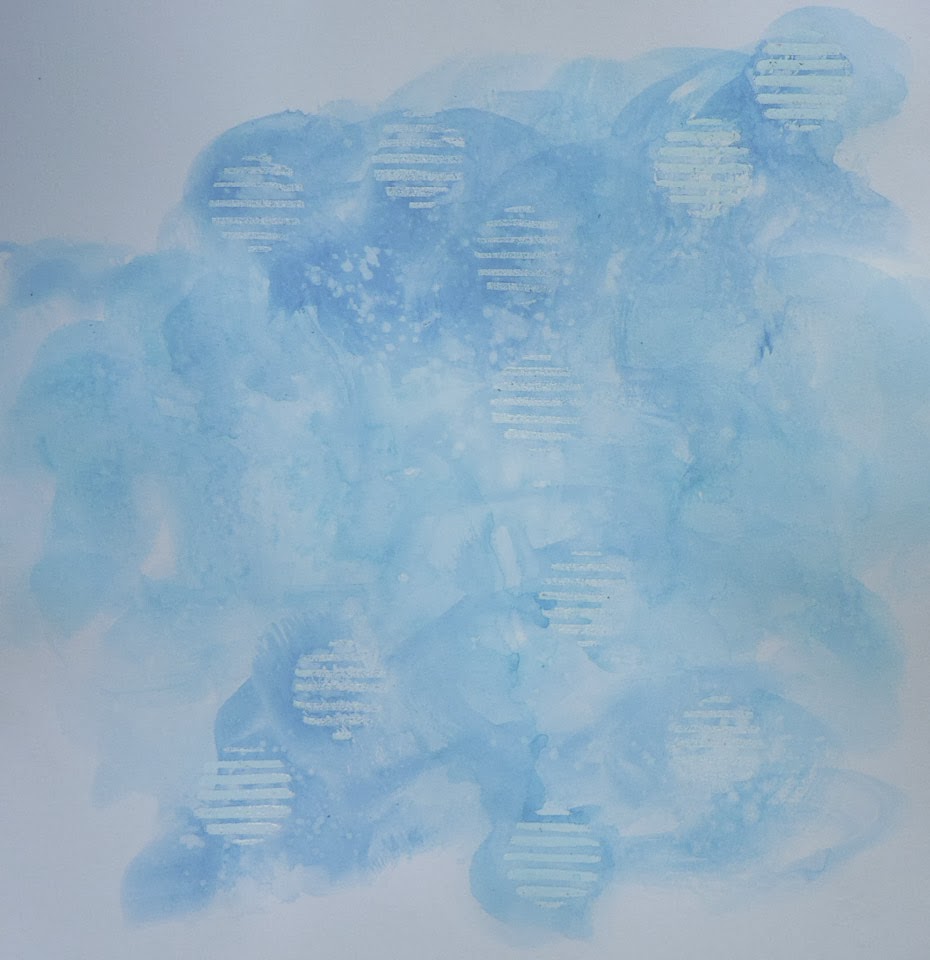
First I got out the Stencil Girl Striped Circle
stencil. I used an embossing pen to trace through the stencil, placing
the circles randomly over the page. Then I poured over some clear
embossing powder, and heat embossed the lines.

Then, using watered down Fresco Paint in Sky Blue and Beach Hut, I painted the colour on loosely, revealing the embossed circles.
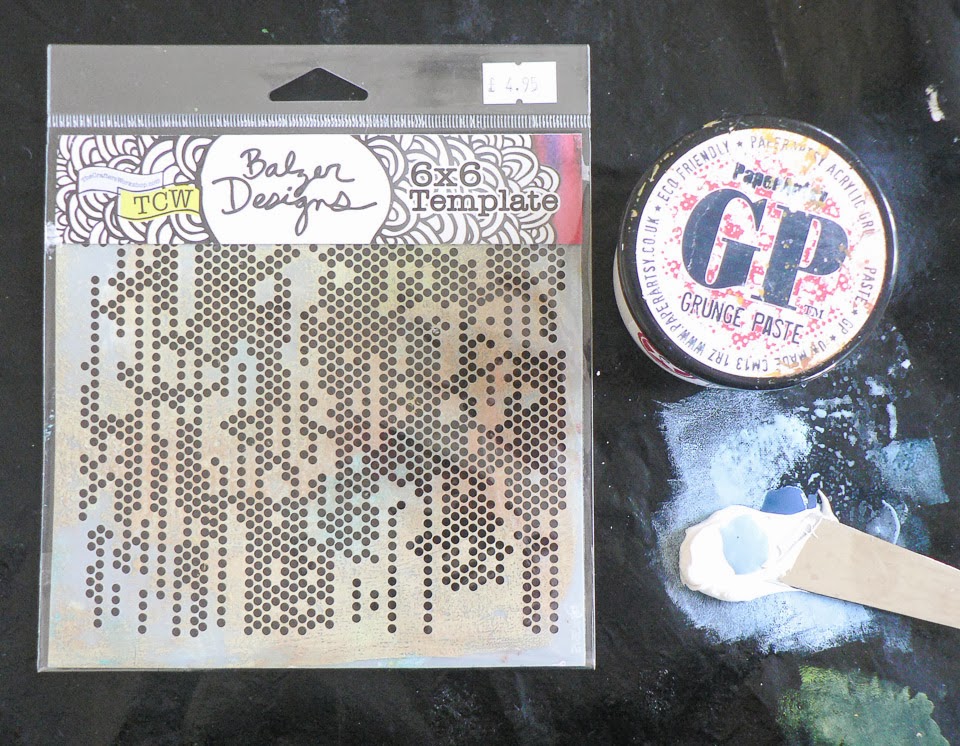
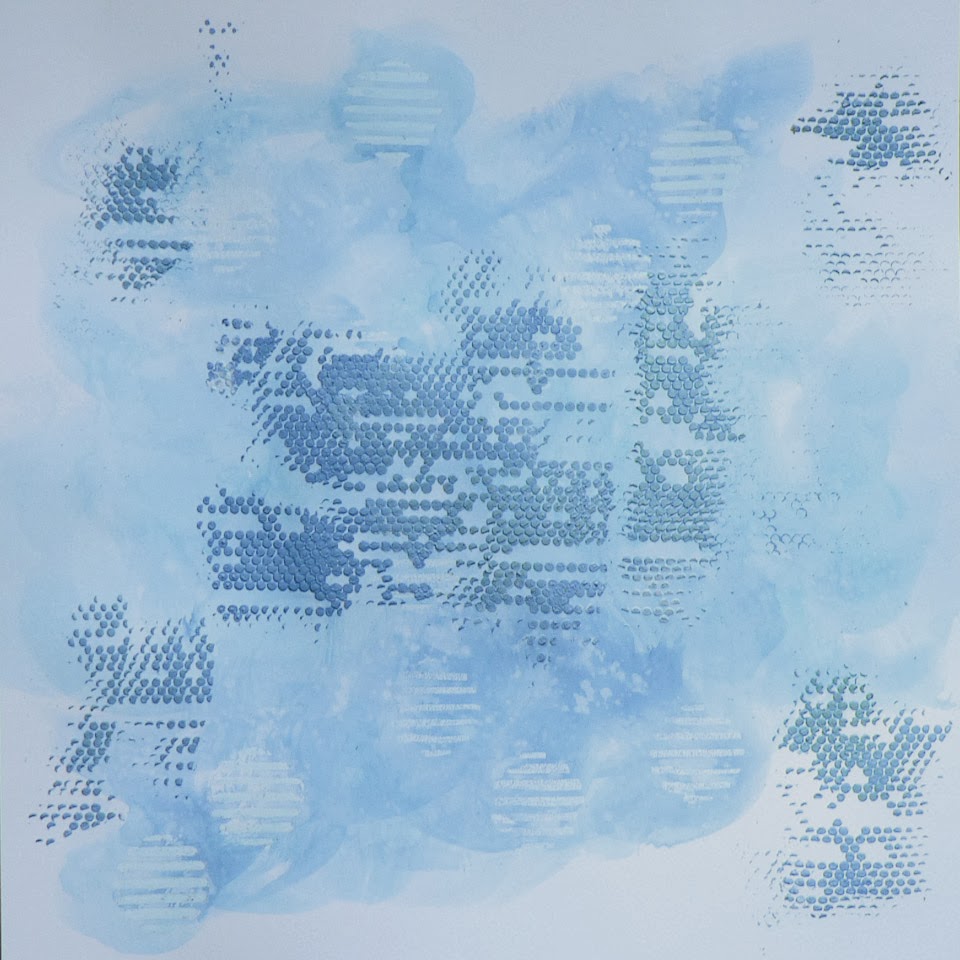
After that it was time to get out the grunge paste which I mixed with Fresco paint in Sky and Baltic Blue, and spread it through the Crafter's Workshop circle stencil. I used to use an old credit card for jobs like this, but I now use a Number 2 Palette knife which makes the job about a zillion times easier!!
So this is the result:
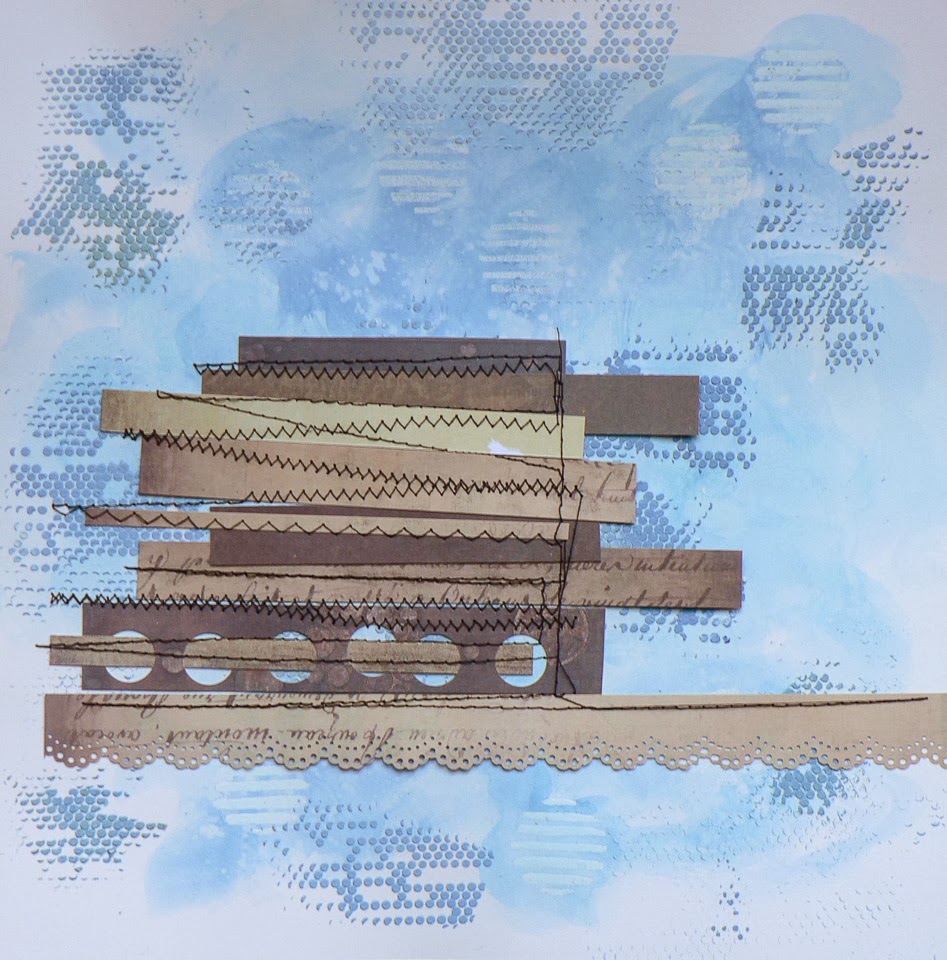
After
that I cut some strips of the brown patterned paper. As you can see I
used a small circle punch to punch holes in one strip, then wove a thin
strip through the holes, and used a Martha Stewart scallop lace border
punch on another strip. It's little details like this that add interest to a page. These were all attached using my trusty sewing machine.
I thought I would add a little more texture by adding some brown stamping using French Roast Fresco paint.. I used the mesh stamp from Frames Plate 2. As soon as I had done this I knew I didn't like it. It felt a bit too grungy for the look that I was after.
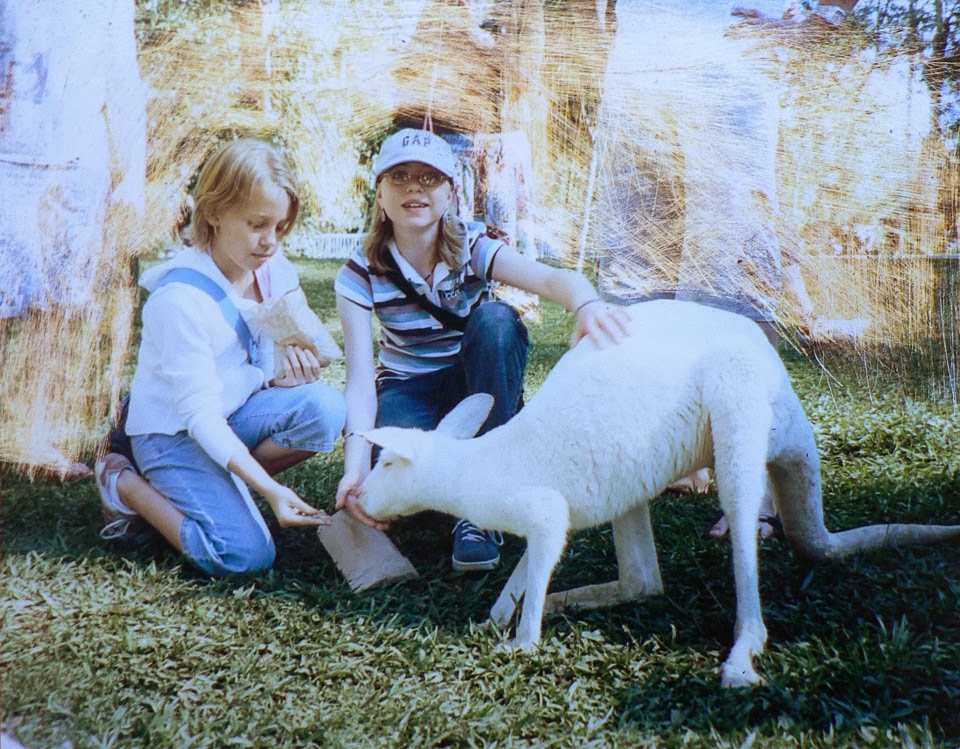
So
now we are on to the photo. I am really pleased with this next bit! The
photo that I wanted to use was taken in an animal park and although
it's a lovely photo of my daughter and her cousin, it is rather spoiled
by all those legs belonging to strangers!
I decided they had to go!

Here's what I did. Working
on a small section of background at a time I took a small paint brush
and lightly painted water on to the parts of the background that I
wanted to change . Then I sanded those strangers right out of the
photo with fine sandpaper! I quite liked the sanded background but
decided to go ahead and paint in my own bush background.
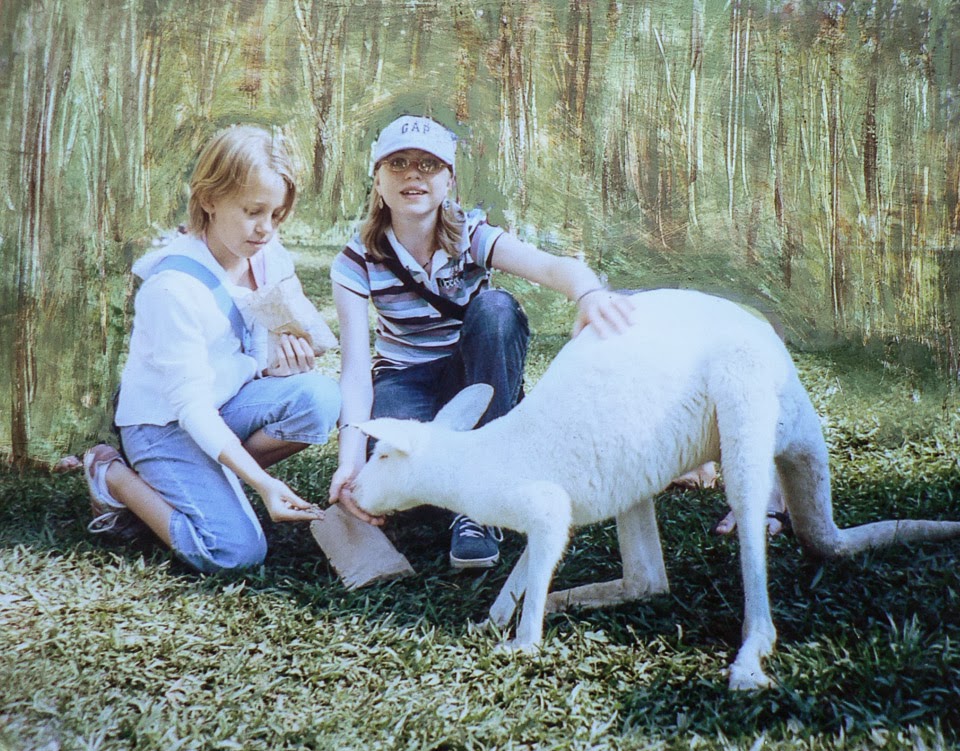
I just painted the background green using Fresco Paint in Hyde Park and Tinned Peas. Because
it was painted on gloss photo paper it took a little longer to dry, and
that gave me time to draw vertical line 'trees' into the wet paint with
the end of my paint brush. I also painted in some trees using French Roast Fresco paint.
I have to say I am really chuffed with how the photo foreground merges into the painted background. And also now the girls and the kangaroo really stand out in the photo!
Next
I set about disguising some of the brown stamping I did earlier. A
banner across the top distracts the eye somewhat, and a painted and
stencilled tag adhered across the bottom takes care of that part!
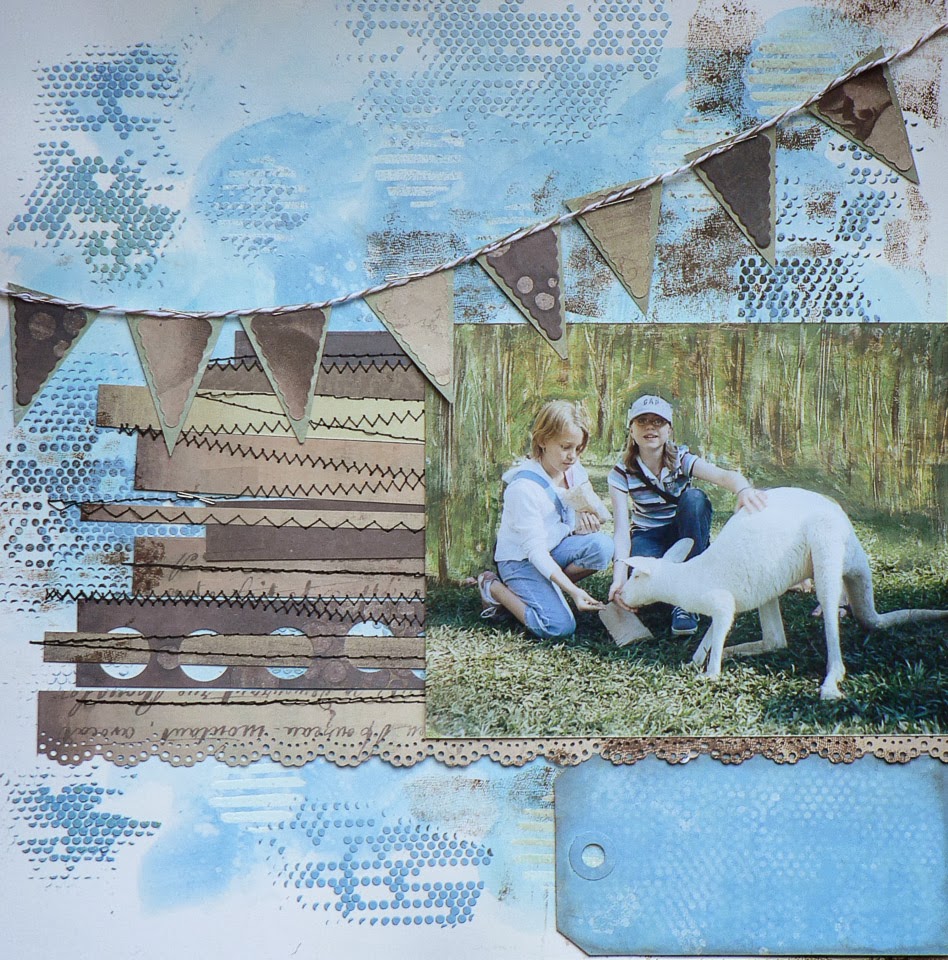
And finally the layout was ready for the finishing touches: Some Prima Wood Bellies, painted with Tinned Peas, a Prima Flower, Vintage trinkets, Eclectica Shapes 3.
I'm
really happy with how this layout turned out. I think the strips of
brown Chatsworth Papers look a bit like planks of wood, which helps
support the outdoor subject matter of the layout. I love the watery look
of the background painting, and I love how well the Fresco Paints
helped to alter the background of the photo!
Leandra Says: I love how the blue really lifts the colour palette to a different level. I adore the fabulous stitched strips too! Thanks for another great round of projects this week Pam. You are really bringing something new to the blog this year.
Gillian Says: Blue's and Brown's always a winning combo in my eyes, love the definition it gives to the textured background. Another beautiful layout Pam, thank you.
If you would like to join in this
week's challenge and play along with Pam's techniques, then do link up your
creativity here, and go in the draw to win some PA stamps of your choice! You
need to link your entry by 17:00, Sunday March 30th 2014


21 comments:
Love love it!
That's a lovely page Pam and what you did with the photo is genius!!
AMAZING page Pam!!! Loving your bush background and your technique to get rid of a background you don't like is brilliant, a genius idea!
Love the image you used and all the sewing just makes me like the page even more.
Fabulous clear instructions as usual, thank you for such inspirational projects :-) xxx
Love the composition. The assorted strips with stitching adds interest. Clever idea with the photo. More inspiration for me, thanks Pam.
Once again, I think your use of stitching is inspired! I love your colour combo on this too and what an amazing photo! Julie Ann xxx
I have just found your blog and I am looking forward to following all this wonderful creativity. Thanks so much x
Love how you altered your photo Pam, and those paper strips are fab!
Alison xxx
Clever and brave to alter the photo in this way! Love the wood effect of the brown paper strips and the blue background.
Gorgeous page!! I love the paper strips & I never noticed that you'd altered the photo, it's fantastic.
You clever girlie what a great scrap page. I love your own painting in the background. I also love the freshness of the blue colours. Using brown is one of my favs too. Absolutely love it xx
Thank you everyone for all your lovely comments-you've all made me very happy tonight!!
Who needs photoshop!! Love how you fixed the photo. Great LO
A really wonderful layout!!!! I totally love what you did with the photo... way cool!!!!
Very cool how you removed the adults from the photo! Great page!
Great piece! Thanks for explaining how you achieved it- i love the look!
This is wonderful! I love what you did with the photo - If I can achieve the same results I'll have so many more photographs to scrapbook with! Great work!!
Thanks for the clear step by step on how you created this Pam. This is a beautiful page, I love the colours and gorgeous textures you've used, and I'm really impressed with the wonderful transformation of the photo. This is very clever. I would never have thought to try texturing and painting out the busy background on a photo, the finished result just draws your eye to the main focal point of the girls and is a lovely keepsake of the memories and experiences of their fun day out!
That is a great way to remove unwanted background images!.. and a really nice scrapbook page.
Love your layouts! Fab project. xxx
Wow wow wow absolutely gorgeous layout. I love the background and all the stitching is awesome :-) Kezzy xxx
Love this LO- really love the way you took out those legs!
Post a Comment