
Hi, Lin here today to share one of my metal techniques with you. I have a passion for working with metal and it's been on the back burner for a couple of years. I re-kindled my interest recently when I started to use metal in conjunction with stencils again. In the past I had always used brass stencils as they have a bit of depth to them, then my curiosity kicked in and I wondered if I would get good results using the stencils that I designed for PaperArtsy...... I am very happy to say that the answer is yes!!!

I started with a little wooden frame and a 10cm canvas.

I painted the frame with Marlin which is one of the new paint colours from my latest Limited Edition set of paints. When the paint was completely dry, I used a stiff brush to dry brush a small amount of Little Black Dress Fresco around the edges.

Now to start work on the metal flower. You will need a foam mat, an acrylic mat (one of your large acrylic blocks will do the trick), some masking tape, stencil PS005, a stylus, a paper stump and some aluminium (about 2cm larger than your canvas), Grunge Paste and a palette knife.
Start by taping the stencil to the aluminium with some masking tape.

Leaning on the foam mat, with the stencil facing down, use a paper stump to rub over the back of the metal ( a bit like brass rubbing) to highlight the design of the stencil.

Using a stylus (I used a tool by Mercart but Ten Seconds Studio also have these although you can improvise with a small embossing tool), I carefully traced around the edges of the design.

Working with my paper stump again and still leaning on the foam mat, I gently stretched the metal inside each of the small petals using a sweeping, back and forth motion.
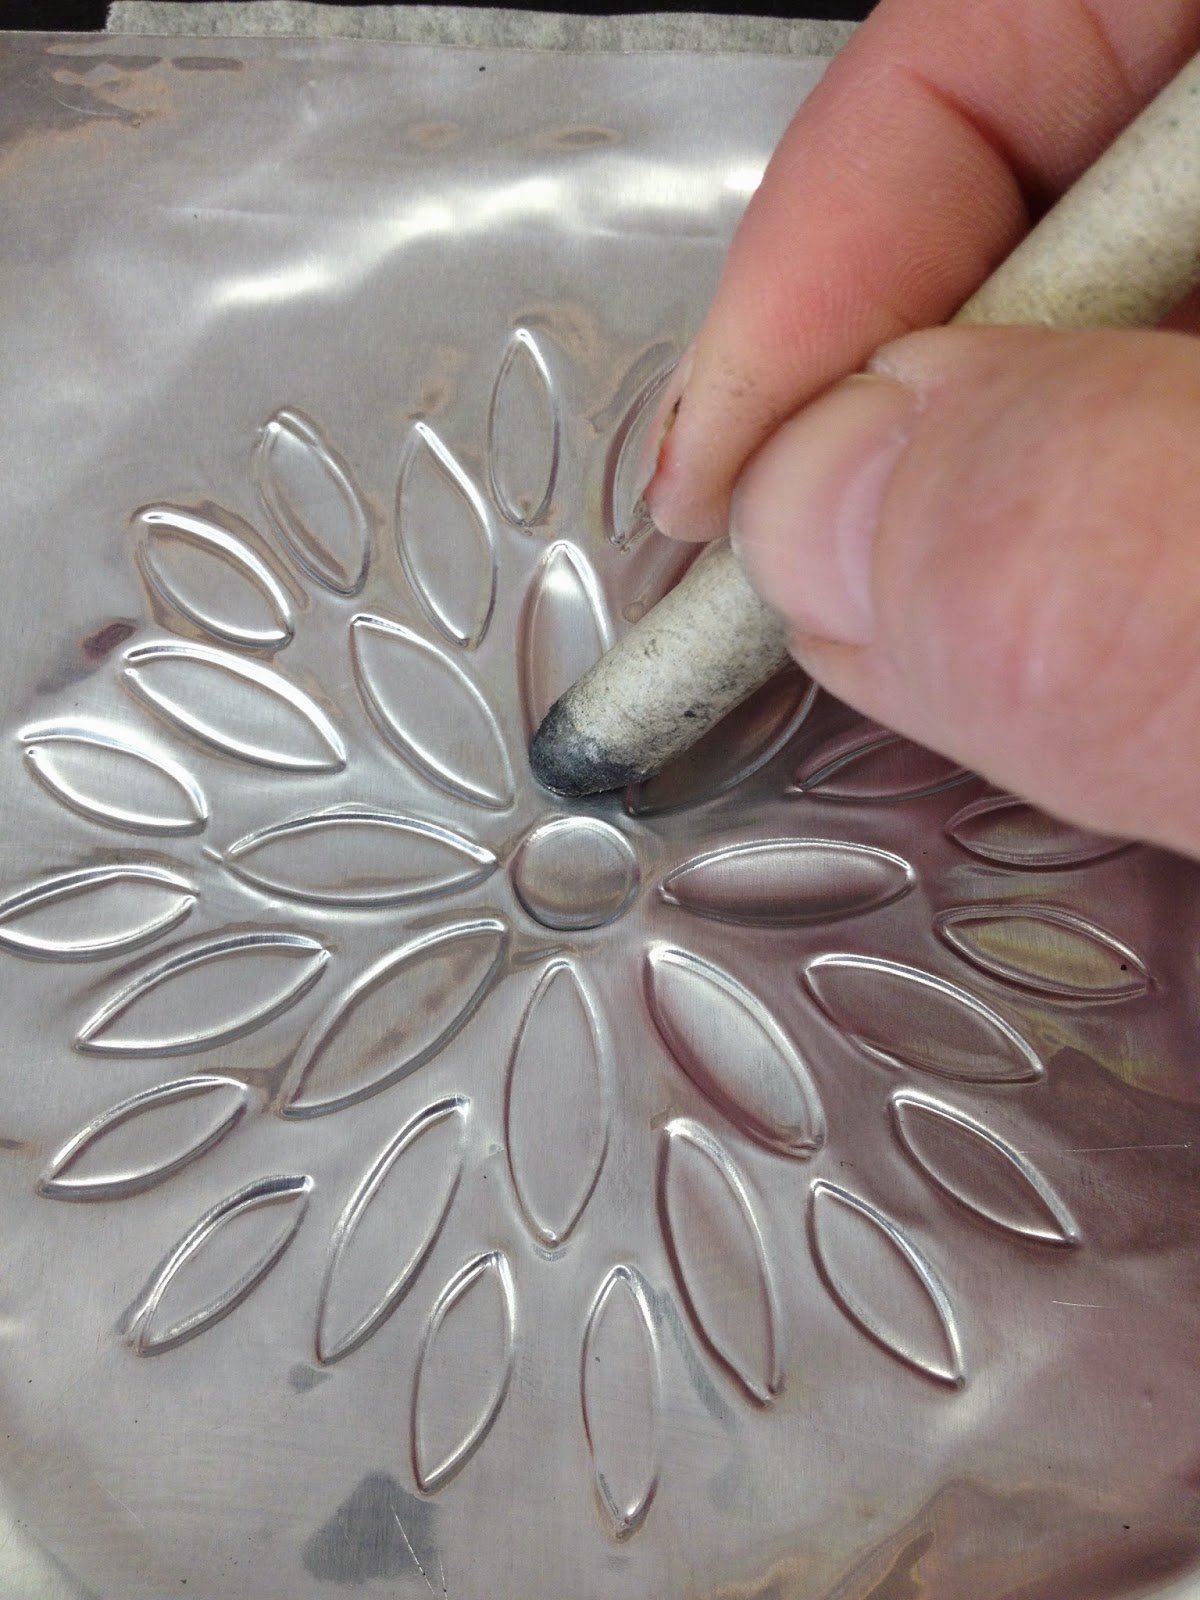
You may find that the metal has become distorted during the embossing process but this is simple to fix. Working from the front of the metal and leaning on the acrylic block, use the paper stump to smooth out and creases or lumpy bits. It is important to start in the centre and work out towards the edges.

Once the metal is nice and flat again, take the stylus and draw around the embossed areas to define the image. This should also be done whilst leaning on the acrylic mat.

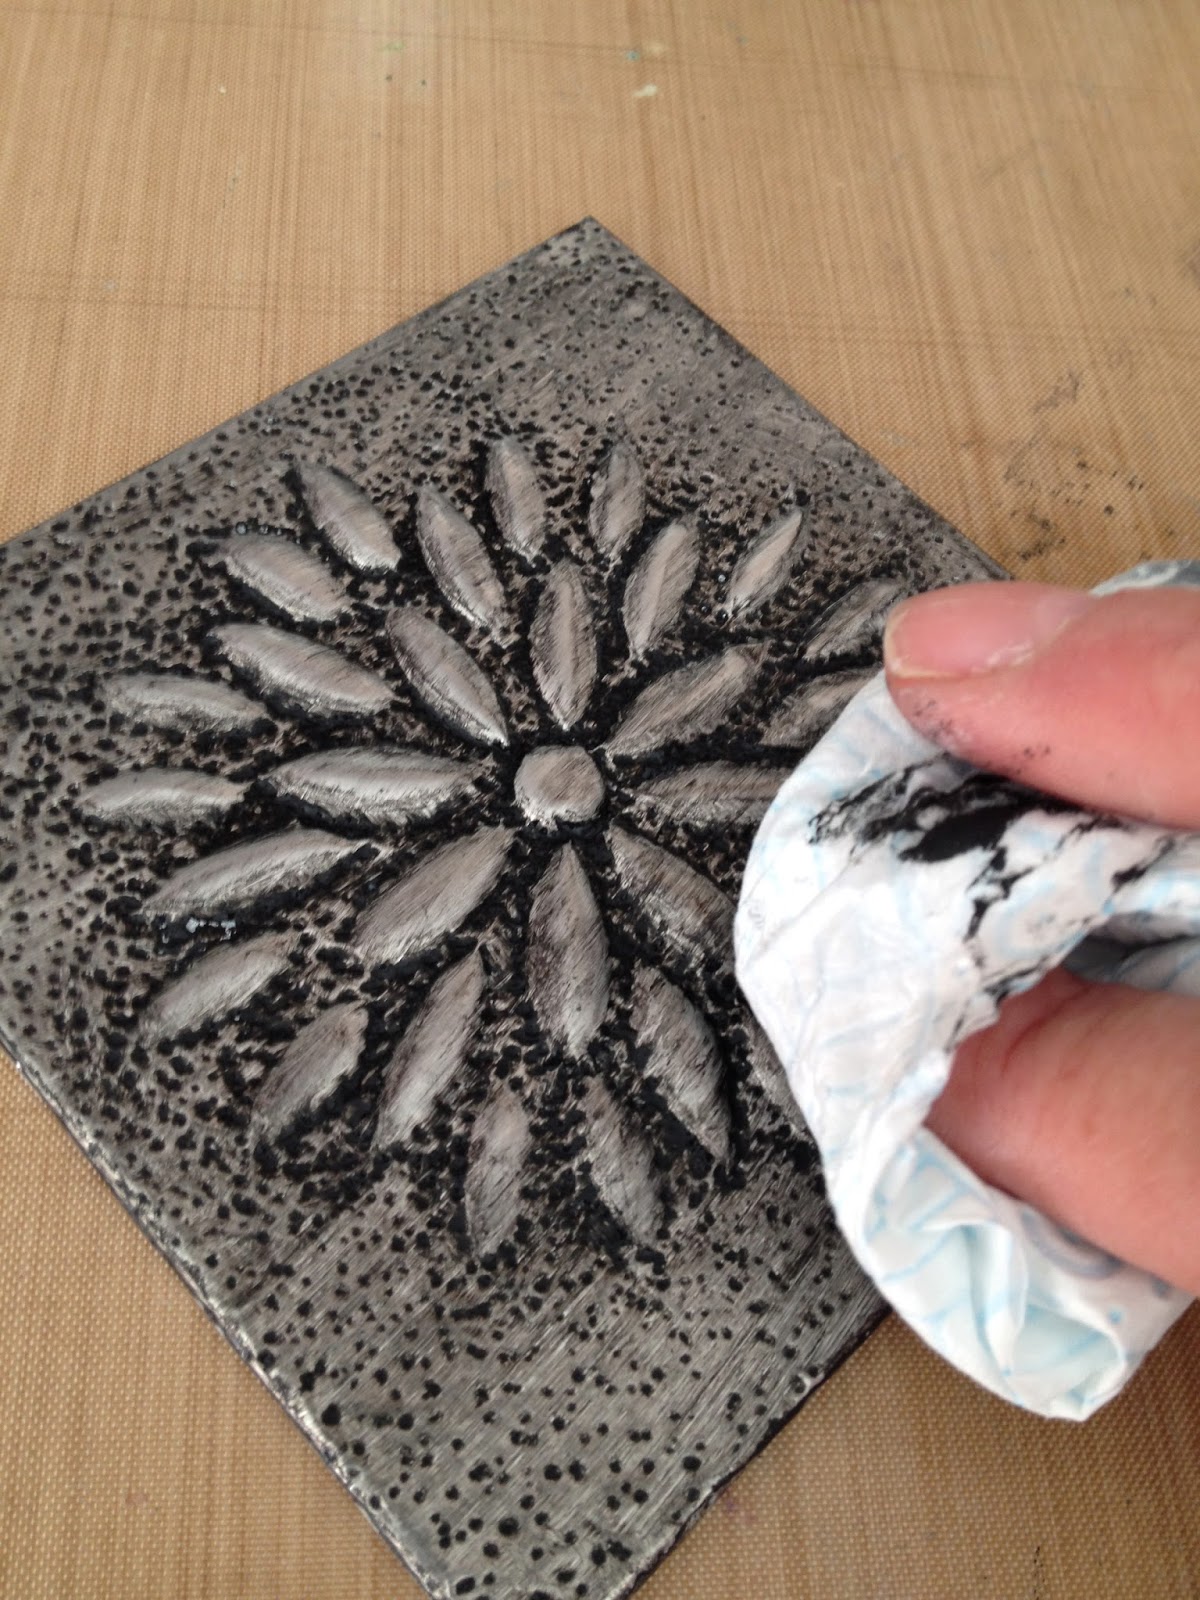
Stippling is a great way to add texture to the background. Simply add a whole load of dots while leaning on the foam mat and you will notice that the flower image really pops.

I also added dots around each of the petals, this helped to disguise a few wayward background dots....I got a bit carried away with the stippling!!!!!!

Now to protect your hard work. It is important to fill the back of the embossed metal with something that will set hard to help prevent the embossed areas getting squashed. I used Grunge Paste to do this. I used a palette knife to apply the Grunge Paste in just the same way as applying it through a stencil. I would recommend you lean on you foam mat to do this.

Once the embossed areas are filled, use a babywipe to wipe away any excess paste and leave to dry.

I cut some acetate the same size as my canvas to help me position the metal correctly as this is tricky to do because you can't see through the canvas. Lay the acetate over the embossed design and mark the four corners.

I applied a sheet of double sided adhesive to the canvas and after removing the backing sheet, I was able to lower the canvas to the metal, lining up the corners with the corner marks. I was then able to fold the excess metal to the back of the canvas.

I painted the metal with a layer of Little Back Dress Fresco, using a small piece of Cut'N'Dry so that I could work the paint down into all the textured areas.

Having painted it, I'm now wiping it off!!! Don't wipe all of it off though. Leaving the metal like this is an option and is one of my favourite looks. It looks simple, striking and in my opinion, very elegant but for this project, I wanted to experiment with layers of Treasure Gold and I knew that it would need a light layer of paint for the Treasure Gold to grab on to.
I used a small brush to apply Indigo Treasure Gold to the background (this photo doesn't do justice to the colour I'm afraid, it's not easy photographing metal!) followed by Classic around the edges and on the flower.

I painted four Tim Holtz metal corners with Marlin and added some Classic Treasure Gold to the embossed areas to highlight the design, these along with a touch of Treasure Gold on the painted frame added the finishing touches. I think the colours are much better in this final photograph.

I hope this little project has inspired you to look at your stencils with a different eye. You can use them in so many different ways......I'm really looking forward to seeing what you come up with.
Lin.
A huge thanks to Lin from all at PaperArtsy HQ. Metal working is so fascinating, the way the metal stretches is like magic. The end results look stunning but for the uninitiated can seem complicated, you have shown here how easy it is to achieve a fantastic and detailed piece. Thankyou for such a great tutorial.
We
would love you to join in with our monthly challenge. If you are
inspired by any of this month's guests who have blogged between Sept
1st 2014 and Sept 30th 2014 then join in and link up your creativity
HERE. You will go in the draw to win a voucher to spend on products
of your choice from the PaperArtsy online store. You need to add your
link by 19:00 (London time) Sept 30th 2014


