Showing posts with label metal. Show all posts

Wednesday, 21 January 2015

2015 #2 Wall hanging {by Sue Carrington}

2015 Theme 2: Shiny Stuff

Hi everyone it's Sue here, joining you this evening with a post about Shiny Stuff ! I love working with metal so when I saw the theme my mind was in a whirl with ideas ! Throw in some Treasure Gold for good measure and I'm in pure heaven! The piece I've made is a wall hanging and I've used a piece of chipboard as the substrate. 


Step One: I started by painted the chipboard with Vanilla Fresco Finish, then I gave it a coat of Clear Gesso. I dried it off and then painted over the whole thing with Pumpkin Soup Fresco Finish. I 'wafted' my heatgun over it, not drying it totally, and then took a baby wipe and wiped over the surface. Some of the paint stays behind so gives a gorgeous distressed look, you can see the brush strokes of the Gesso where the paint has sunk into the grooves ! As the Gesso is clear you also get to see the colour of the bottom layer.


Step Two: Another coat of Clear Gesso and when that was dry I painted Autumn Fire over it, 'wafted' it with my heatgun and repeated the baby wipe process.


Step Three: I then die cut a frame from cardboard and painted it with Little Black Dress Fresco Finish.


Step Four : I then gathered some Treasure Gold together; Ruby, Florentine, Sapphire and Green Amber and started to brush it over the frame, blending it together.


Step Five: The face in the centre of the frame is one of the gorgeous new Lynne Perella stamps from LPC033 set. 


I painted some Smoothy Card with Nougat Fresco Finish and when it was dry I stamped the image with black Archival ink. I then painted the areas of the face that would be seen inside the frame using Beach Hut, Claret, Pumpkin Soup and Hey Pesto.


I was very lucky to have attended Lin Brown's Metal Masterclass workshop a few years ago and I loved making the metal flowers and thought this was the perfect opportunity to make one. 
Lin has done a number of metal flower tutorials on her blog, go and check them out here:
Tutorial one - using PaperArtsy Grungeflower dies, UTEE centrepiece
Tutorial Two Part One  - using Tim Holtz Flower dies, alcohol inks
Tutorial Two Part Two - using PaperArtsy dies, alcohol inks
Tutorial Two Part Three - same dies, making a daisy shape
Tutorial Two Part Four - spiky middle (this is the option used below)

Step Six : The flower is die cut from copper coloured metal using the Scallop Flower die. I used a metal working wheel on both flowers and have cut down the petals on the top flower. The centre of the flower is die cut using the small Grunge Flower die and then cut into strips. The metal automatically curls up like magic ! I sponged a mixture of Autumn Fire and a little French Roast over the two base layers and then brushed a little Florentine Treasure Gold over it. I stamped across the base using 2 more stamps from the same Lynne Perella set and added a couple of embellishments in metal too. I masked off the stamping and then added some script using the little script stamp from the Lynne Perella 014 set.


Step 7: I used the border stamp from the Lynne Perella LPC033 set and stamped it with black Stazon on to some more metal. I defined some of the stamping and used a paper stump to 'puff' out some areas and I filled in the back with Grunge Paste so it wouldn't get squashed. The key is also from the same set and is stamped on to metal, cut out and then I've refined some areas.


Here's one final close up for you !


I thoroughly enjoyed getting to play with metal again, it's so versatile and adds another dimension to your projects as well as looking totally fantastic !

Sue
Twitter  @Ink_and_me 

We fell in love with these Lynne Perrella stamps as soon as the images came across our desk! Thanks Sue for not only highlighting how you can accent the design perfectly with translucent Fresco Paints, but reminding us about Lin's amazing metal flowers!

If you fancy joining PaperArtsy challenge #2: Shiny Stuff, then you can link up your creativity HERE.  

NB.  you will get 3 weeks to participate in this challenge, as we will interrupt the usual schedule for our New Product Announcements which starts Feb 1st for a week.

All links go in the draw to win a voucher to spend on products of your choice from the PaperArtsy online store. The Shiny Stuff link will close 17:00 (London Time) Sunday, Feb 8th, winner will be announced 2 hours later at 19:00.

Monday, 19 January 2015

2015 #2 Plumbers Tape {by Keren Baker}

2015 Theme 2: Shiny Stuff

Hi everyone Keren here, joining you this evening with a post about using metal tape with stamps and Frescos. I am a sucker for anything that can be manipulated or made more dimensional. I found a humungous roll of plumbers tape (with a price tag to match) and started experimenting with this lovely 'magpie-attracting' stuff to create a card. 


The tape is adhesive backed but is super-thin so I adhered two layers together to give more 'puffiness' without worrying about the tape tearing. Simply stamp onto the tape with Stazon, leave to dry and then trace around the outer edges of the parts of the image that you want to add a concave or convex part 


You can see I've used a dense foam- however a mouse mat, or anything with 'give' will be perfect. You'll ideally need a paper stump plus an embossing tool (different sizes of tool are ideal). Hopefully you can see where I've begun to press down and rub in a circular motion on her collar. Unless you've X-ray vision, you'll need to trace around the edges and flip the piece open to get the area on the reverse to rub the paper stump on.


Obviously I've taken a bit of artistic licence with the gorgeous Lynne Perrella stamps from Collection 04; I've sculpted her a bit of a jawline and just picked out certain parts to highlight. For the dashed edge, I simply picked up a pencil (because my desk was a such a mess at the time, I couldn't find any of my tools ;-)! and on a flat surface added the dashes- this helped give a contrast to the depth of the face.


Next, I wanted to add some colour. I toyed with adding a pool of Frescos into the concave parts, but decided to leave her face to 'shine' (pun intended!). So, I gathered up a selection of colours- not worrying about whether they were opaque or translucent as I thought they'd be an interesting combination.


I added drops of different colours in a line across and simply brushed them up and down, gently combining the colours and leaving them to dry.


Now for the fun part; just chop into strips and pleat it. Because it's really gorgeously bendable, it pleats beautifully and once sanded (and do be rough!) it reveals streaks of silver that tie it in with the main metal image.


What else can you do with the tape? I'll show you one of my failures or 'incomplete experiments'! Try painting and stencilling


Add the dried single layer of metal and emboss the metal through the Lin Brown 003 stencil. 

Then sand away carefully onto the embossed parts. Weirdly- only one of the colours wanted to sand- although Darcy (whose brains I was picking at the time) gave some brilliant suggestions using Fairy Power Spray or if all else failed, adding extra stencils or even adding a layer of Crackle Glaze through the stencilled areas and then a contrasting paint colour over the top. I was going to try and complete it for today's post, but lost it (oops!).


Who's ready for a sneak peak!!! 

Below is a peak of ECL03 {available soon}. Using the techniques I've already shown you, here's another idea using the metal and stamps and Frescos. The metal (being shiny) reminded me of a mirror and I thought it was perfect with some brand new stamps (shhh) and the sentiment came to me whilst I was stamping. 


If you use the translucent Fresco's with the metal, they give a fabulous effect whilst not completely blocking out the metal. I've 'sketched' extra details onto the image using a simple embossing tool and the individual letters from another new set are perfect for creating any saying you choose.


Apologies for the reflection in the picture (but you try photographing a mirror surface!!- any tips would be welcome!!).

So- I feel like I've only just scratched the surface of using metal tape- it makes a perfect edging and why not try die cutting some shapes out, adding onto your chosen surface and then carefully smoothing the tape over the shapes. Pick out the embossed areas by dry brushing Frescos over. Because it's adhesive backed, it is perfect for using with PaperArtsy's dies too. Do have a go with the embossing and debossing- it's great fun and very soothing rubbing over metal!

See you soon!  Keren xx @craftstampink

Thanks keren for starting us off on our new theme. You have created a wonderful dimension to the LP image using the faux metal technique and also by using the stencil, it's great you experimented, we like the results. Loving the sneak peak sample :))

If you fancy joining PaperArtsy challenge #2: Shiny Stuff, then you can link up your creativity HERE.  

NB.  you will get 3 weeks to participate in this challenge, as we will interrupt the usual schedule for our New Product Announcements which starts Feb 1st for a week.

All links go in the draw to win a voucher to spend on products of your choice from the PaperArtsy online store. The Shiny Stuff link will close 17:00 (London Time) Sunday, Feb 8th, winner will be announced 2 hours later at 19:00.

Saturday, 27 September 2014

Metal Flower {with ELB Stencil by Designer Lin Brown}

Hi, Lin here today to share one of my metal techniques with you. I have a passion for working with metal and it's been on the back burner for a couple of years. I re-kindled my interest recently when I started to use metal in conjunction with stencils again. In the past I had always used brass stencils as they have a bit of depth to them, then my curiosity kicked in and I wondered if I would get good results using the stencils that I designed for PaperArtsy...... I am very happy to say that the answer is yes!!!


I started with a little wooden frame and a 10cm canvas.


I painted the frame with Marlin which is one of the new paint colours from my latest Limited Edition set of paints. When the paint was completely dry, I used a stiff brush to dry brush a small amount of Little Black Dress Fresco around the edges.


Now to start work on the metal flower. You will need a foam mat, an acrylic mat (one of your large acrylic blocks will do the trick), some masking tape, stencil PS005, a stylus, a paper stump and some aluminium (about 2cm larger than your canvas), Grunge Paste and a palette knife.

Start by taping the stencil to the aluminium with some masking tape.


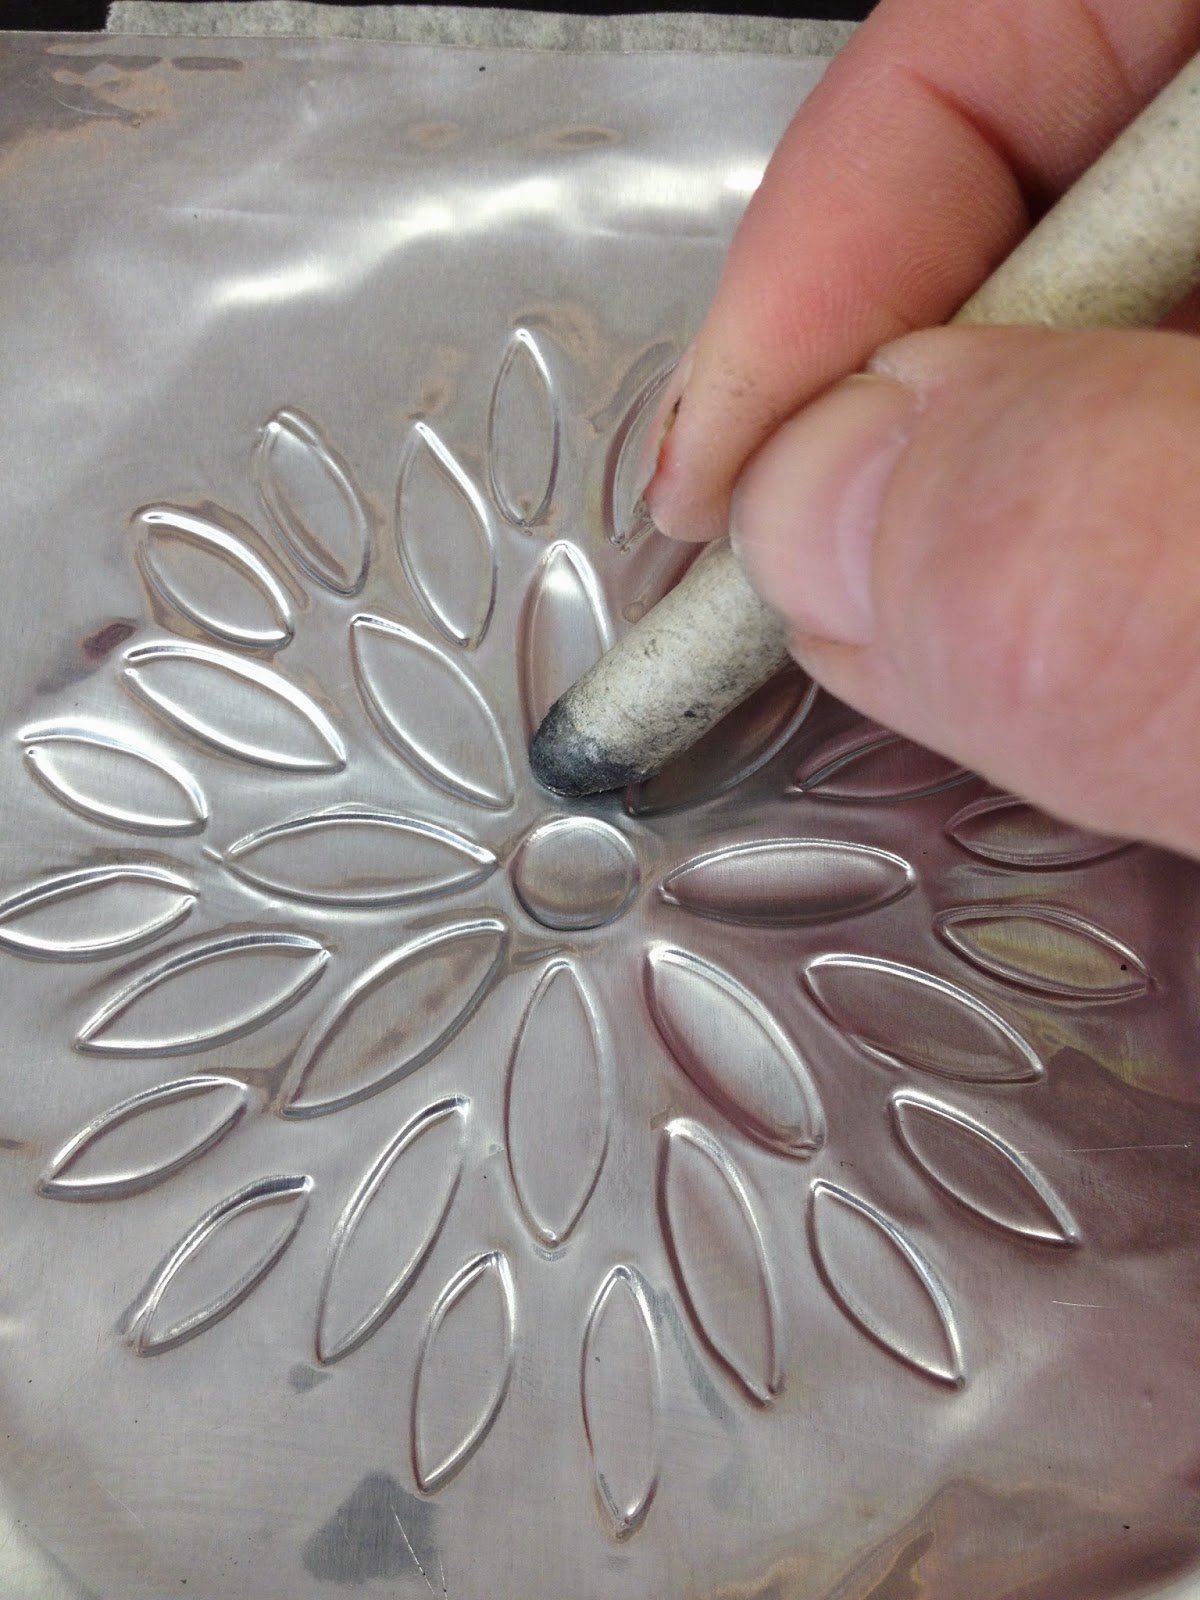
Leaning on the foam mat, with the stencil facing down, use a paper stump to rub over the back of the metal ( a bit like brass rubbing) to highlight the design of the stencil.


Using a stylus (I used a tool by Mercart but Ten Seconds Studio also have these although you can improvise with a small embossing tool), I carefully traced around the edges of the design.


Working with my paper stump again and still leaning on the foam mat, I gently stretched the metal inside each of the small petals using a sweeping, back and forth motion.


You may find that the metal has become distorted during the embossing process but this is simple to fix. Working from the front of the metal and leaning on the acrylic block, use the paper stump to smooth out and creases or lumpy bits. It is important to start in the centre and work out towards the edges.


Once the metal is nice and flat again, take the stylus and draw around the embossed areas to define the image. This should also be done whilst leaning on the acrylic mat.


Stippling is a great way to add texture to the background. Simply add a whole load of dots while leaning on the foam mat and you will notice that the flower image really pops.


I also added dots around each of the petals, this helped to disguise a few wayward background dots....I got a bit carried away with the stippling!!!!!! 

                                                
Now to protect your hard work. It is important to fill the back of the embossed metal with something that will set hard to help prevent the embossed areas getting squashed. I used Grunge Paste to do this. I used a palette knife to apply the Grunge Paste in just the same way as applying it through a stencil. I would recommend you lean on you foam mat to do this.


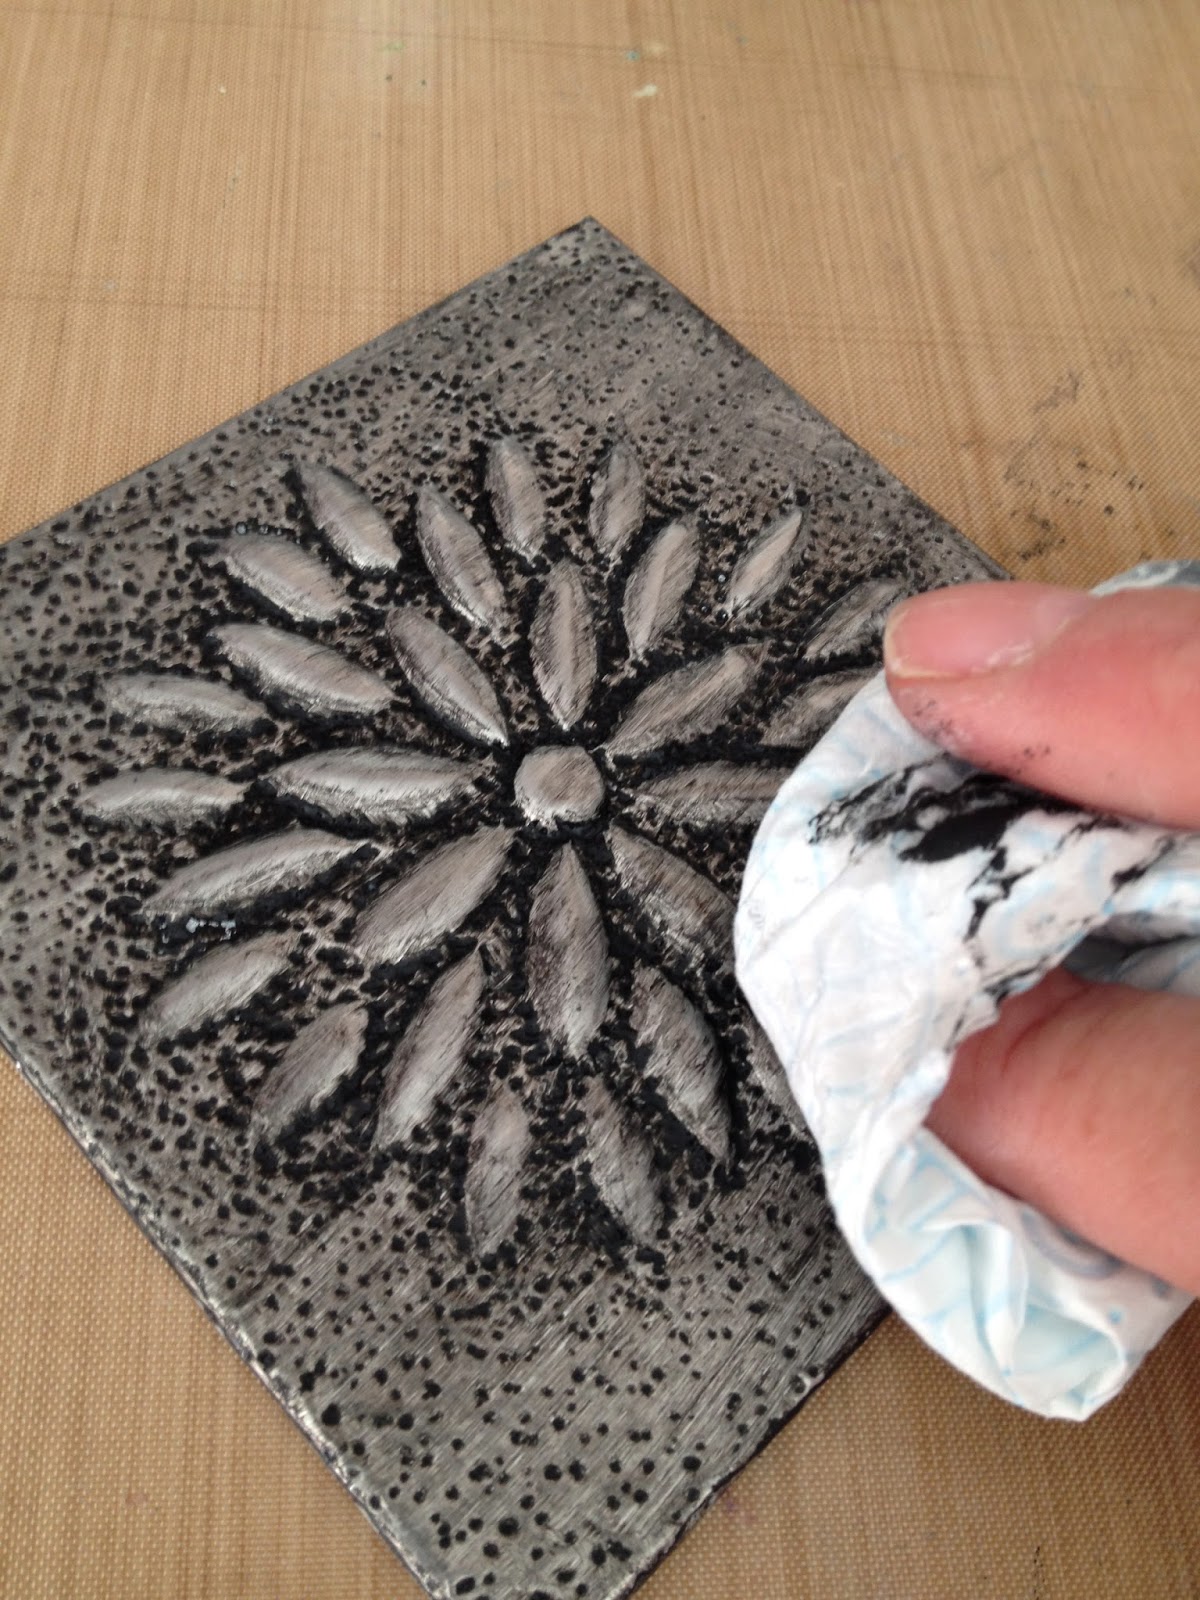
Once the embossed areas are filled, use a babywipe to wipe away any excess paste and leave to dry.


I cut some acetate the same size as my canvas to help me position the metal correctly as this is tricky to do because you can't see through the canvas. Lay the acetate over the embossed design and mark the four corners.


I applied a sheet of double sided adhesive to the canvas and after removing the backing sheet, I was able to lower the canvas to the metal, lining up the corners with the corner marks. I was then able to fold the excess metal to the back of the canvas.


I painted the metal with a layer of Little Back Dress Fresco, using a small piece of Cut'N'Dry so that I could work the paint down into all the textured areas.


Having painted it, I'm now wiping it off!!! Don't wipe all of it off though. Leaving the metal like this is an option and is one of my favourite looks. It looks simple, striking and in my opinion, very elegant but for this project, I wanted to experiment with layers of Treasure Gold and I knew that it would need a light layer of paint for the Treasure Gold to grab on to.


I used a small brush to apply Indigo Treasure Gold to the background (this photo doesn't do justice to the colour I'm afraid, it's not easy photographing metal!) followed by Classic around the edges and on the flower.


I painted four Tim Holtz metal corners with Marlin and added some Classic Treasure Gold to the embossed areas to highlight the design, these along with a touch of Treasure Gold on the painted frame added the finishing touches. I think the colours are much better in this final photograph.


I hope this little project has inspired you to look at your stencils with a different eye. You can use them in so many different ways......I'm really looking forward to seeing what you come up with.
Lin. 

A huge thanks to Lin from all at PaperArtsy HQ. Metal working is so fascinating, the way the metal stretches is like magic. The end results look stunning but for the uninitiated can seem complicated, you have shown here how easy it is to achieve a fantastic and detailed piece. Thankyou for such a great tutorial. 

We would love you to join in with our monthly challenge. If you are inspired by any of this month's guests who have blogged between Sept 1st 2014 and Sept 30th 2014 then join in and link up your creativity HERE. You will go in the draw to win a voucher to spend on products of your choice from the PaperArtsy online store. You need to add your link by 19:00 (London time) Sept 30th 2014


Friday, 22 January 2010

Good Times {JANUARY SALE NOW ON} at PaperArtsy

It only happens once a year and it starts now, the {BIG} SALE is on now, here at PaperArtsy. So bag a bargain while stocks last.

We are always well stocked with rubber, after all we do manufacture all our stamps on site here at PaperArtsy World HQ, so if you need rubber we make it!!! That will not run out! However for supplies of omther items such a paints, texture paste, papers, wood, metal, chipboard or canvas etc we rely on other suppliers, so those products may go out of stock, but we will do our best to re-order popular items ASAP. 

To be sure you get what you want, it would be smart to order now. We will be busy little bunnies getting your orders out as fast as we can, and remember every order gets a freebie gift!

Spend over £30 and get 10% off
Spend over £60.00 and get 20% off
Spend over £100.00 and get 30% off

on top of that, use your Voucher code from issue 117 out now from Craft Stamper magazine and all UK customers will also get free shipping!


Coming up this month are ideas with the new Ink and the Dog Clocks stamps from our Design Team - and more Youtube videos from Leandra! Stay tuned!

Wishing you all a healthy and very happy 2010

Mark andLeandra


Thursday, 17 December 2009

Weeks whizzing by

Yesterday we had snow, and this afternoon and tonight it's going to snow heavily down here in Essex, and the East of England, so I think this morning is my last chance before school ends to get those last few presents sorted out. You  think you have it all done, and then you think of another 6 things you forgot about. So just thought I'd get a note out to you all before I hit the panic button.

My mother is here from New Zealand this year, she has just spent the last couple of weeks up in Lancashire for a family wedding, and catching up with some old school friends, then on Monday she will come down to us. We have lots of evening parties planned next week, so I think by the time Christmas eve arrives we will enjoy a day on the couches watching the tele!!

We launched a PaperArtsy Youtube channel last week and I have put a couple of videos up relevant to recent blog posts. 

Firstly stamping into texture. In this video I used Terra and Ferro, but you don't have to use both on the same project, you could use one or the other. I put a couple of dark colours into the dips, but you can put light in the dips, or leave as is and put darker colours on top. It really is a lot of fun, and great for onto wooden frames or surfaces as well as papier mache or chipboard.

I am expecting a delivery of Terra and Ferro today, so there will be plenty of choice in the shop, plus we have a whole lot of new wooden items to put online too, so get your orders in now ready for that wonderful week between Christmas and New year whihc is a great art-play time!


The second video is the technique of 'puffing' metal. For this you can stamp an image and puff out sections of it. The image might be a bird cage, the castle turrets, birds on a wire, or in the case of the video, a simple flower which makes a beautiful card or scrapbook embellishment. But I also added a simple frame to it.
We will continue to add more videos to the PaperArtsy channel so you can see first hand how to use products that we stock. If you have any specific request, then let us know.

Wishing you all a totally fabulous Christmas and a wonderful New Year.

Leandra & Mark.

Tuesday, 1 December 2009

Ohhhh { Love these metal birds}

 Before we start...A few words on the rugby...
If you were following me on twitter (@paperartsy) the other weekend you would have seen my blow by blow account of the New Zealand All Blacks playing the English. Yay to the AB's. and yay that Mark and I were able to go along to watch with some other kiwi friends. Getting tickets to go to Twickenham is never easy for games like this, so we got them through the New Zealand Rugby Union verified by our kiwi passports. A great method as the section of the stadium we were in was all black too, so that made it even more fun! Plus a try that was scored (AB's) happened in the corner right in front of where we sat, so we were up and out of our seats with excitement!. We had a great spot: the higher stands protected us from the wind and rain, and the corporate "boxes" we just behind us, so we had the same view as them but way more fun! And of course the icing on the cake was the win.

The best part of rugby is the freindly atmosphere. When the poms scored we clapped, and when we scored they clapped...very sporting of us all and exactly how it should be....oh and the TV ref comes in very handy too!! Fair play all round makes for a great event. Had a few laughs on the train on the way back with other supporters from both sides.  Very very enjoyable.

Spinach Pie Success...
Oh and Patricia emailed me last weekend to say she tried my Spinach pie recipe, and her family loved it...that was funny...I know I put the recipes up there for people to try, but didn't think you actually would! SO I may have to put something else up there soon if you are liking that additional feature! lol Really tickled me that.3 bird roast for Xmas coming soon!!

Gift Certificates......

Mark has spent some time crating a series of VERY cool looking gift certificates. These are perfect for you to give firends or family vouchers that can be redeemed online, over the phone or as a postal order. Check them out here.

Back to the metal working....


After being out and about at a few shows in the last couple of months, I seem to get loads of emails from peeps asking me how I did this that or whatever, or how do they get started, usually that they don't remember a thing of what I demoed and want a blow by blow summary. lol. The shows over here like the NEC are absolutely massive. You are doing well to get around all the stands in a day, and you see soooo much thatit can be a bit of a brain drain. So thanks for taking the time to email and ask for help or inspirational ideas and reminders.


This blog is your first port of call. I do try to put up online the samples I made at the shows and give instructions of how they were made. That way, if you were stood watching, you can remember more easily how it was made. This works well until stuff "walks" off the desk....or people poke your samples so the metal gets crushed before the glue supporting it has set. 

Often I come up with new ideas while demoing, and this time, I had a great idea with some of the bird stamps and the little chipboard arches, and it was all looking awesome, but before the filler had set up, nearly every time I would go to show the sample to the next bunch of people watching, and bang, the blimmin thing was all mangled.  So on the last day of the show i tried to make some samples and hid them so i could blog un-poked items. :-)

I am pretty forgiving - poking raised metal is probably something even I would do lol... I guess we must all have some innate desire to have to just test to see if the metal is supported/strong. And people stood there aren't to know that it's not set hard. The drying process for fillers can be 24 hours, so usually the stuff on my desk is at some stage of drying out, but it certainly isn't fully set.


So let me show you what I was up to. If people are interested in how to stretch metal, then the samples above (fleur de lis) is a classic I do a lot, or maybe I might use a small flower, and stamp with a section that would look good puffed out will work, start with a simple design. 


The process is the same. Here is the same idea using the row of birds from SITT2...love that stamp(above) Or with a dragonfly stamp...this one is from the Squiggly Mini #13 .


  1. Substrate. Choose a substrate to work on (this is a mini chipboard arch -we have several new chipboard shapes going online this week) and trace the outline onto a piece of metal and cut out. 
  2. Stamp. Stamp the image onto silver, copper or coloured metal in the position you want with stazOn black ink and dry.
  3. Outline. Use a teflon pointed tool to gently outline the stamped design on the front. Lean on a wad of paper for this.
  4. Puff with paperstump. Flip the metal over, and on the back you will clearly see the outlined shapes. Put the metal onto a soft mat, and use a small paper stump in a circular motion to start puffing the metal inside the design lines. You might find the metal is resistant to you initially, then suddenly the warmth from the friction kicks in and you will feel the metal much more willing to oblige. Don't stop, keep puffing - you need to gradually stretch the metal.
  5. Refine on acrylic mat. Once you have the image puffed out to the depth you like, flip the metal over (puffy side up) and place it on an ACRYLIC MAT. People forget this bit and its the most important. You need to tidy up all the other bits of metal surrounding the puffed design that got mangled or stretched in the process. Use a large paper stump to gently flatten all the areas up to the edges of the stamped design. Don't press hard. Gradually encourage it to do what you want and again it will eventually play ball. At this point you can also place your refine metal back onto a wad of paper, and gently use a small fine perforated dot tool to outline the birds.
  6. Filling Metal. Now you need to fill the metal to support the puffed section. You need a product that will set up hard. Not silicone glue which is a soft flexible glue, even when dry.  You need to use either a glue or a poyfiller type product that will set hard. I use glossy accents for small areas, or polyfilla (plaster-like) for larger areas. There are many polyfillers out there, and some are more lightweight than others...which is good for cards that get posted...so muck about and do some tests to see which products you like the best. Apply the product to the recess and let set overnight. Cut a piece of humungo the same size as the metal. Stick the humungo tape to the substrate, then stick the metal to the humungo. Run a patterned wheel around the edge like a herringbone wheel to finish the edge nicely.
  7. Stamp again. You can add more flourishes, words etc to your piece, and use texture wheels around the edge.

These simple tag-shaped pieces make great tags for presents, and of course you can write a message on the back...do that before you stick the metal down for ease, or if you forget, then place metal side down on a soft mat and then do your writing! The backs would look great with some rum and raisin papers on them!!

Oops...here's a poked one! grrrr...

...and a few more samples so you get the idea...note how once the metal is on the chipboard base, you can still outline the stamped lines as the chipboard with humungo tape is soft enough to accept lines made with a teflon pointy tool.

Love this sample below where part of a flower from SIEN2 or use SIEN4 for a larger one.


Here's one with a difference for those of you who want more of a challenge! Love the added colour which comes from the glimmer mists with a dab of paint underneath.
  1. Outline. Trace around the tag chipboard shape onto a sheet of silver metal with your pointy tool. Cut out
  2. Sand. Use your sanding block to sand the metal in both directions (horizontal and vertical) This will give the metal a stainless steel effect, and adds some 'tooth' to the shiny surface....love doing this before stamping in general...but don't do it to coloured metal ..all you will do is sand off the colour! LOL (you knew that already didn't you!!)
  3. Paint. Apply paint to the surface...if you want the glimmer colours to be rally strong, then use a pale kaisercolour like white, eggshell, antique white, blossom, coastal blue, or one of those really ligfht shades. Swipe a very small amount of paint on with Cut and Dry foam, and then wipe off the excess with a paper towel. You still want to see the shine of the metal.
  4. Glimmer. Paint and sanding the metal gives 'tooth' so that Glimmer mists can stick to the metal. So now you can choose 2 colours of glimmer to use on the metal. Spray Patina onto part of the metal and then dry. Next spray khaki on the remaining area and dry. If you spray loads, you will get 'watermark' type effects. It's a good idea to heat the metal with your heat gun first, and then spray while its hot, this helps the glimmer to dry faster.
  5. Stamp. Now stamp your birdcage image from SINM6 in archival jet black ink on top....DON'T use stazon....why? Because stazon is used onto smooth and shiny NON-POROUS surfaces (eg. metal, acetate, acrylic). We just added paint, and glimmer to the metal, so now you want to use Ranger's archival jet black ink or a black pigment like brilliance would also work. These will give a much better black colour onto the painted, glimmered surface.
  6. Emboss the image. Puff out the image as before, so outline the image from the front with a pointy tool, then flip onto the soft mat and puff out the birdcage from behind with a paper stump, or for a lage area like this the round teflon tool is perfect!. Carefully refine on an acrylic mat to flaten the surrounding areas, and to finish, use a fine dot perforated wheel around the edge of the birdcage if you wish.
  7. Fill the metal. OPTION A: Fill the recess with glossy accents.  You can also apply glossy accents to the rest of the metal, but only a small amount, and you need to smooch it about with your finger so you have a thin even layer. now stick the metal directly to the chipboard. OPTION B: Fill the recess with polyfiller. Let dry overnight. Cut humungo to fit the substrate and stick to the substrate. Stick the metal to the humungo.
  8. Stamp. Add more stamping to the edges of the piece or words like those from SINM6. Also edge the metal with a decorative wheel, like the diagonal. You can also sand the edges of the metal after using the wheel to make a nice frame.

OK so that's your lot for today ..plenty to be going on with... we are mega fast on shipping at the moment, everything is going out within 24 hours, so what are you waiting for!!!

Don't forget that Tim has started his 12 days of Xmas tags today too, so many ideas and techniques to look forward to. I loved his iwred ribbon idea on Tag 1..I'm off to do that with paper!

And please leave a comment with your thoughts on what you will do with these ideas! I love hearing about what you are up to!