Showing posts with label mustard topic. Show all posts

Saturday, 9 February 2019

2019 #1 Mustard: and BlueZzzz with Hot Picks {by Ellie Knol}

2019 Topic 1: Mustard


From vibrant monoprinting on a cardboard book to exploring mixing translucent Fresco Finish paints, Ellie has brought us a book of delights stuffed full of colour and beautiful Hot Picks images.  


Hi everyone, it's Ellie from PAPER-STAMPS-COLOR with you today, and I'd like to share with you a project using yellow Mustard Pickle Fresco Paint and some beautiful blue colors too. I chose to do some gelliprinting with them on pages of a cardboard book. When choosing these colors I knew that most of them were translucent paints... a few semi and opaque paints.

Why did I choose mostly translucent ones? I've long been wondering what the differences are! Now I know! As I also used some opaques, the mix of them together makes a semi opaque effect and sometimes a green colour of course! I've also sprayed on some water and/or retarder to give it a more watery translucent effect. They are all monoprints, so each page has been printed on only once!


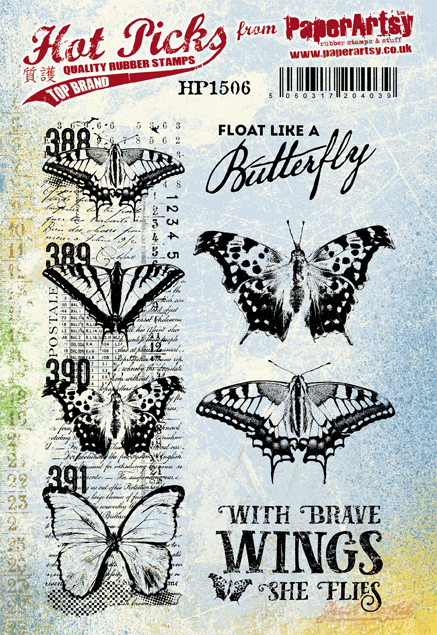
I've wanted to use the HP1506 with its beautiful butterflies on these gelliprinted pages.


I've used these colors of Fresco Finish Acrylic Paints to print and color with:

BlueberryEggplant and Snowflake. LOVE this combination!


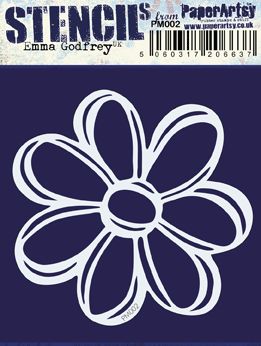
Moving the flower PM002 - PA Mini Mask in the paint on the gellipate and brayering over it, or spraying water gives watery and repeated effects!

Yellow plus blue makes green! Here I've printed on three tags... 


Same process with the PM006 Mini Mask! LOVE the movement this creates on the gelliprints!


Starting with the printed pages now: this uses HP1506; I chose to make this the cover of the page, and used one of the gelliprinted tags also.


On the second page I incorporated a gelliprinted tag and I've used stamps from HP1004 to stamp with.


The third finished page: using one of the butterflies and a script from HP1506 to make a collage.


The fourth finished page uses a piece of a printed tag. The beautiful stamps are from HP1005.


For both the fourth and fifth page I've used the PS092 stencil.


On the fifth page I've used the stampset HP1010!


And finally: the back cover of the book. I've used the butterfly themed stamps from 
HP1506 and throughout the book I've used the BIG script from HP1501.


That is it.. 6 pages finished. I will finish the other six at a later stage.. Work In Progress!You will get to see them in a while! Yes really, in my next post for PaperArtsy!


The mustard yellow makes for beautiful contrasts on these pages, and in combination with  the bluezzz, creates greens.. which I like very much!  

I am happy with the results, and hope you enjoyed it as much as I did making them!
Have a go yourself.. it's fun! 


Thanks for visiting today, and of course I'd appreciate if you left a comment, with a question, or maybe a suggestion for me of what you liked, or liked less?!

See you!! 

Ellie Knol 

Friday, 8 February 2019

2019 #1 Mustard: with Jade and Caramel with EKD {by Lotte Kristensen}

2019 Topic 1: Mustard


By combining mustard, jade and caramel, Lotte has produced contemporary looking projects with a real gorgeous retro vibe. She shows us an easy way of producing your own matching paint sprays and some subtle shading with Frescos too.

Hi everyone, it's Lotte Kristensen here today, and I've been playing with some of the older Eclectica stamps from Kim Dellow - the EKD01.  This is a brilliant stamp set, because you can do so many different things with it: stamp and colour in (which I did with the first card) or using the stamps as design features, as I did with the second card.  Yeah, I got a bit carried away, so thought I might as well share both with you!


Now, since the topic is Mustard, I looked at these stamps and thought that they reminded me of that wonderful 1950's interior design, so I decided that the Fresco Finish Acrylic Paints in Jade and Caramel would provide a nice contrast and give me that sort of retro vibe I was after.  

For the first card, I cut a piece of 300gm watercolour paper measuring 4.5" square, stamped the balloon flowers and leaves in Versafine Onyx Black, and let that dry thoroughly.


Next, I painted the images with thinned down PA Fresco Finish Acrylic Paint in Mustard PickleJade and Caramel.  This combination is really zingy!


The way to achieve shading is done by wetting the image with clean water, before adding thinned down paint; slowly adding more to the lower parts of the image whilst keeping the top lighter.  If you find you've put on too much paint, it's easy to remove it by dabbing once with a piece of kitchen roll or a baby wipe (one dab at a time, or you might end up adding unwanted splotches of colour!).


I used the circle stamp - holding the smallest circle on my fingertip (i.e, not on a block) and stamped randomly in Archival Ink/Paradise Teal.  I stamped the sentiment in Versafine Onyx Black, and some more circles in Archival Ink/Chrome Yellow and layered onto black cardstock' leaving a 1/16" edge.  Finally, I layered the entire piece onto black cardstock, again with a 1/16" edge, before sticking to the front of a 5" square kraft card.


Looking at this card, I can almost hear cool East Coast Jazz playing in the background!

For the second card, I cut a piece of watercolour paper as before.  This time I made up some paint sprays by mixing a little bit of the Fresco Finish Paints in Mustard Pickle, Jade and Caramel with distilled, boiled water.  I used some tiny atomiser spray bottles, adding the water with a pipette.  You want quite a thin spray, so about 1/6 of paint to 5/6 water.  Next I sprayed the watercolour paper with plain water, before spraying with the Jade MYO (make-your-own) paint spray.  I dried this with a heat gun, before spraying with MYO paint spray in Mustard Pickle, dried, then a wee squirt of MYO paint spray in Caramel, and then a wee bit of Infusion Dye Stain in Slime.  Dried with heat gun, and then got ready for stamping!


Using Archival Ink Pad/Garden Patina, I stamped the larger circle stamp randomly all over; next, stamp again using Archival Ink Pad/Chrome Yellow.  After that, stamp the smaller circle stamp in Archival Ink Pad/Paradise Teal.  On a piece of watercolour paper measuring 4.5" x 1.5", I stamped the leaves in Archival Ink/Paradise Teal, then layered on black cardstock, leaving a 1/16" edge. On another piece of watercolour paper, I stamped the sentiment in Versafine Onyx Black, then stamped the larger circle stamp in Archival Ink Pad/Chrome Yellow, before trimming it down and layering on black cardstock, again with a 1/16" edge.  Once I'd decided where these pieces would go, I stamped the leaves again in Versafine Onyx Black before gluing the panel onto the front.  I finished off by layering onto black cardstock, once again leaving a 1/16" edge.


As I'm really into Kraft cards at the moment, I used one again for this project!


So, both cards together - one stamp set, two different looks.  It's great being able to get so much out of your stamp sets!


I liked both processes - the stamping and colouring in on the first card was quite peaceful (I don't like calling it mindfulness!!) and I liked the vibrancy of the colours against the plain white background.  The second card was more experimental, because you don't have quite as much control over where the paint spray goes, but I like the unpredictability of this, because you usually end up with lovely marbled, colourful backgrounds, ready to stamp and collage with.  It's so much fun making your own paint sprays too - and of course you can mix your own colours as well!

I hope you feel inspired to have a go yourself,

Kind regards, Lotte x

https://www.instagram.com/alice_overground/
https://www.facebook.com/aliceovergroundartsies/
www.aliceoverground.blogspot.com

Wednesday, 6 February 2019

2019 #1 Mustard: A Box Of Delights with ESN {by Miriam Grazier}

2019 Topic 1: Mustard


From a leftover to a box 'choc' full of beauty, Miriam's mustard combination takes on an almost rust quality. It wonderfully showcases Sara Naumann's new stamps too. 
Stockists info for new 2019 products available here

Hi everyone, it's Miriam with you today, and I'd like to share with you a re-purposed box that I have decorated.  

Most of us would have received or bought chocolates of some form over the festive season.  I was lucky enough to receive some truffles that arrived in a box that I knew, automatically, I would not be throwing away.  Obviously this meant that I HAD to eat all of the truffles (hard job, I know!).


I loved using a simple colour palette, a palette that I love to use.


The box, itself, was quite shiny.  Fresco Acrylic paint has an amazing coverage, but just to be sure, I gave the box a very light sanding to remove some of the gloss shine.  I then added a coat of Koala Fresco Finish Acrylic paint.


Sara's new release is perfect to be used for so many colour themes.  I love the boldness of the stencils.  They were great for this project, the code is PS123.


For the leaves I used Fresco Finish Chalk Acrylic paint in Caramel which I thought had a warm mustard feel to it. 


I didn't want to stamp directly onto the box, although the detail of these stamps, teamed with the quality of the paints would have worked well.  Instead I created separate panels.  


I used ESN33 to stamp the main images, using CaramelMustard Pickle and Twilight paints.


I love how these colours look together - they are as lovely as a box of chocolates themselves!


I really enjoyed creating this box.  I had planned initially to give it away but am now thinking of keeping trinkets in it.  I loved the colour palette that I chose.  The mustard colours are really warm and the touch of the cooler Koala and Twilight really compliments them.  


I had initially planned to edge the panels with Caramel but when I put them next to the decorated box I thought that it needed the contrast and so went back over and edged them using Twilight.  It really is personal preference though - which is why I love crafting so much.  We could all use the same products and create totally different things.


I hope that I have encouraged you to have a go - maybe you can look at some of the packaging that you received over the festive period and re-purpose that instead of throwing it away or recycling it.    


Thanks for joining me this evening.  Pop over to my blog to see how I created this in more detail.
Miriam


Stockists info for new 2019 products available here