Hello everyone Etsuko (@pixienes ) here with you today and I'd like to share a little spool journal I’ve made using Hot Picks stamps.


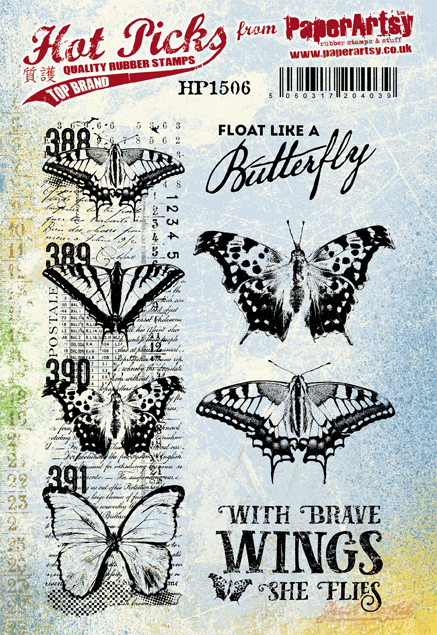
I’ve been wanting to try making a journal using small spools of thread for quite some time now. The theme I was given this time was the Hot Picks stamp set. I believe this was PaperArtsy’s very first original A5-sized set, and I always find the number of stamps, the variety on offer and their versatility extremely useful. Today, I focused on the butterfly from the Hot Picks stamp set 1506EZ (HP1506EZ), whilst also adding two moth designs Hot Picks stamp set 1109EZ and 1104EZ (HP1109EZ and HP1004EZ) to my selection.

For the paint used to colour the butterflies, I chose five vibrant colours, from the left of the page: PaperArtsy Fresco Finish Chalk Acrylic – Green Patina, Southern Skies, London Bus, Persimmon and Banana; and for the background of the journal, three more subdued colours: PaperArtsy Fresco Finish Chalk Acrylic – Wisteria, Blue Oyster and Lemon Meringue. I’ve started working with these lovely PaperArtsy Fresco Finish Chalk Acrylics.


I created some layered material to add to the background of the journal. I applied PaperArtsy Mattint—Bellflower, Dragonfly, Glow and Shadow—or watercolours onto PaperArtsy Printed Tissue Hot Picks – Blank (PT10), and placed a sheet of copy paper underneath to prevent the glaze from bleeding through. This resulted in a pattern as shown in the illustration below, so I used that as a layer too.
Blank Tissue is an essential item for me; I simply cannot do without it when I’m working. For example, I can use it to apply a sheer layer of colour to alter the look of the background, or stamp an image and colour it from the reverse to create a focal point, or even use it to position the stamps I’m using. It can also be crumpled to create surface texture, and there seems to be many more uses for it yet.

I applied Mattints and watercolours to a sheet of tissue paper using a flat brush.

These are the sheets of copy paper that collected colour as underlays.

For the journal’s band, I glued together three 2-inch-wide strips of Smoothy (Heavyweight) A4 white stamping card, cut to the width of the spool. I then applied Fresco Finish Chalk Acrylic – Wisteria, Blue Oyster and Lemon Meringue – using PaperArtsy Brayer as the colours were a little pale, I added some Persimmon to create the base for the background.

To finish off the background, I arranged torn-up sheets of copy paper and the tissue paper cut into circles as shown in the diagram below.


Now let’s create the butterflies and labels, which are the main features. To ensure the butterflies—the focal point—stand out, I coloured each one in a vivid shade. The colour scheme for the butterflies on this screen uses, from left to right, Banana, Persimmon and Green Patina; I blended the colours so that the boundary between Banana and Persimmon forms a gradient. Initially, I cut them out right along the edge of the stamp to blend them into the background, but after checking the contrast with the surrounding area, I left a small white border around them.


As well as the HP1506EZ, the ‘Hot Picks’ section featured a butterfly from the HP1109EZ and moths from the HP1004EZ and HP1009EZ, so I’ve included them here and coloured them using Wisteria and Southern Skies in addition to the three colours mentioned above.


To make the labels, I combined all four ‘Mattints’ colours with an additional shade, ‘Mattint- High Viz’, and applied them to Smoothy (Heavyweight) A4 white stamping card to create the base. I then used the HP2402 and HP2602 stamps to produce the labels.

As I wanted some slightly thicker embellishments, I dyed several types of fabric using some powder pigments.


I stamped an HP2602 butterfly hair clip onto a piece of paper, coloured it, attached it to an O-ring, and applied a thick layer of resin to create a decorative element for the end of the string used to bind the journal.


Now that the base and components for the journal are complete, I’d like to share the details with you. Please do have a look. It’s a bit long, so it’s a shame I can’t show the whole thing on one screen, but I’ll go through it frame by frame.

The first frame.

The second frame.

the third frame.

the fourth frame.

the fifth frame.

the sixth frame

the final frame.


Finally, I’d like to show you the finished piece, featuring the embellishments I made from resin and the coiled design.


Place the dyed fabric beneath the label so that it takes on a slightly three-dimensional shape, and stitch it in place to help it adhere to the background.


I layered some fabric and secured it with eyelets to make some embellishments.

Labels, stamps and small round labels, made in the same way as the first ones.

As I kept unravelling and rewinding the paper time and again for the photo shoot, the stiff paper became creased and wrinkled; the tips of the butterflies started to peel away, and after gluing them back on repeatedly, they were on the verge of breaking—it was a close call, and I nearly ended up with a half-baked vintage journal. However, I’m delighted that I managed to pull it together and was able to show it to you all. I’d like to thank you for stopping by today.
Etsuko xxx