Showing posts with label FP028. Show all posts

Thursday, 2 February 2023

2023 Topic 02: Tetradic Colours {by Ellie Knol} with France Papillon Stamps


Hi everyone and a good day to all of you! Ellie Knol (PAPER-STAMPS-COLOR) here with you today.

I've been enjoying some creative time lately. This topic, Tetradic Colours had me thinking about playing with colors still in the classic yellow, red and blue combo but diverging from the bright primaries commonly used.

First I chose PaperArtsy Fresco Finish Chalk Acrylic - Blueberry It's a purplish blue which has quite a lot of red in the mix. I also chose Claret, a dark wine colour with a purple undertone. I completed my base with Yellow Submarine which is a warmer yellow then the usual primary one. All are translucent and all 3 colours contain more red than the 'pure' colours of a classic wheel. To be honest, I was not sure how they would work well together and if they would create interesting mixes.
 
I used these translucent colors to make some grungy prints on the gel plate. It also allowed me to easily incorporate this quarter's ongoing theme of TRACKS - through splatters, mark-making and repeat-stamping in the printed layers. I'm looking forward to sharing with you how I managed to balance all 4 colors within one project.


    And yes: this post has something to do with collage fodder! Read on to find out!


I had to do some reading before creating this particular color wheel. I am not new to color mixing, but still had to question 'what is a Tetradic Colour scheme'? I learned that it's 2 couples of  complementary (opposite) colors, making four colors in total. A 12-segment colour wheel will create 3 types of tetrad: a square, rectangle and slim rectangle, so lots of options to choose from. 

These are the 3 colors I chose to create my 12 segment color-wheel from: PaperArtsy Fresco Finish Chalk Acrylics - Blueberry, Yellow Submarine and Claret.


After mixing the colors, my plan was to have a big gel printing session, and using some of the prints with France Papillon's stamps. So I got out all the supplies like a PaperArtsy brayer, two 8x10 inch gelatine plates, paper, etc. I also covered my work space with a large piece of white sturdy paper.
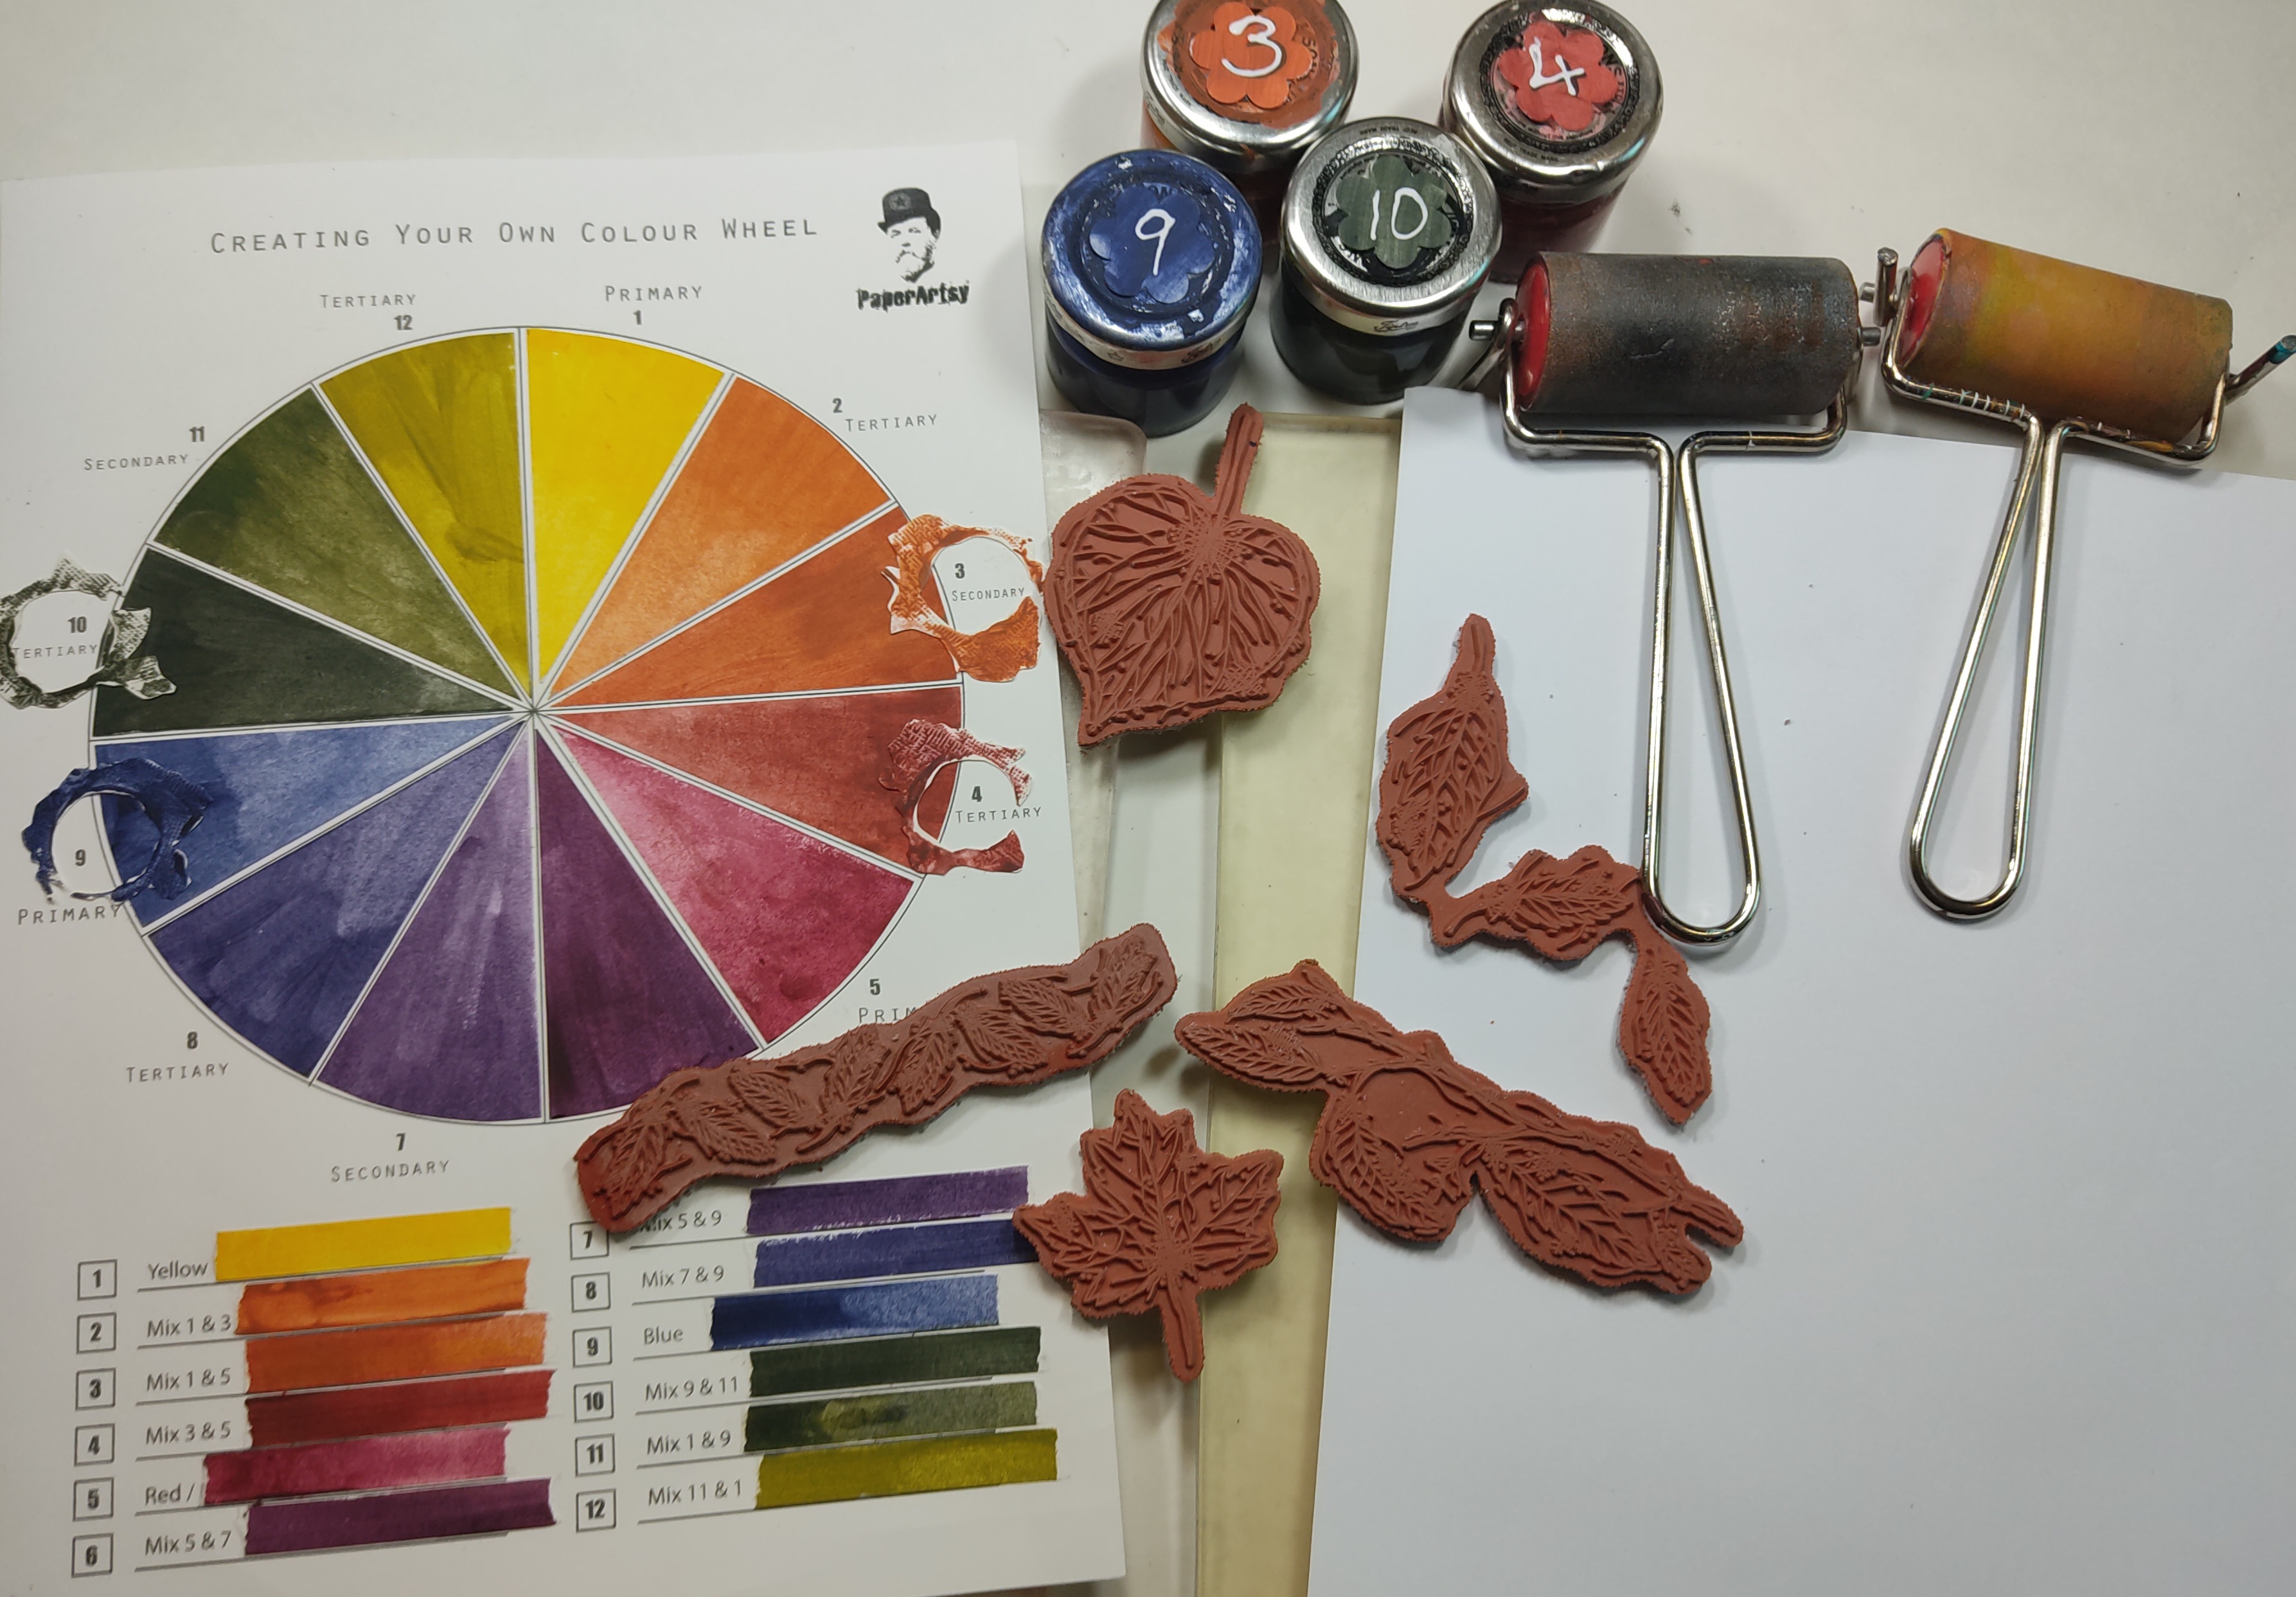


The first step for this project was to mix my colours. I did it in small jars as I was going to use them in more than one stage and so knew i would need quite a bit of each. I did not want to have to mix and re-mix in small batches. A useful tip: I put some clean tiny stones in the jars to help mix up the paints. 


Filling out the color wheel was fun, but so messy, lol. Once it was complete, I tried several combinations and chose a "skinny" rectangle Tetradic color scheme using the numbers 9, 10 and 3, 4 on the wheel. I stamped the colors onto a separate piece of cardstock and adhered that to the wheel for you to better see my selection. I like the look!


Don't judge .... but when I chose these colors I did not realise they were going to match the colors on the stamps packaging!! What are the chances! I chose France Papillon stamp set 28 (FP028) and stamp set 30 (FP030) for the main images and they are coloured with oranges, blues and greens! It really was pure coincidence, I only realized the match when I took this picture! 


Now the phase of the color scheme is ready; let's dive into the next step and get painty!
 

One of the tip given to us from PA HQ guidance for this topic was that Tetradic colour schemes can work well when you choose one of the four colours to be dominant, and the other three as contrast and accent colours. This prevents your project from appearing too busy or unbalanced. I therefore chose a prevalent colour for each of my prints, and off I went! I will not share the details of each of my prints as there are quite a few of them and each one is different but will give you a general idea of my process.

I had one big concern of course: while brayering the colors onto the plate I risked mixing them and creating even more colors. As the slim rectangle tetrad contains 2 groups of complementary colours, the potential for mud was high! Did you know that 2 complementary colours mixed into each other will make brown? So I was  careful to let the colours dry completely on the plate before adding the next one.

I do like to build layers on the plate. Starting with my darkest colour, I put green #9 from my tetrad, just around the edges, in a very thin layer. Using France Papillon stamps, for example, the letters from stamp set 28 (FP028) here, I stamped into this layer with the clean rubber to pick up the colour and stamp it off elsewhere on the plate. After carefully leaving this color to dry, I then repeated this process with the blue, color #10 of the wheel. Adding the red-orange (#4), and orange (#3) the same way will create 4 layers. I chose to keep them really thin.  Remember that all my paints are translucent so all the details of each layer can be seen.


Here is another tip: As you can see I used two gel plates at once. That way I can brayer off all excess paint onto the second one, saving a lot of paint and creating two gorgeous prints at the same time! After all these layers are built on the plate and dry, I pulled the print with PaperArtsy Fresco Finish Chalk Acrylic - Snowflake, for a unique and beautiful result each time.

For other prints, Paper Artsy Stencil by France Papillon (PS347) gave me some extra patterns options on the gel plate. I love the row of leaves along the side!


On some of the prints I only used two of the color mixes, eg. green and blue. You can some examples of my tracks in the prints: repeated elements and patterns from the stamps and stencil, deliberate texture and accidental mark making (there was a hair on one of the plates and the mark ended up on the print of course!).

I also brayered the green and blue onto the plate alone to create an 'ink pad' to stamp the birds with onto white cardstock. These images will be easy to use in the project as they coordinate, or can be saved as collage elements for future fun.


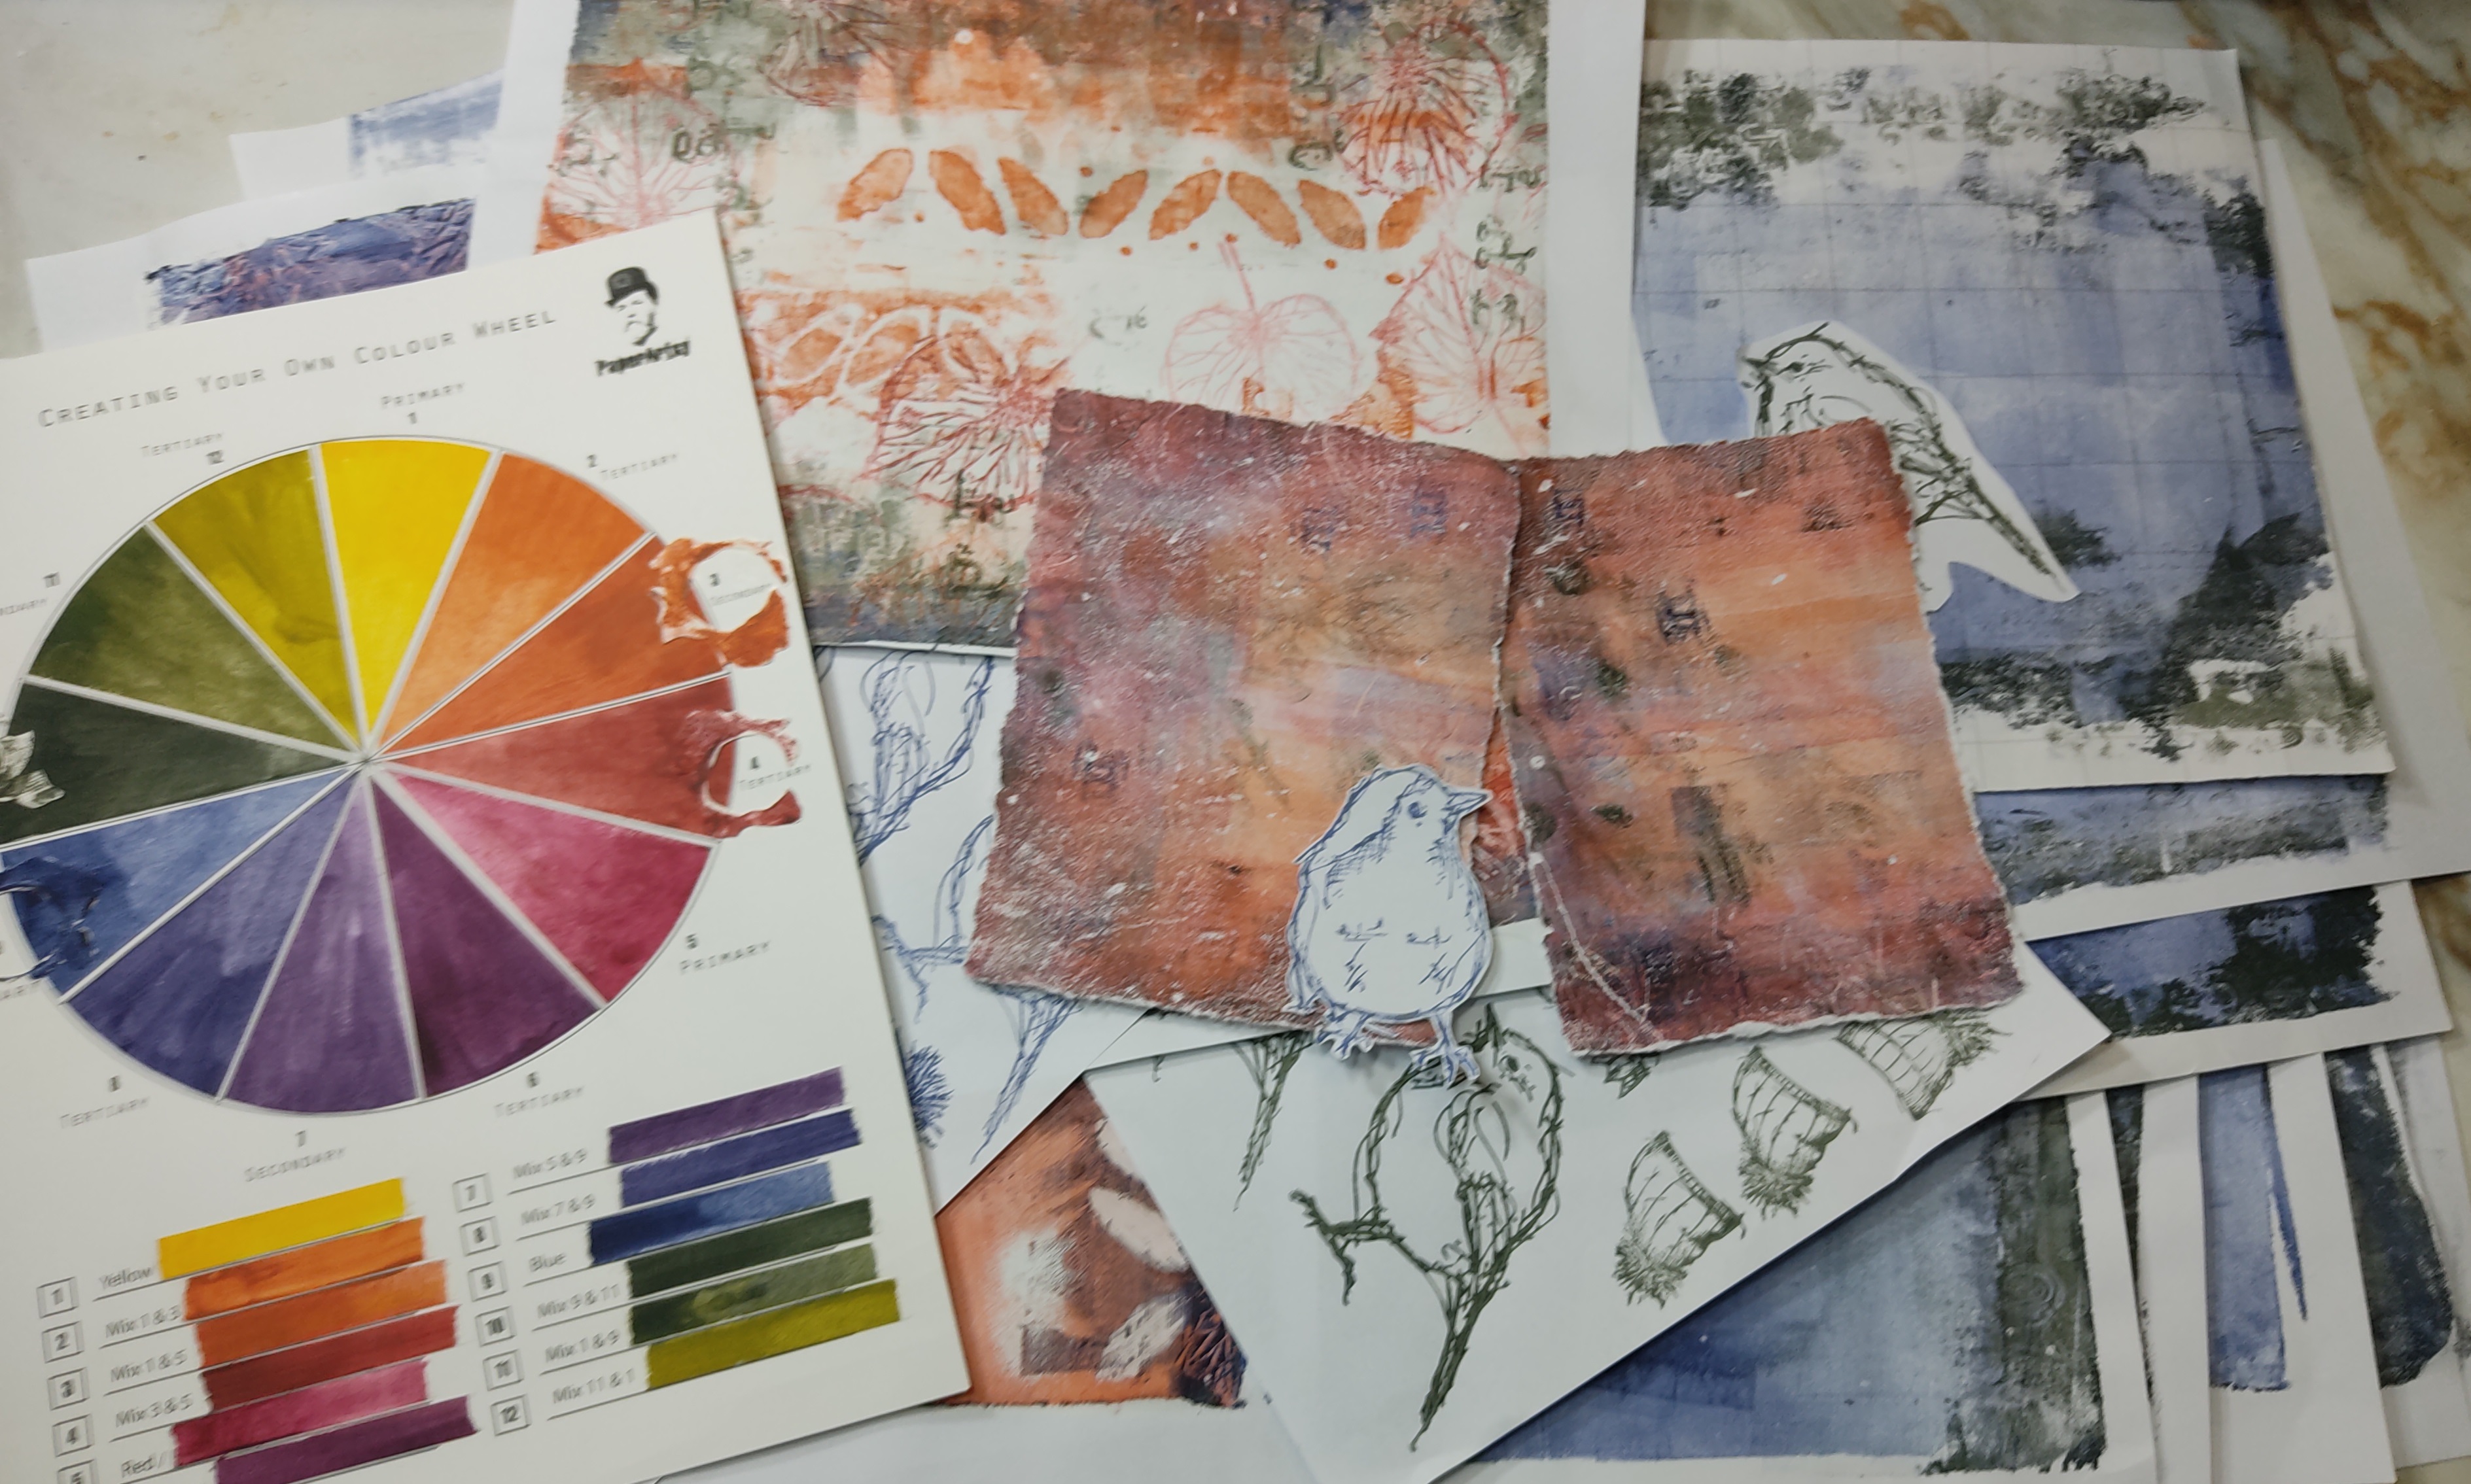
This picture contains only 6 of the 30 gel prints I made. It was a difficult to choose ONLY one of these prints for the actual project. In the end I chose a grungy red/orange one that only had a tiny bit of the green/blue in it. It's hard to believe but it was my first pull of one of the 2 gelatine plates! Apparently the rest of the session was just for fun.

I decided to make a pair of booklet covers so I tore the print in half and then to size. Here is my final choice, among its fellow prints.

To contrast, I painted the cover blanks with green #9. I also added a piece of cotton below the print to separate it from the background and make it pop.
 

Now that my base is ready, it is time to decorate it, with a few changes in direction along the way.


For one, I was convinced I was going to use this bluish print for the project. In the end, I chose another one but it still is my favourite print in this session.


I also planned to use the birds stamped in blue and green Fresco-mixed-colors as focal elements. However these proved tricky to fussy cut and I could not eliminate the white border as much as I wanted. I decided to stamp them directly onto the background.


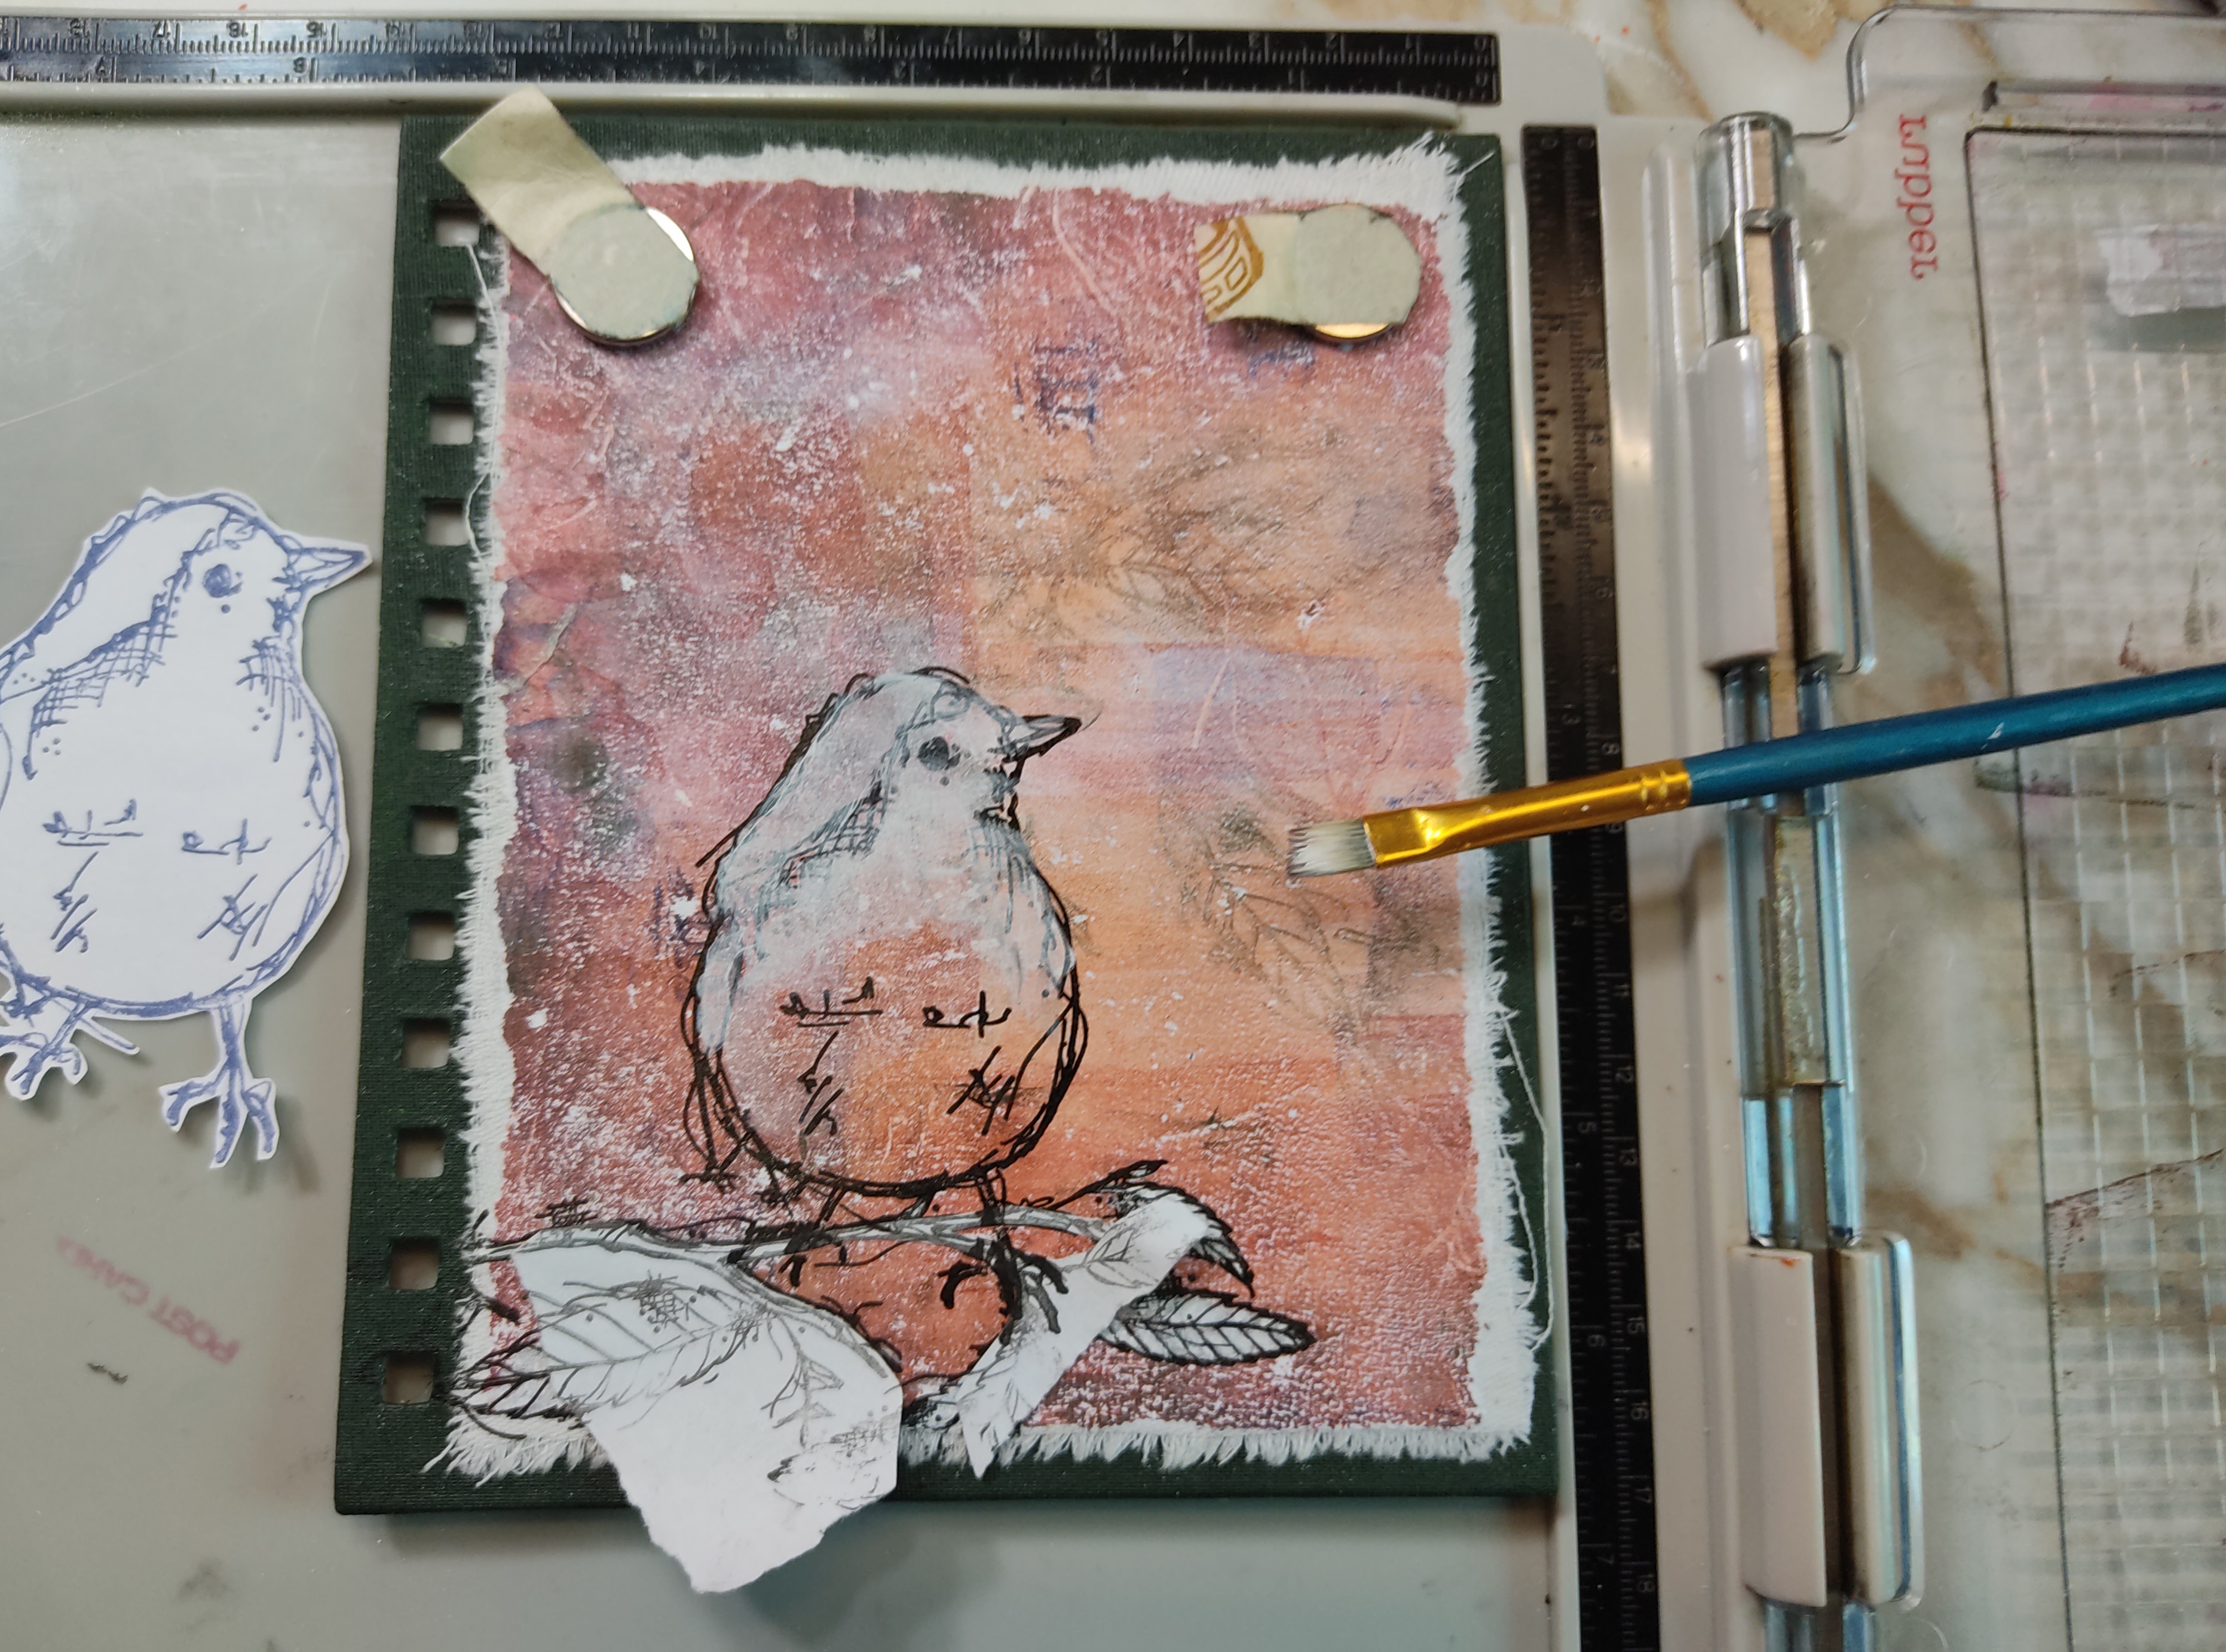
To make this easy, out comes the stamping platform! I started by stamping the branch  from France Papillon stamp set 29 (FP029) image with a black ink, painted with a white acrylic, stamped again once the paint had dried and heat embossed it in clear. I then followed the same steps for the bird from France Papillon stamp set 30 (FP030). I was careful to mask the branch to make the bird 'sit' on it properly.


There you go! A crispy and light birdie on a branch! 


Do you see the word 'fodder'? These are stamped with a black ink and heat embossed alphabets from France Papillon stamp set 28 (FP028)! Such a versatile set!


As the paints I chose initially are all translucent, I could then come back with my mixes to add some colour depth to the focal images to make them pop off the background.


White acrylic pen lines also add depth and interest! I added some more fussy cut alphabet letters (from Ink and the Dog: Words plate 3 - W3) to create the word 'collage'. White splatters? yes please! Orange splatters: also yes! Best way to animate a background!
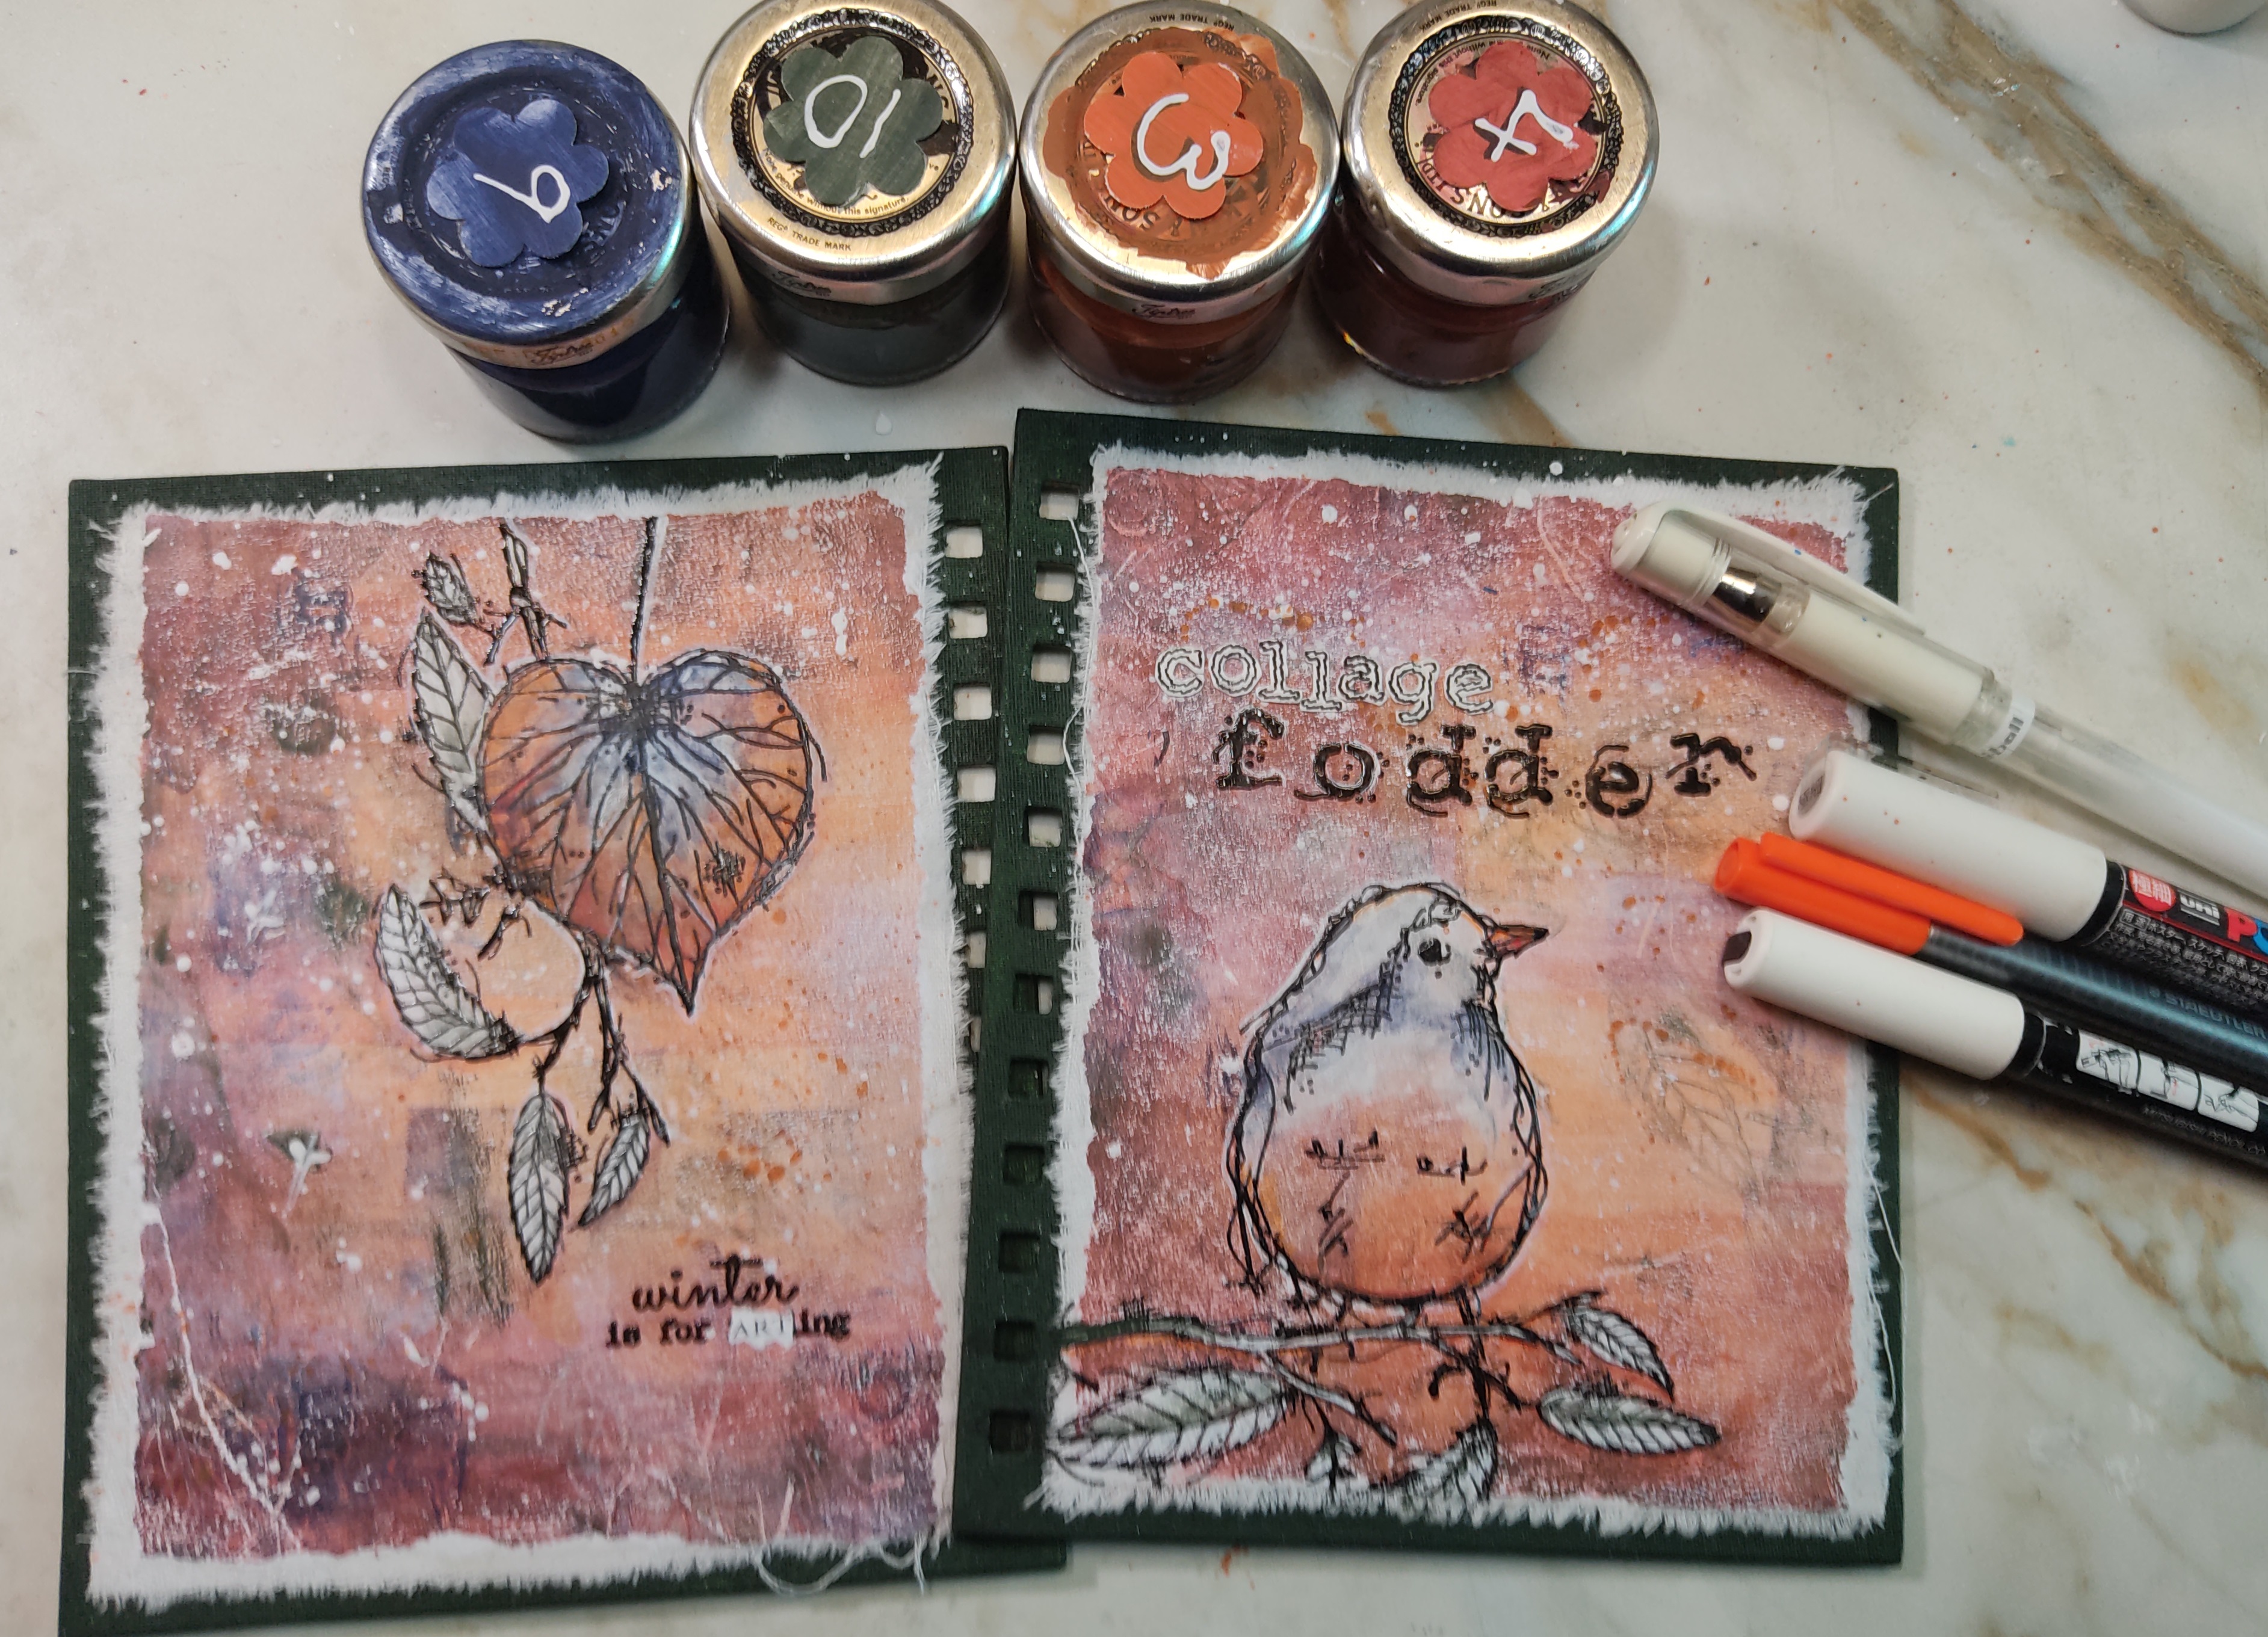

Finally, I only had to re-assemble the booklet and close the metal spiral, all done! I LOVE the front! The torn edges of the cotton and papers add to the feel of the project.

 
The booklet is not actually filled with paper pages but with plastic pouches. I found a pack of 30 in a thrift store for an euro, quite a bargain! I can therefore fill the book with some collage fodder to be used in future projects.


A close up of the words and bird on the front cover.


The back cover is full of tracks: a hair left a white line on the print in the left lower corner, such a happy accident!


Did you notice? I changed the quote from France Papillon stamp set 30 (FP030) to read "winter is for ARTing" as a sentiment on the back cover. I used a piece from a PaperArtsy correspondence card: the word art is all over the place :)


Enjoy some more pictures.


I loved making this collage fodder book. To be truthful, I would never have tried mixing these three colors by myself and I am glad I signed up for this topic as I learned a lot! I was particularly happy with the very deep green it created.... a moody green I will call it.

Would I change any of the process? I don't think so. When come the time to write the looong post I always think I should limit my steps, lol. But it is difficult to achieve for me... I hope you don't mind!

Create and relax with making art, or read a book in winter, as France suggests...


Facebook: https://www.facebook.com/EllieKnolCrea/
Instagram: https://www.instagram.com/ellie.knol/

Monday, 24 October 2022

NEW PaperArtsy Products: France Papillon Collection {October 2022}


A note from Leandra:
France Papillon has created 3 gorgeous autumnal/wintery sets; a handy alphabet that incorporates her personal trailing-leafy-flourish style, autumnal leaves that you can absolutely see floating downwards in the chilly breeze, and the most gorgeous winter birds that I think are a fabulous size, and beautifully drawn. These will tick a lot of boxes for sure! Of course she has also created 3 regular stencils that complement each set beautifully. All these designs will work so well for both Christmas cards/tags/wrap as well as journal pages. I think these designs have a timeless elegance that offers superb versatility.
 
France will be along to share with you LIVE her new products and ideas over in our facebook Group, PaperArtsy People shortly after this post publishes. I hope you can drop by for the live, or try to catch the replay. it's fantastic to hear direct from the designer about each new release and get a better understanding of what she sees as the possibilities!!
 
For the next few months, these stamps are only available EXCLUSIVELY from our approved stockists. Please check the list at the foot of this post to find a retailer online or geographically near you, it makes sense to order within your country where possible.
 
Hi everyone,  France here

I'm super excited to share with you my newest release for PaperArtsy. 3 stamps and coordinating stencils.

This is my first ever seasonal coordinated collection launch and it does give that extra little special feeling to it for me. I hope you will feel the same way!


Price: RRP €23.00 +VAT
Size:5" x 6" (13 x16.5cm)
All stamps are individually trimmed onto cling foam, presented in a clear hanging bag
with a laminated storage/index sheet.

  
France Papillon Collection Set 028 (FP028)

The art journaler in me just had to kick this off with an ode to my art journal, which is, in essence a visual diary. And I'm sharing a secret right with this very first photo: stamping in a journal, especially right over the center can be tricky! But as I knew I was going to use a colorized version of the stamp, all I needed were the scribble lines and the major outlines of the design.
 

Once glued down, no one can tell the stamped image underneath isn't really ok, right? Let that be our little secret please ;)
 
 
To make the wording stand out, I added a touch of glossy accents over the stamped letters. It just makes them pop off the page!


France Papillon Collection Set 030 (FP030)
 
When I designed this set, I did it with the idea in mind that I want those hand to be able to hold not just that cup, but also that I wanted one of the leaves to look like a heart. So of course I had to play with that on this art journaling spread! I stamped and colorized the hands, the leafs and the branch on Smoothly card and trimmed them. And I stamped the same images in my journal. 
 

Once done, I could start gluing everything in place. And of course you can add little leafs to the branch.
  

The leaf sits perfectly in the hands, like an autumn heart. Can you imagine the endless possibilities of stamp combination with the hands?


France Papillon Collection Set 030 (FP030)
 
I really wanted those robins to have center stage on this spread, to play the major role. So I kept it as simple as possible, with them being the only real color accent on the spread! And the two bulb hangers from the set will allow you to turn anything into a Christmas decoration. Yes, even the birds!
 

He already looks dashing if you ask me. Nonetheless, you can even have them wear the little hats from the stamp set.
 
 
I used the set in a journal, but on a card, it will work just as good, if not better! And we need to vote: with or without the hats? What's your favorite?


Regular Size: 6.5" x 7" (16 x 18cm) Price: RRP €5.64 + VAT
  
PaperArtsy Stencil 347 by France Papillon (PS347)

Combining the leaves with the branch was already fun to do. But adding the little circles from the stencil just made it 'autumn meets winter' in one go!
 

For these leaves, I used the border part of the stencil. Just taping off the openings so that I could just use one leaf over and over again.
 

For this spread I used the elements as focal points, but of course they could just as well be part of the background. To create a leaf pattern or just a grid, using the branch.


PaperArtsy Stencil 348 by France Papillon (PS348)

One of the ways I like to use stencils, is by tracing the image on a colorized piece of paper, trim it and use it as a focal point. This works perfectly with these birds!
 

At the same time, the lines of the bird at the bottom of the stencil are done in such a way that just colorizing them in the softest way will still give you a very clear image.
 

Combining the tracing and colorizing allowed me to have 11 birds on this small spread! And that is exactly what I was going for, I wanted all the birds I could have on this spread, using just this one stencil!
 

PaperArtsy Stencil 349 by France Papillon (PS349)

No, the stencil doesn't say birdy. And yet... these letters do allow for some playing around! And I have to admit that I'm in love with the robins' little tummies. Don't they just look cute?
 

If you too want to create those cuty little bird tummies, keep on reading! I'm sharing how I did it in the final project of this post :)


Birdy bookmark


I made a bookmark, using the birds as charms.


First I used FP028 to stamps random letters on a piece of Smoothy card. The paper already had a bit of hickory smoke distress oxide on it. So when pushing the letters back by blending them with a bit of water, the first layer got reactivated, which made everything blend in nicely together.


I applied Distress oxides over PS347 and PS349 to create the little bird on the branch. To have a pretty orange tummy for the bird, use a make up sponge and rusty hinge distress oxides. Then brighten the color with a bit of lightfast orange neocolor II.


I opted for embossing powder to add the wording. And of course it needed some snowflakes, which is just a good excuse to add splatters with a posca pen ;) To give the little bird some extra glow, I gave it a coating of glossy accents as well once the card was assembled with some black background paper.


I stamped the birds on shrink plastic. Some with a hat, some with the ornament pendant, some I colorized, some I left plain. After trimming, all that is left to do is melt it with the heat gun! If you try this out, don't forget to make the opening to hang them before you melt them!
All that was left to do was to hang the little charms on the bookmark. 

I hope these will inspire you some cosy autumn/winter crafting or art journaling. I'm looking forward to all your creations with these new goodies! Thank you for sharing them with me when done :)


Socials...
Website: https://www.france-papillon.com
YouTube: https://www.youtube.com/francepapillon
App:
Appstore: https://apps.apple.com/us/app/francepapillon/id1603061223
Google play: https://play.google.com/store/apps/details?id=com.francepapillon
Facebook: https://www.facebook.com/StudioFrancePapillon
Instagram: @france_papillon


 PaperArtsy Stockist List

Our stockists are your go-to  source for all PaperArtsy products, and we suggest that you also use the PaperArtsy People Facebook group to source a retailer in your country. Many are members of our FB group and will happily share links to their online stores.

Australia
Bev's Cross Crafts, Spreyton, Tasmania https://www.bevscrosscrafts.com.au/
Crafters Cupboard, Berwick, Victoria www.crafterscupboard.com.au
Memories on the Murray, Murray Bridge, SA  https://www.memoriesonthemurray.net/
Natalie May Scrapbooking, Dover Gardens, SA https://nataliemay.com.au/
Scrapbook Superstore & More, South Penrith, NSW https://www.scrapbooksuperstore.com.au/
The Scrapbooker's Confetti Box, Swansea, NSW https://thescrapbookersconfettibox.com/
The Scrapbook Store, North Perth,WA http://thescrapbookstore.com.au/ 
Time To Create, www.timetocreate.com.au

Belgium
Cart N Scrap Art, Antwerp, www.cartnscrapart.be
Créatelier Caracolle, Liège, www.createliercaracolle.be

Canada
Clipper Street Scrapbook Company, Langley, BC. www.clipperstreet.com
Paper Art Creations Inc, Leduc, Alberta, www.paperartcreations.com/
Scrapbook Centrale, Dollard Des Ormeaux, Quebec www.scrapbookcentrale.ca
Scrap Addicts, Edmonton, Alberta www.scrapaddicts.ca/
Scrap and Bean, Edmonton, Alberta scrapandbean.com/ 
Scrapbooking Fairies, Drayton Valley, Alberta www.scrapbookingfairies.com/
The Paper & ink Boutique, Calgary, Alberta www.paperandinkboutique.com/
The Scrap Yard, Calgary, Alberta, www.thescrapyardcalgary.com/ 

Denmark
Hobbyboden Scrapworld Samso www.hobbyboden.dk

France
Eirl Bancon Cartoscrap, Midi Pyrenees, www.cartoscrap.com
Fée Du Scrap, Saint Sébastien-Sur-Loire, www.feeduscrap.fr/
Horizon Créatif, Ste Jalle www.horizon-creatif.fr
Instant Créatif, La Possession, La Réunion, www.icreatif.re
Katzelkraft, Ingwiller www.katzelkraft.fr/en/
Kerudoc Creation, St Yvi www.kerudoccreation.com
Le Grenier des filles, Pierre Benite
Page de scrap, Saint Pavace, www.pagedescrap.fr/
Scrap Déco Home, Goutrens, www.scrapdecohome.fr/
Toutencolle, Dun sur Avon www.toutencolle.fr

Finland
Heidin Korttipaja, Istunmaki, www.korttipaja.fi/fi
Piia Paper, Kittilä, www.piiapaper.com/fi

Germany
Stempelbar, Berlin, www.stempelbar.de
Stempeloase Munich, Munich www.stempeloase.de
Stempelfee Shop, Hilden www.stempelfee-shop.de
Stempellaedle, Stuttgart, www.stempellaedle.de/shop

Greece
Scraps N Pieces, Kallithea www.scrapsnpieces.gr

Italy
Immagine SAS di Rapaccini, Rome, www.immaginelab.com
Il Negozio Della Mamma Di Cle, Torino, www.ilnegoziodellamammadicle.com
Marte Savona, Savona, www.martesavona.it
Pezze E Colori, Lissone, www.pezzeecolori.it/ 
Piccole Passioni, Siena, www.piccolepassioni.it

Japan
La Wadao, Odawara, Kanagawa, www.lawadao.com
Tiny Dots, Funabashi-shi, Chiba www.tinydots.shop-pro.jp

Netherlands
De Hobbystudio, Genemuiden, www.dehobbystudio.nl/
Doe@ding,Spijkenisse doeading.nl/
Hobbycompleet de Duif, Leeuwarden www.hobbycompleet.nl
Stampingcorner, Capelle Aan Den Ijssel www.stampingcorner.nl

Norway
Hobbygarasjen, Kopervik, www.Hobbygarasjen.no

Spain
Cien por Cien Manualidades, Barcelona,  www.100x100manualidades.es
Ideas 10 Manualidades Y Scrapbook, Bilbao ideas10manualidades.com/
Marakiscrap, Tarragona, www.marakiscrap.com
Scrap & Papers Experiences, Barcelona, www.scrappapersexperiences.com
The Paradise Corner, Barcelona, www.theparadisecorner.com

Sweden
Butik Elva, Staffanstorp, www.butikelva.se

Taiwan
Mandy's Cards, Taipei www.facebook.com/mandy.card.77

United Kingdom
Amelia's Creative Crafts, Studley, Warwickshire  www.ameliascreativecrafts.co.uk
Art from the Heart, Harrogate, Yorkshire www.afth.co.uk
Crafts at The Malthouse, Herstmonceux,  East Sussex, www.themalthouse.co.uk/
Loobi Crafts, Leighton Buzzard, Bedfordshire, www.loobicrafts.co.uk
Papermaze, Ipswich, Suffolk www.papermaze.co.uk/ 
Stampers Grove, Springbank, Lilliesleaf, Melrose,Scotland www.stampersgrove.co.uk
The Artistic Stamper Craft Store, Faversham, Kent www.theartisticstamper.com
The Forget me not Kraft Kabin, Rochford, Essex, www.TheForgetMeNotKraftKabin.co.uk

USA
Artistic Artifacts, Alexandria, VA www.artisticartifacts.com/
Artistic Studio Creations, Fayetteville, Georgia www.facebook.com/ASCbyCrystal
Craftiness, Chatsworth, CA, www.craftinessonline.com/
Ephemera Paducah, Paducah, Kentucky www.ephemerapaducah.com
Everything Scrapbook & Stamps, Lake Worth, Florida https://everythingmixedmedia.com/
Frantic Stamper, Oregon www.franticstamper.com
Free Heart LLC, Denver, Colarado, www.freeheartllc.com/
Joggles, Coventry, Rhode Island, www.joggles.com
PaperCraft Clubhouse, Westbrook, Connecticut, papercraftclubhouse.com/
Qingquing's Stamp Shop, Portland, Oregon
Runaway, Art & Craft Studio, NE Salem, Oregon www.runawayart.com/
Simon Says Stamp, Columbus, Ohio www. simonsaysstamp.com
Topflight Stamps, Irmo, South Carolina topflightstamps.com/

Our brand is only available from established stockists who are VAT/ GST/ sales tax registered and for whom product education is a core principle. If you would like to apply to be a stockist, you can find our more about our supply criteria here.

PaperArtsy Links
Facebook Group PaperArtsy People
Facebook Page PaperArtsy