Showing posts with label ESN58. Show all posts

Sunday, 30 January 2022

2022 Topic 02: Pattern Play {by Claudia Neubacher} with Sara Naumann Stamps


Hi everyone, it's Claudia Neubacher from VonPappe II with you today, and I'm here to share with you an idea on how to use mainly text based stamp sets for pattern making - which isn't something that you would think of in the first (or maybe even second) place.


During my studies at Art University I also learned a lot about creating posters (back then these had to be done by hand!) and using single words, text lines or blocks and the patterns they also are (besides transporting a readable message) as a part of an artful composition. I especially enjoyed my weekly four-hour Friday classes on calligraphy and poster design. 

I didn't question the why back then, but today I'd say it is the rhythm and visual quality of a printed or beautifully handwritten text that not just relaxes and attracts me - because I am visually enjoying the rhythm and order. So when it came to combining the "Pattern Play" theme with some of the new stamp sets from Sara Naumann, I was immediately transported back to my happy times in poster design class and it was the idea of creating text based washi tapes to alter a journal cover which evolved!


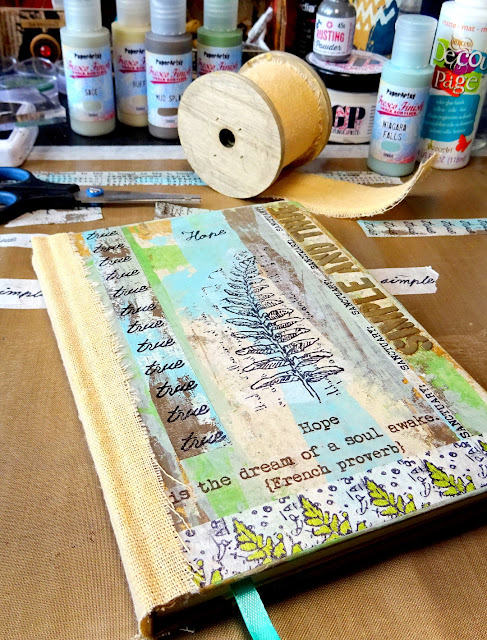
I gathered a blank Kraft journal I found in a dollar store (I am a hoarder of these honestly), a palette knife, stamping ink and a stamping block, PaperArtsy Fresco Finish Chalk Acrylics, a roll of masking tape, two of the beautiful new Eclectica Sara Naumann stamp sets and one of her new stencils and started with some experiments on repetitive text stamping.

I worked on a large non-stick Teflon sheet so the masking tape could be peeled off easily once finished to be used on my planned project. I started working at the top section of my craft sheet to have enough space to continue working while the first strips were drying.

As the stamping ink takes some time to dry on the masking tape, I used that drying time to scrape my Fresco Finish Chalk Acrylics across four more strips of masking tape, creating layers until I was content with the look. 

 
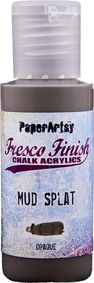
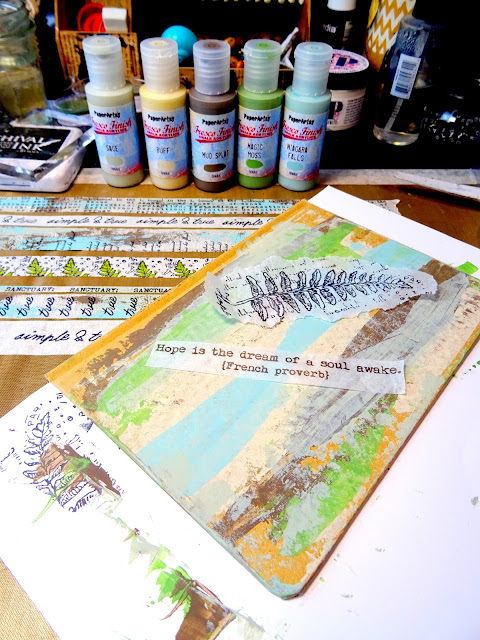
For starters I used Fresco Finish Chalk Acrylics Sage (FF66), Niagra Falls (FF205) and Mud Splat (FF61). I made sure I let each layer dry before I added the next to avoid smudging the paints. The trick to creating these loose scrape patterns is to use very little paint, just the very tip of the palette knife and to hold it real flat while scraping. Lift off the palette knife now and then and continue to scrape in other spots. I usually add a little paint to a palette or directly on my craft mat and pick it up from there.


While the paints were drying, I coloured one of the stamped washi tapes with a green metallic marker (which I found was quite relaxing...it felt almost a bit like colouring a mandala, only not that annoyingly long...lol). For this particular washi tape I simply used the very top of the fern image from the new Eclectica Sara Naumann stamp set 56 (ESN56) and stamped that repeatedly, trying to keep the stamp at the same angle each time. But it is of course the little imperfections of the hand-made that make your mixed media art come to life! So I embraced any stamped fern top image that was a bit out of order.
 

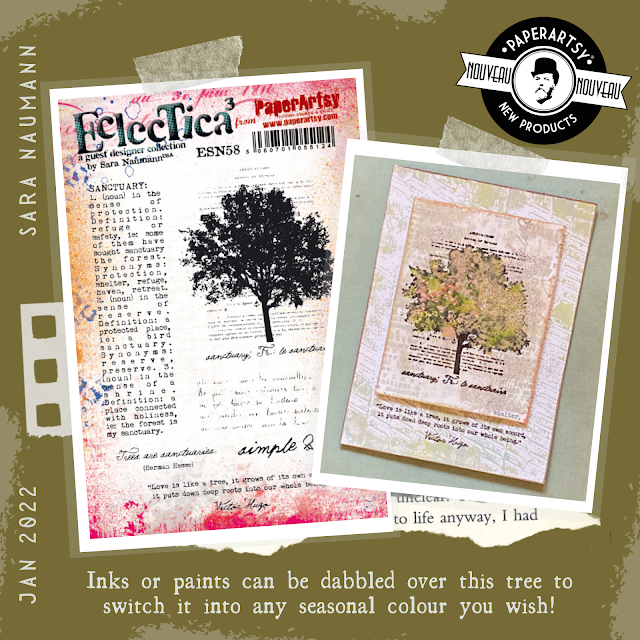
In the meantime the tapes with the scraped on paints had dried and were ready to get stamped too. In this picture I am using a text stamp from the Eclectica Sara Naumann stamp set 56 (ESN56) and Ranger Archival ink (Jet Black). The lovely "simple & true" quote on one of the upper strips in the background comes from the Eclectica Sara Naumann stamp set 58 (ESN58) - the one with the beautiful tree and lots of inspiring quotes.


If you want to just use part of a stamp - like the "true" from this quote - and make sure it always goes in the same position, there's a simple trick: mark the spot where you want the border of the stamped image to align with the washi tape's edge on your acrylic stamping block! To do so just position the stamping block with the selected part of your stamp image face up on your washi tape in the position you want it to go and then mark the bottom of the washi tape edge with the masking tape directly on the acrylic block. When stamping you just need to align the upper edge of that masking tape with the washi tape you're stamping onto.


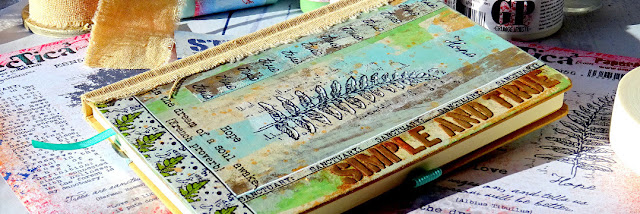
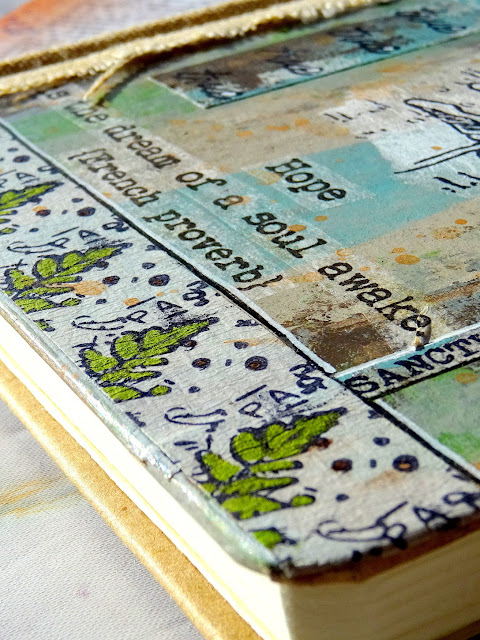
Finally I trimmed some of the washi tapes by gently sticking them to my cutting mat and carefully cutting along a metal ruler with a carpet knife. I then immediately returned the tapes to the Teflon sheet for later use. I will just sneak in a few close up of how they ended up fitting in on the cover.


I cut off part of some of the tape with the fern tops to make it narrower and I also just wanted the "SANCTUARY." as a single word instead of the whole text from that stamp. Here is how that ended up being used as a narrow strip ....


Once I found I had enough self made washi tape (and some more in case my text pattern experiments didn't fit the design I had in mind), it was time to tackle the journal cover!

Pattern play for me also included playing with the patterns created by the tools used to apply the paint and by the substrate's texture - so my plan was to combine the stamped text patterns with the paint scraping patterns on the washi tape and cover backgrounds. Also I was inspired by the lovely fern image on one of the two Sara Naumann stamp sets (ESN56) that I fell in love with at first sight and wanted that as a focal image for a journal with affirmative and soothing character (as I seem to need a lot of calm and positive thinking these days).

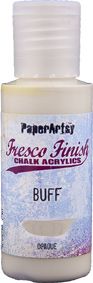
I always like to have all the elements I want to play with at hand and to be able to move them around on my substrate to find the most pleasing design - so I stamped the fern image and the French proverb onto some deli paper and cut and tore the dry stamped images to size. The cover background was created by scraping on the Fresco Finish Chalk Acrylics I had already used on my washi tapes plus two more tones: Magic Moss (FF130) and Buff (FF96). To keep the journal from being stained during the process, I inserted a protective paper sheet behind the cover.


Using PaperArtsy Grunge Paste and Sara's PaperArtsy Stencil 297 (PS297), I added another version of the "simple and true" quote to the design (I already had one version stamped on tape and variation and repetition are always a good thing to have).

 
While the Grunge Paste was still wet I sprinkled on some PaperArtsy Rusting Powder and sprayed that with some table vinegar from a spray bottle to initiate the rusting process. I repeated spraying on more vinegar while I continued working on the cover. To protect the other areas of the cover I simply used a sheet of printer paper to kind of mask these while spraying. 
 

I played around with all my components and only loosely attached the washi tapes so I could remove them easily to try other spots for different designs until I was content with the design of my cover. 


In the meantime I kept spraying on vinegar and slowly but steadily the rusting process started to show just beautifully!


You can see how the rust colour travels with the vinegar liquid to rust-stain around the letters and into texture too...


During the designing process another benefit of using stamped images and quotes on tissue or deli paper started to show; I found that by cutting the stamped fern image and quote into sections I became even more flexible with my design! 


I found that my journal needed some haptic texture as well to go with the visual one, I added a strip of rough linen ribbon to the spine after I had glued all the stamped images and washi tape strips to their spots. I used DecoArt Americana Decou-Page (matte) and a wide soft brush to glue everything in place. I also covered the tape strips with a layer of the decoupage glue to make sure they stayed in place and wouldn't come off during use. 


I also added some tape strips to the back cover and the insides of the covers to round up the look of the journal and bind it all in. Especially the cool flap pocket on the back cover's inside needed some special highlighting! 
 

This way even left overs of tape strips I had used on the cover were used up and also helped unify the design throughout the whole journal! 

It had all come together just beautifully! For final touches I went in with a white Sharpie and added little highlights to the fern image for a bit of depth and also coloured the little loops of the "e"s with every "true" on the self made washi tape - this way these became a kind of pattern on their own with the regularly recurring white dots in one vertical line! I also traced the edges of some of the added tape strips with the white Sharpie and a black ink marker to visually bind in the black and white from the stamped focal image and to emphasise the strip design.
 

I love how the texture from the scraped on background, the clean focal image and stamped repetitive words, the subtle white highlights and the grungy feel of the beautifully rusted quote all work together! 


The rhythm of the fern leaves gets repeated by the rhythm of the repetitive words on the hand made washi tapes! What a great match!


Combining textural media like the PaperArtsy Fresco Finish Chalk AcrylicsGrunge Paste and Rusting Powder with the linen ribbon and with applying the paints in a highly textural way I got a beautifully worn and weathered looking mixed media piece! I definitely love my new affirmative journal as it really gives me a soothing and calm nature feel in every way - and isn't that fern image just lovely! 


Using only sections of stamp images for repetitive stamping to create your own washi tapes is such a rewarding thing to do! Be daring - experiment! 


As I have, you will end up with some designs that don't work well enough to create striking patterns - but you will develop an eye for it! Looking at text as a shape or pattern instead of just seeing the message it transports will open up new possibilities for striking designs with that graphic intellectual touch! 

Claudia x

Thursday, 20 January 2022

NEW PaperArtsy Products: Eclectica³ Sara Naumann {January 2022}


A note from Leandra:
I am sad to be at the end of such a wonderful release week. Normally this time of January, we would be announcing these products from the USA trade show. We would be teaching classes to retailers, sharing lots of IG and FB lives of the show and our activities, and enjoying the buzz of a trade show. Then we would be in Frankfurt for the last week of January, for a European repeat, but that has been cancelled. We are thankful for the second year of no trade events, we have still managed to release new products for January, and continue our normal release schedule with full involvement from our stockists regardless. 

Sara's release is loaded with beautiful botanical imagery, and contrasted with glorious geometric stencils. I love the colour scheme she has picked, and I love all the reverse stencilling and painterly layers she creates. 
 
Sara will be along to share with you LIVE her new products and ideas over in our facebook Group, PaperArtsy People shortly after this post publishes. I hope you can drop by for the live, or try to catch the replay. I love to hear direct from the designer about the concepts and story behind their release.
 
For the next 3 months, these stamps are only available EXCLUSIVELY from our approved stockists. Please check the list at the foot of this post to find a retailer online or geographically near you, it makes sense to order within your country where possible. We have also added a tab at the top of the blog home page with stockists for easy access too.
 
Hi everyone, Sara Naumann here.

I'm super excited to share with you my newest release for PaperArtsy, three stamps and coordinating stencils.

Many of you know I'm from Oregon—and those familiar with Oregon know it's famous for its natural beauty. We Oregonians love our places of nature, meaning the wildfires that affected the area in the past couple of years have been devastating for not only the environment but also weighed heavily on our hearts. 
 
Yet what we know is that nature does its best to regenerate, for trees and plants and forests and also for humans and their hearts. I wanted this release to reflect the notions of hope, sanctuary and regrowth, a little spark of optimism as we march steadily into a new year.
 
For this series of projects, I found myself reaching for rich, earthy colors and fell in love with the combination of Tracy's Aqua Duck Egg, along with Cayenne and Slate. The process of dirty-brayering and reverse-stenciling helped me let go of some of the "shoulds" I often feel and enabled me to create with a bit more spontaneity.


Price: RRP €21.92 +VAT         Size:5" x 6" (13 x16.5cm)
All stamps are individually trimmed onto cling foam with a laminated storage/index sheet.

  
Eclectica³ Sara Naumann Set 56 (ESN56)

Botanicals and text are such a perfect combination for card focals—all you need is a little dirty-brayering (more on that later) and maybe some embossing powder for dimension and no-smear detail painting.
  

Dirty-brayering is just what it sounds like: You know when you're painting, and you have little bits of various paint colors on your craft mat? Don't bother cleaning the brayer or the mat—just roll across that dirty mat with your dirty brayer, then onto white cardstock, and let the magic happen. My tip? Use a light touch and leave some white showing to reduce muddiness. Here I've got Limelight (a favorite), GrapeFront Door, and StoneCayenne snuck in there too.
 
  
Embossing the image makes it easier to paint in the details. I like to use a brown pigment ink (Versafine Clair is a good one) and then tap on with a tone-on-tone metallic embossing powder. (Here I'm using one of my new ones from WOW Embossing, Platinum.)
 

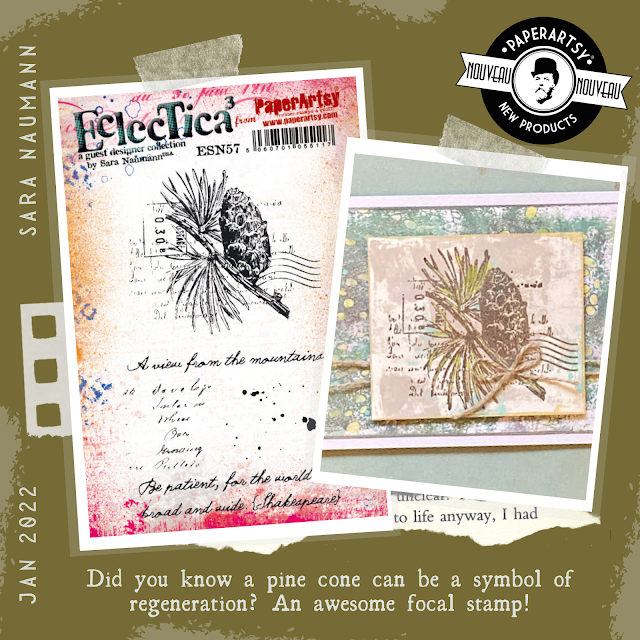
Eclectica³ Sara Naumann Set 57 (ESN57)
 
The humble pine cone is associated with so many beautiful symbols—especially regeneration and resurrection. The pine cone closes when it's cold or dark; its purpose is to protect the pine tree seeds until it's time to release them into the world. It's a touching image, these earnest little pine cones waiting until the time is right to open up.
 
 
This pine cone focal is stamped and embossed onto paint-brayered card stock, then detail-painted with Limelight.
 

The texture of the pine cone goes really nicely with a textured, stenciled background. For this I used PS296 (another release from this launch!) and Platinum embossing powder.
 

Eclectica³ Sara Naumann Set 58 (ESN58)
 
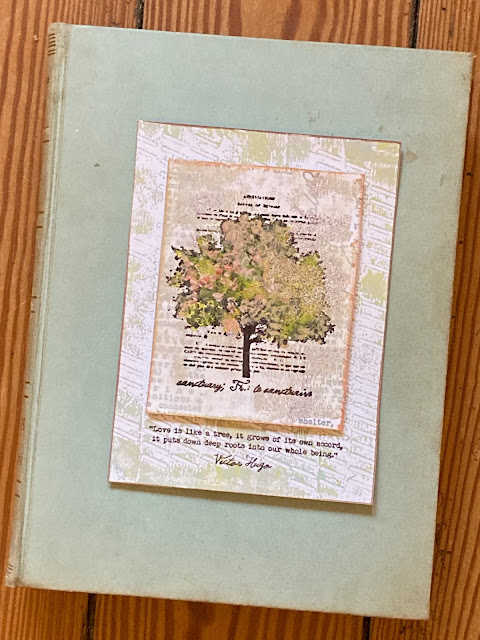
Trees are a versatile focal for so many themes and occasions. Here I've stamped the tree with brown pigment ink, sponging on LimelightSherbet and Cayenne paints to give it a spring effect... but think how pretty it will be with autumn colors!

 
Use Cut N Dry for even paint coverage, then use the end of your paintbrush handle to dab on additional colors.
 

A geometric background design is a nice complement to the tree image—I reverse-stenciled PS295 (just see below) with a blend of Front Door and Stone paints.


Regular Size: 6.5" x 7" (16 x 18cm) Price: RRP €5.38 + VAT
  
PaperArtsy Stencil 295 (PS295)

When I designed this stencil, I wanted you to have something that created a striking geometric pattern that could balance with the softer botanical images on the stamps. This one turns out to be ideal for reverse-stenciling, where you simply brayer paint onto the stencil, mist with water and press it onto your surface. This gives wonderful surface coverage and a more ghostly pattern design.
 
 
This stenciling technique is ideal for simple-style backgrounds—I love it, because while there's a lot of paint and pattern going on here, everything is on one piece of Smoothy cardstock.
 

The stamped sentiment is from the ESN56 set, and brown-embossed for texture and contrast. The paint color combination is one of my (*swoon*) favorites: Cayenne and Aqua Duck Egg.
 
 
PaperArtsy Stencil 296 (PS296)

I have a thing for uneven circles (you can call them blobs, that's okay)—I think they add charm and realistic pattern to backgrounds. This design is another great one to reverse-stencil, as I've done here, with that wonderful dirty-brayer effect. It's easy to do, and a great way to experiment and play with texture. I've used a fairly grubby mixture of CayennePumpkin SoupStone and just a tiny bit of Slate that got in there accidentally.
 
 
Load up the brayer with a bit of Slate paint and tap it on horizontally to create lines that become sections on the background.
 

You can of course layer another stencil design on top of the first, and stamp on top of it too—here I've used contrasting Aqua Duck Egg to stencil PS297 on top of the blobby circles. The text stamp comes from ESN57.
 

PaperArtsy Stencil 297 (PS297)

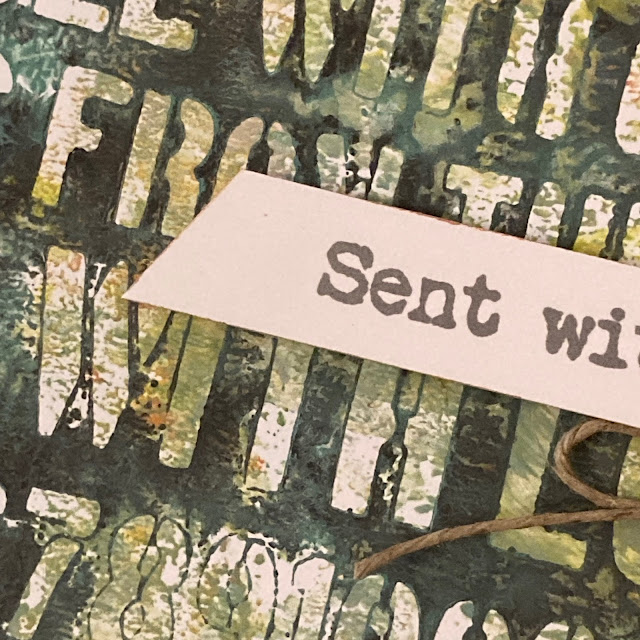
I love love love stenciled letters and words—especially when they can do double-duty as an eye-catching background, or as something softer or more muted. This design also works beautifully as a reverse-stencil pattern.

 
Front Door and Slate together create a wonderful forest green that contrasts so nicely with the Limelight brayered underneath.
 
  
A simple sentiment works wonders to balance a background-as-focal design. The "sent with love" stamp is from ESN56 and I love that it accidentally mirrors one of the lines on the stencil. 
 
 
Thanks, everyone, for having a read today! I hope you've been inspired to pull out your brayers and have a go with these easy and fun backgrounds and focal images. And thanks, as always, to the PaperArtsy people for always producing such wonderful supplies with the very best quality.

Socials...
Website: saranaumann.com

Teaching Schedule:
I'll host a FREE Facebook Live demo for Stampers Grove on January 29 at 3:00UK time. 

Below is a list of the retailers who have already got these new releases in stock ready for you to buy NOW!
   

PaperArtsy Stockist List

Our stockists are your go-to  source for all PaperArtsy products, and we suggest that you also use the PaperArtsy People Facebook group to source a retailer in your country. Many are members of our FB group and will happily share links to their online stores.

Australia
Bev's Cross Crafts, Spreyton, Tasmania https://www.bevscrosscrafts.com.au/
Crafters Cupboard, Berwick, Victoria www.crafterscupboard.com.au
Memories on the Murray, Murray Bridge, SA  https://www.memoriesonthemurray.net/
Natalie May Scrapbooking, Dover Gardens, SA https://nataliemay.com.au/
Scrapbook Superstore & More, South Penrith, NSW https://www.scrapbooksuperstore.com.au/
The Scrapbooker's Confetti Box, Swansea, NSW https://thescrapbookersconfettibox.com/
The Thread Studio, 6 Smith Street, Perth http://www.thethreadstudio.com/
The Scrapbook Store, North Perth,WA http://thescrapbookstore.com.au/ 
Time To Createwww.timetocreate.com.au

Belgium
Cart N Scrap Art, Antwerp, www.cartnscrapart.be
Créatelier Caracolle, Liège, www.createliercaracolle.be

Canada
Clipper Street Scrapbook Company, Langley, BC. www.clipperstreet.com
Paper Art Creations Inc, Leduc, Alberta, www.paperartcreations.com/
Scrapbook Centrale, Dollard Des Ormeaux, Quebec www.scrapbookcentrale.ca
Scrap Addicts, Edmonton, Alberta www.scrapaddicts.ca/
Scrap and Bean, Edmonton, Alberta scrapandbean.com/ 
Scrapbooking Fairies, Drayton Valley, Alberta www.scrapbookingfairies.com/
The Paper & ink Boutique, Calgary, Alberta www.paperandinkboutique.com/
The Scrap Yard, Calgary, Alberta, www.thescrapyardcalgary.com/ 

Denmark
Hobbyboden Scrapworld Samso www.hobbyboden.dk

France
Eirl Bancon Cartoscrap, Midi Pyrenees, www.cartoscrap.com
Fée Du Scrap, Saint Sébastien-Sur-Loire, www.feeduscrap.fr/
Horizon Créatif, Ste Jalle www.horizon-creatif.fr
Instant Créatif, La Possession, La Réunion, www.icreatif.re
Katzelkraft, Ingwiller www.katzelkraft.fr/en/
Kerudoc Creation, St Yvi www.kerudoccreation.com
Le Grenier des filles, Pierre Benite
Page de scrap, Saint Pavace, www.pagedescrap.fr/
Scrap Déco Home, Goutrens, www.scrapdecohome.fr/
Toutencolle, Dun sur Avon www.toutencolle.fr

Finland
Heidin Korttipaja, Istunmaki, www.korttipaja.fi/fi
Piia Paper, Kittiläwww.piiapaper.com/fi

Germany
Stempelbar, Berlin, www.stempelbar.de
Stempeloase Munich, Munich www.stempeloase.de
Stempelfee Shop, Hilden www.stempelfee-shop.de
Stempellaedle, Stuttgart, www.stempellaedle.de/shop

Greece
Scraps N Pieces, Kallithea www.scrapsnpieces.gr

Italy
Immagine SAS di Rapaccini, Rome, www.immaginelab.com
Il Negozio Della Mamma Di Cle, Torino, www.ilnegoziodellamammadicle.com
Marte Savona, Savona, www.martesavona.it
Pezze E Colori, Lissone, www.pezzeecolori.it/ 
Piccole Passioni, Siena, www.piccolepassioni.it

Japan
La Wadao, Odawara, Kanagawa, www.lawadao.com
Tiny Dots, Funabashi-shi, Chiba www.tinydots.shop-pro.jp

Netherlands
De Hobbystudio, Genemuiden, www.dehobbystudio.nl/
Doe@ding,Spijkenisse doeading.nl/
Hobbycompleet de Duif, Leeuwarden www.hobbycompleet.nl
Stampingcorner, Capelle Aan Den Ijssel www.stampingcorner.nl

Norway
Hobbygarasjen, Kopervik, www.Hobbygarasjen.no

Spain
Cien por Cien Manualidades, Barcelona,  www.100x100manualidades.es
Ideas 10 Manualidades Y Scrapbook, Bilbao ideas10manualidades.com/
Marakiscrap, Tarragona, www.marakiscrap.com
Scrap & Papers Experiences, Barcelona, www.scrappapersexperiences.com
The Paradise Corner, Barcelona, www.theparadisecorner.com

Sweden
Butik Elva, Staffanstorp, www.butikelva.se

Taiwan
Mandy's Cards, Taipei www.facebook.com/mandy.card.77

United Kingdom
Amelia's Creative Crafts, Studley, Warwickshire  www.ameliascreativecrafts.co.uk
Art from the Heart, Harrogate, Yorkshire www.afth.co.uk
Blade Rubber Stamps, London www.bladerubberstamps.co.uk
Crafts at The Malthouse, Herstmonceux,  East Sussex, www.themalthouse.co.uk/
Fave Rave, Stourbridge, West Midlands www.shabbychicstencils.co.uk
Loobi Crafts, Leighton Buzzard, Bedfordshire, www.loobicrafts.co.uk
Papermaze, Ipswich, Suffolk www.papermaze.co.uk/ 
Stampers Grove, Springbank, Lilliesleaf, Melrose,Scotland www.stampersgrove.co.uk
That's Crafty
, Romford, Essex www.thatscrafty.co.uk
The Artistic Stamper Craft Store, Faversham, Kent www.theartisticstamper.com
The Forget me not Kraft KabinRochford, Essex, www.TheForgetMeNotKraftKabin.co.uk

USA
Artistic Artifacts, Alexandria, VA www.artisticartifacts.com/
Artistic Studio Creations, Fayetteville, Georgia www.facebook.com/ASCbyCrystal
Craftiness, Chatsworth, CA, www.craftinessonline.com/
Ephemera Paducah, Paducah, Kentucky www.ephemerapaducah.com
Everything Scrapbook & Stamps, Lake Worth, Florida www.everythingscrapbook.com
Frantic Stamper, Oregon www.franticstamper.com
Free Heart LLC, Denver, Colarado, www.freeheartllc.com/
Golden Hills PaperCrafts, Fairfax Station, Virginia, www.goldenshillpapercrafts.com/
Joggles, West Warwick, Rhode Island, www.joggles.com
PaperCraft Clubhouse, Westbrook, Connecticut, papercraftclubhouse.com/
Qingquing's Stamp Shop, Portland, Oregon
Runaway, Art & Craft Studio, NE Salem, Oregon www.runawayart.com/
Simon Says Stamp, Columbus, Ohio www. simonsaysstamp.com
The Ink Pad, New York, www.theinkpadnyc.com
Topflight Stamps, Irmo, South Carolina topflightstamps.com/

Our brand is only available from established stockists who are VAT/ GST/ sales tax registered and for whom product education is a core principle. We would rather supply a few hand selected stockists, than the greater masses. If you would like to apply to be a stockist, you can find our more about our supply criteria here.

PaperArtsy Links
Facebook Group PaperArtsy People
Facebook Page PaperArtsy