Showing posts with label ESC16. Show all posts

Monday, 19 August 2024

2024 Topic 6 : Scrapcosy - Grunge Mini Tag Album {by Mi Mii}


Hello everybody, it's Mi Mii from France with you today.

I am delighted to share with you this tag mini album created for Topic #6: Scrapcosy, with a touch of the current theme: Hidden.

For me, Scrapcosy's designs, with their vintage style I am discovering and enjoying more and more. They invoke cosy vibes, a wellness pause. So I chose to play with transparency and a touch of grunge for this tag album. I also made a fabric cover to slip the album in and hide it!

Because of painful circumstances mid-July for me personally, starting this project was difficult. But in life, we must sometimes push ourselves... and finally, settling in my workspace and concentrating on creating was very therapeutic and soothing for me.
In the end, I have to admit I am quite satisfied with the result, as this project does give the impact I had imagined.

Bonjour à tous, c'est Mi Mii ici avec vous aujourd'hui. 
Pour ce nouvel article, je suis très heureuse de partager avec vous ce mini album tags que j'ai créé pour notre sujet PaperArtsy actuel : Scrapcosy, avec le thème : caché
L'univers de Scrapcosy m'évoque un esprit cocooning, un instant bien-être, avec ce côté vintage que je redécouvre et affectionne de plus en plus. J'ai donc décidé de partir sur un projet de mini album tags tout en transparence, avec un esprit grunge. J'ai également créé une pochette en tissu, dans laquelle vient se glisser et se cacher ce mini. 
En raison d'un évènement douloureux survenu mi juillet, me lancer sur ce projet a été compliqué pour moi. Dans la vie, parfois il faut forcer  les choses...finalement m'installer dans mon atelier et me concentrer sur ma création fût très thérapeutique et apaisant pour moi.
Je dois l'avouer, je suis satisfaite du résultat final, l'ambiance générale correspond assez à ce que j'avais imaginé.


As it is hidden, I need two pictures to present my project: first in its cover...

Puisqu'il est caché, je vous fait découvrir mon projet en 2 photos. La première dans sa pochette...


Then the album in all its glory!

La seconde le mini album tags en détail!


I chose two stamp sets in Scrapcosy's collection: ESC16 and ESC27. Their timeless theme called to me: tea cups, little cakes, small text and textures... perfect for a tea lover like myself!

Côté matériel, j'ai sélectionné 2 planches PaperArtsy Scrapcosy (ESC16 et ESC27) dont le sujet intemporel me plaisait beaucoup. Les tasses, les gâteaux, petits textes et textures... idéal pour la gourmande et grande consommatrice de thé que je suis !


For the tags, I used kraft card cut into 30 x 6.5cm rectangles. I cut out 7 x 5.5cm windows in the middle. I used a die but it easily doable with just a ruler and knife.

Pour mes tags, je suis partie sur une base kraft. J'ai découpé 5 bandes de 30 cm x 6.5 cm, dans lesquelles je suis venue évider une partie afin de créer des fenêtres de 7 cm x 5.5 cm. Je me suis servie d'un die mais il est tout à fait possible de les faire à l'aide d'un cutter et d'une règle.


I then randomly glued selected pieces of Scrapcosy's Printied Tissue (PT05) directly on the bases. With all the subsequent layers, these almost can't be seen in the final result! It is no big deal, they still bring some texture to the background and are a way to get started, breaking the blank page.

J'ai ensuite sélectionné des parties de printed tissue PaperArtsy ScrapCosy (PT05) que j'ai collées aléatoirement sur mes bases. Par la suite, vous constaterez qu'avec toutes les couches de matière que je rajoute nous ne les verrons quasiment plus. Ce n'est pas grave cela apporte malgré tout de la matière et une texture à mes fond et c'est un bon moyen de se lancer face à la page blanche (ou kraft!)


For some grunge, I stamped the splatters from stamp set ESC27 with Vintage photo Distress Oxide. I sprayed the ink lightly with water to get softer results.

Pour apporter un peu de grunge j'ai tamponné des taches de la planche PaperArtsy ScrapCosy (ESC27) avec de la distress oxyde vintage photo sur laquelle je vaporise de l'eau afin d'obtenir cet effet diffus.


To add dimension and texture, I spread some Grunge Paste (GP190) through the words of PaperArtsy stencil PS105 by Scrapcosy.

Pour plus de matière et de texture j'ai rajouté du texte avec le pochoir PaperArtsy Scrapcosy (PS105) et la PaperArtsy grunge paste (GP190).

Then, a bit of aging thanks to my favourite Infusion for this type of project: Just Walnut (CS25)!

Un peu de patine avec mon infusion PaperArtsy chouchou pour ce type de projet, la Just Walnut (CS25) ..


Time for some PaperArtsy Fresco Finish paints! Here, I went with Verdigris (FF191) and Tomato (FF229). I like to apply them with a brayer, with only a little bit of paint and a light hand. Just catching the relief, it creates a peeling paint effect I particularly love.

Il est temps de sortir les peintures acrylique PaperArtsy Fresco Finish! Ici j'ai utilisé la Verdigris (FF191 
et la Tomato (FF229). Je les applique au brayer, sans trop charger en peinture et par touche légère. J'effleure juste le relief. J'obtiens un aspect peinture écaillée, usée que j'aime beaucoup.

In the end, as I said, the tissue paper is barely visible... just some peeks here and there. Next time, I might use translucent paints and sprinkle less Infusion! 

En revanche comme je vous l'indiquais plus haut, mon papier de soie ne se voit quasiment plus... on le devine à peine. Pour éviter cela je pense que la prochaine fois j'utiliserais des peintures translucides et je mettrais moins d'infusion.  

To finish the tags, I cut some acetate and use black Stazon to stamp the coffee rings from ESC27. I then added them to my windows. I felt the tags might be a bit dark so I splattered some Chalk Fresco Finish (FF83) for more light and contrast.

Pour terminer la base de mes mins Tags, j'ai découpé des morceaux de rhodoïd et j'y ai tamponné, à la Stazon noire, la tache de la planche PaperArtsy Scrapcosy (ESC27). Je le ai ensuite collé à l'emplacement découpé dans mon tag. Pour apporter un peu de luminosité et de contraste, je viens faire des petites taches avec la peinture PaperArtsy Fresco Finish Chalk (FF83)

Some stitching and my bases are finished!

Un peu de couture, un onglet et voilà mes supports terminés ! 


Time for the focals!

Il est temps de s'atteler aux éléments principaux!


Let's get stamping! I love the designs of this PaperArtsy stamp set by Scrapcosy (ESC16).

Je passe au tamponnage ! J'adore le design de cette planche PaperArtsy Scrapcosy (ESC16).

I chose all the designs to fit nicely in the windows and made sure they chimed with each other!

J'ai choisi  mes éléments pour qu'ils rentrent dan les fenêtres et les mis en place pour qu'ils se repondent!
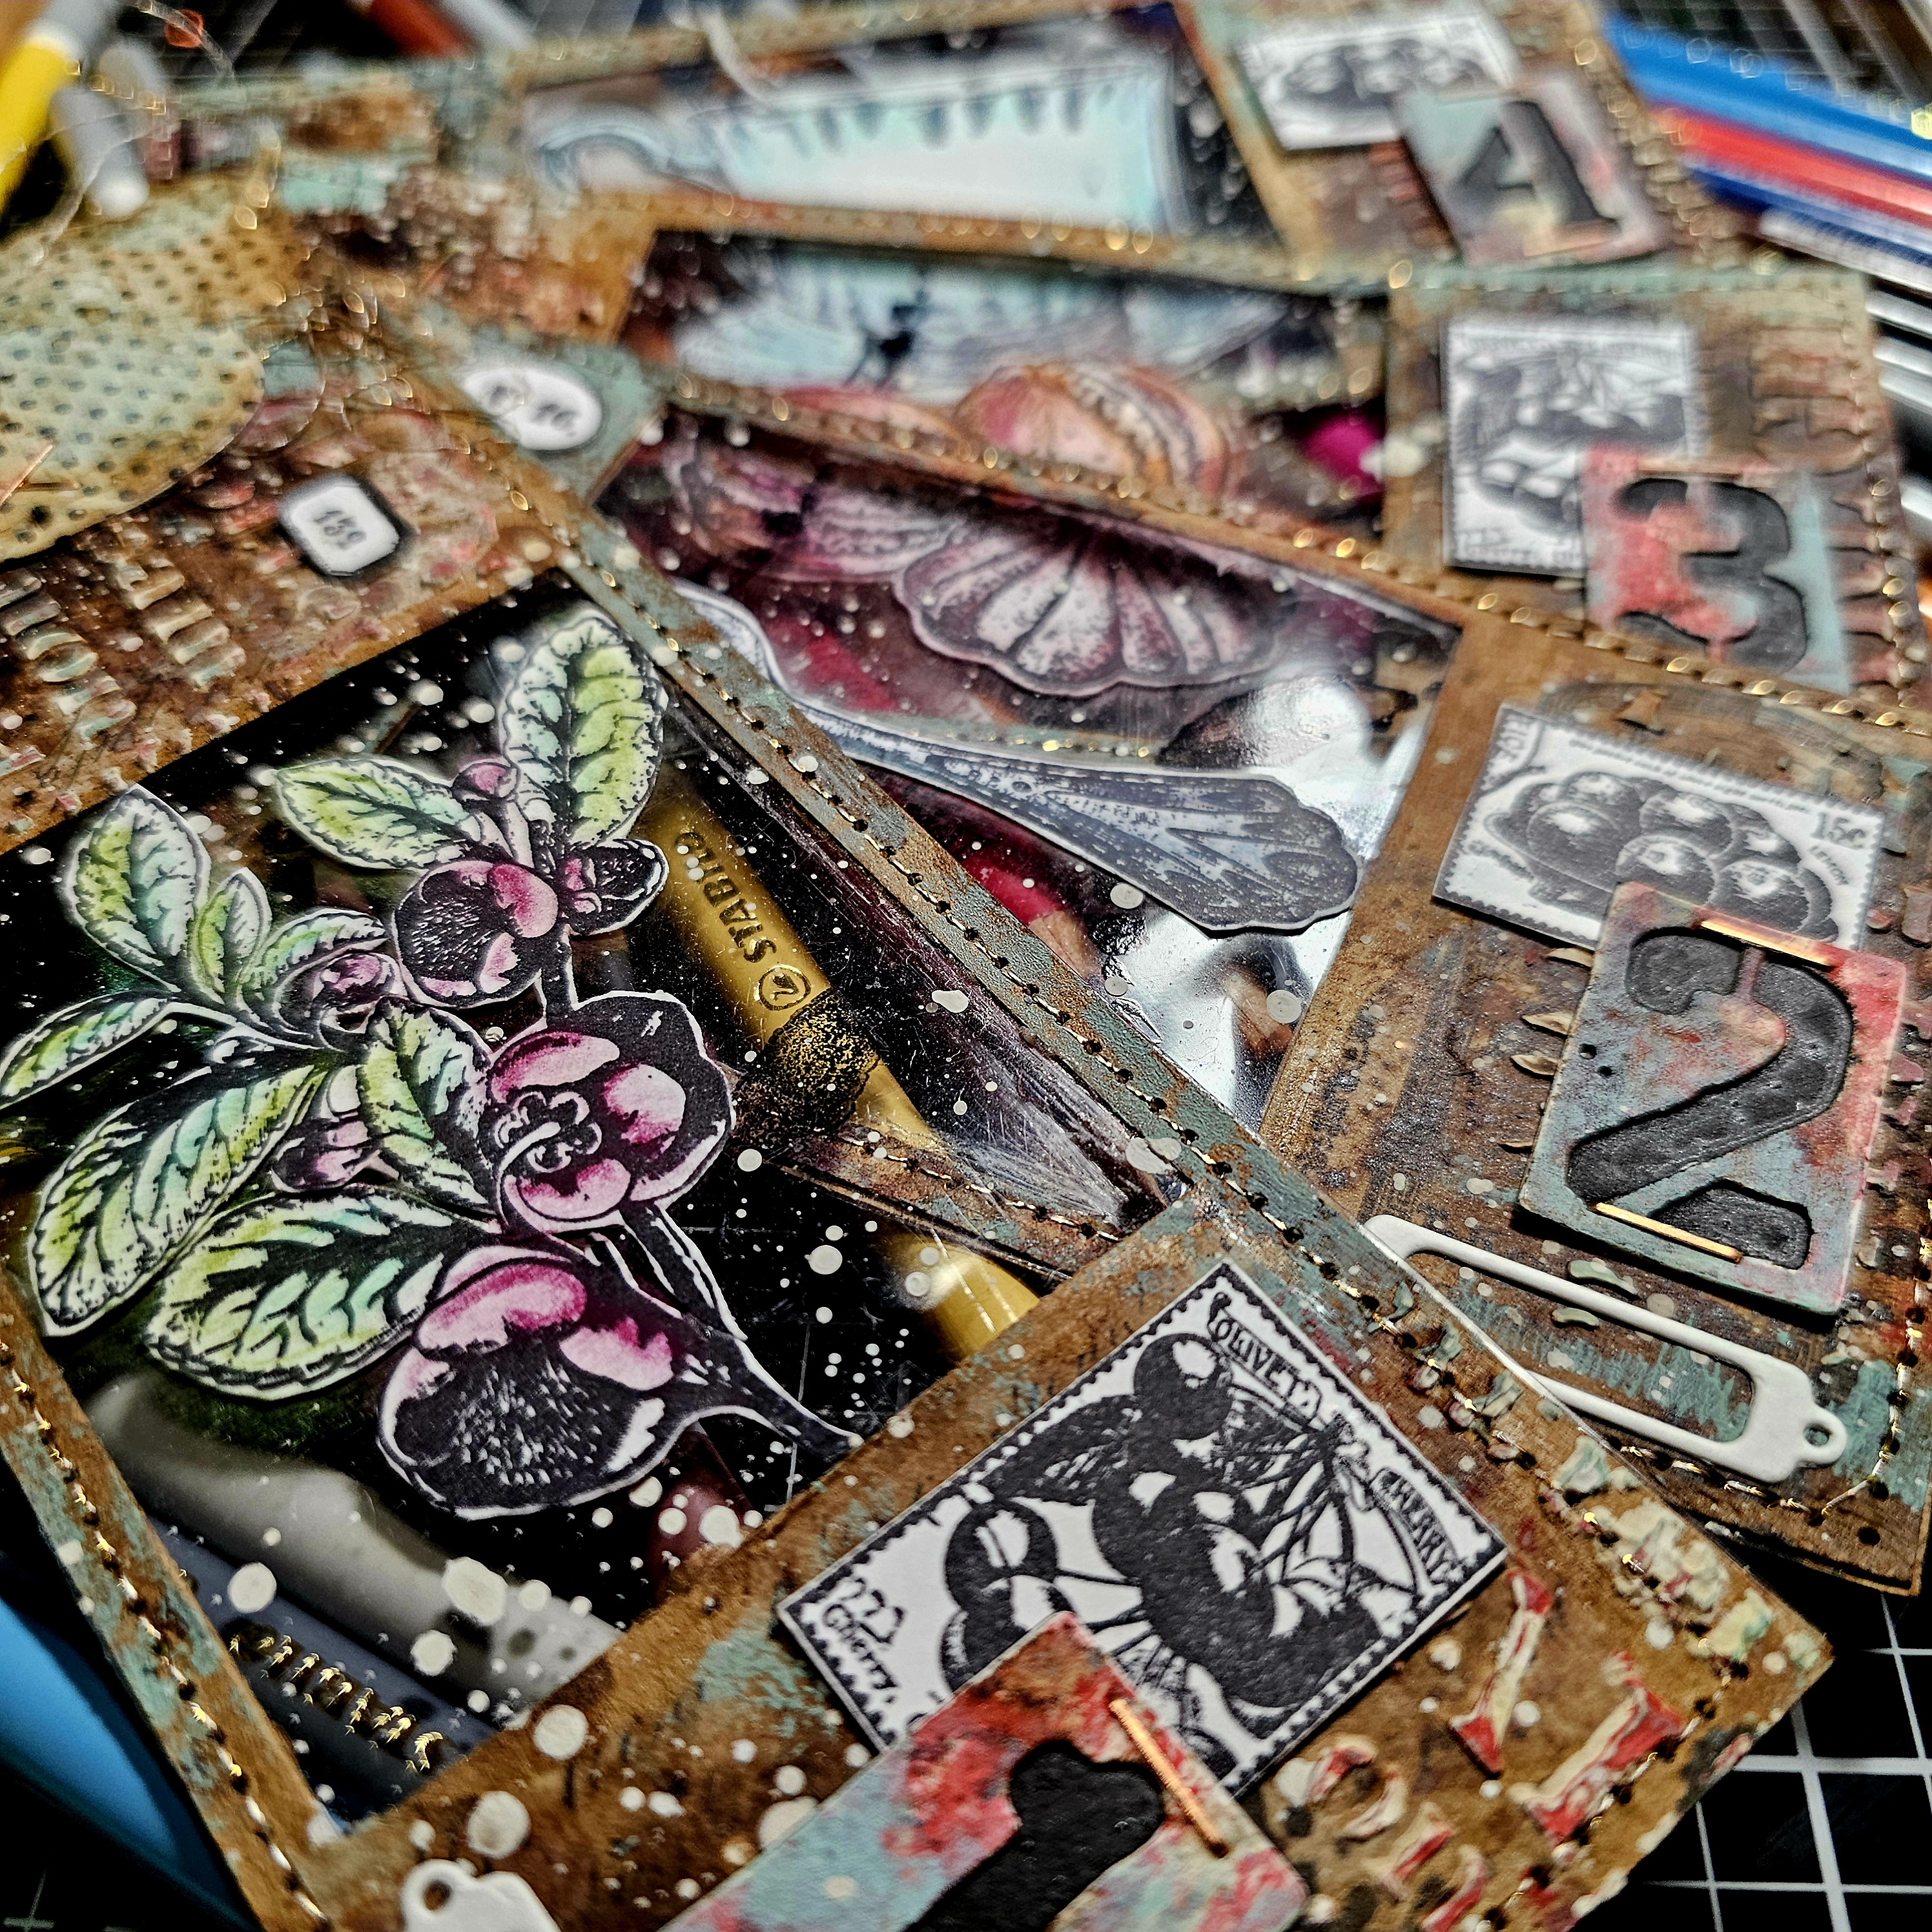

To colour the focals, I used Stabilos Carbothello but I could also have used Mattints. The Pink (MT08), Glow (MT01) and Fern (MT03) would have been perfect. I only thought of it afterwards! Habits are hard to break...

Pour la colorisation des motifs j'ai utilisé les stabilos carbothello, mais  j'aurais tout aussi bien pu opter pour les PaperArtsy Mattints. La Pink (MT08), la Glow (MT01) et la Fern (MT03) auraient été idéale. J'avoue n'y avoir pensé qu'après!


To fit the theme, Hidden, I decided to make a little case for my mini album. I stencilled some Grunge Paste (GP190) on a piece of white cotton fabric, using PaperArtsy Stencil PS107 by Scrapcosy.

Pour être parfaitement dans le thème, Hidden, j'ai décidé de fabriquer un étui à mon mini album tag. J'ai imprimer, avec la PaperArtsy Grunge Paste (GP190), des motifs du pochoir PaperArtsy Scrapcosy (PS107) sur un morceau de tissu coton blanc.


I grunged the fabric up like the tags: ink blots (from ESC16 et ESC27stamping, diluted Just Walnut (CS25) spritzing, and Fresco Finish Verdigris (FF191) brayering! Then a bit of sewing and my cover was done!

J'ai tranformé le tissu un peu comme les tags: quelques tamponnages avec les planches ParperArtsy Scrapcosy (ESC16) et (ESC27), des pulvérisation d'infusion PaperArtsy Just Walnut (CS25) diluée avec un peu d'eau dans un spray, pour vieillir tout ça, de la patine au brayer avec de la peinture acrylique PaperArtsy Fresco Finish Verdigris (FF191). Puis un peu de couture et voilà mon étui est terminé !


A little added detail: with some air-drying clay and a text stamp from set from PaperArtsy Scrapcosy (ESC27), I made a small medal. I mounted it on a clothes tag (don't throw away, recycle!). It perfectly completed my project!

Petit détail supplémentaire: avec de la pâte autodurcissante et un des tampon texte de la planche PaperArtsy Scrapcosy (ESC27), j'ai confectionné une petite médaille que j'ai attaché sur une étiquette de vêtement (rien ne se jette, tout se recycle !). Cela complète parfaitement mon ensemble !


And now, I leave you to explore the final result!

Et voilà, je vous laisse découvrir le projet final ! 


In the end, I did enjoy working on this project a lot. They might be vintage inspired but Scrapcosy's designs do work for all styles.

J'avoue avoir pris beaucoup de plaisir à faire ce projet. Ils ont beau être d'inspiration vintage, les designs de Scrapcosy se prêtent à tous les styles. 


You can easily imagine the same base but with other colours for a completely different vibe! Why not neons? I quite tempted to try...

On peut tout aussi bien imaginer la même base mais avec des couleurs et une ambiance totalement différente ! pourquoi pas dans des couleurs pep's fluos ? moi je dis ça se tente ! j'essaierai !


I hope you also liked following me in this adventure and that you found some inspiration on the way.

J'espère que vous aussi vous avez apprécié cette aventure et que vous y avez trouvé un peu d'inspiration!

Stay creative
Mi Mii x


Instagram :  Mi Mii 
Facebook :  @themy32 

Wednesday, 26 February 2020

2020 #4 Mighty Mica: Vintage Gelli Print Journal with ESC {by Autumn Clark}

2020 Topic 4: Mighty Mica


Introduction:
Autumn has a gorgeous in-depth project tonight, you can see how she totally got caught up in the making of this! What a delight!
~ Leandra

Hi everyone, it's Autumn Clark from SewPaperPaint with you today, and I'd like to share my latest journal/mini album featuring the glorious newly released PaperArtsy Eclectica {Scrapcosy} Collection.  

When I saw Raquel's new stamps and stencils my heart melted and I really wanted to create a soft, vintage book to showcase them.  For days I couldn't stop adding more and more layers and bits to my pages and even now as I see the final photos, I am beckoned to go back and play in it yet again... (so forgive me for such a long post please :))


Having been a stamper for some 20 years I have quite the collection of odds and ends from trends that have come and gone, sheet mica being among the others.  I knew it would be beautiful with these stamps and a palette of Fresco Chalk Acrylic Paints in: Blue Oyster, Waterfall, Toad Hall, Sage, Hint of Mint, Taupe, Concrete, Cloud 9 and Chalk.  

Eclectica {by Scrapcosy} Sets 19 & 20: ESC19 & ESC20

PA Stencil 191 {by Scrapcosy}: PS191

PA Stencil 108 {by Scrapcosy}: PS108


I used the bird image from ESC19 on my opening spread, but also wanted to use it on my cover; what a beauty he is!  First I stamped him directly onto my gel-printed papers using a stamp platform, then painted him with the above mentioned Frescos and overstamped him again for definition.   

To make the images stand apart from one another, next I stamped him onto vellum with black Archival ink and then painted the top of the vellum so I could flip him over and use the image in reverse.  The result was so soft and much more delicate.  


By starting with simple color printed pages, I was able to add stamping, stenciling, and layers wherever I wished and built my composition in reverse around the focal elements.  


For my foreground stamping, I used scraps of gelli printed pages and stamp platform as described above.  When I felt like the images needed a little more shading, I did so with watercolors.  This is why I love working with Fresco paints so much, because the matte finish allows for such dynamic layering.  Here I mixed stamps from ESC18 with one of the new stencils, PS191.  They all work so beautifully together.  

Eclectica³ {Scrapcosy} Set 18: ESC18

PA Stencil 191 {by Scrapcosy}: PS191

This stamping/painting/repeat stamping technique with the platform allowed me to paint over the words in the circle frame stamp and I covered the circles with die cut letters.  I used the excess paper in my book construction to make little flaps and belly bands to store ephemera.  I love using embossing folders with my prints for adding additional texture.  A gentle sanding reveals the pattern.


I added some Distress Oxide stamping here and used the coordinating Distress Oxide Spray over PA106 stencil.  All of my mica was stitched in place, though it doesn't show well in the photos.  The subtle shimmer works perfectly with these soft colors.  Flowers and birds and tea, of course!  I had to mix in ESC16, but used the dotty image in ESC19 to give the teacup a pattern.  

Eclectica³ {Scrapcosy} Set 16: ESC16

PA Stencil 106 {by Scrapcosy}: PS106


Because my gel-prints were done on both sides of the paper to make this book, I accidentally tore one of my beloved stamped dogwoods in half.  Upon realizing this, I used them on opposite sides of one spread, but painted them differently so that they seem to be different flowers all together.


So many details...


I love that Raquel included a corner motif in her stencils and a corner flower stamp.  These will be showing up in many a future project.

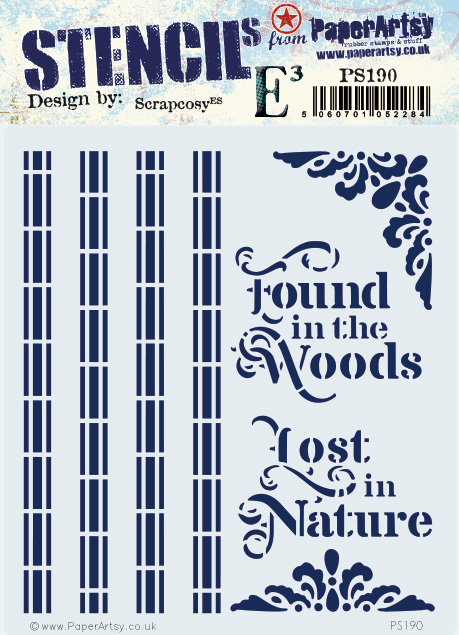
PA Stencil 190 {Scrapcosy}: PS190


I had so much fun adding ephemera to my pages and journaling out my thoughts here and there.  


Again, I used the same images in different colors and orientations, highlighting favorite details with mica.  


I am really happy to discover how wonderfully PaperArtsy Fresco Finish Chalk Acrylic make double sided prints.  There are so many times when a double sided patterned paper is just what you need, especially with book making.  I would love to share how I constructed this book, but fear this post would be far too long.  If you're up for it, head on over to my blog post HERE for the specifics.  

Though projects of this size can seem daunting, you can certainly try some of these techniques in a smaller format.  But if you are up for it, make plenty of paper so you can stamp your heart out and have a wide array to work with in your own book.  What colors are calling to you when you see these nature inspired stamps?  Hmm?

It has been a pleasure, Autumn

Blog:  SewPaperPaint
Facebook: Autumn Clark
Instagram: @sewpaperpaint
Pinterest: Autumn S Clark