Showing posts with label 2015 Topic 1. Show all posts

Saturday, 17 January 2015

2015 #1 Paper-Fabric Postcards {by Darcy, PA Signature Designer}

2015 Topic 1: Fragile Papers


Hi everyone Darcy here, joining you this evening with a post about paper fabric, using fragile papers. I love creating stuff from other stuff, mashing things together, and using ephemera for purposes other than the one it was designed for. hence I glue a lot of 'stuff' together... This theme suited me perfectly, I love fragile paper, I love all kinds of paper ephemera. (So much that I have the word 'ephemera' as a tattoo!)


What are fragile papers? well over the past fortnight I am sure you have discovered many of your own, here are a few of mine. 

Tissue papers, plain, coloured, patterned, stamped and dressmaking tissue
Book pages, English and Egyptian, painted tracing paper, music paper, origami and wrapping paper, blueprints and marbled paper
Doilies, paper napkins, shopping receipts, coffee filters tissues( yes those bank notes are tissues) moulded toilet tissue
Handmade paper - bought and homemade, silk paper, and paper containing fibres


I often make painty layered papers and patchwork papers and this is a combination of both... Paper fabric, is usually created on fabric... the clue is in the name. This creates a pretty strong and durable medium, useful for all sorts of projects. The idea of the paper being fragile, not meant for a long life, really appeals to me. I wanted to keep that fragility, but add just a little stability. So instead of using cotton fabric as my base I used 'nappy liners'.( Only those of you that ever used fabric nappies/diapers will have come across them) These too are fragile, and easily ripped, they are very thin. 


I lay one liner down and added some watery white glue, then I began to add torn pieces of my fragile papers. 


I covered the whole of the liner, overlapping many of the pieces. The thinner tissue was layered over other pieces entirely. 


To finish the sandwich, I added more watery white glue, then a sheet of plain white tissue paper. I patted this down very gently, working from the centre outwards. The paper fabric is now done and just needs to dry. I blasted mine with a heatgun, till they were no longer soggy, then put them aside to dry overnight. 


Here are 2 pieces after drying the top layer of white tissue has all but disappeared, and all those lovely bits are showing through. 

This photo shows the back, on the left you can see the piece made on a nappy liner. The piece on the right is made using cotton calico fabric. The top surfaces look identical, but you can see how very different they look on the back. The fabric one is much stiffer and stronger, the one on the liner is still very fragile. 


Now to decorate.. Using Fresco paints in lots of shades I brayered, and stencilled. I added a light layer of brayered Snowflake, and then stencilled some more. 


For this layer I gently rubbed Archival ink pads over my pieces. I just love how the ink picks up the wrinkles in the top layer of tissue paper. 


Now for some stamping. I used lots of background stamps, dots and circles and lots of text, including the German text from ESN01

ESN01

At this point I also added more pops of colour using Fibralo pens, on some pieces I coloured in stamps and on others I dripped. I love these pens so much for their drippage qualities! i also added details like the black lines, just an old credit card dipped in Little Black Dress. 


Then onto some more focal stamping, one of the images I used was the text heart from EDY01

EDY01
Then I added some glittery embossing powders over some border stamps, I loved using this one from EDY05 with a silver powder. Finally I added circles of white using an old bottle lid. 

EDY05 
These pieces had all sorts thrown at them, the more you add the stronger they become and the more interesting the layers. The eagle eyed detectives amongst you will notice there are BRAND NEW stamp images on these pieces...

Whoooaaah! Sneaky peek alert!


I know, I know, so cruel, but look carefully at this photo and you will spot more sneaks. 


Almost done, I printed off these postcard blanks onto Heavy Smoothy card, cut them out and glued one to the back of each of my painty pieces. 


The final step was to trim the edges and then take each postcard to my sewing machine and stitch around the edges. You really don't have to do this, but I think it finished them off nicely and it makes sure they aren't going to come apart. 


So many painty,inky,stampy layers... all on top of those original fragile paper layers, add in a bit of shimmer and some threads.. Be still my beating heart. 


Giveaway ( now closed)

I had a lot of painty messy fun making these postcards, and yes they are real postcards.I love that they still have the fragility of a postcard, they could easily be damaged.  I would like to share them with you. please leave a comment below and on Monday 19th 2015 (at 7pm) I will draw 6 names at random from the comments. I will then post a card to each winner, not in an envelope, but actually as a real postcard. 

Winners

10. Miriam
16. Bracken Sparkes
29. Emma Elliot
42. Miek
48. Wendy K
58. Barbara Moore

please get in touch with me, Darcy, with your postal details. 

darcydotneedles@hotmail.com

We would love you to join in with challenge #1: Fragile Papers. If you are inspired by any of our guests who have blogged on this topic over this fortnight, then please join in and link up your creativity HERE

All links go in the draw to win a voucher to spend on products of your choice from the PaperArtsy online store. This link will close 17:00 (London Time) Sunday, Jan 18th 2015, winner will be announced 2 hours later at 19:00.

Friday, 16 January 2015

2015 #1 Playful Portfolios {by Helen Chilton}

2015 Theme 1: Fragile Papers

Hi everyone Helen here, joining you this evening with a post about Waxed Tissue paper and heated Portfolios. By shaving the Portfolios onto tissue paper and then screwing it up into a ball, it stops the shavings blowing away as you heat them and also reminded me of tie dying with material. You can work with one colour at a time or lots of different coloured shavings in one go. The Portfolios melt and you can scrunch the paper up several times to spread the colours.


Step One.
Fold a sheet of the tissue paper in four and scrape some of the Portfolio pastel onto it:


Step Two
Scrumple up the tissue paper and heat with heat gun. Squidge it around a bit:


Step Three.
Open up and add different colour shavings. Scrumple and heat:


Add further colours in the same way:


Step Four.
When you've finished, separate out the layers of tissue paper. You'll see the crayon has seeped through to each layer. I've used the lighter one for stamping my image onto and the darkest for making my background:


Step Five.
To make my project, I stamped text onto the tissue paper first in coordinating colours of Distress inks, then added shavings and heated.  Then I stamped the text in white Portfolio crayon over the top. To do this, heat the stamp, rub over the crayon, heat again and stamp:


Step Six.
Stamp the image from Hot Pick 1004 and die cut this and bottom layers using  Grunge Flowers 2 and 3. Layer onto white Portfolio stamped corrugated card and add embellishments.


I like the element of surprise you get with this technique - you could try working from dark to light with the Portfolios, or adding a whole layer of melted white on top to create a subtler colour palette.This technique works equally well with the Waxed Kraft Crunchy paper which is a little more robust. I got round the fragility of the tissue paper by using several layers at once. 

Thanks for looking! Helen

Thanks Helen, your command of the Portfolios never ceases to amaze us. Such vibrancy from a relatively simple medium.. and of course because they aren't wet, your fragile tissue isn't compromised.. only enhanced. 

We would love you to join in with challenge #1: Fragile Papers. If you are inspired by any of our guests who have blogged on this topic over this fortnight, then please join in and link up your creativity HERE

All links go in the draw to win a voucher to spend on products of your choice from the PaperArtsy online store. This link will close 17:00 (London Time) Sunday, Jan 18th 2015, winner will be announced 2 hours later at 19:00.

Monday, 12 January 2015

2015 #1 Fabric Paper {by Anneke De Clerk}

2015 Theme 1: Fragile Papers

Hi everyone Anneke here, joining you this evening with a post on fabric paper and.....with a sneak peek on some new Eclectica Sara Naumann stamps!!! 

I collect all kinds of tissue paper to use in my art and I'm always searching for colourful paper napkins. Making fabric paper is perfect to use up some of this 'stock'. It's an easy technique and the outcome is a sheet of sturdy paper, useful in many projects. I transformed a simple notebook into an eye catching one, simply with the use of my homemade fabric paper.


Start with gathering your supplies: gel medium (I used the matte version), tissue paper (I used Tim Holtz tissue paper), a variety of paper napkins in matching colors, a large plastic bag and a sheet of smooth and translucent white paper. I used Chinese Mulberry paper but white baking paper will work as well.


Cut open the plastic bag, remove the seams an place it on your worktable as a base to work on. Cover the bag with a thin layer of gel medium and glue a sheet of Chinese Mulberry paper/baking paper on top.


Tear napkins into small pieces and collage them on the paper as shown. Add bits of the black and white tissue paper too. Let air dry.


Look for matching colours of Fresco Finish Chalk Acrylics. I used Blush, Antarctic and Chalk.


Colour the blank spaces in between the collaging with paint, this makes the pattern more coherent, brings it all together.


Add random stamping to finish it off. I used stamps from an awesome upcoming ESN14 new stamp set (available in February)


and did the stamping with Archival Ink Cornflower Blue and Jet Black along with StazOn Ink 'Cherry Pink'.


After drying you can peel off the fabric paper from the plastic bag. You can use this beautiful paper on many projects. It's even heavy/sturdy enough to be treated as fabric and to sew on.


I cut a rectangle out of my sheet of fabric paper and glued it on a simple notebook with PVA glue. After trimming the edges I added further stamping with stamps from the ESN05 set. I glued buttons to the flower centres.


I cut out one flower and used it as a 3D element. I stamped the label of the ESN05 set on a scrap, cut it out and glued it on the notebook.


Fabric paper is a great base to stamp on, to sew on, to spray on, to stencil on....the possibilities are endless! I'm sure you have some beautiful napkins and tissue paper in your stash too, so why not give this simple technique a try? I would love to see what you come up with!

See you soon!
Anneke


Fantastic use of fragile papers Anneke, the soft but yet bold color scheme is delightfully executed. Collage ... what better way to use up any left over scraps and still create a stunning cover for your journal/notebook. Thank you for sharing this technique with us.

We would love you to join in with challenge #1: Fragile Papers. If you are inspired by any of our guests who have blogged on this topic over this fortnight, then please join in and link up your creativity HERE

All links go in the draw to win a voucher to spend on products of your choice from the PaperArtsy online store. This link will close 17:00 (London Time) Sunday, Jan 18th 2015, winner will be announced 2 hours later at 19:00.

Sunday, 11 January 2015

2015 #1 Box Canvas {by Leandra}

2015 Topic 1: Fragile Papers

Hi everyone Leandra here, 

Tonight I've got videos and lots of pictures for you! I'm brayering left right and centre to show you Part 3 of the brayering series (lots of colours and lots of stamps this time), and then using the results and my Fragile Papers to make a gorgeous feature flower with the adorable Ellen Vargo Eclectica stamps.

If you want to see more ideas using the brayer, and Ellen's stamps, then please go and check out Ellen's blog, she really is the brayering guru! She uses bold bright colours with her wonderful stamps to great effect! Stunning backgrounds which end up quite different to my more soft pastel versions, yet using similar techniques.


Step One: 
As you probably realise already, if you've followed my brayering video series (video 1 here, video 2 here), brayering colour is such a quick, un-messy way to alter card, paper, even fabric. I'm not much of a purple girl, but I do love an ochre/ eggplant combination, and that is the gist of what I had in mind to do.

So first up we need to brayer shades of ochre colour onto our book page. I try to create depths of the same or similar tones with Toffee, Vanilla, Haystack, Caramel and Pumpkin Soup. Then stuck it onto a 4x6" Box Canvas with Ranger Multi Medium (Matte)

NB. A video showing how to make this ochre BG, is at the foot of this post.


Step Two: 
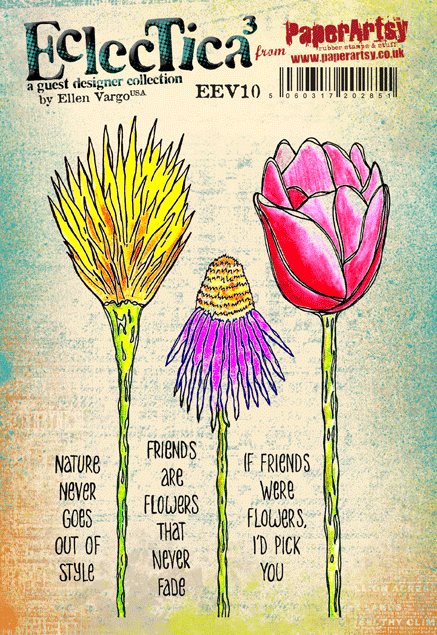
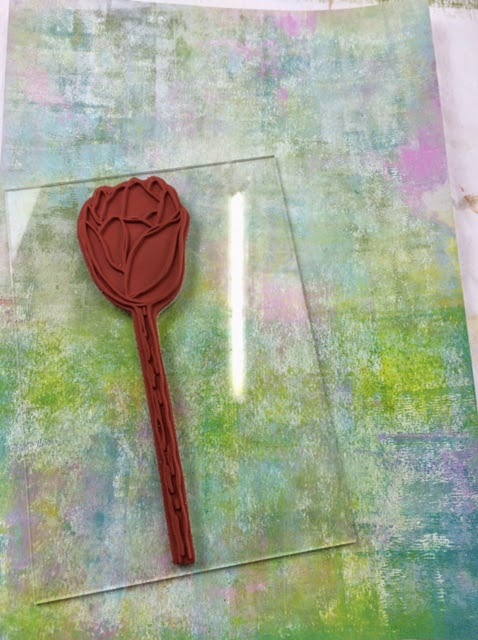
Well, its not like me to plan things to this extent, but the ideas were whizzing in my head too fast, and I just needed to commit to one of them. I grabbed some Prima Bellies, EEV10 flower stamp, and some charms. Then feeling a bit scatterbrained, I had the good sense to take a photo and thus committed to a plan.


....and then quickly, before I could change my mind, slapped Pansy (fantastic high coverage opaque) onto the bellies.


.... and then added the obligitory Bora Bora by dry-brushing to add interest and depth. Not one to drybrush once, I also dry-brushed Eggplant, Squid Ink, Mermaid and Snowflake

It is certainly true that the more layers you add, the happier you will be. More is more when it comes to dry-brushing! Of course, it won't end here, the finishing touch will eventually be Treasure Gold...but which one?? You'll find that out later...


...and then a quick check that the purple tones are looking good next to the ochre tones...


Step Three: 
Onto Ellen's lovely flower stamp set.
First up I grabbed the background I made in Video 2...see there was a masterplan all coming together in this blog post!


...and then stamped it in Archival Coffee Ink, a bit softer than Jet Black, nice with the Ochre too. Cut it out; this forms a nice base for what is to follow. I added some depth of green to the stalk with Hey Pesto and a tad of South Pacific.


...and slotted the flower into place on the canvas.


Step Four: 
As I said at the start, brayered and layers of the stamped Waxed Tissue Paper is the focal point of the flower head. 


Check out the video below to see how the paint was layered on the tissue with the brayer, and then I used a variety of stamps: EEV02 (scratchy), EEV06 (Spots), ELB04 (bold solid flowers), HP1304EZ (large script), in numerous Fresco Chalk Acrylic Colours to build up a striking and very easy to achieve, fragile paper.


Step Five: 
Now the background is made, I'm going to stamp it 6 times to make a layered flower head for the canvas, with Coffee Archival Ink. Heat set quickly, sometimes ink bleeds on tissue if you leave it for a bit. 


... like this..


...and then cut them something like this so the layers expose those sitting behind.


Step Six: 
Now it's just a matter of layering the tissue carefully with a touch of glossy accents as a fast glue, and tiny foam pads to add dimension. And always finish things off with a tickle to the embellishments of Brass Treasure Gold.


Here's a video showing the ochre background being made (back in Step One), and the tissue layers, plus a few finishing touches to the project with Fancolour Water Soluble Pens (the student version of Fibralo Pens)


And finally ... here it all comes together.


I hope you have been enjoying the fragile papers, and the new look to the blog? More fragile Papers projects keep on coming this week, I hope you can find some time to have a play yourself, and show us what you can do with Fragile Papers.

Leandra

We would love you to join in with challenge #1: Fragile Papers. If you are inspired by any of our guests who have blogged on this topic over this fortnight, then please join in and link up your creativity HERE

All links go in the draw to win a £50 voucher to spend on products of your choice from the PaperArtsy online store. This link will close 17:00 (London Time) Sunday, Jan 18th 2015, winner will be announced 2 hours later at 19:00.