
2015 Topic 1: Fragile Papers
Hi everyone Leandra here,
Tonight I've got videos and lots of pictures for you! I'm brayering left right and centre to show you Part 3 of the brayering series (lots of colours and lots of stamps this time), and then using the results and my Fragile Papers to make a gorgeous feature flower with the adorable Ellen Vargo Eclectica stamps.
If you want to see more ideas using the brayer, and Ellen's stamps, then please go and check out Ellen's blog, she really is the brayering guru! She uses bold bright colours with her wonderful stamps to great effect! Stunning backgrounds which end up quite different to my more soft pastel versions, yet using similar techniques.

Step One:
As you probably realise already, if you've followed my brayering video series (video 1 here, video 2 here), brayering colour is such a quick, un-messy way to alter card, paper, even fabric. I'm not much of a purple girl, but I do love an ochre/ eggplant combination, and that is the gist of what I had in mind to do.
So first up we need to brayer shades of ochre colour onto our book page. I try to create depths of the same or similar tones with Toffee, Vanilla, Haystack, Caramel and Pumpkin Soup. Then stuck it onto a 4x6" Box Canvas with Ranger Multi Medium (Matte).
NB. A video showing how to make this ochre BG, is at the foot of this post.

Step Two:
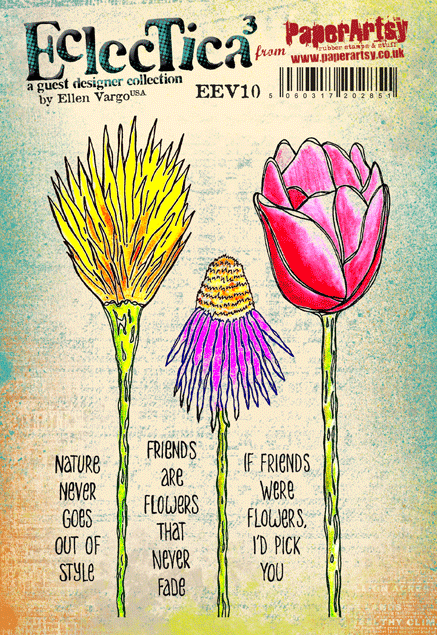
Well, its not like me to plan things to this extent, but the ideas were whizzing in my head too fast, and I just needed to commit to one of them. I grabbed some Prima Bellies, EEV10 flower stamp, and some charms. Then feeling a bit scatterbrained, I had the good sense to take a photo and thus committed to a plan.

....and then quickly, before I could change my mind, slapped Pansy (fantastic high coverage opaque) onto the bellies.

.... and then added the obligitory Bora Bora by dry-brushing to add interest and depth. Not one to drybrush once, I also dry-brushed Eggplant, Squid Ink, Mermaid and Snowflake.
It is certainly true that the more layers you add, the happier you will be. More is more when it comes to dry-brushing! Of course, it won't end here, the finishing touch will eventually be Treasure Gold...but which one?? You'll find that out later...

Well, its not like me to plan things to this extent, but the ideas were whizzing in my head too fast, and I just needed to commit to one of them. I grabbed some Prima Bellies, EEV10 flower stamp, and some charms. Then feeling a bit scatterbrained, I had the good sense to take a photo and thus committed to a plan.
....and then quickly, before I could change my mind, slapped Pansy (fantastic high coverage opaque) onto the bellies.
.... and then added the obligitory Bora Bora by dry-brushing to add interest and depth. Not one to drybrush once, I also dry-brushed Eggplant, Squid Ink, Mermaid and Snowflake.
It is certainly true that the more layers you add, the happier you will be. More is more when it comes to dry-brushing! Of course, it won't end here, the finishing touch will eventually be Treasure Gold...but which one?? You'll find that out later...
...and then a quick check that the purple tones are looking good next to the ochre tones...

Step Three:
Onto Ellen's lovely flower stamp set.
First up I grabbed the background I made in Video 2...see there was a masterplan all coming together in this blog post!

...and then stamped it in Archival Coffee Ink, a bit softer than Jet Black, nice with the Ochre too. Cut it out; this forms a nice base for what is to follow. I added some depth of green to the stalk with Hey Pesto and a tad of South Pacific.
Step Three:
Onto Ellen's lovely flower stamp set.
First up I grabbed the background I made in Video 2...see there was a masterplan all coming together in this blog post!

...and slotted the flower into place on the canvas.

Step Four:
As I said at the start, brayered and layers of the stamped Waxed Tissue Paper is the focal point of the flower head.

Check out the video below to see how the paint was layered on the tissue with the brayer, and then I used a variety of stamps: EEV02 (scratchy), EEV06 (Spots), ELB04 (bold solid flowers), HP1304EZ (large script), in numerous Fresco Chalk Acrylic Colours to build up a striking and very easy to achieve, fragile paper.
Step Five:
Now the background is made, I'm going to stamp it 6 times to make a layered flower head for the canvas, with Coffee Archival Ink. Heat set quickly, sometimes ink bleeds on tissue if you leave it for a bit.

... like this..

...and then cut them something like this so the layers expose those sitting behind.
...and then cut them something like this so the layers expose those sitting behind.

Step Six:
Now it's just a matter of layering the tissue carefully with a touch of glossy accents as a fast glue, and tiny foam pads to add dimension. And always finish things off with a tickle to the embellishments of Brass Treasure Gold.

Here's a video showing the ochre background being made (back in Step One), and the tissue layers, plus a few finishing touches to the project with Fancolour Water Soluble Pens (the student version of Fibralo Pens)
And finally ... here it all comes together.

I hope you have been enjoying the fragile papers, and the new look to the blog? More fragile Papers projects keep on coming this week, I hope you can find some time to have a play yourself, and show us what you can do with Fragile Papers.
Leandra
We would love you to join in with challenge #1: Fragile Papers. If you are inspired by any of our guests who have blogged on this topic over this fortnight, then please join in and link up your creativity HERE.
All links go in the draw to win a £50 voucher to spend on products of your choice from the PaperArtsy online store. This link will close 17:00 (London Time) Sunday, Jan 18th 2015, winner will be announced 2 hours later at 19:00.


25 comments:
That is so gorgeous! I love the flower, the petals look so pretty. Thanks for another video Leandra!
What a brilliant canvas - that ochre background is a stunner - perfect vintage warmth, and the layered flower is fabulous. Love the soft blues of the embellishments too - the spool is too cool!
Alison xx
what a brilliant project, I adore that tissue flower, so much depth with the layers. Thanks for another wonderful video.
Ooh! A video! Off to watch! Love your finished project - looks fabulous!
What a stunning project, love the layered tissue flower, now off to look at Part 3, wonderful inspiration this week...as always. Ruth x
Fab post, Fab box canvas and fab new look to the blog! Love it all and the fragile papers seems to have struck a chord with lots of PA fans. Off to change browsers so I can watch the videos ..... Firefox is not playing nice probably cos I haven't updated something, lol!
Hugs
Lesley Xx
What a stunning project! This is the perfect colour combo and the flower looks wonderfully dimensional! Fragile Papers has certainly got the blog off to a terrific start for 2015 - stimulating stuff!
pretty, pretty, pretty...lots of inspiration for when I get back!
very lovely! love a bit of book text! :o)
Beautiful love the flower xx
Fab canvas, love it....more stamps added to the wish list! lol
Gorgeous project, great video. Off to deal with a recalcitrant bit of tissue paper...
A very beautiful canvas Leandra!!! Thanks so much for all your videos on brayering techniques, I absolutely MUST have a serious playtime with my paints and my brayer, I'm itching to have a try on all this! xx
What a beautiful project! Love your choice of colors, the brayer technique and the lovely tissue flower.
That's amazing, I can't wait to try those two background techniques and I love that layered flower!!
Lucy x
What a amazing project Leandra! Stunning background colours combo with tissue paper and pretty flower. The canvas project is fabulous, I love it. Thank you for your wonderful videos. xxx
Wonderful videos, and a gorgeous canvas, many thanks for all the info and inspiration x
Fantastic post Leandra and a gorgeous canvass. Xx
Fantastic!!! Love your colours Leandra x
So enjoy your videos, loving the Pansy/Bora Bora combo ... you do know that is in the purple family right :) x
Taken me a while to watch, but got there and really enjoyed watching all the layering. Some great ideas Leandra...thanks! Xx
Thanks for two fab videos Leandra, I received some wax tissue paper last week as something new to try. Now I will be having even more fun than I thought.... Thanks :D x
So beautifully made, love the flower and the colors.
Anni
Wow wow wow totally stunning canvas, love all the added bits and the flower is fabulous. Love the videos in this challenge series. Happy Creating :-) Kezzy xxx
Thank you for sharing so much inspiration along with great techniques too!
The colors you used on your fragile paper covered canvas really are yummy and the layers for your flower add such interest to the wonderful paper you created.
Hope you are having a nice winter weekend!
oxo
Post a Comment