


Hi everyone, it's Liesbeth with you today, and I'm here to share with you my vintage fantasy street, the street of my dreams!

My starting point was the wonderful four A6 stamp plates: the PaperArtsy Ink and the Dog Architecture series. The stamps are exactly the style I love so much! In combination with the theme 'Up my Street' I started to fantasize, like I always do...about times gone by, a street full of beautiful old buildings, people from long ago, and a row of houses.


I knew my project had to be a leporello book, a row of houses. I thought about thicker front and back covers...I still had no idea how exactly to do it. So I just started to cut lots of houses. I wrecked an old carton box and cut house shapes out of it for the covers. I also cut some out of white cardstock for the pages . My houses measure 12,5 x 6,5 cm.

I glued some of the thick carton houses together to create a thickness of 1 centimeter, two times for the front and back cover.

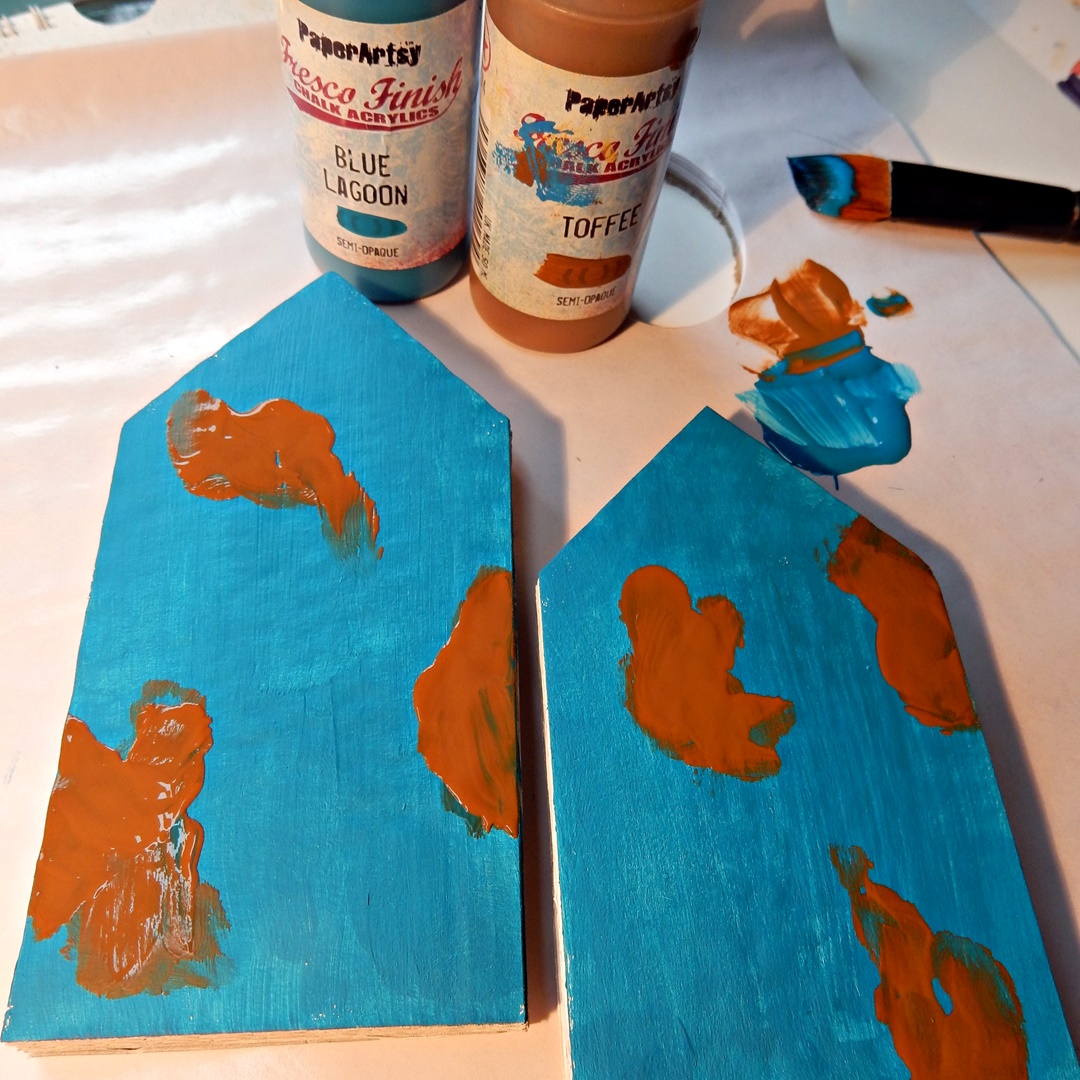
After a thin layer of gesso, I painted the covers on one side with PaperArtsy Fresco Finish-Blue Lagoon and some spots with PaperArtsy Fresco Finish-Toffee as shown here. How I love this colour combination!
After drying, I applied some PaperArtsy Crackle Effect here and there (amazing stuff!!).

I dried the crackle glaze carefully with my heat tool and applied PaperArtsy Fresco Finish-Chalk on the entire area. Beautiful crackles apeared right away!

Half way through the drying time, using a baby wipe, I wiped away some of the Chalk paint to create a weathered, peeled off look.

At this stage I thought it looked to new, a bit to white. So I watered down a drip of dark brown paint , PaperArtsy Fresco Finish-Chocolate Pudding , and painted the pieces with this ,watercolour paint'. I also painted the short sides with it. Now I was satisfied about the look!


I put aside the covers for a moment... now it was the turn of the white cardstock pages first. Using stencils and a small sponge I painted the edges of the houses. On every house I used Fresco Finish-Chalk and one of the other paints: Toffee or Blue Lagoon. The paint will work as a resist later on; a great effect!
These are the PaperArtsy Stencils I used:


I searched for 3 Ranger Distress ink colors matching with the paints and I found Antique Linen, Vintage Photo and Mermaid Lagoon. I applied the three colours one by one in overlapping areas, using a foam blending tool. Now you already see the resisting of the ink by the paints!

I sprayed a bit of water in my hand, clapped my hands above the cards and dabbed the waterdrops off with paper towel.

Using the same stencils again I sponged with Distress inks Gathered Twigs and Chipped Sapphire across the diagonal of the houses. I tried to keep the centre light.

At this stage I had lots of houses. 16! With different backgrounds (still didn't know if I use them all) and two covers. The very best part starts now: stamping!

Stunning stamps! 😍


I started stamping randomly, using Tsukineko StazOn Jet Black. I used almost every stamp of the four plates and tried to make it as varied as possible.

I watered down a drip of pure bleach, made a puddle of it on my craft sheet and used that as an 'ink pad'. I stamped the bricks stamp from Architecture Plate 3 on a few pages, stamping with thinned bleach. I was very surprised when I saw a pink colour appear!

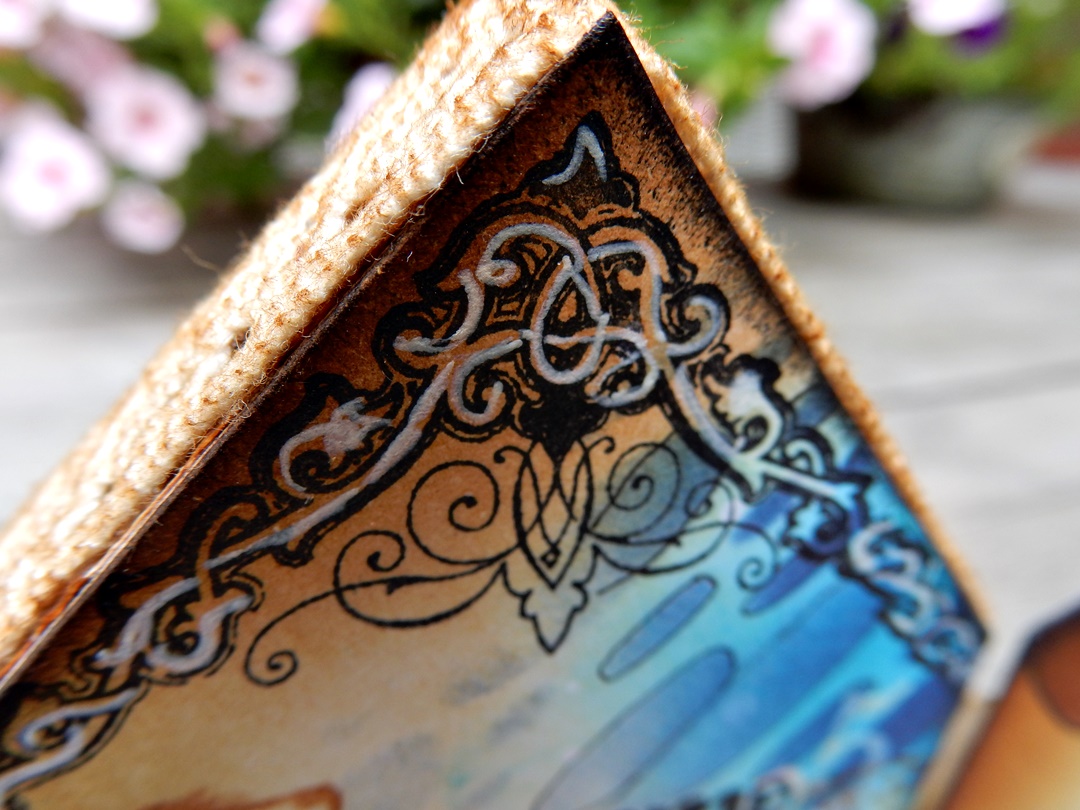
Some finishing touches for the pages: I stamped some images using Distress ink-Vintage Photo and texts with black, sponged the edges with black ink, made some shadows with a charcoal pencil, bleached some of the focal points (people, windows, tower), drew fine black lines around the diagonal stenciled parts (just the corners, not in the middle) and I made some accents with a white gel pen.

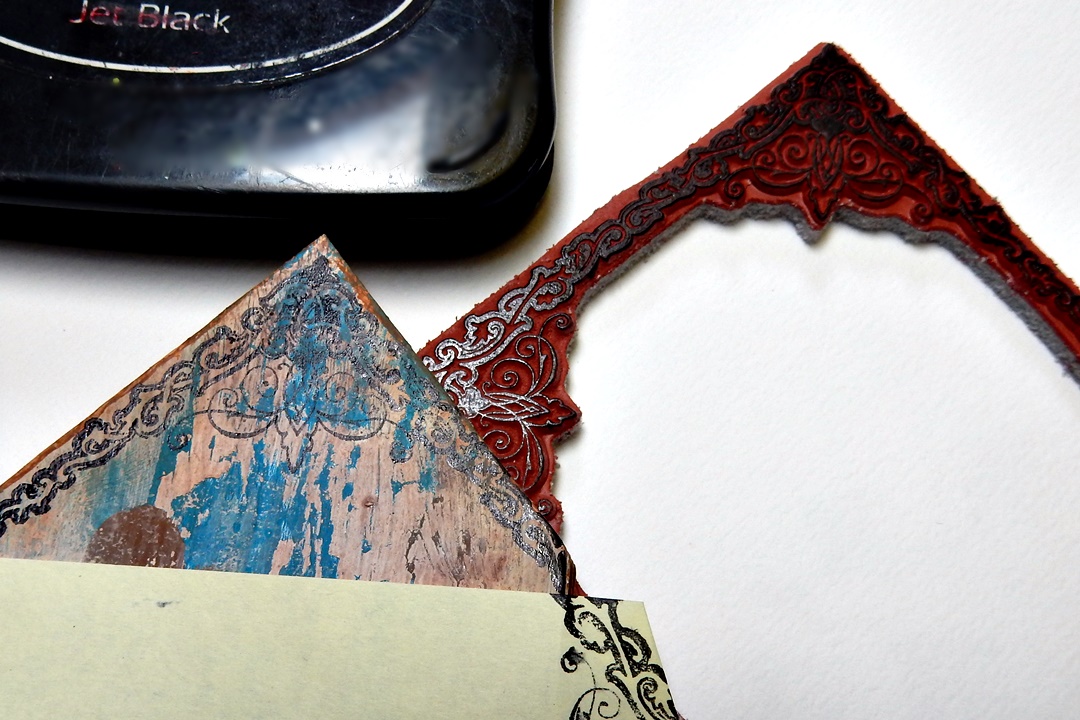
Using the big frame stamp (Architecture plate 3) and StazOn, I stamped the ridge part of the covers. I protected the bottom part with a piece of masking paper as shown.
I created my own text by composing out of the different texts of the stamp plates. I cut the letters out and sponged the edges with Vintage photo, and added them to the front cover.

I still didn't like the short sides of the covers.. so I decided to glue lace around them. To make it old looking, I sponged the lace with Distress ink -Vintage Photo.


There are so many ways to bind a book! This time I chose to bind my houses with ribbon and to make an accordion book. A nice way to create a row of houses...a street! I chose the 14 pages I liked most, I had 2 left overs. I made a beautiful composition/row of 8 houses, put them in a row on the table, upside down, and glued two strips of ribbon on the back sides. I used thin organza ribbon. There were 3 millimeters between the pages.

After that I glued the other 6 pages and the two covers back to back onto the first row of 8 and let dry well. I think the picture clarifies it.

This is what the book looks like when you fold it.

And here- the street of my dreams appears.


I enjoyed making this leporello book so much! The stamps I used are some of my favourites, they inspired me a lot! They are perfect for a daydreamer who wants to create a colourful fantasy street!
This wonderful topic with the theme 'Up my Street' can be anything, use your imagination and I hope you give it a try yourself. I'm so curious how everyone interprets the topic! Have fun!
Liesbeth XX

Facebook: Liesbeth Fidder-de Vos
Instagram: liesbeth_fidder


11 comments:
What a stunning accordion book project Liesbeth! Book shapes, textures and using Ink and the Dog stamps different fun images of pages. I love this. xx
A fabulous work of art Liesbeth. Great use of the stamps too. Xx
WOW! This looks like it was a LOT of work...but it was WORTH it! This is absolutely fabulous!! It is a gorgeous piece of work.....Thank you for sharing your process!!!
Fantastic street scene - love the thick covers and how you've covered the edges with lace.
Really a gorgeous project in all ways! Well done you, Lisbeth!
Wow, what an amazing project Liesbeth!!
Greetings Margo.
I am completely blown away by your creativity.
Super post Liesbeth! I loved how the reel on IG shows the size, I wasn't sure if it might have been a bit bigger, totally adore what you made!
Wauw Liesbeth, this is so beautiful, love the colors and th whole design.
Wat heb je er weer een mooie serie van gemaakt. Schitterend. Groetjes Henriette
Thanks so much everyone!
Post a Comment