2019 Topic 14: Inchies & Twinchies
Helen's
bright idea of using Stampbord really takes the jewellery to a bespoke
level. You'd never know its humble beginnings and the etching gives
gorgeous dimension. The echoes of the images in the background make for a
beautiful duo.
Hi everyone, it's Helen with you today, and I'd like to share with you a pendant and a bracelet decorated with some of Kay's new flowers.
When the topic said 'Inchies and Twinchies', I immediately thought of Stampbord which comes in just those sizes and is one of my favourite surfaces. Kay's stamps work well because they're made up of lots of little flowers, ideal for a small area.
I've always wanted to make a bracelet using the inch tiles but the problem has always been that if you use a Cropadile to punch the holes you've lost most of the surface. I got round this by using an old hand drill that was in the tool box (now staying in my craft room!) - wonderful! Perfect size holes and I even found some tiny eyelets in my stash that fit.

I've just dripped the alcohol inks on these and left them without using blending solution. It's quite dark but no worries as...

...you can lighten it up with a baby wipe.

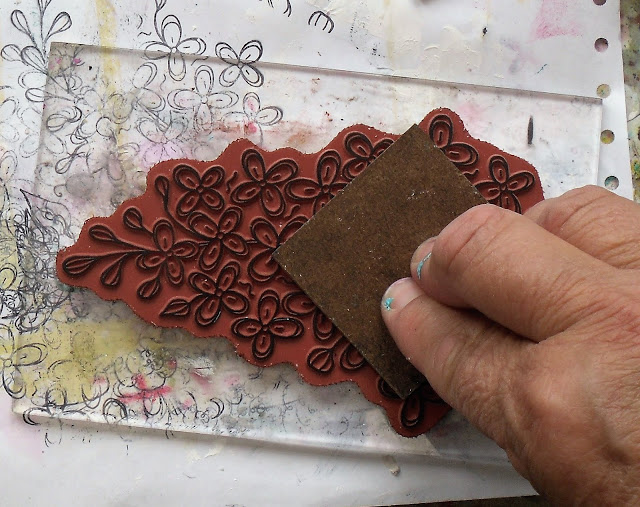
I always press the Stampbord piece onto the stamp.

I'm
using quite a wide scraper from the original Stampbord set. It's always
worth practising etching on a spare piece, especially with this tool as
otherwise you can scrape out the wrong bit! I like this tool as it
creates a lovely sweep and doesn't dig in like the sharp pointed etcher.
Does that make sense? I hope so!
I
then used the stencils and stamps to make some tags. I love the way the
stamps have slightly 'missed' the stencilling - it seems to give more
depth.
I was so carried away with the Inchie theme that I drew some on the tags and then punched out some extra ones to go on top.
You'll
want to neaten up the backs of these Stampbord tiles - I just used
scrapbook paper and then edged with a silver chrome pen. As these are
for wearing you do need to varnish them on both sides. I used a spray
varnish and then added some Liquid Glass to the petals. As
you can see I made my bracelet on the diagonal which does work, but if I
did it again I'd work on the square as it sits better on the wrist. My
own fault - I was too lazy to drill all the holes and attach the jump
rings! It might have been easier to use wire instead to attach them as I
did with the pendant. I can see I'm going to have to try another one to
find out!
Watch this space!


.jpg)
10 comments:
what a great idea! they look fabulous
Oh wow... Great idea... And gorgeous!
Very pretty, and a nice presentation!
How gorgeous, Helen, i have always loved Stampbord and I would wear these in a heartbeat! Love your idea of adding the colour back in!
Lucy x
Such a clever idea to make a bracelet; it is so cute and colorful! The background is lovely, too, Keep calm and create on!
Terri
Love this Helen! Great gift idea. I love Stampbord too especially for jewellery pieces.
Amazing project Helen, great idea and beautiful jewelries. xx
Absolutely love your jewellery Helen and Stampbord is one of my faves too, don't know why I haven't used it for so long!!! xx
What a creative project!! :)
Love your inchie bracelet and your inchie tag is such a great way to display it . Fabulous . So pleased that you have been finally created a bracelet from stamp board that you have always wanted to . Thanks for sharing some great hints and tips.
x
Post a Comment