Thursday, 4 May 2023

2023 Topic 5 : Tinged Blue {Floss Nicholls} with Squiggly Ink stamps (tones)


Hi everyone, It's Floss with you again today and I'm here to share an exciting project I have just designed using the star of the current topic; Surfs Up. The challenge set for me this time by PaperArtsy was to use Surfs Up with a grey so that I could explain and demonstrate the use of 'tones' of Surf's up to you. Mixing Surfs Up with Slate gave me some wonderful tones to play with on my gel plate to create master boards ready for making pages for my 'Any Year Calendar'.  


It turns out I learnt a few things along the way and I hope that you enjoy this project as much as I did creating it.


There were several things that I needed to do before I started sharing my 'any year calendar' with you as it was still at the idea stage and so it needed a prototype.  But first things first, I needed to do some colour mixing/testing to explore the 'tone' terminology.


I snaked my way across the page and back...it probably would have been more helpful if I'd have used a longer piece of card and did my colour mixing in a straight line to show the tonal increments for your reference, and so apologies for that.  I think I also could have added the slate grey in smaller amounts to give me more lighter or closer variations within the Surf's Up end on the page. What was interesting though, was that I did find that the darkest tone would not exceed that of the slate acrylic paint.  I found this was the same when I trialled elephant too.

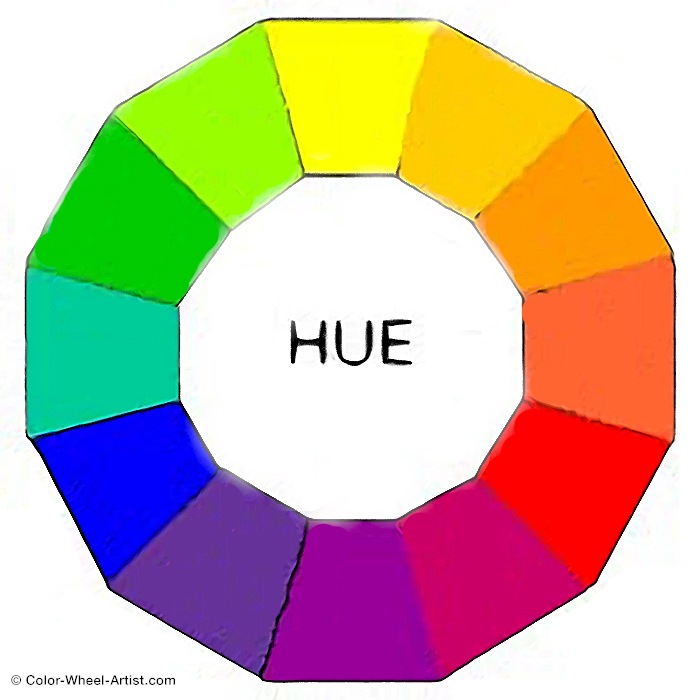
So to clarify the use/definition of the word TONE; Tone is a colour created by adding grey to the starting colour. Tonal colours are often considered more pleasing to the eye as they are more subtle. Generally speaking almost every colour we see day-to-day has been toned to some degree. As you can see on the example I found below, the toned colours are slightly softer on the eye as the grey takes away the brilliance of the original colour.


I chose to use PaperArtsy fresco finish acrylic paints Tinned Peas (FF55) as I liked the similarity of its colour strength, Vintage Lace (FF18) for its contrast and Slate (FF84) to mix with Surfs Up (FF146).  I added those to my colour swatches and mixed a little of all the paints together which made an interesting putty grey colour which I loved. I often mix a little of all the colours I use together as I think it helps make all the colours work together nicely.


Before I started prototyping the calendar stand, I needed to work out the size that the date and month pages would need to be so I printed a few different layouts using the Squiggly Ink stamp Love and Kisses Plate 4 (SILK4EZ) for the letters and Ding Dong Plate 9 (SIDD9EZ) for the numbers. I started looking at colours and how I'd fill each box and letter, whether to be neat and stay inside the box lines, or whether to overflow the edges.


Using these stamps gave me the dimensions 120mm x 45mm for the month pages and 70mm x 60mm for the date pages. I looked at two calendar stand possibilities after doing a few sketches on my 'under paper'. I always have paper not a mat or glass under whatever I am working on as it allows me to jot notes or doodle ideas onto it whilst working away on other things. It also has a wonderful way of building layers without trying and often ends up as a wonderful collage piece used elsewhere...enough of that; sorry I digress...The first calendar idea allowed me to potentially have three pages to turn but it meant that I would've had to have had a slot for one set of the pages which would need to be slotted through the face every time I made a date change which was fiddly, so I ruled that one out!
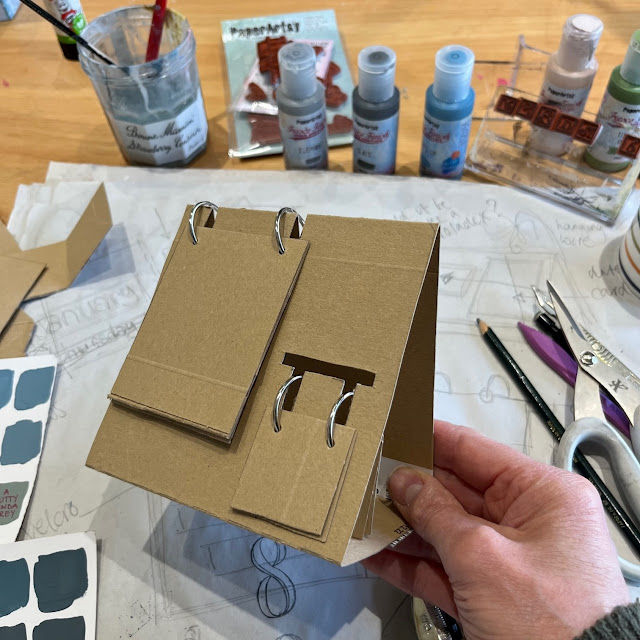

My second idea was to make the stand oblong and have only the month and the date pages. I found that by making the month slots deeper, they would hang lower to make it more visually appealing.  This gave me a calendar surface of 240mm x 90mm.
 

I marked the base out onto 30gsm card; it measured 315mm x 240mm overall. The picture below shows sections left to right as 75mm x 240mm, 90mm x 240mm, 90mm x 240mm, 40mm x 240mm and the two half circles were made in the remaining 20mm x 240mm being 40mm in from the edges with a diameter also of 40mm. Score the three fold lines. The slits were made by folding it into a triangle and marking where the semi circles needed to go to hold the base together. Cut these with a knife. The slots will be explained later. I gave the surface a base coat of acrylic.


Now that I was happy with how it was going to be constructed, it was on to the most fun part...creating the master boards for the pages and playing with collage and the designs.
 

Out came the gel plate, I wanted to try and lift painted dragonflies from it! I started with stamping dragonflies using the Squiggly Ink Mini (SM13) with Rangers Distress Archival Ink in faded jeans.  I let that dry before painting Surfs Up directly onto the gel plate. After letting that dry, I rolled a layer of Surfs Up mixed with Slate to make it two shades darker over the top and pulled the image.


I decided this would be good to use on the calendar stand but the image didn't lift the first time as I tried to gel print straight onto the card. Gel printing definitely works better onto thinner paper. Because the images only half came out I let it dry and then sanded the surface ready to try a second pull over the first, it created quite a distressed look which I quite liked, and it left me with some dragonflies on the gel plate which added to my next gel print.


I made a selection of 'master sheets' to make the calendar pages from.  I started by collaging small parts of the PaperArtsy tissue paper (PT01) and slightly off-white book pages onto A4 paper with matte gel medium and letting that dry before rolling different mixes of Surfs Up and slate onto the gel plate to make the gel prints.


I used gesso over the areas where printed book pages were to mute/soften the words and also over the edges of the collage papers to blend them.


I used the Squiggly Ink Tops and Tails Plate 2 (SITT2EZ) to add further detail to the sheets. The little dragonflies on the bottom left sheet were the ones I painted onto the gel plate to lift. I really like the way they turned out.


I glued the A4 gel prints back to back so that the images were double sided to make them stronger and I could choose which prints were the best of the bunch. I cut them into their pages. I made six 120mm x 45mm rectangles for the months and sixteen 70mm x 60mm rectangles for the dates.


Rather than printing out each word or date onto the tissue paper as it read; and so that I could space the letters and numbers individually, I counted how many of what letter and number I needed, then printed them making sure that I had a couple of spares for each in case I made a mistake.


I waited for these to dry before painting on the reverse of the tissue paper. I decided to paint all of the letters using PaperArtsy Fresco Finish chalk acrylic in Vintage Lace keeping inside the boxes.


I used a combination of the Vintage Lace and PaperArtsy Fresco Finish Chalk Acrylic Tinned Peas for the numbers. I decided to do a variation of keeping inside and painting over the edges for the numbers as I generally like a more grungy unkempt kind of feel to my art.


Using a thin paintbrush and water, I painted a fine line and separated each letter and number tearing them carefully apart ready to apply them to the card pages. I tore them rather than cut them as the torn/feathered edges blend better into the substrate when gluing them on.


I then randomly selected various designs to paste onto their background cards for the first six months and 16 days. As the pages were double sided it was important to have the months turning in sequence so that July would be on the reverse of June, August on the reverse of May working through so that December was on the reverse of January.  The same was important for the numbers so that 17 was on the reverse of 16, 18 on the reverse of 15 working through to 31 being on the reverse of 02 leaving the reverse of 01 blank. This allowed the cards to be turned in sequence throughout the year and in date order just by turning them over.


To hold them into place I punched two holes in each using a card jig. This allowed the holes to be in exactly the same place each time with only needing to measure one card for each.


I secured the dates and the months together both using two 30mm loose hinged rings.


Having made all the components I was ready to make the slots and assemble it all.

I continued to distress the stand using more layers of the Surf's Up tones. I watered down a small amount of Surf's Up to wash over the empty areas to give the brilliance back to the original colour.

Using the holes that I had punched as a guide to where the slots needed to be. I marked either side allowing the slot to be 5mm wide making sure to keep the spacing at the edges equal when laying out both pages.


I measured 35mm down for the month slots and 30mm down for the date slots and double checked that the rings lined up.


I folded the calendar at the top and cut down the line using scissors, folded the waste from the slots inside the stand, then tucked the semi-circle tabs inside the holding slots on the underside allowing the stand to become 3D.


Which left the last thing to do...pop the dates in place and sit it on a shelf... 


I tried to keep the contrast between the stand and the calendar pages so the blues did not merge into one another.  Since photographing the final outcome, I now think that I could have added more detail to both the stand and the pages without going totally overboard. I may add more stamped images from the same set at a later date...maybe I should have incorporated the flower stamp but definitely the birds...I think my stand is crying out for something more. 

There is room to add to this project and I've since thought that it could be possible, and a fun touch, to add a dragonfly/dragonflies to some wire to be secured into the apex of the stand so they could be flying above/around the stand...let me know if you try that.


Until next time, enjoy your creative time and space.

Floss x


I have made a YouTube video to show you easy to follow step by step instructions.


Facebook: flossWORKSHOPart


Website for Art and Classes: flossworkshopart.com

I will be teaching various mixed media classes from my workshop in East Sussex UK including


Monday, 1 May 2023

2023 Topic 5 : Tinged Blue {by Renata Peley} with Hot Picks stamps


Hi everyone, Peley Renata with you today and I have prepared something really fun for this blog post. This won’t be the first time (nor probably the last) I tell you that I did something new, out of my usual style or comfort zone. I feel like blogging for PaperArtsy has been a great motivator for me to expand my knowledge and my skills. So, let me share my newfound knowledge with you.


Perhaps this project seems simple enough, but let me show you the ways I have explored the colors and textures of this month’s topic.


For this topic, I felt like my starting point should be some research.

As we are exploring variations of blue color, in particular PaperArtsy Fresco Finish Chalk Acrylic Paint Surf’s Up (FF146), I will talk about the shades of this color. 

I think many of you, same as me have mixed up the terms 'shade', 'tint' and 'tone' so first let’s define what does a shade of a color mean. 
Shade is a hue (pure colour) or mixture of pure colors to which only black is added. 
Shade darkens the color, but the hue remains the same. When mixing a shade, we begin with the color itself then add black one drop at a time.

To better understand what I mean, take a look at the picture below.


Now that we understand what the shades of a color are, let’s start mixing PaperArtsy Surf’s Up. For making shades, I had to add pure black color which is PaperArtsy Fresco Finish Chalk Acrylic Little Black Dress (FF19).


On the image above, you can see the various 'shades' of Surf’s Up that I have achieved. This is a very basic and not too precise palette that I have made as I have eyeballed the amounts of the paint. For instance, I know for sure I could have achieved a few more brighter shades, and I encourage you to try it yourself.


Before I start focusing on my project, I wanted to do some experimenting first. 

This quarters’ topic is ‘textures’ and I think that is a topic on which we all from the PaperArtsy team could write blogs all year long, but let’s start simple.

For creating texture, I chose only a few simple tools: PaperArtsy Grunge Paste (GP190), my chosen acrylic paints, a couple of brushes, paper napkins and a palette knife.


I made six experiments and I will tell you a couple of words about each of them. I have also prepared a video on which you can see my process for each of these backgrounds.

For each project, I used heavy weight (300gsm) smooth paper and some Grunge Paste. But I made sure to apply the paste and the paint in different ways. So, let’s start.

Example #1

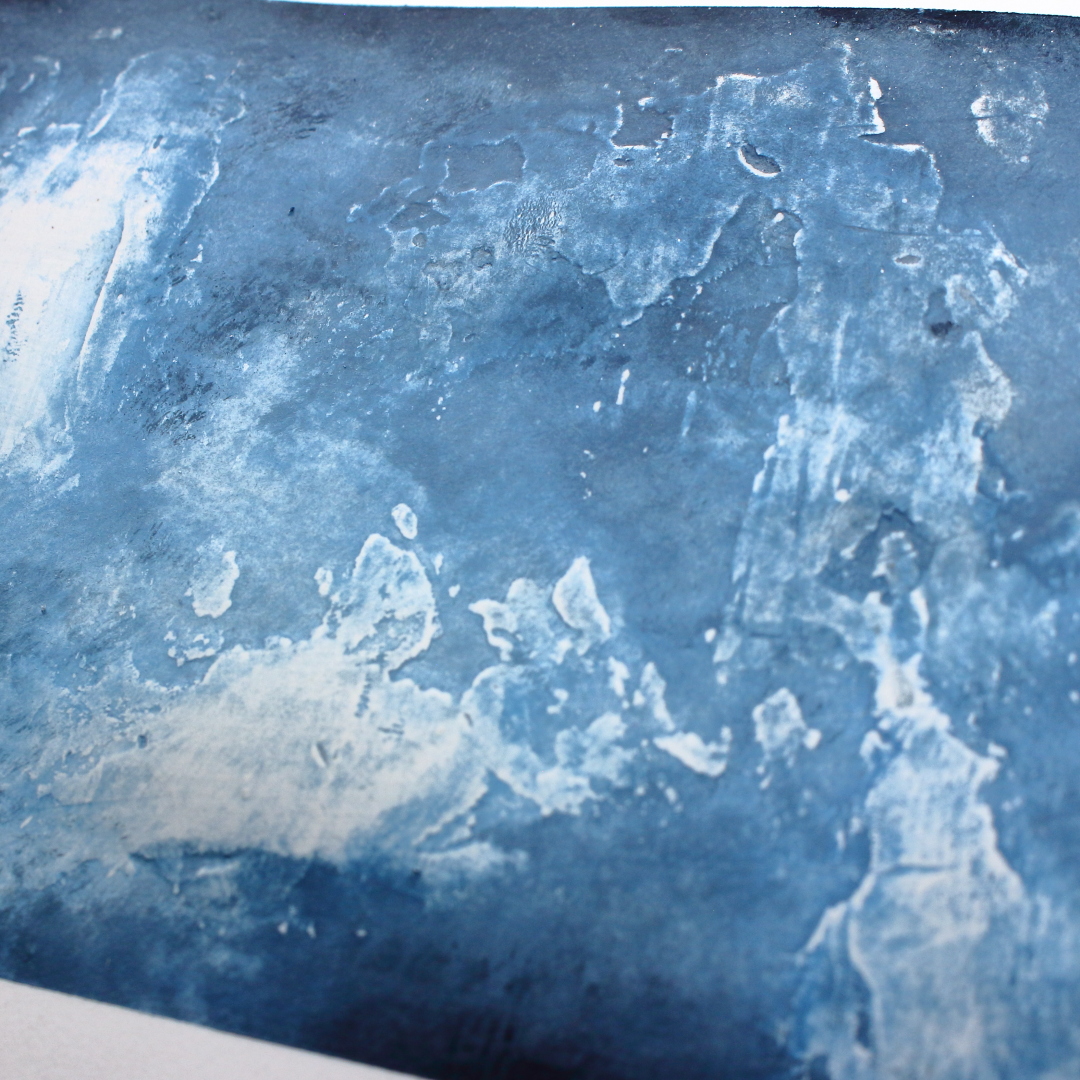
Here I applied a thick layer of Grunge Paste in a vertical line and I made some deep marks on the paste with the side of my pallet knife.


I applied the paint with horizontal brush strokes, going from long brush strokes with lighter shades to shorter brush strokes with darker shades. 
When the paint was dry, I added some splatters with the PaperArtsy Fresco Finish Chalk Acrylic Snowflake (FF15) and I have removed a thin layer of paint from my textured area with a sanding block for contrast.


Example #2

In this case I have applied the Grunge Paste while trying to smooth the edges of the paste so that textures wouldn’t be too rough and bumpy. I did this dry, but if you mist water over GP, that is another way to create a very silky smooth surface with this product.


The paint was next applied with a dry brushing technique with a wide, flat brush going from brighter to darker shades. I tried to keep darker shades mostly towards the edges of my paper. When the paint was dry, I once again used sanding block to remove paint from the textured areas.


Example #3

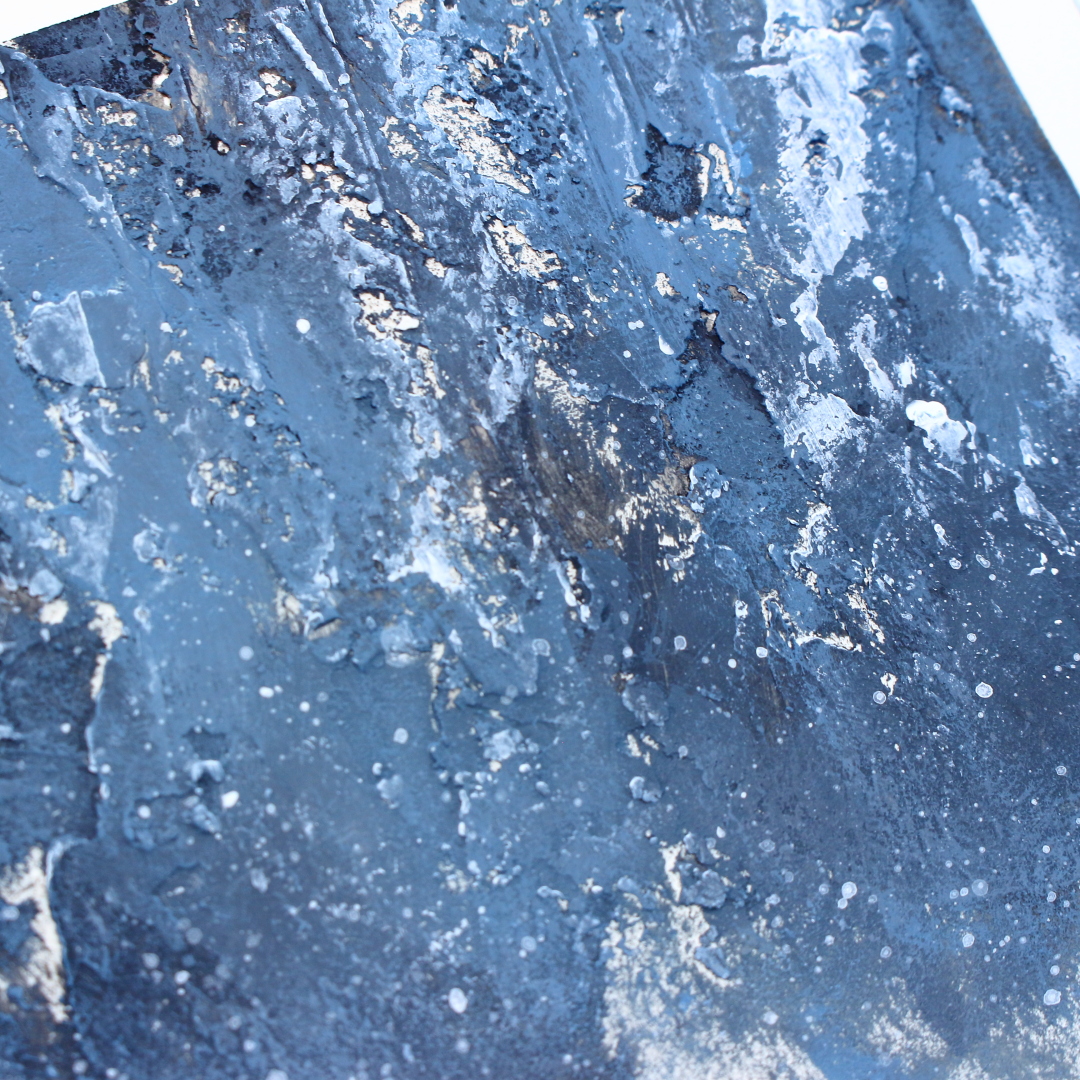
In contrast with the previous experiment, I applied Grunge Paste while making sure that my textures would be as rough and bumpy as possible.


For this and the next experiment, I tried layering the paint a bit differently. I have first applied darker shades and then the brighter shades over them. To accentuate the textures, I have added a bit of white acrylic paint in the end.


Example #4

Once again, I have applied a very thick layer of Grunge Paste and made deep, vertical impressions on it. While drying the Grunge Paste, I have noticed that it doesn’t bubble up under the heat as some other texture pastes might. Some people like this effect while others don’t, so it is just something to be aware of. 

(TIP from Leandra: Grunge Paste is very stable when dried with a heat tool because it is clay-based, not plastic! Generally it is plastic products that will bubble. However, if you want to create cracks and fissures in Grunge Paste,  spritz the GP generously with water while it is wet, then use your heat tool to dry the GP fast. The underlayer will dry first because the water stops the very top section from drying. As you dry you will see cracks appear, and sometimes you might also get bubbles, this just depends on the heat tool intensity that you use, the thickness of the GP, and the amount of water you mist)


As I said, here too I was applying paint going from darker to brighter shades, but this time I used a pallet knife for painting. One fun way to create texture with your paint is to apply it in a thicker layer and lightly tap it with your pallet knife. I think it creates really pretty and fun textures. Since this kind of texture is not too noticeable, I used white acrylic paint to accentuate it.


Example #5

Another cheap way to make interesting textures is to use paper napkins or tissue paper. I have separated the layers of my napkin and used only one layer. It is very thin and delicate. I used matte medium to adhere it while making sure to wrinkle my napkin and make as much texture as possible. 


For applying the paint, I used the pallet knife. I really enjoyed how the paint gets stuck in all those texture nooks and crannies. Once again, I didn’t resist using white paint to accentuate the texture.


Example #6

Now last but not least and perhaps even my favorite one. This time I have combined the texture made by adhering the paper napkin with Grunge Paste that I applied over it. This way I had two types of textures.


In this case, I was going a bit back and forth with adding darker and lighter shades. I also applied some white paint and a bit of white splatters. For applying the paint, I used dry brushing technique.


I came to the realization that I really enjoyed how the various shades of Surf’s Up can look with the dry brushing technique. As far as texture making goes, my favorite technique was the mix of paper napkin and Grunge Paste, so these are the things that I am going to try to replicate for my canvas.

You all know how important the size of your focal image is compared to the substrate. And since I am very bad at eyeballing the sizes, I decided to first make the focal image before choosing my canvas.

The whole inspiration for this project for me came from the PaperArtsy Hot Picks stamp set HP2102. So, the first step was to stamp this image. I decided to give it a more astral look by heat embossing the circle around the girl on a vellum paper with gold embossing powder, then I embossed the girl on simple white paper with black embossing powder. 


Now of course I fussy cut both of the elements and adhered them to each other. This way my focal image was ready to help me with deciding on the canvas size. For this project, I chose to work with 20x25 cm (7.8x9.8 inch), but honestly it doesn’t matter much as you can see what size fits the best for your own imagination.

After choosing the canvas, I started preparing for the fun part – texture making.


As you can see, I prepared two pieces of paper napkins, matte medium and an old brush. When adhering the napkin, I really did my best to make a lot of wrinkles. Also,  I didn’t have fully white napkins at home, just some children cartoon-themed ones so you can see a bit of the color on my canvas at this point (sometimes even the second and third layer of the napkin can have a bit of the color from the print), but that didn’t worry me as I will fix that with some white gesso.


In some other cases I would even leave the canvas as it is, with that napkin coloring and that might have been an effect of its own. But this time I really wanted to focus on achieving those beautiful shades and didn’t want those colors to be corrupted by the napkin print, so I have covered the canvas with white gesso, and on certain, more colored areas even added two or three layers of it as well.


And now let’s not forget about the PaperArtsy Grunge Paste. I have applied it mostly randomly and over areas where I felt that the paper napkin had created a bit too sharp lines. And I don’t know about you, but I am totally in love with how this project looks so far. In my mind, this kind of background gives a perfect opportunity to show all those lovely shades of Surf’s Up.


For applying the paint, I went with the dry brushing techniques as planned. I have placed a big blob of Surf’s up on the craft mat and a smaller one of The Little Black Dress. For the very first layer of paint, I placed pure Surf’s up, but for every next layer, I was adding more of the black color bit by bit. I covered the majority of my canvas with the first layer but with each darker shade, I was moving more towards the edges of the canvas. This way, all the various shades can be found over the surface of my canvas.

Sometimes it can be hard to take photos of every layer of shade, but I do have a full process video on my YouTube channel, where you can get a even more clear image of what I was doing.

When the paint was dry, I grabbed a sanding block and very gently sanded off a small amount of the paint on the more textured areas. It gave an effect of some highlights. I really liked these brighter areas so using a pallet knife, I applied very small amounts of PaperArtsy Fresco Finish Chalk Acrylic Paint Snowflake (FF15) on the textured areas but also in that brighter area on the left. Of course, I felt a couple of white splatters were necessary as well. 😊


To be honest, I was really enjoying my background as it was, but me wouldn’t be me if I didn’t have to add a couple more details.


As you know, before starting to work on my canvas, I made my focal image. There I did heat embossing with gold and black embossing powder. Now was the moment to connect my focal image with my canvas and for that, I needed some gold details on my background as well.

To achieve that, I have used Windsor & Newton Ink in Gold color and PaperArtsy Hot Picks stamp sets HP2102 and HP2103. The idea was to copy that same golden pattern around the girl’s head to the background.


And once again, I had to add those very irresistible splatters, this time in gold.

I really don’t understand why it is that way for me, but very often I feel these kinds of projects incomplete without a word or a sentiment. I could have completed my project before placing the image, but as soon I added the picture, I felt the text become necessary.

And what has to be done, has to be done. For the text, I just chose the word “imagine” which comes from the PaperArtsy Stencil PS100 designed by Sara Naumann. 


Well guys first of all, this was a very long blog post so thanks to all of you who stayed with me until the end. This was such a learning process for me, so I really do hope I managed to pass some of this knowledge to you as well. And to be honest, my head is still spinning. First, if you just look at those shades. The beauty, the richness of color that we achieved… and then we have those gorgeous textures which even more accentuate the colors… I mean, I know it is silly to self-praise but I just love everything about this project. I enjoyed experimenting, playing, learning and I enjoy the end result. The next level for me is to try to replicate something like this on a bigger scale and make a larger canvas (again in blue color as it is one of my favorites, just perhaps experiment with making shades with a different blue color) and see how I deal with texture making there. 

Anyway, I hope you enjoyed my creative process and that I have managed to inspire you to try some experimenting with colors and textures as well. 

Renata 💜


As I have previously mentioned, I have prepared two videos as well. In one of the videos you can see how I am learning and experimenting with colors and textures, while in the other one I am applying my newfound knowledge to make a beautiful canvas using some fun mixed media  techniques combined with beautiful PaperArtsy stamps and stencil.

()

()


Facebook: Renata Peley
Pinterest: @peleyrenata