Showing posts with label TS056. Show all posts

Friday, 26 May 2023

2023 Topic 6 : Tracy Scott {by Mags Woodcock} with Tracy Scott stamps


Hi everyone
Mags here with you today.

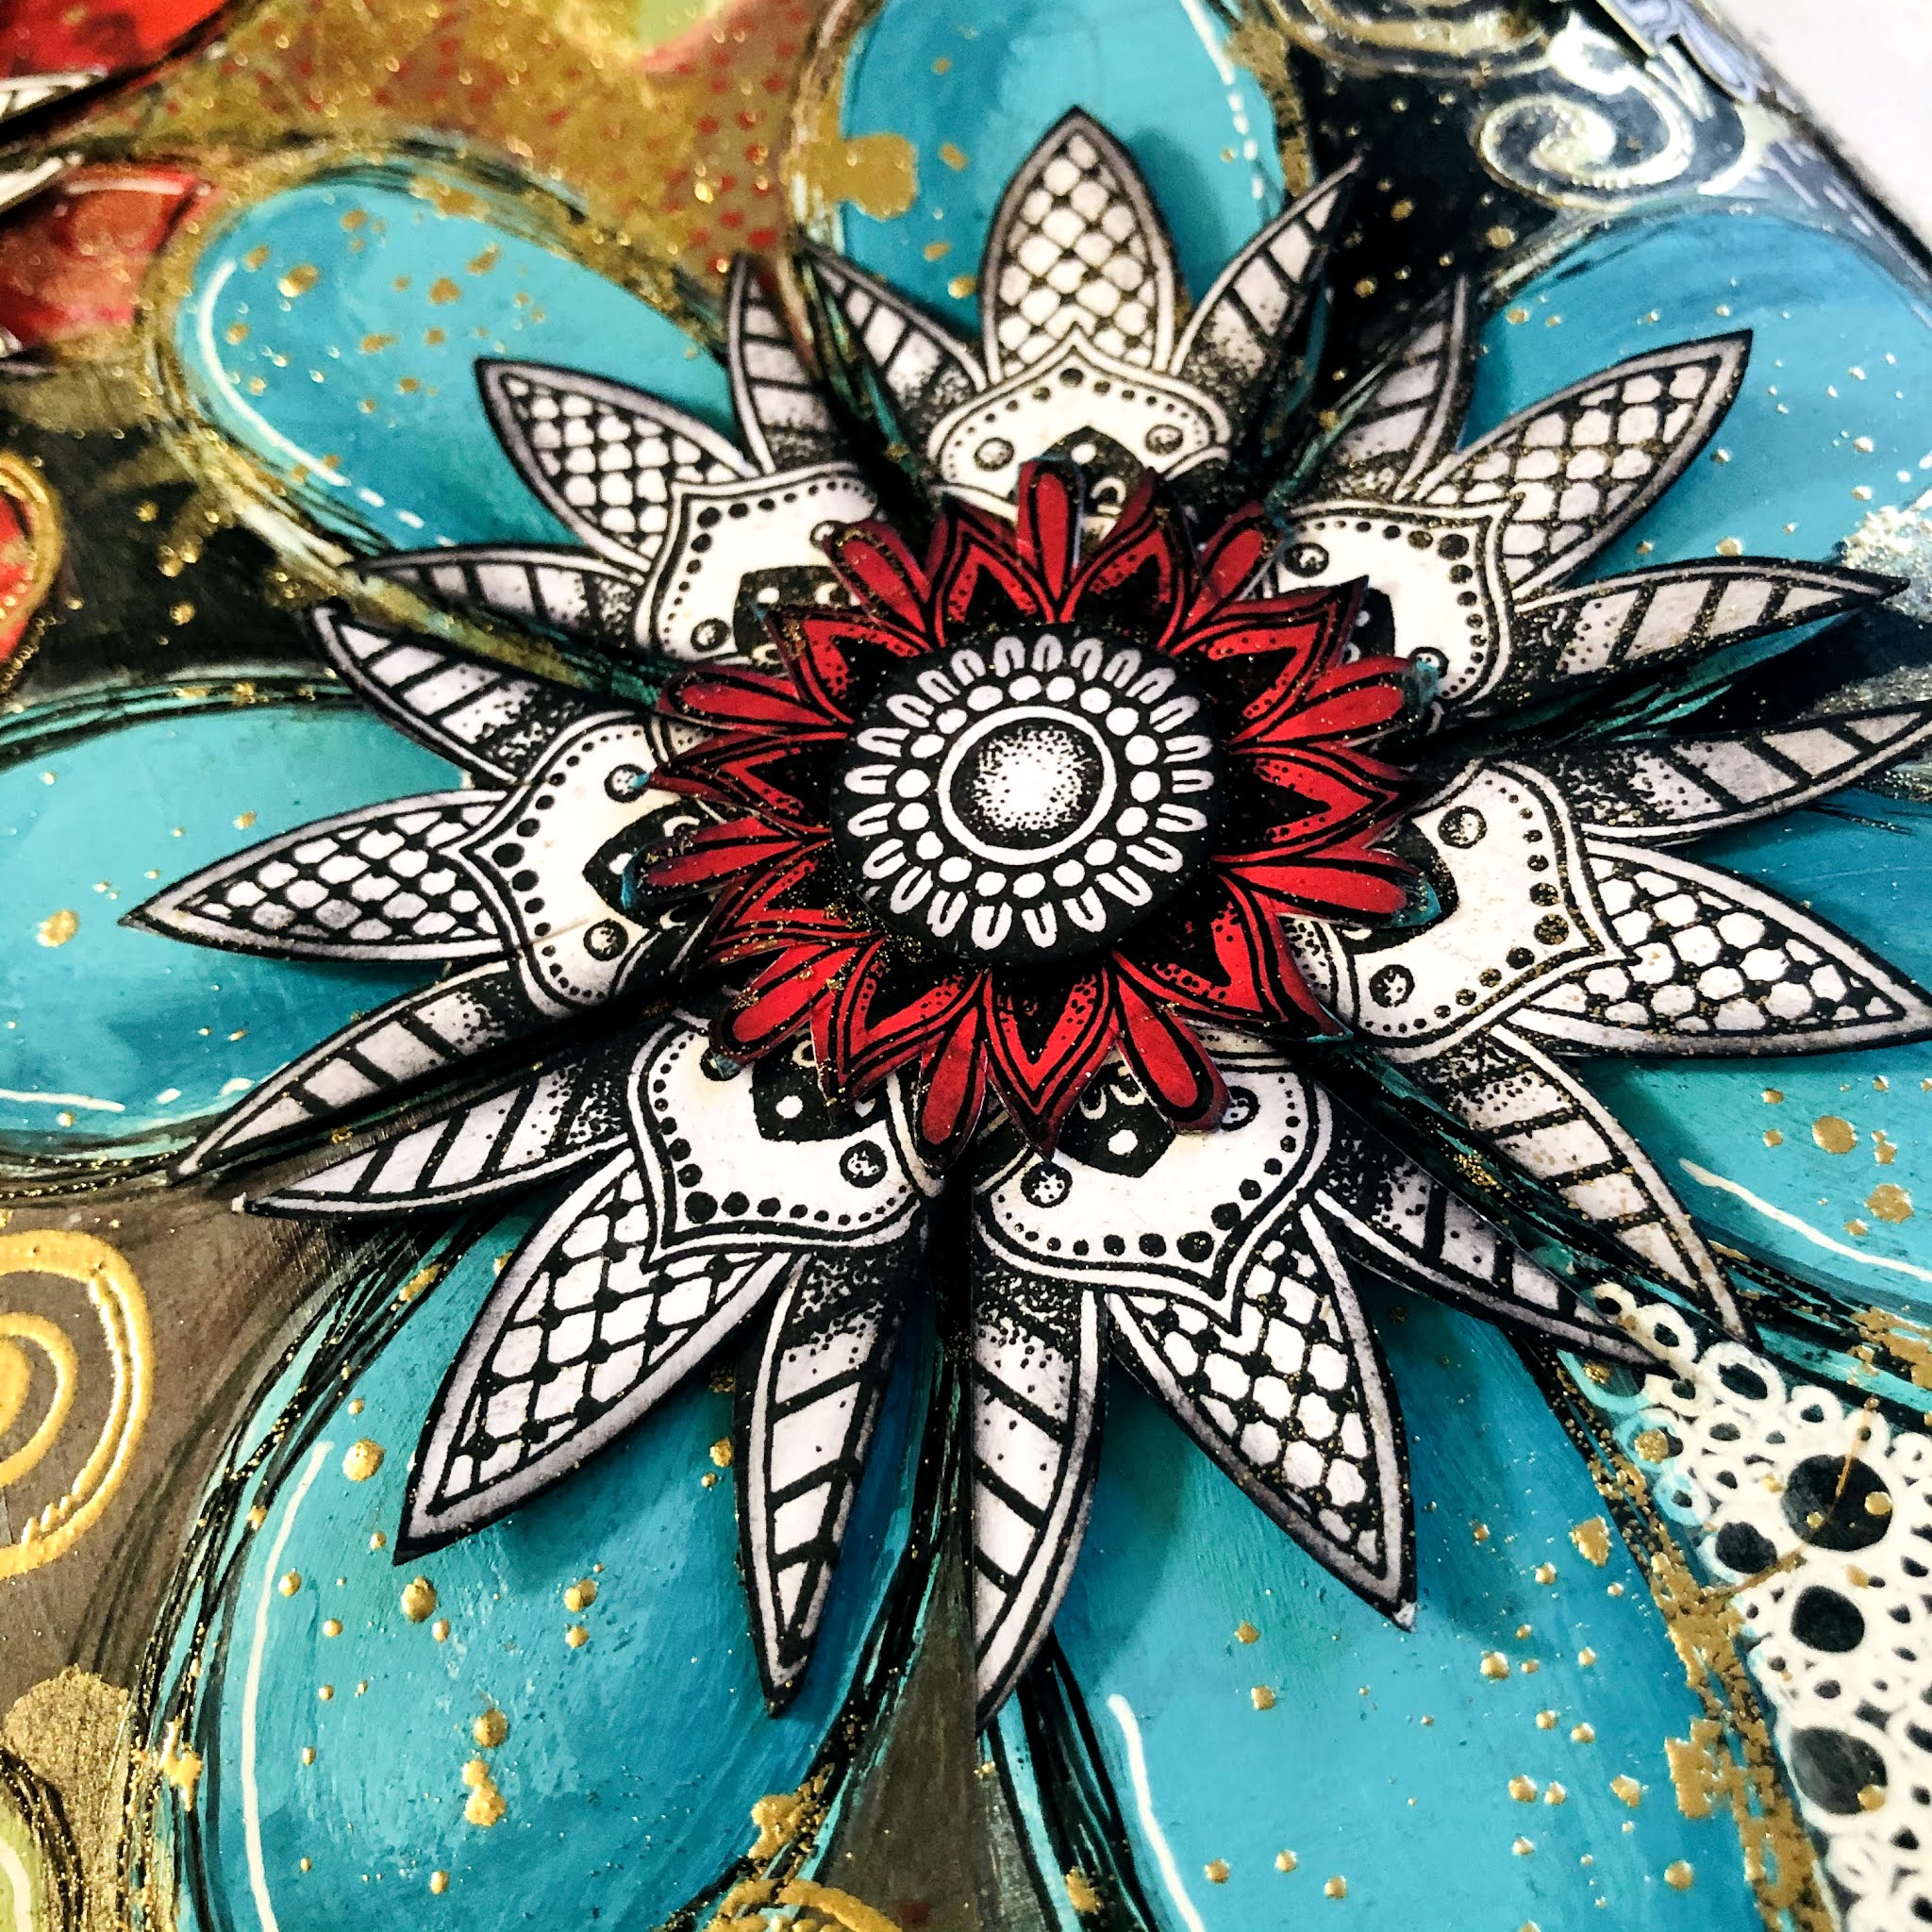
I've been having fun lately exploring the theme and topics of this quarter's blog posts. I couldn't decide which topic to concentrate on, so in the end I incorporated them all: Mail Art, Tones of colours, Tracy stamps and texture of course!

Tracy Scott designs the most amazing stamps and stencils and I couldn't wait to combine those with my own grungy distressed style. Exploring the tinged topic was also on my list of things to try ... I love to mix tints, tones and shades of a colour in projects so quite often work in a fairly limited colour palette. Cerulean was the obvious colour choice to combine with my rusty textures and colours. 

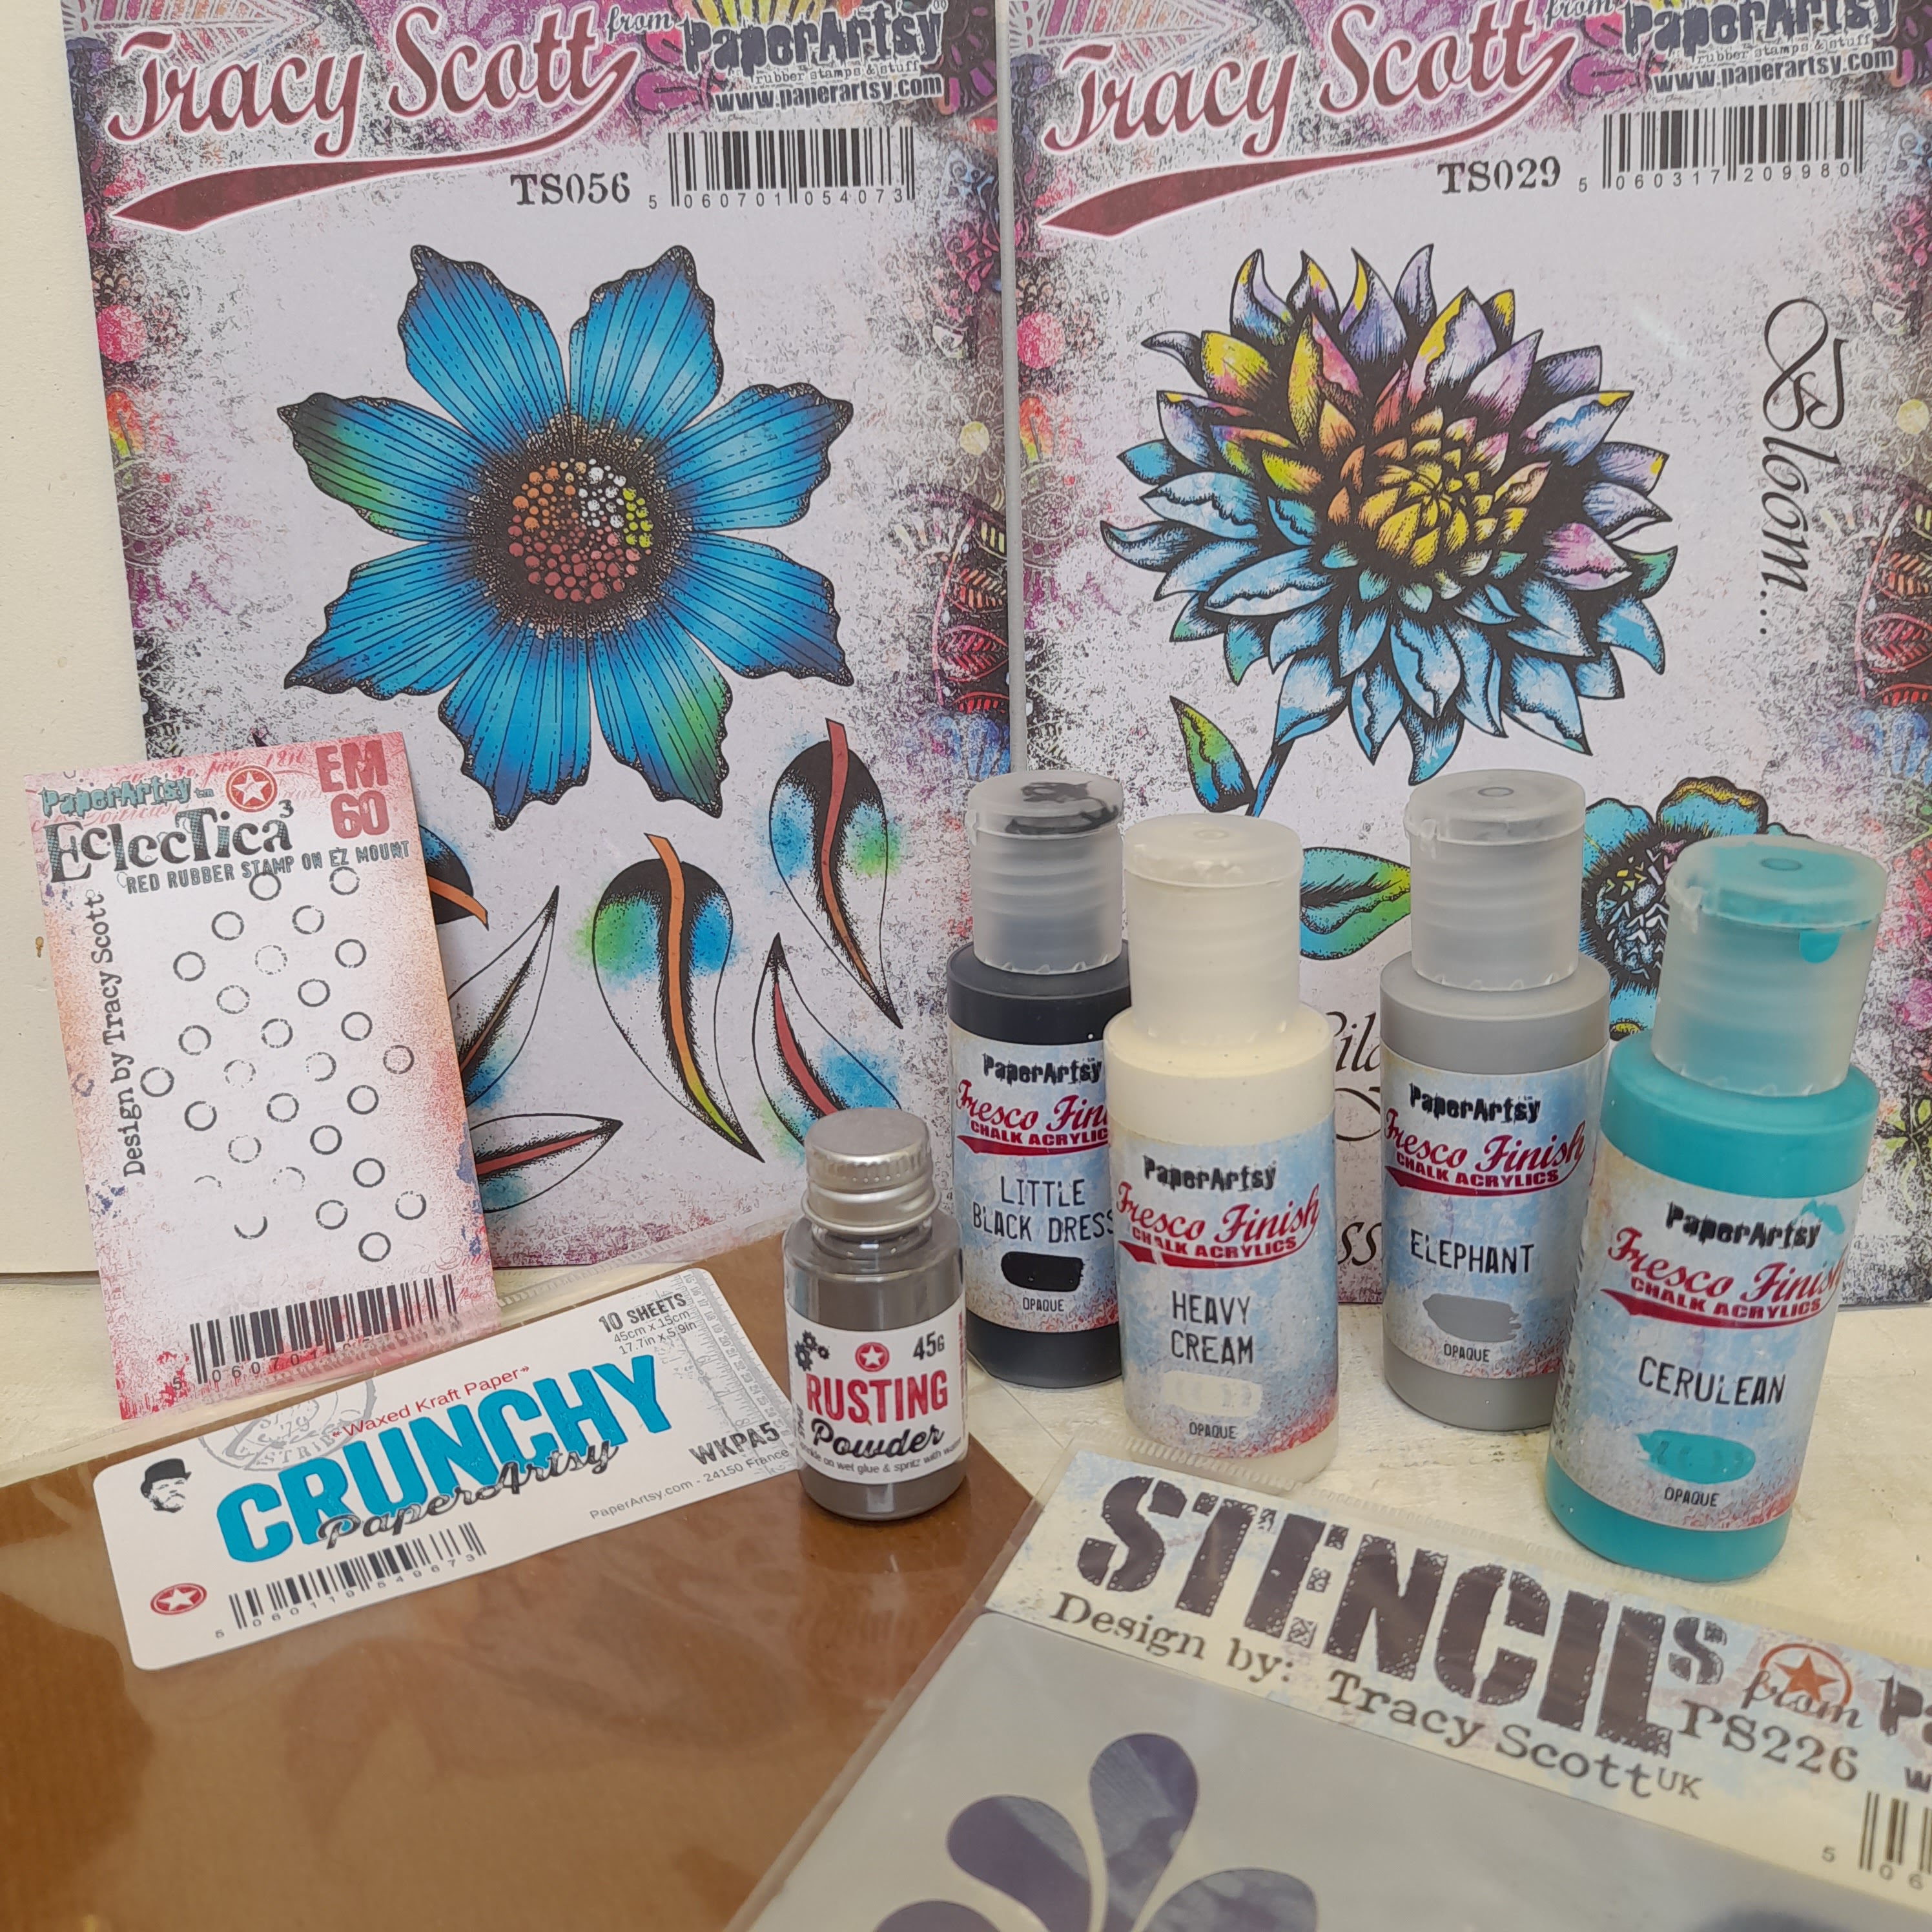
The next decision was what type of project. As I enjoy sending and receiving art in the mail I decided to create a set of notecards with matching envelopes. The theme for this part of the year is texture. Well what can I say ! I am a texture junky/freak and just love adding it in my work. As I gathered my supplies to start work, I was very excited to combine lots of texture into the project: Rusting powder, Crunchy Waxed Kraft Paper, Fresco Finish Paints, along with the stamps and stencils by Tracy were going to be so fun.


I really enjoyed adding machine stitching to the waxed paper envelopes and using a centuries old technique to add texture. I love how the set of notecards have so much texture and many tiny details to explore, including adding colour to the stamped images with rust.


When I first started thinking about this project I had several ideas in mind. As it progressed some of these were abandoned and some developed further. I knew for certain that I wanted to use Rusting Powder on cotton rag paper. When combined with vinegar to activate it, the depth of rust is fabulously intense in some areas and subtle in others. 

Tracy's Fresco Finish Cerulean is a great contrast to the rust and also adds a pop of colour to the project. I chose to create the envelopes for the notecards from Crunchy Waxed Kraft paper as I know how easy it is to add texture to this in many ways.
.

As I mentioned, I wanted to create the first layer of the notecards using cotton rag paper. It's easy to achieve a lovely textured rusty background by sprinkling Rusting Powder (RP45) onto the paper. I laid my paper panels in a deep plastic tray, dipped a fan brush into the Rusting powder and then tapped the brush over the paper to release the fine powder. I sprinkled on vinegar to activate the Rusting Powder and set aside, overnight in a well ventilated room.


While the rust on my cotton rag papers was developing I started creating the coloured papers onto which I would stamp my flowers and leaves. I wanted a variety of tints tones and shades and also some visual texture. With this in mind, I chose Heavy Cream (FF203), Elephant (FF64) and Little Black Dress (FF19) Fresco Finish Chalk Acrylics to mix with my Cerulean (FF200) paint. I must admit I loved all the variations I achieved and got slightly carried away. 

I mixed varying amounts of the neutrals separately with the cerulean and applied them to heavy weight copy paper (160gsm). Once I had started the painting process I realised I could add more visual texture by dry brushing a lighter tint over a  shade for example. This then developed into painting rough circles with a variety of the colours I had created. I loved how the brush strokes added interest, so kept as many as possible showing.


 

Once all the paint was dry it was time to stamp the flowers and leaves. I decided to use a stamping platform and Ranger Archival ink (Jet Black) The circular paint layers lent themselves well to the flowers and the more linear dry brushing was a good fit for the leaves and smaller flowers. I chose Tracy's stamp sets TS029 and TS056, both of which had some large flowers and lots of leaves for creating a strong focal image on the notecards.


As I said earlier I may have got a little carried away ! I needed only a few stamped images, but I know there will be many occasions when these flowers and leaves will be perfect addition to a project. So the extras will always come in handy.


It was now time to return to the sheets of cotton rag paper which had turned our beautifully. I removed them from the plastic tray, brushed any loose rust powder back into the tray and set the papers aside for later. I wanted to harvest the rusty goodness in the plastic tray, so added a small amount of clean water. Using an old brush I loosened any dried on rust from the base and sides of the tray, this took a while but was worth the effort. I transferred the resulting rusty water to a small jar with a close fitting lid.


Using rusty water to add colour to stamped images is one of my favourite techniques. I started by using a palette and swatching the rust water onto plain paper, adding a little water to each section along with some of the rust. The more water, the paler the colour. Again I stamped the flowers and leaves from the stamp sets onto heavy copy paper, once dry I used the rust water to add colour and interest.


I think you will agree that once all the stamped and coloured images were fussy cut out they look lovely and a feast for the eyes. I was very pleased with my results and couldn't wait to move on to creating the envelope.


Now that I had the main elements for the notecards created and ready to go, I moved on to the envelopes. I had already decided I wanted to add lots of texture to these. The Crunchy Waxed Kraft Paper (WKPA5) looks fabulous when pressure embossed, but I also wanted to add stitching in some way. I created a prototype envelope and learnt quite a few things along the way.


Using a ball tool to add pressure embossing to the Crunchy Waxed Kraft paper was easy. I found the best results came from embossing on the reverse of the paper with a stencil for the template. I laid the paper on a soft stamping mat (a sheet of foam would be a good alternative) placed the stencil (PS226) on the top and used this as a guide to add the embossing and details to the leaves.


The next technique I wanted to try was something my mum has used on her handmade cards for years; Victorian pinwork. It is similar to Pergamano, but just slightly different. I pared the technique down slightly to a simpler version as it is normally quite ornate looking. I started by using the pricker on my craft tool, but found this wasn't very easy. I had some push pins on my desk and gave one of those a try, it was ideal, the right size hole and very easy to handle. Again this technique is best applied on the reverse of the paper to get the best effect. A tip to make things easier is, rest your hand on a wad of kitchen roll when embossing and pricking the paper, that way any jewellery and rings don't scratch the paper and leave a Mark.


I was happy with how the Waxed paper was looking but I also wanted a pop of colour to tie in with the notecard flowers. The Waxed paper takes Fresco Finish Chalk Acrylics really well so I painted one half of the leaves with Tracy's Cerulean. A couple of thin coats gave a nice solid block of colour.


I wanted to add some details to the blank areas of the envelope, so I chose to stamp some mini circles using one of Tracy's mini stamps (TSM04) and Cerulean paint.


To add more texture still I decided to pressure emboss the centres of the circles I had stamped. There was just one problem, I couldn't see them from the reverse of the paper. So the solution was to emboss from the front, flip the paper over and then repeat from the back. Strangely enough that seemed to enhance the embossing even more and gave the raised dots an almost metallic gold look. Quite an unexpected bonus !


As I mentioned before, I wanted to add some stitching to the project, in particular the envelope. To contrast with the Cerulean paint I chose black sewing thread and stitched across the leaves. The pricked holes were great to sew into and made life so much easier. I tied the thread off at the back and added a tiny blob of PVA to stop it coming undone.


It was now time to stitch the envelopes around three sides. I had learnt that stitching with the back of the envelope facing me on the sewing machine gave a more textured look, a little similar to the Victorian pinwork idea. I had also learnt from my prototype that I needed to add another sheet of waxed Kraft paper behind the hand stitched sheet, otherwise the notecard flowers and leaves caught on the inside stitching. So I added the extra sheet and used a large zig zag stitch to seal the edges of the envelope. It helps to stop ruching of the paper if you stitch from the bottom of the paper to the top.


All that remained to do now was to punch a semi circle from the top of the envelope to make it easier to remove the notecard . I also glued the extra sheet of waxed paper to the front sheet with a tiny amount of strong PVA just at the top.


Now my envelope was finished I could go back to creating my notecards and adding more details.


Once I started to work on the notecard layers again I realised I wanted to incorporate some of the elements from  the envelopes, so creating a cohesive look to the two parts.
The mini circle stamp was the obvious choice, it added extra visual texture and another pop of the pure cerulean.


One of the techniques I use quite often with circular stamped images is to add a little shading to one side of the circle. This gives a slightly more dimensional look. It is very easy to do and gives great results. Using a soft pencil (5B) I drew a small line at one side of the circle and used a cotton bud to smudge out the graphite slightly.


Before assembling the notecards I wanted to add some details to the darker coloured flowers, this was easy using a Signo Uniball white gel pen. It just added a lighter pop to some of the flowers.


It was now time to bring everything together on the notecards. I spent quite a while deciding on combinations of colour and flowers. Eventually I created 3 completely different looking cards, but all combining the rusty goodness and cerulean. I mounted the cotton rag panels onto panels of kraft cardstock. PVA was a good choice for attaching all the leaves and flowers.


I love all the texture on the notecards and all the tiny details which make them so special. Hopefully the recipients will feel the same.


To finish the project off with a bit of bling I added some sequins in coordinating colours and black. I glued these onto the rusty backgrounds with gel medium.


Some of the rust coloured flowers needed a touch of the cerulean paint to lift them a little, as you can see here.


Once the stitching was completed on the cards I tied the loose threads off, leaving some short ends and tying others in a loose bow.


I loved creating these cards and envelopes, it was great getting to grips with stitching on a project, as this is something relatively new to me. I also learnt quite a bit about using the Crunchy Waxed Kraft Paper and how fabulous it is when embossed. 

I must say my mum was very pleased I had embraced one of her favourite techniques. The paint mixing was a joy and I have lots of leftover flowers and leaves to play with later. I must admit I love the rusty painted flowers and leaves and will definitely be combining those in art journal pages in the future. I have an idea for a project inside a shadow box frame using a combination of the flowers and possibly an Ombre type background. I hope you give the techniques a try and have some creative fun too.

Happy crafting! ......Mags 


Facebook:https: //www.facebook.com/mags.woodcock


Wednesday, 24 March 2021

NEW PaperArtsy Products: Tracy Scott {March 2021}

  Tracy Scott Collection

March 2021 New Product Announcement
 

If you have been following along with Tracy this year, you will know how addicted she is to pattern play. Take one design, build on it and suddenly you have made something completely different. 
 
Tracy is really good at building her layers with all the tools she designs close to hand: stamps, stencils, paints, embossing powders, but she always does it in her bright and bold way. 
These stamps allow you to build on those that have gone before, and as you have come to expect, there is always an unexpected surprise or 2 in the mix.
 
We have Tracy sharing these stamps live in PaperArtsy People shortly after this post publishes. It's nice to meet the designer and hear direct from them about this new release, so I hope you can catch Tracy either LIVE or via replay.
 
These stamps are available EXCLUSIVELY from our approved stockists for the next 3-4 months. It makes sense to buy local within your country, so check out the list and links at the bottom of this blog post. 
 
~Leandra
 
Hi everyone, Tracy here

Wow, can you believe its new release time again!!... seems like only yesterday I was typing my last blog post,  its certainly been a bit of a whirlwind this last few months.
I've been super busy preparing my release, designing my stamps and stencils and I certainly hope that you enjoy them as much as I have been.
Most of you know by now that I am a little random when it comes to my releases and this one is no exception, I hand draw all of my designs and am constantly sketching whenever I get ideas so I end up with lots of different ideas going on all at the same time. I love the eclectic mix that gives me when it comes to release time as I can create in lots of different directions and lots of different themes... it certainly keeps me inspired when working!!!
So let's get on with it.... lets see what I've been up to.......


New Stamps
Price: RRP €21.92 +VAT
Size:5" x 6" (13 x16.5cm)
All stamps are individually trimmed onto cling foam, presented in a clear hanging bag
with a laminated storage/index sheet.

   
Tracy Scott Set 53 (TS053)

Omgoodness.... what can I say about this little fella other that I absolutely love how he has turned out and so many possibilities to alter and adapt him!!
 

Different sizes, different profiles.... there are a number of ways you can alter this little fella!

 
Or just go full on phoenix mode! All the layers and then some!


Or if mini is more your thing...that that is an option too!

 
Or there's always the side-eye look.....

 
As always colour just brings everything alive somehow, and plenty of options for white doodle accents too.

 
So this is the 'straight out of the tin' option, basic bird. But how can you not be tempted to try all the other options too?

I hope you can see from the photos above that I have created 4 different versions of him and there are definitely many many more options available to be created with him.... some not even involving birds?..... I'll be showing you a couple more ideas with this stamp set in my 'live' in the PaperArtsy People group at 7:30pm so make sure you tune in... you might just be surprised!!

   
Tracy Scott Set 54 (TS054)
  
Pattern play, patterns, patterns and more patterns. So take a triangle, and then build your patterns. Maybe in black, or with accent colours....there are literally endless options...endless decisions. Spaces? No spaces? Fill the page completely, or perhaps create new geometric shapes.... take a look....


Hanging ornament ?


Creating new geometric patterns can be a bit addictive! But they even look different when stamped in colour.


Can you spot them here in the background layers? Or even as the tiny focal embellishment!


So as you can se from all of the samples above, the TS054 triangles were primarily designed as more Pattern Play stamps. I wanted to design some additional pattern stamps in different shapes and decided that triangles could be an interesting option having not explored that shape before. However once I started playing I realised that they could be used for so much more. Take a look at the flower card above, that was created using one of the larger triangles and those hanging ornaments.... who knew you would be able to create 3D projects with them!! I have had so much fun with this and I know that I have only touched the tip of the iceberg...so many more ideas and lots more playing to be had over the coming weeks.

   
Tracy Scott Set 055 (TS055)
 
In reality, this large mandala seems so much bigger than it looks on this image of the index sheet.


As if it wasn't big enough, you can see below I have actually made it seem bigger by adding even more layers for it to sit on. There's a stencil in there coming up later....


Look closely, and you can see each layer stands alone. That makes it easy for cutting out and raising/ lifting up any layer.

 
Plus the other 2 circular stamps give you alternative 'middles', or separate mini mandalas.
 

Well no surprise that there just happens to be a mandala in this release with set TS055, yes, my love affair with mandalas continues.... this one I actually started sketching about 18 months ago but never got around to finishing it,  I found it in my sketchbook and felt it was time to bring it to life.  I love that you can really layer this up to create a fantastic 3D focal point, but can also cut it apart to create lots of different sized elements, as well as using it in your backgrounds.

   
Tracy Scott Set 056 (TS056)

Last stamp set for this release and of course there had be a large flower in there and a selection of leaves.... this one is approximately four and a half inches in diameter so a really good size not only for journal pages but also as a focal for cards and scrapbook pages too.
 
 
We all love a focal flower don't we! And the leaves on this set are going to be a handy addition to the previous leaf set (TS040). You can just poke them in and build up foliage under the flower so easily for dimension.
 
 
Even the leaves on their own can be used in interesting ways. Look at how this grew...


I made sure to design my leaves in different sizes and going in different directions too, to give a lot more options when placing. This set coordinates perfectly with some of my previous sets so they will definitely be well used well loved stamps.


New Stencils
Large Size: 6.25" x 9.5" (16 x 24cm) Price: RRP €6.28 +VAT
  
PaperArtsy Stencil 233 (PS233)

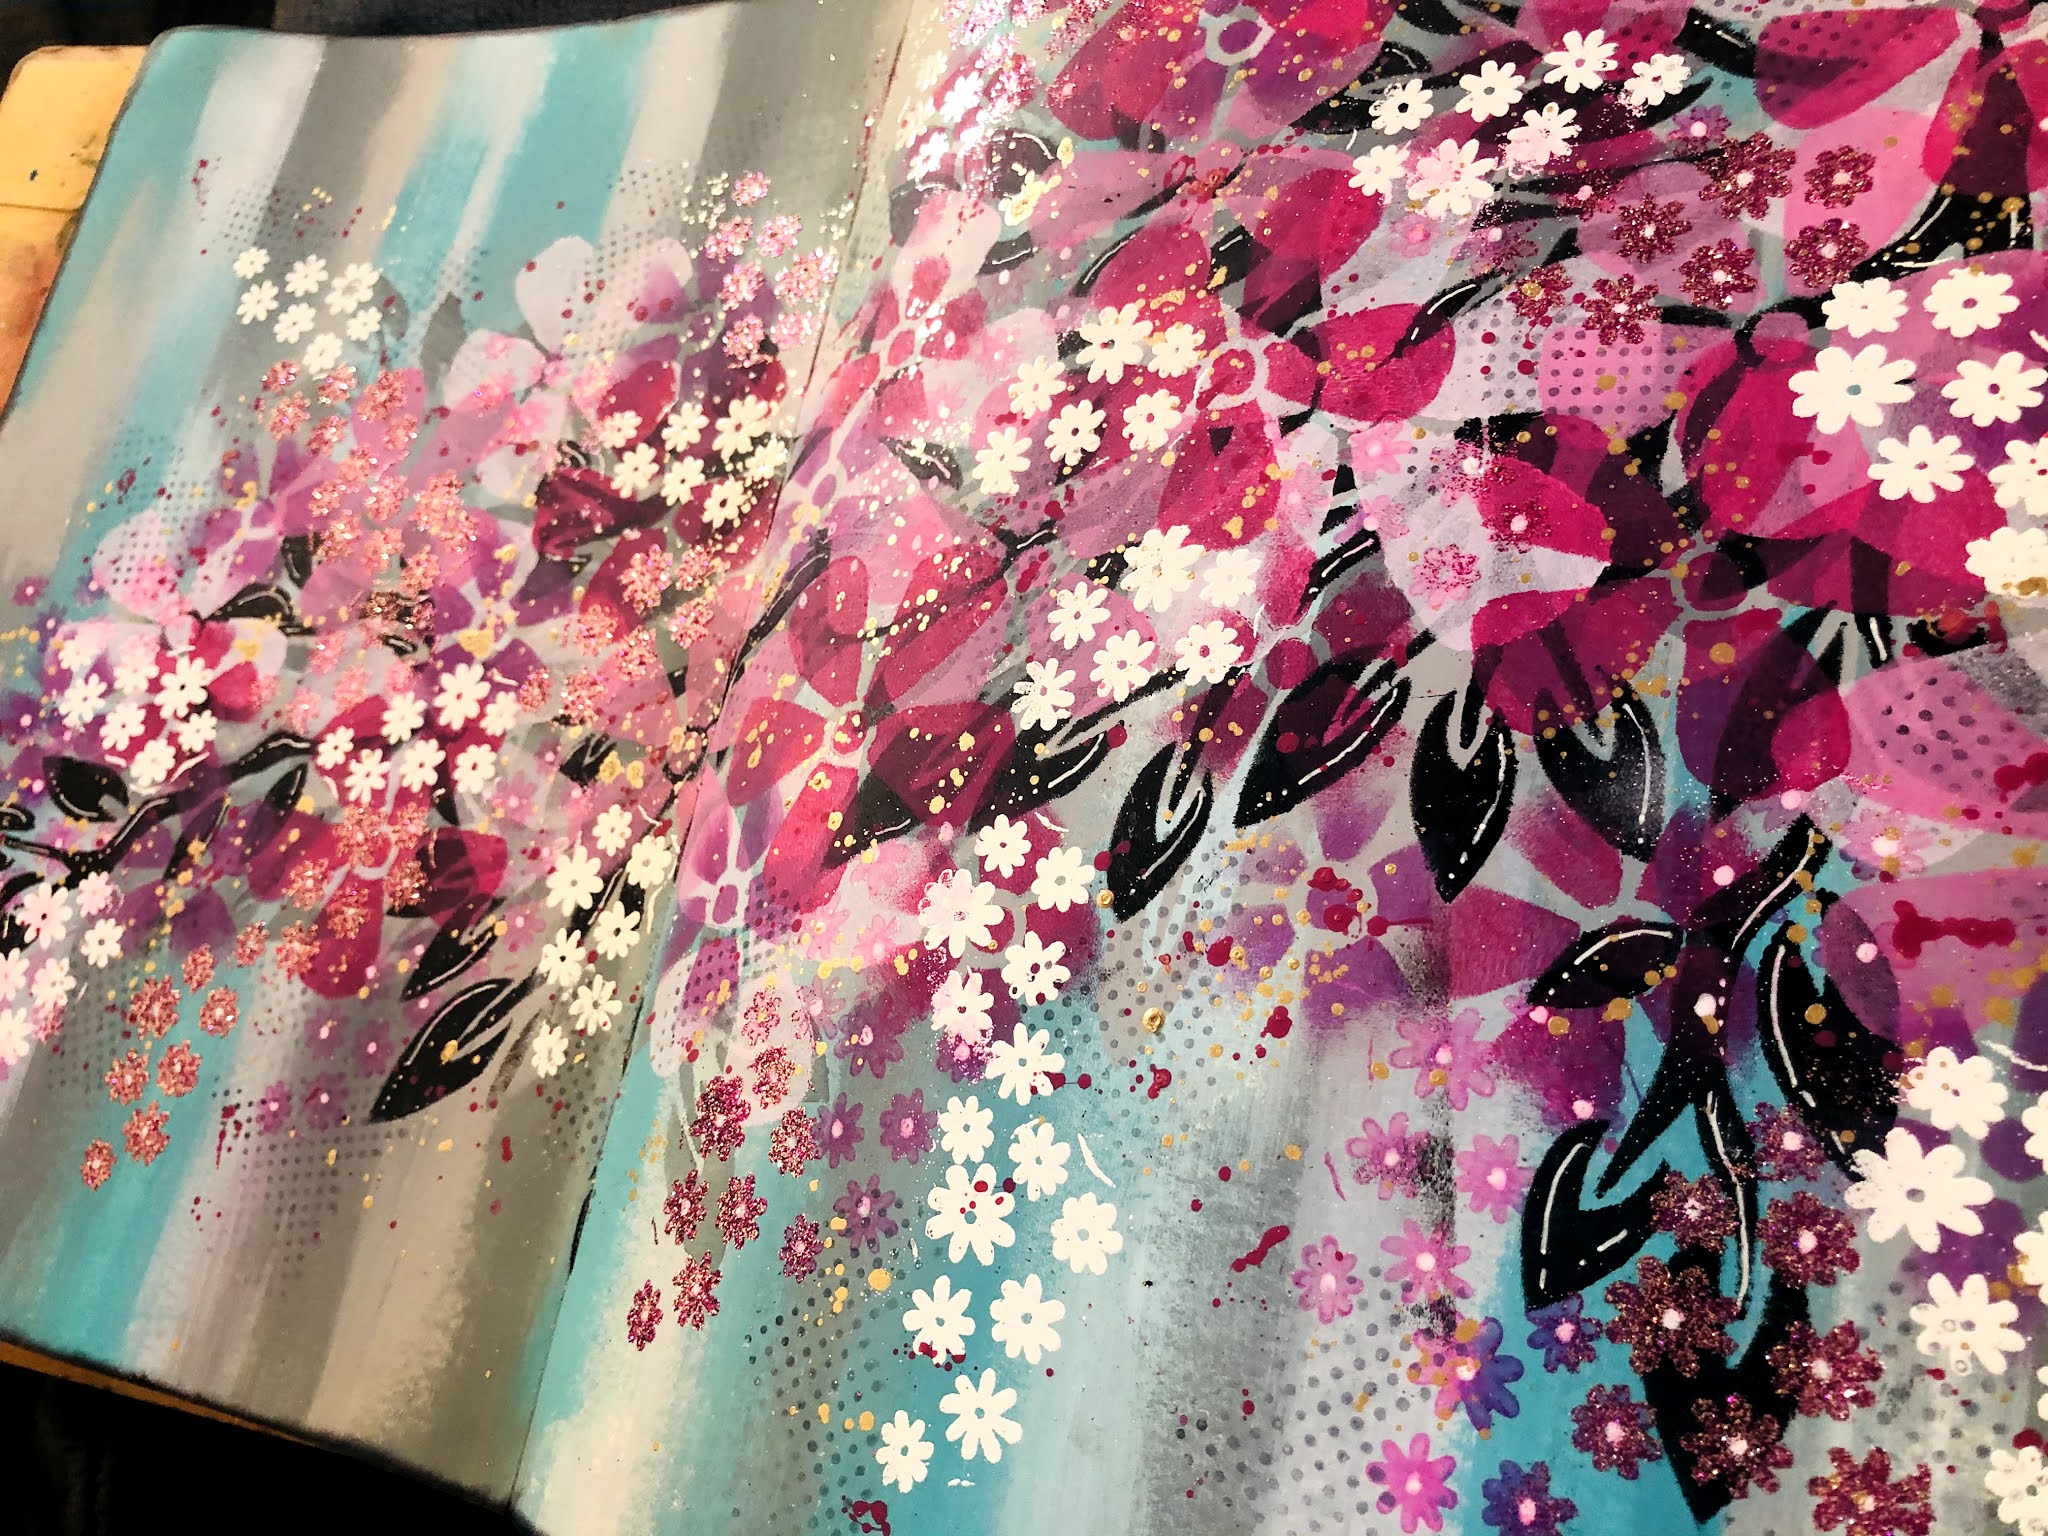
So my first stencil for this release is the branch with the leaves.... to be honest I designed this stencil with just one idea in mind and that was to create a cherry blossom tree.... and I just adore how this one has turned out...
 
  
Black stencilling underneath, with pink, white and purple petal layers overlapped, and tiny white blooms from my last release allow this journal spread to be built up in gradual layers using the stencil as a foundation foliage layer.
 
 
You can just get that sense of a dripping summer bouquet.


Can you see my new sparkly pink embossing powder ?


I used this branch stencil in conjunction with some my older stamps (minis too) and stencils as well as paints and embossing powders and it is just so pretty. Of course, once I started playing around I thought up some more ideas for this one.... it's no good having a stencil that can only be used for one thing after all.....more will be revealed for this one in my 'live' at 7:30pm.... you don't want to miss it.
 
 
PaperArtsy Stencil 234 (PS234)

So for PS234, I did something a little different.... a backgrounds stencil.... not something I've ever done before but I thought about the sort of background patterns I would most like to have and decided to combine them into one stencil.... after all backgrounds are always going to be useful right.... here's all 3 layered.


Those white dots make great accents too...
 

I can see these could easily be used everywhere!

 
I love the way these look on my pages and can't wait to use them lots more in the future.
I've put a couple of examples up here where they are mostly used in the backgrounds on these projects... but you will see more ideas in the PA People live too!

  
PaperArtsy Stencil 235 (PS235)

So if there's one thing I love as much as mandala patterns, it's damask patterns.


There is something so captivating about the shapes and designs that I have long been in love with, whether it be wallpaper designs, fabric designs or even wrapping paper.


I am absolutely am drawn to these designs in black and white, so I knew I had to try them on painted black card with white embossing powder and oh boy I was not disappointed... this simply makes my heart sing.


But, how about a gold focal point, these elements can also be the star of the show too!


Absolutely love that gold embossing to create a focal point for my handmade sketchbook and they are perfect for backgrounds too... I'm really looking forward to playing with this one lots more over the coming weeks.

  
PaperArtsy Stencil 242 (PS242)

So my last stencil to share with you is another mandala type design.... did I mention how much I love mandalas?.... this one has 3 different designs in various sizes so that they all co-ordinate perfectly together but can also be used as stand-alone elements.


I used grunge paste on this one to really bring out the details on this stencil and the whole double page was created using only this one stencil and one of my mini background stamps.


I am in love with this one, the largest mandala is over five inches in diameter so makes a real statement when used on your projects. And of course like all my other stencils works perfectly in a background too.


So now that you have seen all the new products, you will see in the projects below how I have combined them to use a mix of both stamps and stencils....
 
Journal Swirls
 
I spy a mandala... note how snipping the leaves in half totally creates a new effect.


Damask Flower
 
Absolutely love this opulent gold background, perfect for some damask layering on top.


Bird of my Heart
 
You can certainly see the background stencil used to great effect here in all shades of blue. 
And the rainbow heart is a nice layer for a blue bird to perch on.


That's it from me... thank you so much for joining me, I do hope you love the new release as much as I do and I really can't wait to see what you create with these new designs...
 
Do remember to join me over on the PaperArtsy People Facebook page at 7:30pm UK time where I will be showing you all of these samples plus a few surprise ones.... I would love to see you there.
 
Tracy

Socials...
Facebook: www.facebook.com/myjournallingjourney
Instagram:  www.instagram.com/tr4cy1973


Teaching Schedule:
All my current teaching is being done through online workshops, see my Creative Cafe Page on Facebook for details www.facebook.com/groups/309503793095648/


PaperArtsy Stockist List

Many of our stockists worldwide have their physical stores impacted in different ways due to COVID-19. Please contact a stockist direct to find out if you can visit them. Many are also using FB Live Streams to share with you new product arrivals or offer a personal shopping service via video calls.
 
Our stockists are your go-to  source for all PaperArtsy products, and we suggest that you also use the PaperArtsy People Facebook group to source a stockist in your country. Many are members and will happily share links to their online stores.

Australia
Bella Paperie, Brendale, Queensland, www.bellapaperie.net.au
Bev's Cross Crafts, Spreyton, Tasmania https://www.bevscrosscrafts.com.au/
Crafters Cupboard, Berwick, Victoria www.crafterscupboard.com.au
Memories on the Murray, Murray Bridge, SA  https://www.memoriesonthemurray.net/
Scrapbook Superstore & More South Penrith, NSW https://www.scrapbooksuperstore.com.au/
The Scrapbooker's Confetti Box, Swansea,NSW https://thescrapbookersconfettibox.com/
The Thread Studio, 6 Smith Street, Perth http://www.thethreadstudio.com/
The Scrapbook Store, North Perth,WA http://thescrapbookstore.com.au/ 
Time To Createwww.timetocreate.com.au

Belgium
Cart N Scrap Art, Antwerp, cartnscrap@gmail.com
Cotrain, Kontich, www.cotrain.be
Expression Hobby, Marcinelle www.expressionhobby.be

Canada
Clipper Street Scrapbook Company, Langley, BC. www.clipperstreet.com
Paper Art Creations Inc, Leduc, Alberta, http://www.paperartcreations.com/
Scrapbook Centrale, Dollard Des Ormeaux, Quebec www.scrapbookcentrale.ca
Simply Scrapbooking, Prince George, BC https://www.facebook.com/simplyscrapbooking/
Scrap Addicts, Edmonton, Alberta https://www.scrapaddicts.ca/
Scrap and Bean, Edmonton, Alberta http://scrapandbean.com/ 
Scrapbooking Fairies, Drayton Valley, Alberta https://www.scrapbookingfairies.com/
The Paper & ink Boutique, Calgary, Alberta https://www.paperandinkboutique.com/
The Scrap Yard, Calgary, Alberta, https://www.thescrapyardcalgary.com/ 

Denmark
Hobbyboden Scrapworld Samso www.hobbyboden.dk

France
Eirl Bancon Cartoscrap, Midi Pyrenees, https://www.cartoscrap.com/blog/
Fee Du Scrap, Saint Sébastien-Sur-Loire, https://www.feeduscrap.fr/
Horizon Creatif, Ste Jalle h.creatif@gmail.com
Katzelkraft, Ingwiller http://www.katzelkraft.fr/en/
Kerglaz, Basse Goulaine, https://www.kerglaz.com/  
Kerudoc Creation, St Yvi www.kerudoccreation.com
Quartier Serre Teston, Ste Jalle, hcreatif@gmail.com
Scrap by Nini,  Uzerche, Limousin https://scrapbynini.fr/ 
Scrapo'naturel, Tourville La Riviere, www.scraponaturel.fr/livraison 
Toutencolle, Dun sur Avon www.toutencolle.fr

Germany
Paperbasics, Hessen, www.paperbasics.de
Stempelbar, Berlin, www.stempelbar.de
Stempeloase Munich, Munich www.stempeloase.de
Stempelfee Shop, Hilden www.stempelfee-shop.de
Stempellaedle, Stuttgart, www.stempellaedle.de/shop

Greece
Scraps N Pieces, Kallithea www.scrapsnpieces.gr

Italy
Immagine SAS di Rapaccini, Rome, www.immaginelab.com
Il Negozio Della Mamma Di Cle, Torino, clelia27@liberio.it
L'artistica Glo, Cinisello B (Mi), www.artisticaglo.it
Marte Savona, Savona, www.martesavona.it
Pezze E Colori, Lissone, http://www.pezzeecolori.it/ 
Piccole Passioni, Siena, www.piccolepassioni.it
Scrap it Easy, Rome, https://www.scrapiteasy.com/it/

Japan
Tiny Dots, Funabashi-shi, Chiba www.facebook.com/TinyDots

Netherlands
Doe@ding,Spijkenisse https://doeading.nl/
Hobbycompleet de Duif, Leeuwarden www.hobbycompleet.nl
Stampingcorner, Capelle Aan Den Ijssel www.stampingcorner.nl

Norway
Hobbygarasjen, Kopervik, www.Hobbygarasjen.no

Spain
Cien por Cien Manualidades, S.L., Bizkaia, Catalunya,  www.100x100manualidades.es
Endulze & Crista S.L, Pampalona, Navarra,  www.endulze.com
Ideas 10 Manualidades Y Scrapbook, Bilbao https://ideas10manualidades.com/
Marakiscrap, Tarragona, www.marakiscrap.com
Scrap & Papers Experiences, Barcelona, Info@casonadequintana.com
Scraphouse S.L. Barcelona www.scraphouseshop.es
The Paradise Corner, Barcelona, www.facebook.com/theparadisecorner 

Taiwan
Mandy's Cards, Taipei www.facebook.com/mandy.card

United Kingdom
Amelia's Creative Crafts, Studley, Warwickshire  www.ameliascreativecrafts.co.uk
Art from the Heart, Harrogate, Yorkshire www.afth.co.uk
Blade Rubber Stamps, London www.bladerubberstamps.co.uk
Countryview Crafts, Potton, Bedfordshire www.countryviewcrafts.co.uk
Crafts at The Malthouse, Herstmonceux,  East Sussex, http://www.themalthouse.co.uk/
Fave Rave, Stourbridge, West Midlands www.shabbychicstencils.co.uk
Loobi Crafts, Leighton Buzzard, Bedfordshire, www.loobicrafts.co.uk
Stampers Grove, Springbank, Lilliesleaf, Melrose,Scotland www.stampersgrove.co.uk
That's Crafty
, Romford, essex www.thatscrafty.co.uk
The Artistic Stamper Craft Store, Faversham, Kent www.theartisticstamper.com
The Forget me not Kraft Kabin www.TheForgetMeNotKraftKabin.co.uk

USA
Artistic Artifacts, Alexandria, VA https://www.artisticartifacts.com/
Artistic Studio Creations, Fayetteville, Georgia www.facebook.com/ASCbyCrystal
Craftiness, Chatsworth, CA, https://www.craftinessonline.com/
Ephemera Paducah, Paducah, Kentucky www.ephemerapaducah.com
Everything Scrapbook & Stamps, Lake Worth, Florida www.everythingscrapbook.com
Frantic Stamper, Oregon www.franticstamper.com
Free Heart LLC, Denver, Colarado, http://www.freeheartllc.com/
Joggles, West Warwick, Rhode Island, www.joggles.com
PaperCraft Clubhouse, Westbrook, Connecticut, http://papercraftclubhouse.com/
Runaway, Art & Craft Studio, NE Salem, Oregon http://www.runawayart.com/
Simon Says Stamp, Columbus, Ohio www. simonsaysstamp.com
The Ink Pad, New York, www.theinkpadnyc.com
Topflight Stamps, Irmo, South Carolina https://topflightstamps.com/

Our brand is only available from established stockists who are VAT/ GST/ sales tax registered and for whom product education is a core principle. We would rather supply a few hand selected stockists, than the greater masses. If you would like to apply to be a stockist, you can find our more about our supply criteria here. Please note we are not accepting new stockists until we are relocated into our new building here in France. Covid restrictions have slowed our progress somewhat, so we hope to be in by the latter part of 2021.

PaperArtsy Links
Facebook Group PaperArtsy People
Facebook Page PaperArtsy