Showing posts with label Pumpkin Soup. Show all posts

Friday, 20 March 2026

Secret Garden Spool with HP {by Jenny Marples}


Hello everyone, Jenny Marples here with you today to show how I transformed a long strip of paper into a mixed media adventure through a secret garden, all securely attached to a spool for easy storage. I'll be sharing how I build the collage 'vignettes' along the way, a process that can be applied to journal pages, tags, books, boxes and more.


We are delving into the vaults of PaperArtsy's Hot Picks range to play with stamp sets HP1005 and HP1006, combining them with a more recent stencil PS021, Fresco Chalk Acrylics, Grunge Paste and Printed Tissue.


Start by gluing torn pieces of book page/manuscript, brown wrapping paper, gel printing cast offs and stained paper onto your strip of backing paper. If you need to recreate these, apply Fresco Chalk Acrylic Sorbet (FF169) and Koala (FF141) to plain (or even better tea stained) paper and add a thin layer of Mattint Ladybug (MT12) to graph paper or similar.


These scraps need blending together with the background - I find scraping a fine layer of  Grunge Paste over the edges and toning down the colours/text with Fresco Chalk Acrylic Chalk (FF83) works well for this.


Finish your base layer by lightly tea staining it all, adding extra depth in areas if needed with dry used teabag papers and highlights with more Chalk paint.


Now to start adding the details.
 

I adore the process of combining translucent layers, stamping and stencilling to create collages but it can feel overwhelming when looking at the finished pieces. Start with thinking about where you want your stamped image to go a try applying a layer of sewing pattern tissue below it. This helps to draw the eye to the image. Make use of any text on the pattern piece to help you line up your stamp. You can even use a fine permanent pen to extend the manuscript lines.


Try re-stamping some of the images within the larger stamp to make those details pop. Then extend the design further by using the text stamp either side of the main image. And to finish for now help to blend the edges between your stamping and the background by adding Grunge Paste through the stencil.


Let's repeat this process in another section, beginning again by deciding where your stamping should go. There's a straight edge to this border so I added some Printed Tissue Postcards (PT13) on one side, adding the stamped butterfly to enhance the design.


Repeat stamping a border can be very effective when you are looking to fill an area. Try adding another of those translucent layers below the stamping (in this case some 'mop up' paper towel covered unevenly with Infusions Golden Sands (CS05). If you don't want extra stamping like the swirls to compete with the border design try using a coloured permanent ink, and then add more stencilling to blend it all together. You'll spot that I added an extra butterfly and used some paper coloured with Fresco Chalk Acrylic Pumpkin Soup (FF33) to make them more impactful.


Here's one final example of this process in action, starting with the Printed Tissue and stamping with different coloured inks.


More layers are added by stamping the images onto card which can then be cut out and place where you need them to be. The repeat stencilling and some tea stained lace help to create a natural flow along the whole design. The scrap of woven fabric beneath the lace was coloured with Fresco Chalk Acrylic London Bus (FF37) which I then rinsed and dried for a more faded appearance.


Just a few more elements to go now.


Work along your paper adding more stamping to extend your designs further. Don't be afraid to leave some areas blank - this provides a visual break and makes those focal points stand out even more. I love to add stitching using different threads. Follow the lines of your stamped images to give them more textural impact.


Cut out stamped images to add over previous stamping and stencilling to help finish your panel.
 

I often strengthen the back of my panels/pages by adhering a layer of calico but in this case that went 'wrong' as the paper buckled when the fabric dried out. The only way to make the paper lay flat was to cut into the fabric.


Rather than give up I remembered how Shelley Rhodes deliberately adds flaws to her paper and fabric. And so I visibly stitched through the two layers to secure the fabric and create 'rivers' of thread throughout the paper.


All that remains is to attach your paper to a spool or similar so that it can be rolled up for storage purposes.


Here's the end of finished spool...


... and here's the beginning, inviting you into the Secret Garden Spool.


Let's take a walk through the whole of the design.


All of this has been created using just two stamp sets and a stencil - so the question is which of your stamp sets would you use to create a spool of your own?


Thursday, 5 January 2023

2023 Topic 01: Shrines {by Liesbeth Fidder-De Vos} with Lynne Perrella stamps


Hi everyone!

It's Liesbeth here with you today. You can't imagine how much I enjoyed this project! As soon as I saw the topic ,Shrines' I instantly thought YESSS!

I have always been a big fan of all kinds of shrines and I love to share the making of mine with you and hope you give it a try yourself! 


This is what I came up with: a vintage, a bit medieval, soft coloured shrine with lots of details... with the wonderful Lynne Perrella stamps, metal embellishments, rhinestones, flowers, lace, legs and even real light inside. Of course I also added my ,Tracks'...our 2023 theme for quarter 1: pieces of a very old Ireland map. 


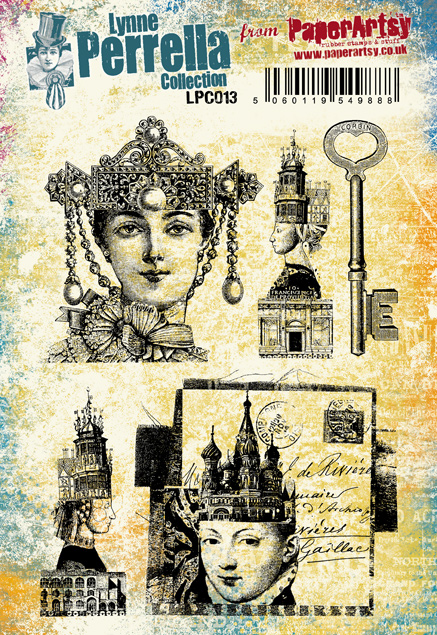
As always I didn't have a plan when I start. For me, the ideas come only when I'm in the creative process, never before. My starting point was this wooden toy farm for children, the shape, and the niche, is perfect to make a shrine. It looks like a triptych. I was inspired by the most beautiful PaperArtsy stamps ever (to me :-) ) LPC012 and LPC013. So very fine and detailed and I love the images... it's about times gone by.


So in this early stage I really didn't know yet what else I was going to use, and where it would end... so let's start and find out!


The first thing I had to do was transforming the toy into a real shrine. It was very smooth and slippery so I sanded the front with sanding paper. After that I let all the colours dissapear by covering the entire piece with three thin layers of gesso, a perfect base.


I needed some structure in the background for a more antique look, so I teared out some old maps and old book paper. I used an old map of Scotland and...Ireland. The style of the Lynne Perrella stamps I use here always remind me of my beloved Ireland...  I glued the paper pieces down with gel medium.


Using a thin layer of gesso here and there I softened the texts and map a bit and I choose three beautiful colours PaperArtsy Fresco Finish paints.. blue, yellow and red. Always a safe and perfect combination for mixing colours, it will never get ,muddy´! Caribbean SeePumpkin Soup and Bougainvillea. I used this three paints and three fingers to apply overlapping small areas. The effect was what I hoped!


More ideas came up: to create a beautiful crackled background for the inside of the shrine. First I painted the inside and some head sides with PaperArtsy Fresco paint - Claret. After drying I covered the inside with PaperArtsy-Crackle Glaze and dried it with the heat tool. I finished with a thick top layer of PaperArtsty Fresco paint-Nougat, and the magic happened, it's always so nice to see the crackles appear!


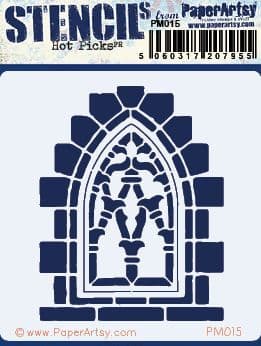
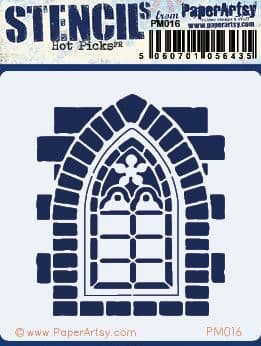
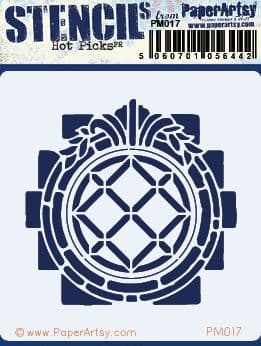
Now let´s decorate the front of the shrine. To create that medieval, sacred ambiance I decided to use three  PaperArtsy mini stencils (PM015-PA Mini MaskPM016-PA Mini MaskPM017-PA Mini Mask) I fastened them on the front with a small pieces of tape, easy to remove. Using a small sponge I dabbed the paint through the stencil, not to much so it doesn´t get under the stencil. At the top I used black (PaperArtsy Fresco paint - Little Black Dress) and at the bottom the off-white I used before (PaperArtsy Fresco paint - Nougat), in the middle I mixed both paints so that it transitions gradually.


Onto one layer of a kleenex tissue, (or use the bottom layer of a paper napkin) I stamped the big woman's head and the two castle ladies with black waterproof ink (I used StazOn - Jet Black) and tore them out. I think the two smaller ladies are perfect like some kind of guards for the shrine.


Before I glued them on the shrine I first stamped one of the other stamps directly on the surface as shown here,  with StazOn - Claret. That ink colour fits perfectly to the Fresco paint - Claret! You also can see here how the stencil prints turned out.


Using some gel medium, I glued the stamped tissues in place.


One of the stamps has that beautiful fringe/tassel thing at the bottom. I stamped it along the slanted edge of the shrine with StazOn - Claret.


Using the PaperArtsy  Fresco paint-Claret again I sponged the edges of the shrine.


After everything was dry I coloured the images of the women with colour pencils.


While I was busy painting, stamping and gluing I thought this shrine with that niche is totally perfect to add real light, because the edges of the niche are not visible from outside! So I bought a string of wire led lights with 20 lights.


I didn't want the string to be to visible so I drilled a hole in the side of the shrine. The lights went through easily. I addhered the battery unit at the backside with double sided tape.


Using tape I secured the wire led lights at the sides of the inside of the niche.

Ok, it was time for the finishing touches and embellishments, and in this case it's a lot, a bit over the top because I love it! :-)

First I coloured a piece of white lace with some Distress ink - Vintage Photo and a brush  to create an antique look. I also coloured some white and pink paper flowerd that way.


Here below you can see the lace is glued onto the 'roof'. Under the woman's head I glued lots of paper flowers, and in between some rhinestones. Also some bigger pink rhinestones onto the jewellery of the lady, and yellow Stickles on her golden adornments. A metal flower with pearl at the front on the stencilled window.


I my opinion it was still a little bare, so I glued some beaded strings at the edges of the niche, below and above.


Four metal legs, and some metal corner pieces to ,frame' the shrine. I thought it was almost finished!


I was not satisfied with one thing: the fringe, it needed a bit of colour to let it pop out and to finish the shrine: a pink glitter marker.


Finished! Here you can see the light catching the sparkle! It's not easy to make a nice picture of the light, this one is pretty good I think.


This shrine was so very much fun to make! I enjoyed the process so much! Some people are scared to start creating without a plan. I recommend you to try it anyway, you will be surprised! I was inspired by the shape of the shrine (farm...haha) and the Lynne Perrella stamps and the ideas really came up naturally. 
Enjoy!

Thanks for stopping by! Wishing you a great day!

LiesbethXX