Showing posts with label LPC012. Show all posts

Saturday, 7 June 2025

Spinning Tag with Lynne Perrella stamps {by Tracy Hickman}

Hi everyone! Tracy Hickman, @anonymous.palette on Instagram here with you today.

This year on the blog, we are being given free rein to do a deep dive into one of the PaperArtsy product ranges, and for this post I have been exploring Lynne Perella’s fabulous stamps.  I decided to create an oversized interactive tag with 6 spinning faces celebrating the many faces of Lynne... I'm looking forward to sharing how I dyed cheesecloth with Infusions (and my fingers in the process ;) and how combining multiple stamps within individual elements create depth and interest.


I created a simple protective sleeve with the amazing cityscape stamp and loved the idea of using this sun stamp as closures for the cover, making the reveal of the tag below a bit more special.


A PaperArtsy Stencil inspired the spinning aspect of this tag and love the cutout of the main focal stamp to reveal 6 artsy faces that rotate within a hidden spinning circle, steps shown below!


Three fabulous PaperArtsy Stamp Collections by Lynne Perrella were combined in the making of this project: LPC005, LPC011, and LPC012.  A PaperArtsy Stencil - PS456 came along for the ride and PaperArtsy - PS376 Large Stencil by Scrapcozy inspired the spinner idea.

Lynne’s stamps are so lovely and detailed. I really just wanted them stamped with black ink for maximum contrast and to show off the great detailing so a more muted and dreamy background was selected to let the decorative elements really stand out and the painted faces shine.


A trio of Distress Oxide Inks from Ranger in Milled Lavender, Speckled Egg, and Stormy Sky was smooshed on a craft mat,  spritzed with water and the watercolor paper tag then dragged through in several passes.  One of the stamps from set LPC011 was used with brown archival ink for added interest.


I used a lavender ink with a somewhat dirty sponge applicator through the PaperArtsy - PSA456 Stencil above for an additional layer but decided to stop there to keep the background somewhat simple and let those detailed stamped images shine.


PaperArtsy Smoothly Card Stock has been a game changer for my stamping! This paper creates such wonderfully detailed images and a new GO TO for sure.  The stamps above were stamped with black permanent ink.


Embossing some of the details with a favorite glittery bronze Embossing Powder from Lindysgang named Toadstool Taupe on a separate stamped image, I then fussy cut and adhered.


WOW Embossing Powder in Amethyst Ice by Seth Apter adorns this graphic heart.


Dyeing cheesecloth with PaperArtsy Infusions was easy and immediately gratifying.  I applied about a half inch of water in the bottom of a cup and sprinkled about three batches of infusions, mixed up and swished in the cheesecloth.  I ultimately ended up using Violet Storms that created the loveliest, pale purple gray shade.  This was used under the main focal point behind my spinner to draw some attention and texture to that area.  This technique would work great with any fabric or lace.


The stencil that inspired the spinner and triangle cut from the focal stamps in set LPC005


I used the PaperArtsy - PS376 Large Stencil by Scrapcozy to cut out six triangles for my faces and glued onto the round circle that was about a half inch bigger from the triangles in the stencil..  (I should have made the triangles slightly larger than the corresponding hole in the tag for some extra insurance with improper aligning ;)

Several PaperArtsy Fresco Chalk Acrylics and Mattints were used to color the faces in an artistic and modern way.


The spinner was attached with a brad behind the tag and a matching size piece of watercolor paper tag sandwiched that in.  I used that same triangle stencil to cut the side tab in order to reveal the edge of the spinner on the right side of the tag shown in the final piece.


A quick detail of the architectural long stamp from set LPC012 and the adorable sun stamp from set LPC005 that made perfect closures for the cover mounted on larger embossed circles.


A stamped banner on vellum creates a change of texture and adds sheen for variation.


Focal stamps with embossed details, raised with foam strips for added depth flanking the central focal spinner…


You can see my pencil lines that haven’t been erased yet, and I should’ve made the face triangles slightly larger than that triangle opening for a fudge factor…


The finished tag with spinner dial accessible on the right. This rests on the inside of the cover highlighting that long architectural stamp again and bringing the outside in ;)


I loved highlighting these beautiful stamp sets from Lynn Perella.  While I kept this in muted down “royal colors” (as I always think of Lynne’s collections as being so regal ), my original thought was to turn this into a Valentine card in brighter tones: reds, pinks and magenta.  I also think it would be a really cute idea to add a shaker element to the coin purse and do a pull down tab underneath the heart that would reveal a secret message.

I hope this gave you some inspiration or a take away of some sort.  Stay creative and craft on!

Tracy

@anonymous.palette

Thursday, 5 January 2023

2023 Topic 01: Shrines {by Liesbeth Fidder-De Vos} with Lynne Perrella stamps


Hi everyone!

It's Liesbeth here with you today. You can't imagine how much I enjoyed this project! As soon as I saw the topic ,Shrines' I instantly thought YESSS!

I have always been a big fan of all kinds of shrines and I love to share the making of mine with you and hope you give it a try yourself! 


This is what I came up with: a vintage, a bit medieval, soft coloured shrine with lots of details... with the wonderful Lynne Perrella stamps, metal embellishments, rhinestones, flowers, lace, legs and even real light inside. Of course I also added my ,Tracks'...our 2023 theme for quarter 1: pieces of a very old Ireland map. 


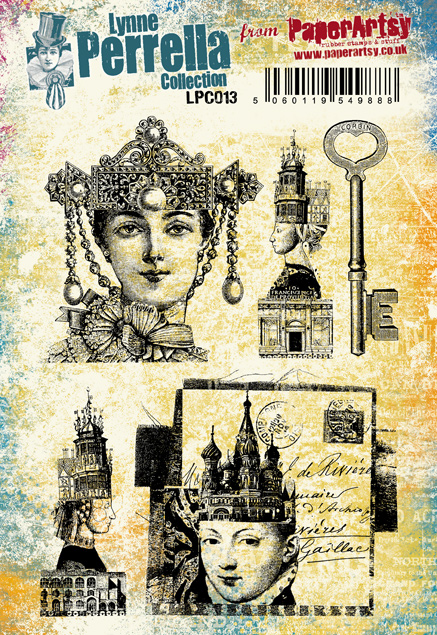
As always I didn't have a plan when I start. For me, the ideas come only when I'm in the creative process, never before. My starting point was this wooden toy farm for children, the shape, and the niche, is perfect to make a shrine. It looks like a triptych. I was inspired by the most beautiful PaperArtsy stamps ever (to me :-) ) LPC012 and LPC013. So very fine and detailed and I love the images... it's about times gone by.


So in this early stage I really didn't know yet what else I was going to use, and where it would end... so let's start and find out!


The first thing I had to do was transforming the toy into a real shrine. It was very smooth and slippery so I sanded the front with sanding paper. After that I let all the colours dissapear by covering the entire piece with three thin layers of gesso, a perfect base.


I needed some structure in the background for a more antique look, so I teared out some old maps and old book paper. I used an old map of Scotland and...Ireland. The style of the Lynne Perrella stamps I use here always remind me of my beloved Ireland...  I glued the paper pieces down with gel medium.


Using a thin layer of gesso here and there I softened the texts and map a bit and I choose three beautiful colours PaperArtsy Fresco Finish paints.. blue, yellow and red. Always a safe and perfect combination for mixing colours, it will never get ,muddy´! Caribbean SeePumpkin Soup and Bougainvillea. I used this three paints and three fingers to apply overlapping small areas. The effect was what I hoped!


More ideas came up: to create a beautiful crackled background for the inside of the shrine. First I painted the inside and some head sides with PaperArtsy Fresco paint - Claret. After drying I covered the inside with PaperArtsy-Crackle Glaze and dried it with the heat tool. I finished with a thick top layer of PaperArtsty Fresco paint-Nougat, and the magic happened, it's always so nice to see the crackles appear!


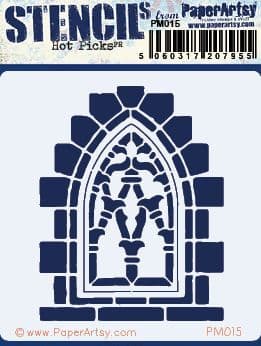
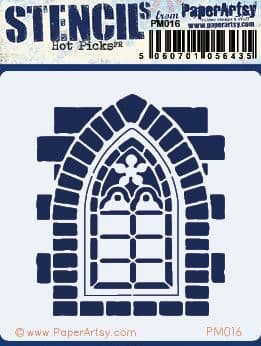
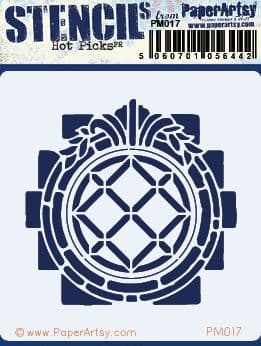
Now let´s decorate the front of the shrine. To create that medieval, sacred ambiance I decided to use three  PaperArtsy mini stencils (PM015-PA Mini MaskPM016-PA Mini MaskPM017-PA Mini Mask) I fastened them on the front with a small pieces of tape, easy to remove. Using a small sponge I dabbed the paint through the stencil, not to much so it doesn´t get under the stencil. At the top I used black (PaperArtsy Fresco paint - Little Black Dress) and at the bottom the off-white I used before (PaperArtsy Fresco paint - Nougat), in the middle I mixed both paints so that it transitions gradually.


Onto one layer of a kleenex tissue, (or use the bottom layer of a paper napkin) I stamped the big woman's head and the two castle ladies with black waterproof ink (I used StazOn - Jet Black) and tore them out. I think the two smaller ladies are perfect like some kind of guards for the shrine.


Before I glued them on the shrine I first stamped one of the other stamps directly on the surface as shown here,  with StazOn - Claret. That ink colour fits perfectly to the Fresco paint - Claret! You also can see here how the stencil prints turned out.


Using some gel medium, I glued the stamped tissues in place.


One of the stamps has that beautiful fringe/tassel thing at the bottom. I stamped it along the slanted edge of the shrine with StazOn - Claret.


Using the PaperArtsy  Fresco paint-Claret again I sponged the edges of the shrine.


After everything was dry I coloured the images of the women with colour pencils.


While I was busy painting, stamping and gluing I thought this shrine with that niche is totally perfect to add real light, because the edges of the niche are not visible from outside! So I bought a string of wire led lights with 20 lights.


I didn't want the string to be to visible so I drilled a hole in the side of the shrine. The lights went through easily. I addhered the battery unit at the backside with double sided tape.


Using tape I secured the wire led lights at the sides of the inside of the niche.

Ok, it was time for the finishing touches and embellishments, and in this case it's a lot, a bit over the top because I love it! :-)

First I coloured a piece of white lace with some Distress ink - Vintage Photo and a brush  to create an antique look. I also coloured some white and pink paper flowerd that way.


Here below you can see the lace is glued onto the 'roof'. Under the woman's head I glued lots of paper flowers, and in between some rhinestones. Also some bigger pink rhinestones onto the jewellery of the lady, and yellow Stickles on her golden adornments. A metal flower with pearl at the front on the stencilled window.


I my opinion it was still a little bare, so I glued some beaded strings at the edges of the niche, below and above.


Four metal legs, and some metal corner pieces to ,frame' the shrine. I thought it was almost finished!


I was not satisfied with one thing: the fringe, it needed a bit of colour to let it pop out and to finish the shrine: a pink glitter marker.


Finished! Here you can see the light catching the sparkle! It's not easy to make a nice picture of the light, this one is pretty good I think.


This shrine was so very much fun to make! I enjoyed the process so much! Some people are scared to start creating without a plan. I recommend you to try it anyway, you will be surprised! I was inspired by the shape of the shrine (farm...haha) and the Lynne Perrella stamps and the ideas really came up naturally. 
Enjoy!

Thanks for stopping by! Wishing you a great day!

LiesbethXX