Showing posts with label PS428. PS429. Show all posts

Monday, 16 September 2024

2024 Topic 7: (Gel) Printing {by Kate Crane} on the PaperArtsy Blog


Hi everyone, Kate Crane here with you today.

I've been busy gel plate printing lately, although to be fair I do a lot of gel plate printing all the time!  I looked through my stamp collection and picked out the closest thing to nature! Fishies chasing each other, and of course the humble tree. 

When I'm printing I like to print quite a few backgrounds for a couple of reasons. Firstly it can be a bit messy so you might as well do a few while you're on, and secondly I like a few colour combinations to choose from. It stops me from overthinking about what goes with what. If you have a few prints you can just grab and go, and sometimes find yourself creating something a bit different, something that you would have never have thought of.

I created a few backgrounds on my gel plate using a combination of alcohol inks and Frescos along with stencils. I love the serendipity of printing; you just don't know what you are going to get and you never get the same result twice!

In my projects today I'm going to build up layered backgrounds, playing with colour combinations, and then add some fun bouncing hanging stamped images, coloured with Mattints.


Frescos: Cerulean, Aqua Duck Egg, Snowflake, Dirty Lime
Stencils: PS442, PS441, PS428

When I added my colours to the gel plate I was quite careful about the colours I put together to avoid making mud. If you choose colours from the same colour family, or cool or warm colour combinations a you can avoid making murky prints. Opposites on the colour wheel will make brown (so blue and orange for example) - a good tip to remember.


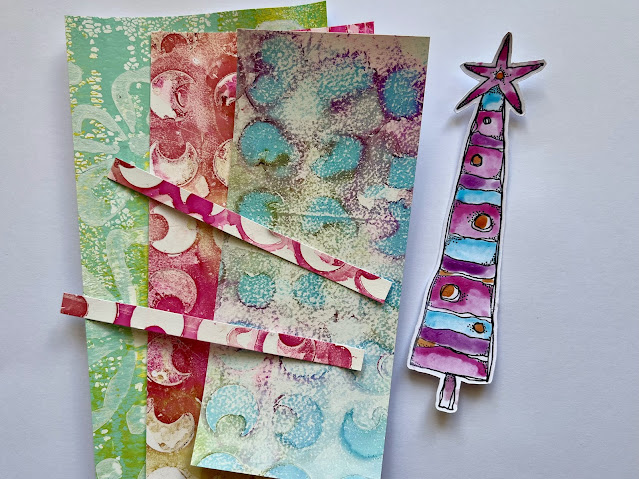
I began my print-making session with alcohol inks and Frescos. Alcohol inks dry fast, so once dry on the gel plate you need a layer of acrylic paint to pick up your print. In the past I have used alcohol inks on my gel plate with stencils a lot, but this time I did it a little differently.

I began by splashing alcohol ink on the gel plate along with a little blending solution which dilutes the colours a little for a more pastel result. I then put a protective glove on and spread the ink a little on the plate with my hands. While it was wet I laid the stencil over this and the ink immediately flooded under the stencil creating a pattern. I then just rolled kitchen roll over the top to remove some of the ink and then let it dry for a short while (remember alcohol dries fast!). Finally I lifted the stencil and simply brayed a thin layer of Snowflake Fresco over and took a print while the Snowflake paint was still wet. 

I repeated this a few times using different colour combinations. 


I then tried something else a little different. I placed my stencil directly on the plate and brayered a thick layer of Snowflake Fresco paint. I lifted the stencil, let it dry, and then built up several light layers of blues and greens with a brayer, letting it dry in-between. This creates a nice grungy look! Once the layers have dried a final layer of white allows you to lift the pattern.


I'm really happy with the various colours and patterns I have created here, and this gives me plenty of choice for building my backgrounds. Sometimes prints can look messy and untidy when you first do them but once you trim them and start using them they take on a whole new life.


Stamp: KC003

Next, I needed some coloured images for my little projects. I stamped, and then coloured with Mattints. I find Mattints are perfect for adding colour to your stamped images. They blend easily and you can build up the layers to create strong colour.

Backgrounds next! I chose to layer several prints over each other each time getting a little smaller. Here I am working on two little projects at the same time. This is when it is so useful to have a few prints to play with, you can experiment easily with different colour combinations.

Stamp KC008


Before I start gluing things down, these backgrounds and images need a little more work. I like to add depth to my stamped images with a Stabilo All pencil. The stamped images have micro dots for shaded areas so this a good guide for where to add the Stabilo shading. You can go really quite dark in these corners, it helps your images to pop! And then of course, a white Posca paint pen is great for adding highlights.


But Poscas aren't just for images, they are great for adding nice scribbles to your background too. I let the pattern created by the stencil guide me for this.


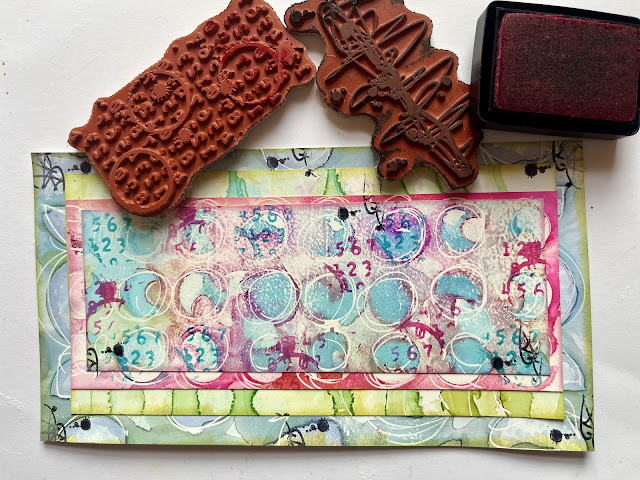
Once you glue or tape your background layers together, a bit of texture stamping over the top of everything looks great especially if you use corresponding colours and just a touch of black.

Stamps: KCM001, KCM002

In something like this, stitching is completely optional as it is purely decorative and not functional, although it is an alternative to wet glue! I love the look of stitching though, so I just use a regular sewing machine with a regular needle and add stitch away!


My very final background layers are always a touch of Stickles Glitter for a bit of sparkle, and a touch of metallic paint, usually by junk-stamping with loads and old cards or lids. These final touches do help to bring the layers together.


To add my floating-bouncy hanging images I used Grafix DurLar clear film, simply cut into narrow strips and glued to the reverse of my background panel.


If you missed any of my recent tutorials in the PaperArtsy People Facebook group, head over there to the guides section, and under the Kate Crane Guide you will find the following...

Tuesday, 23 April 2024

NEW PaperArtsy Designer & Products Kate Crane {April 2024}


A note from Leandra ...

It is always an exciting event when a new designer joins the team, and Kate comes to us ready to begin a new phase in her creative walk, partnering with us as manufacturer of her stamps and stencils.

Many of you may be aware that, Kate was previously designing for Carabelle Studio, who surprised us all when they announced their intention to close in Autumn 2023.

Kate, who is based in the North of the UK, has worked consistently over the years to build a loyal and dedicated following that has quickly evolved and expanded across the globe. You might have attended one of her regular classes at Art From the Heart in Harrogate, or perhaps seen her demo at a show for Stampers Grove, or maybe you have taken a live-streamed class with her from your corner of the globe. Kate has creative interests ranging from textiles to ceramics to paper, and working across different media really adds depth to what she can share as a mixed media artist.

Having a teaching background, she is a fabulous person to learn from, and who wouldn't love to learn more about her quirky mixed-media layers and striking colour combinations?  Kate is equally at home with paints & inks or alcohol inks and infusions. Whatever she makes, there are sure to be elements in all her layers that resonate with you, from bright and cheerful marks through to infusion tickled images, or backgrounds made from stencils dripping in colour.

We kick off this release with a significant number of products giving Kate lots to use in her upcoming classes; 5 large A5 stamps sets, 5 stencils and 8 mini stamps. You will soon find out there is a fun mix of abstract designs and those adorable quirky characters that Kate so loves to create; be it loved-up fish, frilly birds or miniature winged houses.

If you would like to see this release revealed, and the numerous samples Kate has created, then head on over to our Facebook Community PaperArtsy People at 20:30 Paris time, or catch the replay, it will be pinned to the featured posts at the top of the group page for easy access.

Welcome Kate, we really hope you enjoy being part of the PaperArtsy family, it's lovely to have you here!

Leandra & Mark
 
Kate and Leandra will be LIVE over in our Facebook Group, 'PaperArtsy People' shortly after this post publishes, and ... don't forget
 
These stamps are ONLY available EXCLUSIVELY from our approved stockists. Please check the list at the foot of this post to find a retailer online or geographically near you, it makes sense to order within your country where possible. 

Our retailers also endeavour to join the designer's live to share their direct shopping links - this makes it super easy for you to find a store with product in stock immediately.


Hi everyone, Kate here, and I'm absolutely delighted to be here. Thanks for the very warm welcome. 

I've been playing with mixed media for many, many years but Paper Artsy were the first rubber stamps I ever bought so it feels really special to be joining the team here. I have been designing for quite a while now but drawing and doodling forever so I'm very happy to be sharing some of my quirky hand drawn characters alongside grungy background elements that all work seamlessly together. 

I have been happily playing with my new collection using Frescos, Infusions, and experimenting with colouring with Mattints so you'll see a bit of everything in my samples, but one thing for sure, you will see a lot of colour! I'm super happy to have stencils too, four of which are great for creating all over background pattern, and one which has all of my 'essential' mark making so fabulous for top layers.  I like to throw in a bit of alcohol ink, and add extra transparent layers, and often a bit of stitching (always optional as it's purely decorative and not at all functional).  

I'm also a very messy creator. Very! I love products that are a little bit unpredictable (Infusions!) and always try to find different ways to use things. I'm not afraid to try something just to see what happens - experimenting is key. My art is made of multiple simple layers - nothing is too hard! But typically a lot of layers to achieve the depth and complexity that I love to create. I look forward to sharing plenty more ideas, samples, techniques and getting very messy with you going forwards. 
.... 
 
Let me introduce you to a collection of 'Mini Moos' measuring just 3 x 7cm, it was very fashionable a few years ago to trade these with other artists. These are a great way to use tiny leftover scraps of ready-made backgrounds and to showcase the stamps, so here you see paint, alcohol ink, infusions. No stamp is too big for these, just chop them down and use remnants!


Kate Crane Red Rubber Mini Stamps
Price: RRP €4.90 +VAT 
Size: generally credit card (ish) size images
All stamps are individually trimmed onto cling foam

Here we have eight minis featuring some of my quirky birds and crazy fish. Who says a Sword Fish can't carry and deliver a heart?! These are adorably small. And you'll find in the mix a few backgrounds to add textural layers to your backgrounds and even one of my scribbles. I LOVE scribbles! This is a brilliant way to add something to ground an image - give it something to stand on. And of course a few quotes in my favourite vintage typewriter style.


Kate Crane Mini 001 (code: KCM001)

Who doesn't love a bit of text? This is such a useful stamp and a great way to add depth and texture to your background. Of course you don't have to use the whole stamp. Using it unmounted is a great way to add touches of colour and texture as seen here on this fishy journal page.

Grungy tag background

I created a background using infusions (A Bit Jaded) and added extra layers with the mini text KCM001 (and also white painted dots using a stencil but more on that later). I have also brought the Scribble stamp KCM002 in around the very edges.
 

Another background using Infusions (Magenta) with extra stamped layers using the text again, and also the scribbled circles 003. I stamped tone on tone here, it's a great and subtle way to build interest in the background, and then add a bit of depth by stamping in black too.

  
And here we have a few fish (from the larger set) happily swimming amongst the text!
 

Kate Crane Mini 002 (code: KCM002)

Art Journal page - Inner Beauty

Oh that scribble! We happily scribble as children but as we grow older we sometimes lose the freedom to just let go and scribble, but I love it. I created the image for this stamp by scribbling with black ink and a dip pen, and i find it so useful for both grounding an image as well as adding a little extra around the edges.


And here some grungy backgrounds again, with scribbly edges and a few scribbled circles.


Kate Crane Mini 003 (code: KCM003)

Mini Journal Collage

Another really useful stamp. I created this image by ... you guessed it ... scribbling with ink and a dip pen! Adding touches of black to a brightly coloured background really helps to make the colours pop.
Here there are a few more layers added, including a transparent overlay, but you can still see those circles peeping through.

Kate Crane Mini 004 (code: KCM004)

Mini journal page - Arty Party!


This is a small journal page I created to go in my little Travelers Notebook journal, using this silly, frilly bird! I coloured it twice and then cut one in half to make a line of birdies all heading somewhere. Well, to an arty party! On an Infusions background, and that little scribble stamp again. (You see? It's a very useful stamp!)


Kate Crane Mini 005 (code: KCM005)

Oh, it's another silly bird! They have huge appeal and always bring a smile!

Crazy bird tag

I layered up some of the backgrounds I created with stencils (more on that later), added rows of toadstools from the larger set KCM004 and then added this feathered crazy on the top. In fact I stamped him twice and layered it up so his wings were doubled up for dimension. I think he looks a bit regal here. King Bird!


Kate Crane Mini 006 (code: KCM006)

Take Flight Greetings Card

Well, we all love a quote stamp. But I think it's interesting to try and use them a bit differently. Here I cut the house off the hilltop and added wings for a flying house, so it made perfect sense to use the 'Take Flight' quote!


Kate Crane Mini 007 (code: KCM007)

Fishy Fishy Tag Card

Teeny tiny fishies! I stamped these onto card and then coloured around them with Mattints, and also coloured the fishies with Mattints. (These are a super easy way to colour images) Layered up on stencilled backgrounds, and then lots of glitter, because SPARKLE! These fish are really quite detailed (in a small kind of a way) so great for colouring in multi-colour.


Kate Crane Mini 008 (code: KCM008)

Swordfish Love Tag

What is it with fish? I just love crazy fish! My quirky head tells me it makes perfect sense for a swordfish to be carrying something hanging off his sword.


I coloured him (her?) with layers of Mattints, placed on an infusions background, but I also used a transparent layer (DuraLar Wet Media) with additional circles created with Infusions again. This crazy swordfish makes me chuckle!


Red Rubber Stamps (A5 set)
Price: RRP €23.00 +VAT    
Size:5" x 6" (13 x16.5cm)
All stamps are individually trimmed onto cling foam, with a laminated storage/index sheet.

PaperArtsy like to have a mix of designs on their A5 (half-plate) size stamp sets, with the idea that a project can be made with all the elements to hand, so you will find a mix of background stamps, focal images, and perhaps some words to add (even more) personality to the characters when you create cards, tags, ATC's or journal pages.

Kate Crane Stamp Set 001 (KC001)

Nerdy Bunny Tag

I have always drawn images with elongated body shapes, or unrealistic proportions, and here is a rabbit with an elongated bottle type body and ridiculously large ears. My first drawing was a little different ... Leandra said 'Can you make it more nerdy?'!  So I did! 
 

I find tiny eyes can be tricky to add to a stamp, but a tiny dot of colour works really well to add the eyes.


Mini Moo Bunny


And here's bunny on a Mini Moo (if someone overheard you saying this out loud, what on earth would they think?!) A Moo measures just 3 x 7 CM ) actually 2.8 cm if we're being picky) so you have to trim it to fit. But as long as you get the main focus of the image on there, I find it just works. And they are fast and fun to make (and swap).

Kate Crane Stamp Set 002 (KC002)

Art Journal page - Inner Beauty

This is a larger scale project, a page for my art journal featuring a quirky doll with a bird on her head! Notice how the mini stamps fit inside the body of the doll. Or you can stamp them, cut them out and hang them from the top of your page. or any where else you fancy. This gives you lots of different options and alternatives with the doll images.
 

Here she is layered on a painted background, also using Stencil PS428, with a little bit of alcohol ink thrown on top for good measure (told you I was messy!). You can also see the VERY USEFUL text and scribble minis.
 

I used Stencil PS429 (more on that later) with infusions too because circles are great for adding a focal image to. It really frames the main image.
 
Collage Mini Journal Page

The little archways featuring birds, stamps, toadstools .... are actually designed to fit inside the doll's body, but they also work really well as main focal images, especially on smaller pages or projects.
 

I'm going to colour more of these and make them into stickers (I haven't yet but I AM going to!) because then I will always have a little image ready to add to a journal page, planner page or card. 

Kate Crane Stamp Set 003 (KC003)

Keep Swimming Journal Page

Ah yes, fish. Because fish seem to work for any project! For this larger journal page I wanted one stand-out fish to be swimming in the opposite direction because that works so well with the 'keep swimming'. You know, you can do your own thing and swim against the tide.
 

Again coloured with Mattints.
 
 
But you know, I also thought about doing a journal page with many fish all swimming in the same direction ... along the lines of 'find your tribe' so maybe watch this space for that one.

Dishy Fishy Whale Tag

And what is not to love about a colourful whale? I like the ambiguity of this - I can't decide if he is greeting the smaller fish, or about to eat him...


Kate Crane Stamp Set 004 (KC004)

House Mandala Journal Page

A house on a hilltop - or a mandala of hilltop houses, all coloured with Mattints. The bright background was created by brayering Frescos and then adding lots of stamped texture.
 

I used  bunting from a different set KC001, but you know, mix and match!
 
 
You can also see lots of additional texture in the background using stencil PS427. And here you can see how I coloured with Mattints and added a few extra polka dots. Generally I tend to colour in loose 'pools' and leave plenty of white space.


Small Journal Collage

I always love houses, always did. I think it's one of the first things you draw as a child.
 

This time I stamped it onto a ready made background using Infusions so I didn't have to colour it in. Instant colour! And added stamped texture of course.

Kate Crane Stamp Set 005 (KC005)

Oooh all of my essential marks in one stamp set! Great for adding lots of texture to backgrounds but also one of my favourite ways of using these is to stamp all over old text or ledger paper, and then tear it up to use as collage.


This is my brayered background before I added the mandala of houses. I added so much extra depth to this by stamping lots of the essential marks - usually tone on tone, stamping in colour. These disappear in the overall effect but add so much to the overall impact, and you can never make 2 papers the same! Unique.
 

The layer under the bunny you can see how I have randomly stamped with all of the mark-making stamps.....
 
 
... and filled an entire page. So much collage fodder here!


PaperArtsy Stencils {Regular}
Price: RRP €5.64 + VAT
Regular Size: 6.5" x 7" (16 x 18cm) 
Robust 250 micron mylar designed to offer longevity, deep texture and easy clean up


PaperArtsy Stencil by Kate Crane (PS426)

Inky Stencilled Background

This stencil started off as a much larger pattern drawn in a dot grid journal. I took one of the elements and turned it into this delicate repeating floral background. So many different ways to use a stencil! Alcohol inks and the gel plate are one of my go-to ways to produce inky backgrounds.
 

You can create a variety of backgrounds by direct prints, then lots of pick up prints for a softer effect.


And after a while the colours start to merge and you just don't know what you're going to get.


And here you can see a completed collage small journal page. The stencilled background is now hiding under other multiple layers but if you look closely you'll see it's still there.

PaperArtsy Stencil by Kate Crane (PS427)

Mixed Media Journal Page 


A super useful stencil! Sponging paint through is a simple but very effective way to add more layers to your mixed media projects.


Dots, lines, crosses, circles ... if you look closely you will see this stencil creeps into many of my backgrounds.


PaperArtsy Stencil by Kate Crane (PS428)

Moon Phase Inky Background


I do love the moon, I am always looking out for her. I used a moon phase image and kept rotating it to create an all over background. I've used Infusions here (getting messy again!) I experimented and found splashing plenty of watery Infusions onto your card, adding the stencil while it is wet, leaving it a dry a while then bingo! You get this lovely, slightly imperfect, watery background.
 

This technique works great with two colours too. You can also flip your stencil when it has picked up wet Infusions and add that to another background!
 

And of course you can't go wrong with a bit of white pen doodling over the top.


PaperArtsy Stencil by Kate Crane (PS429)

Broken Circle Inky Background

An imperfect circle. A little bit broken and rough around the edges. Perfect for adding a focal image! Anything circular is just *asking* for a focal image right bang in the middle!


I created this one with alcohol inks on the Gel Press....


...and this one with watery Infusions.


The central circle is a great focal point and works well with any other images.
 
 
Here I used Infusions and it blurred a bit but I love its imperfection!
 

Of course white splats and doodles really add a little extra something.


And of course here it is again as a finished page, with the stencilled design mounted on a painted background. A great place to add Dolly!

PaperArtsy Stencil by Kate Crane (PS430)

Inky Floral background


Another all over pattern stencil which was taken from another drawing - this time done in a small dot grid journal. I call it pattern building, just playing with repeating shapes and allowing it to grow.


Here (and above) I've used alcohol inks on the gel plate for a bold print with strong colour.


But here I've used Infusions for something a little more watery and a lot more gentle.


If you look closely at the background of this 'take flight' card you can see a gentle watery infusions background print peeking through.


And here, behind King Bird, you just might be able to spot one of my alcohol ink prints layered up.


Well as you can see I have had a lot of fun creating with my somewhat extensive first collection for Paper Artsy! I have used a bit of everything, generally allowed myself to play and experiment,. and had a lot of messy fun along the way. I do hope you enjoy creating with my quirky, eclectic designs too. I'm so looking forward to seeing what you all get up to!

But right now, I'm going for a little lie down!


You can see more and visit me at... 


 PaperArtsy Stockist List

Our stockists are your go-to  source for all PaperArtsy products, and we suggest that you also use the PaperArtsy People Facebook group to source a retailer in your country. Many are members of our FB group and will happily share links to their online stores.

Australia
Bev's Cross Crafts, Spreyton, Tasmania https://www.bevscrosscrafts.com.au/
Crafters Cupboard, Berwick, Victoria www.crafterscupboard.com.au
Memories on the Murray, Murray Bridge, SA  https://www.memoriesonthemurray.net/
Natalie May Scrapbooking, Dover Gardens, SA https://nataliemay.com.au/
Scrapbook Superstore & More, South Penrith, NSW https://www.scrapbooksuperstore.com.au/
The Scrapbooker's Confetti Box, Swansea, NSW https://thescrapbookersconfettibox.com/
The Scrapbook Store, North Perth,WA http://thescrapbookstore.com.au/ 

Belgium
Cart N Scrap Art, Antwerp, www.cartnscrapart.be
Créatelier Caracolle, Liège, www.createliercaracolle.be

Canada
Paper Art Creations Inc, Leduc, Alberta, www.paperartcreations.com/
Scrapbook Centrale, Dollard Des Ormeaux, Quebec www.scrapbookcentrale.ca
Scrap Addicts, Edmonton, Alberta www.scrapaddicts.ca/
Scrap and Bean, Edmonton, Alberta scrapandbean.com/ 
Scrapbooking Fairies, Drayton Valley, Alberta www.scrapbookingfairies.com/
The Paper & ink Boutique, Calgary, Alberta www.paperandinkboutique.com/
The Scrap Yard, Calgary, Alberta, www.thescrapyardcalgary.com/ 

Denmark
Hobbyboden Scrapworld Samso www.hobbyboden.dk

France
Eirl Bancon Cartoscrap, Midi Pyrenees, www.cartoscrap.com
Fée Du Scrap, Saint Sébastien-Sur-Loire, www.feeduscrap.fr/
Horizon Créatif, Ste Jalle www.horizon-creatif.fr
Instant Créatif, La Possession, La Réunion, www.icreatif.re
Katzelkraft, Ingwiller www.katzelkraft.fr/en/
Kerudoc Creation, St Yvi www.kerudoccreation.com
Le Grenier des filles, Pierre Benite
Page de scrap, Saint Pavace, www.pagedescrap.fr/
Scrap Déco Home, Goutrens, www.scrapdecohome.fr/
Toutencolle, Dun sur Auron www.toutencolle.fr

Germany
Stempeloase Munich, Munich www.stempeloase.de
Stempelfee Shop, Hilden www.stempelfee-shop.de
Stempellaedle, Stuttgart, www.stempellaedle.de/shop

Italy
Immagine SAS di Rapaccini, Rome, www.immaginelab.com
Il Negozio Della Mamma Di Cle, Torino, www.ilnegoziodellamammadicle.com
Marte Savona, Savona, www.martesavona.it
Pezze E Colori, Lissone, www.pezzeecolori.it/ 
Piccole Passioni, Siena, www.piccolepassioni.it

Japan
La Wadao, Odawara, Kanagawa, www.lawadao.com
Tiny Dots, Funabashi-shi, Chiba www.tinydots.shop-pro.jp

Netherlands
De Hobbystudio, Genemuiden, www.dehobbystudio.nl/
Doe@ding,Spijkenisse doeading.nl/
Hobbycompleet de Duif, Leeuwarden www.hobbycompleet.nl
Stampingcorner, Capelle Aan Den Ijssel www.stampingcorner.nl

Spain
Cien por Cien Manualidades, Barcelona,  www.100x100manualidades.es
Ideas 10 Manualidades Y Scrapbook, Bilbao ideas10manualidades.com/
Marakiscrap, Tarragona, www.marakiscrap.com
Scrap & Papers Experiences, Barcelona, www.scrappapersexperiences.com
The Paradise Corner, Barcelona, www.theparadisecorner.com

Taiwan
Mandy's Cards, Taipei www.facebook.com/mandy.card.77

United Kingdom
Amelia's Creative Crafts, Studley, Warwickshire  www.ameliascreativecrafts.co.uk
Art from the Heart, Harrogate, Yorkshire www.afth.co.uk
Crafts at The Malthouse, Herstmonceux,  East Sussex, www.themalthouse.co.uk/
Loobi Crafts, Leighton Buzzard, Bedfordshire, www.loobicrafts.co.uk
Stampers Grove, Springbank, Lilliesleaf, Melrose,Scotland www.stampersgrove.co.uk
The Artistic Stamper Craft Store, Faversham, Kent www.theartisticstamper.com
The Forget me not Kraft KabinRochford, Essex, www.TheForgetMeNotKraftKabin.co.uk

USA
Artistic Artifacts, Alexandria, VA www.artisticartifacts.com/
Artistic Studio Creations, Fayetteville, Georgia www.facebook.com/ASCbyCrystal
Craftiness, Chatsworth, CA, www.craftinessonline.com/
Everything Scrapbook & Stamps, Lake Worth, Florida https://everythingmixedmedia.com/
Frantic Stamper, Oregon www.franticstamper.com
Free Heart LLC, Denver, Colarado, www.freeheartllc.com/
Joggles, Coventry, Rhode Island, www.joggles.com
PaperCraft Clubhouse, Westbrook, Connecticut, papercraftclubhouse.com/
Qingquing's Stamp Shop, Portland, Oregon
Runaway, Art & Craft Studio, NE Salem, Oregon www.runawayart.com/
Simon Says Stamp, Columbus, Ohio www. simonsaysstamp.com
Topflight Stamps, Irmo, South Carolina topflightstamps.com/

If you are interested in becoming a PaperArtsy stockist contact Dounia@paperartsy.com for more information

PaperArtsy Links
Facebook Group PaperArtsy People
Facebook Page PaperArtsy