Showing posts with label PS086. Show all posts

Sunday, 16 February 2025

February 2025 - With 3 Things: Flower Book {by Liesbeth Fidder de Vos}


Hi everyone, it's Liesbeth here with you for a 'With 3 Things' challenge post. 

This feature on the PaperArtsy Blog is where 3 bloggers are sent 3 items in the post. Typically we will receive a stamp, a stencil and a couple of Fresco Paints, and in 2025, everyone will receive identical products. 

We have no clue what PaperArtsy HQ is going to send, the whole idea of this challenge is to do something crafty in our personal style with these 3 items. We are allowed to bring other PA products into the mix if we feel it is necessary.

So let's take a look at what I received from PA HQ ...


It was so exiting again to unpack the pacage! The three things are lovely and really perfect together, and ideas popped up immediately. I have made a small flowery book, let's take a closer look.


The booklet has pockets that fit a small tag. This is how I made it:


Using a sponge and an old credit card, I applied the two beautiful colours of PaperArtsy Fresco Finish paint Sunshine and Flamingo onto an A4 PaperArtsy Smoothy stamping card (regular, SCA4) and on a smaller piece of the Smoothy heavy cardstock (SCA4H) for the cover. I didn't apply it too neatly... because that's not me. :-)


I mixed a tiny drop of PaperArtsy Fresco paint Little Black Dress with the pink Flamingo and used a sponge and the JoFy stencil (PS086) to apply it here and there onto both pieces of cardstock. With a small round blending tool I also made dots with both Flamingo and Sunshine.


Using a waterproof ink (I used Tsukineko StazOn jet black) I stamped the two flowers of the PaperArtsy stamp set (JoFy76), spread all over the surface.


Now it becomes a book: I folded the A4 in 8 parts and cut the middle of the centre score line as shown.  I fold the book to a ,zine'. Hope this is clear.. The small heavy card will be the cover, I cut it a bit bigger than the book, and scored a 3 millimeters spine. I didn't throw away the left-overs.


I sponged the edges of the pages and the cover with black ink and glued the book into the cover, only at the edges as you can see on the picture..


Time for decorating the booklet! Using waterproof ink, I stamped the several JoFy76 stamps onto regular Smoothy cardstock. Now I have used every stamp of the set, they are so nice! I coloured them with (very) watered down PaperArtsy Fresco paints Sunshine and Flamingo.


I cut the stamped images out, sometimes the entire stamp, but also only parts. I decorated every page with them, trying to create nice compositions for every page or spread.


Out of the left-overs I made a tag, it fits in one of the pockets of the booklet. I finished the piece with white gel pen, black fineliner, some ribbon and three glass beads. And of course a tiny bit of glitter glue because I love glitter! 
Ready!


I'd love to show you every page...the lovely cordial text makes a story! This is the front of the booklet.


The first spread: Relax,...


Second spread: recharge,...


Third spread: get set, GO!


And finally the back side of the book, with the tag.

This was so much fun to do and it's always a pleasure to work with these wonderful PaperArtsy products! I'm so curious to see what the other ladies are creating with this 3 things! Hope we inspired you, have fun!

See you soon,

Liesbeth XX

Instagram: liesbeth_fidder

Monday, 10 February 2025

February 2025 - With 3 Things: Miniature Flowers {by Jenny Marples}


Hi friends, introduction it's Jenny (Pushing The Right Buttons) with you for a 'With 3 Things' challenge post. 

This feature on the PaperArtsy Blog is where 3 bloggers are sent 3 items in the post. Typically we will receive a stamp, a stencil and a couple of Fresco Paints, and in 2025, everyone will receive identical products. 

We have no clue what PaperArtsy HQ is going to send, the whole idea of this challenge is to do something crafty in our personal style with these 3 items. We are allowed to bring other PA products into the mix if we feel it is necessary.

So let's take a look at what I received from PA HQ ...


Today I have made an arrangement of miniature flowers... let's take a closer look.

After receiving those mystery supplies my mind immediately went to the idea of making flowers, but the stamps in the JOFY76 stamp set are quite large so I decided to use them with lightly sanded shrink plastic and permanent black ink.

As you'll see below, by adding small amounts of Little Black Dress and Snowflake PaperArtsy Fresco Finish Chalk Acrylic Paint to the Sunshine and Flamingo ones (and by mixing those two together) you can extend your colour palette.

Following advice from a previous post on the PA blog I watered down the paint before applying it to the surface of the shrink plastic.

After cutting out each stamped image and heat shrinking them (deliberately curling them along the way) you can the paint the reverse and edges of each cooled piece with undiluted paint. If needed you can also touch up bits of the front too.

Knowing these flowers will be seen from all angles you can add your own details to the back of the flowers with permanent black and white paint markers. Those noticeable black and white stripes in Jo's original designs can be replicated on the edges of the flowers and also on the paper-covered wire stems. You can protect your painted flowers with clear nail polish.

Now it's time to create the larger flowers with the individual petals and centres. Use a fast bond glue that dries clear throughout the assembly process.

To stick the stems to the base of the flowers I recommend threading beads and a bead cap onto the wire before bending it over at the end. Glue them together and allow to dry.

Below you'll see some suggestions for the ways you can then embellish the stems with extra beads, twisting the wire and by adding miniature painted leaves - I used dies from CoolKatzCraft to cut mine.


To hold the finished flower stems I'd found an old bottle but it needed improvement, which is where the PS086 stencil came in useful. I found it easier to use a permanent black marker to trace the design onto the uneven surface before filling them in with a couple of coats of the Little Black Dress PaperArtsy Fresco Finish Chalk Acrylic Paint.

I suggest adding something like sand into your finished container to help hold the flower stems in place. And you can add extra stems decorated with beads and bits of broken/old jewellery and the smallest flowers to complete your arrangement.

Here are some close ups of the finished stems...


Well that was fun! I'm off to find out which other PaperArtsy stamp sets will help me create more miniature flowers.

Jenny


Tuesday, 8 June 2021

2021 Topic 7: Stamp Mash Up JOFY, EEG, ESN, I&D minis by Helen Chilton

  2021 Topic 7: Stamp Mash Up: JOFY, EEG, ESN, I&D Minis


It's fascinating how diverse images can meld so perfectly. Using an almost tropical colour palette and some beautiful stencilling, Helen has created a wonderland garden full of beauty. With some clever reversing tips plus some super glossy blooms, you might want to dig out your magnifying glass!

~ Keren

Hi everyone, it's Helen with you today, and I'd like to share with you my mash up project. I love doing these as you have so many stamps to choose from but that can also be a disadvantage as you're spoilt for choice.
With this project I was going to do something totally different, using very different JOFY stamps. However when I'd made the background it looked too tropical for what I was planning so I went through my stamps again! Actually it worked in my favour as I could make the Sara Naumann birds a focal point as well (plus I love those stamps).


Brayer two colours on to start with, if you brayer one layer over another while it's tacky it also pulls some paint off leaving an interesting texture.


Love this stencil and have used it in all directions.


I've chosen a circular pattern for the next layer - by chance it fits in well with the stamped and cut out circles later although I can't claim to have planned that far ahead!


I finished with zigzags and those large leaves; I can see that stencil becoming one of my favourites.


Use the Minis to stamp in paint - you've already built up six layers.


I used a Stamping Platform for the flowers simply so I could go back over the outlines once I'd painted them. Be careful with this stamp as it's easy to get ink on the open spaces.


The gloss glaze used here just gives the flowers a lift. While it's wet you can also add the beads to the centres.


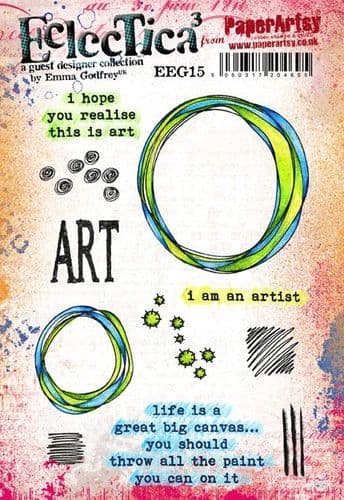
I was thinking of creating a sun with this stamp of Emma's but in the end cut out the middle and used it as a frame and a perch for the birds.


Using black paint to stamp these meant I got a really intense image. As it's a silhouette stamp I just cut it out and painted the back to get my bird to face the other way.


Playing around with the layout, I added some smaller cut out circles in blue and yellow. I was going to use the pink again, but it was too much.

To finish, I used the Minis to frame the whole board - the script is lovely and loopy and the circles echo the circle frames.


Finish off with the text, stamped on a matte background to contrast the glossy flowers.


I love the contrast of the black paint with the bright background - it really stands out. In fact, apart from the flowers and text, I've used paint to stamp everything here - it gives a good opaque image, yet at the same time I'm not worried about it being perfect. The whole idea is to give an impression. Using all these different stamps has once again been great fun. If it's too daunting to have completely free rein, limit yourself to four designers as is done here. You could try pulling together the designers that seem most different for an even greater challenge!