Showing posts with label HP2302. Show all posts

Friday, 5 July 2024

2024 Topic 5: Ink Pads {by Claudia Neubacher} on the PaperArtsy Blog


Servus, dear creative friends!

It's Claudia here with you today to share an easy to do birthday card with a hidden surprise!

I love PaperArtsy's actual "hidden" theme and combined with the new "Ink Pads" topic, it made me think of two birthday cards to make for my wonderful son and for my evenly wonderful niece. I had two amazing nature themed PaperArtsy Hot Picks stamp sets in mind that have stamps on them that can easily be transformed into "moving images" that reveal another - hidden - image...a kind of birthday (card) surprise, if you want.

My idea was to use these alongside with some heavy water colouring - so the choice when it comes to stamping ink that shows every tiny detail of the stamped image AND withstands loads of water being added by a brush was an easy one - a Tsukineko VersaFine Clair (Nocturne) ink pad!

To create soft water colour-y effects with the PaperArtsy Fresco Finish Chalk Acrylic paints I needed to go with tones that either read "translucent" or "semi-opaque" on their labels. I went for three basic colours (red, blue and yellow) and one particular orange tone that I knew I could not mix with the basic colour tones.

But first things first - the finished project (and the PaperArtsy products I used):


The two birthday cards look as simple as they are in the making - I promise! And all I needed were the two stamp sets, four PaperArtsy Fresco Finish paints and one PaperArtsy stencil.

But this picture does not reveal the hidden surprise...a hint: its making involves a tiny bit of paper mechanics (of course I will show you how to do it a bit later in this post).


Here - once again - the supplies I needed to create my cards. The stencil I used to create the quote is not shown as that was a spontaneous idea. You'll find info on it later in the post. 
The card stock shown in the picture is PaperArtsy Smoothy Heavyweight A4 White Stamping Card (SCA4H), but you can as well use heavyweight smooth printer paper if you are not sure about your stamping skills.


The Tsukineko VersaFine Clair ink pads are my go-to ink pads when it comes to very fine detail stamps or techniques like heat embossing or colouring in stamped images with water colours. They are quick drying, light fast and fade resistant and absolutely waterproof (as they are oil based pigment inks). And they are also perfect for the technique I want to show you in a sec! ;)


You can see how the image details are still crisp though I have really given this stamped image a heavy dose of water colouring. No smearing at all (though I always heat dry the stamped images to make sure they have really dried...the Tsukineko - VersaFine - Clair inks really do dry quick, but I like to play it absolutely safe).


And this squid buddy's background image withstood the same treatment with heavily diluted PaperArtsy Fresco Finish - Glass Blue (FF102) just as safely. This paint is translucent - so it is perfect for letting the details of the stamped images show through.

But what is wrong with this image? Why does it show mirrored and how could that happen"?


Of course this was no accident! I needed this particular image to be mirrored, because I wanted my "hidden surprise" to swim to the left and needed the space to its right to hide it (the top banner picture already showed the little trio of fish that can be pulled out of the nautilus). Mirroring stamps is quite easy to do, but it takes a bit of practice (so if you do not want to mess up on the heavyweight PaperArtsy card you should try it several times on cheap smooth heavyweight printer paper).


What you need for this "trick" is a brayer - most preferably an orange or light grey one where you can see the inked image you are taking from the stamp. The Tsukineko - VersaFine - Clair ink pads provide a really deep and strong pigment (you can see that by how "wet 
with pigment" the inked stamps are) - so they also help you as you do not need to hurry during the process.

You thoroughly ink the stamp (just like you always do) - I have "fixed" mine to my non-stick craft sheet for that purpose - and then you carefully roll the brayer across the inked stamp without changing the direction. Pay attention to not smudge any detail. Rather work with no pressure than too much - that helps avoiding sliding off with the brayer. The most tricky parts are the start and the end of this rolling process as these are the moments when you slip and smudge most easily.


Then roll the reverse image from the brayer onto the substrate where you want the image to appear on your project. I prefer to use a silicone mat for this as it helps with not losing any detail while rolling the brayer across the paper or card.  
For the "hidden surprise" repeat this process on a scrap of left over smooth card so you have a second reverse image of the nautilus.

This technique definitely needs a bit of practice. Not smudging the image when taking it onto your brayer is the hardest part, but you will quickly get the hang of it! Of course this technique only works with "narrow" designs, as the brayer's circumference defines the size limit of the image's width.

It's a technique that comes in especially handy when you need symmetrical designs (like for example two hands pointing towards some focal image in the centre of your project from the left and the right). In my case I just needed the nautilus to look to the other side (and I can live with the reverse text as it still adds lovely texture to the background).
 

Time to get into the "paper mechanics" zone!

That sounds more tricky than it actually is. What's important is that you use images that work together - one with a possible "opening" for the other to appear in it.

The lovely images I've used come from the two marvellous PaperArtsy Hot Picks stamp sets 


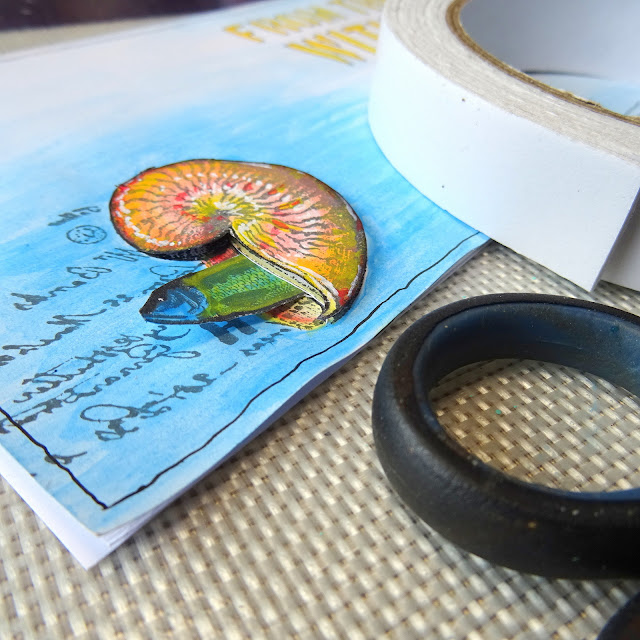
The fish from the HP1111 stamp set is just the perfect size for the opening of the nautilus from stamp set HP2302! And its giant squid and the metering rule were a perfect match too. On the rule you can circle the age of the birthday child (I did so using a red marker).


I stamped the fish three times, creating a straight line from left to right onto a strip of heavyweight smooth printer paper. I needed a sturdier paper so the paper strip would not bend when pushing the pulled out strip back into its "hiding corner".


Just look at how fine the Tsukineko - VersaFine - Clair pigment shows all the pretty detail of the stamped image!


Then I took a pencil and a ruler and drew the outlines of my paper strip plus a wider tab at the right end and cut that out. The tab is going to get folded over in the middle so it gets twice as thick (to make sure it will keep the paper strip from getting pulled out completely). Maybe you can see the dotted line in the center that I drew to mark the fold line...

Most important is that this tab at the end of your strip is at least four to five millimetres wider each at top and bottom than the incision the strip is going to be pulled through. You can eyeball that. In case you forgot to make the tab you can still glue one to the strip's end afterwards.


I used a detail knife and cutting mat to cut the opening slot of the nautilus. Then it was time to test if the strip and the opening went together well...


Just perfect! Yay! Now would be the time to adjust to opening's width, if you haven't cut it wide enough the first time.


This picture of the backside of the card shows the opening and the tab at the end of the strip that has been folded over and glued to twice its thickness this way.


As the back of the card was going to be covered by another piece of card the exact same size, I shortened the upper end of the tab that was in the way of the double sided sticky tape I was going to use later. One wider tab end is enough in this case as the strip runs close alongside the card's edge. This way it cannot be pulled out accidentally as there is no room for the strip to move sideways towards the card's edge. In any other case two tab ends would be crucial!

Now that I was sure all my paper mechanic parts were working, I could move on to paint the stamped images and finish off the cards by adding sentiments and such.


I did the background first by adding a wash of heavily diluted translucent PaperArtsy Fresco Finish Arcylic paint - Glass Blue (FF102).


To paint the nautilus I used PaperArtsy Fresco Finish Chalk Acrylic paints London Bus (FF37), Yellow Submarine (FF73) and Coral (FF122). All of these are either translucent or semi-opaque, which is important for a soft watercolour-y effect. White highlights were added using my white Sharpie pen.


Don't forget to also paint the opening of the nautilus image on the card! The other painted image will be fussy cut and glued on top of the stamped image using sticky foam pads.


Next were my "fish gang" - I only used a thin layer of Fresco Finish - Glass Blue (FF102) as a base layer, let that dry and then added a watery layer of Yellow Submarine (FF73) on top to create the green tone on their bodies.


The strip's background was painted using up the Glass Blue left over paint on my palette. As you can see I thinned that even more to create a lighter blue than with the fish heads and tails.


I found my card looked a bit empty in the top right corner, so I decided to add a quote using the cool PaperArtsy Stencil - PS297 (designed by Sara Naumann).


I painted that using Fresco Finish - Yellow Submarine (FF73) again.


Before I fixed the painted nautilus image to the card I inked the edges using a blending tool and Ranger Industries - Archival ink (Jet Black). Its pigments are less oily (and also my ink pad is  quite dry already), so there is no risk of smearing on black ink when blending.


Voilá - the nautilus and a little fish peeking! The dimensional sticky foam tape adds lovely depth which also helps direct the focus towards the image with the hidden surprise.


I used my Faber-Castell PITT artist pen to add the "Alles Gute zum Geburtstag" (= German for happy birthday) quote to the fish strip. Once everything was done and in place, I used thin double sided sticky tape around the edges to glue another piece of card to the card's back to hide the mechanics (and some smudged on fingerprints as well).


As you can see I also did another birthday card using the giant squid and ruler images to create a hidden surprise that can be pulled out - using the same paper mechanics technique. 


For this variation I needed to only stamp parts of the images, which can be easily done by only inking the areas you want to stamp and also wiping off any excess ink (using a baby wipe).


I painted the squid's images using PaperArtsy Fresco Finish Chalk Acrylic paints - London Bus (FF37) and Glass Blue (FF102), mixing all the tones I needed using these.


I tested the cards on hubby (without telling him that there was a hidden surprise) - to see if one gets tempted by the card's designs to pull out the fish and the squid from their shells....and it worked! :) 


It was such great fun making these and I cannot wait to give them to the birthday children this June and in August!!!!
Have fun creating your own "hidden-surprise-birthday-(or other)-cards"!!!!

Hugs and happy crafting!
Claudia xxx

Tuesday, 30 May 2023

NEW PaperArtsy Products: Hot Picks {May 2023}


Hi everyone, Leandra from the PaperArtsy Team here

We are super, super excited to share with you our newest release for PaperArtsy, 3 stamps and complementing stencils.

This release is a Mr PaperArtsy masterpiece! Lots of interesting designs that suit journaling just perfectly, as you will see from all the samples I have absolutely LOVED making for this release. And I got to do the stencils for this release, I wanted them to sit with the stamps and yet be not too perfect.

There is something that tickles my fancy when you combined bold bright colours with Vintage designs - its a bit unexpected and pretty funky, but  this has to be one of my favourite colour combinations that I go back to because of the bold pops that just sing with creative joy!

Don't forget Leandra (that's me) will be along to share with you LIVE these new products and ideas over in our Facebook Group, PaperArtsy People shortly after this post publishes. 
 
For the next few months, these stamps are available EXCLUSIVELY from our approved stockists. Please check the list at the foot of this post to find a retailer online or geographically near you, it makes sense to order within your country where possible.


Price: RRP €21.92 +VAT, Size:5" x 6" (13 x16.5cm)
All stamps are individually trimmed onto cling foam, with a laminated storage/index sheet.

  
Hot Picks 2301 (HP2301)

The more you look at these designs, the more you discover. Each number is represented in English, French, Roman Numerals, plus there are other embellishments adding personality to each, and overall tiny script for cohesion across them all. Perfect for birthdays and events, on envelopes withing journal pages, or just for the heck of it!

Numbered Boxes
 

This journal spread is pretty simple to be honest. Paints are scraped on with a catalyst tool, boxes drawn with a Stabilo All pencils, then the pencil activated with water, and the numbers are all stamped on tissue and glued onto the page.


I have been using Versafine Clair ink as my 'go to' a lot of late. It is a much slower-to-dry ink that the original Versafine Ink, but it takes so little effort to ink up a stamp, the ink cleans up off the stamp beautifully with water, it has a long open time, so easy to emboss, and if you don't want it to look too embossed, then use a matte clear Embossing Powder.


Most of my samples I stamped the image onto tissue paper, heat set, then applied with one swoop a layer of the PaperArtsy Matte glaze over the image, dry that (naturally or with a heat tool), and then you are ready to apply the image to your journal page. The matte layer seals the ink, and makes the tissue a bit more robust, so when you finally adhere it to your page, you can pick it up, lay it down, wiggle it or lift up and down again until you have the position perfect.


I did apply a little Heavy Cream paint on the reverse side to allow the writing on the image to 'pop' off the colourful background


Randoms


I thought it would be good to see how the numbers work with each other too, and created a bunch of mini collages for this spread. 


On these I also added more colour on top after gluing them down, Banana and Bougainvillea were the chosen colours with the odd bit of Southern Skies. 


Up close you can see all the cool details within each of the numbers, I think these are going to become much used numbers for me! All our favourite Hot Picks elements are in there from harlequin to script and of course rulers!


Hot Picks 2302 (HP2302)

It's a series of fishy collages for this set, and I have to admit I could not resist dissecting a few fish along the way! And if not the fish, the stamps! That is one of the great things about stamping onto tissue paper, you can use a water brush to easily pull apart sections of the stamp and find a new use as you do so.

Tranquility

 
Look closely and you will see the central collage is made from bits of images from various designs within this stamp set.


A bit of Heavy Cream was added behind the ruler and Mr Squid. There are 2 different Mr Squids on this set and they are both quite endearing, and the ruler is from the other Mr Squid, the one with the crazy tentacles/hair do!


The script is also from the other stamp, and I used a water brush to dissect it on a diagonal, allowing me to apply the 2 script sections above and below the newly created collage. For the journalpage, this technique allows me to make a bigger stamp to fill the space.


A date stamp was added, and I love the tiny words stamp (from HP2303), the Stencilled word is from PS393, more on that design in a bit!


Another finishing touch - this tiny little phrase is from under the 'Peace' bird from HP2303

More Randoms

Back to this sample, and again you can see each little collage in more detail in the close ups. All the images were stamped onto tissue paper, then adhered to the collage layers. They seem fused to the layers. Again a bit of dissection of some of the stamp designs went on!


The layers in these mini collages started with some brayered papers from left over colours I was mixing when making colour wheels. Those were layered onto painted book papers with extra bits torn, stapled and so on.


Another example of how the text alone can be adhered in place. And you can see the same text was stamped in white around the page edges too!


Half of Mr Squid lower right ...oops, poor guy ....


Mr grumpy fish in his happy colours - all the collages had colour added over the tissue paper - this is where translucent frescos come in handy as the stamped image doesn't get obliterated...


The other half of the other Mr Squid ... he cracks me up


Hot Picks 2303 (HP2303)

It's time for some 'Peace' in this world. This stamps set is a response to my inner frustration(s). I'm getting pretty fed up with the lack of truth and honesty coming out of the mouths of leaders. So many democratic (or not) countries seem to be losing touch with respect for others and their own people. I find myself constantly wondering (and worrying) where have things gone so wrong? And what can we do as individuals. Well for us, we can express ourselves with our stamps and stencils creatively, so here we are, a set that is a plea for peace! I guess the chaotic nature of this page is representative of the unpredictable world we seem to be in right now.
 

This stamp set is a heartfelt 'just chill out' moment! There are 2 stencils that work well with this set - I'll explain those in a bit.


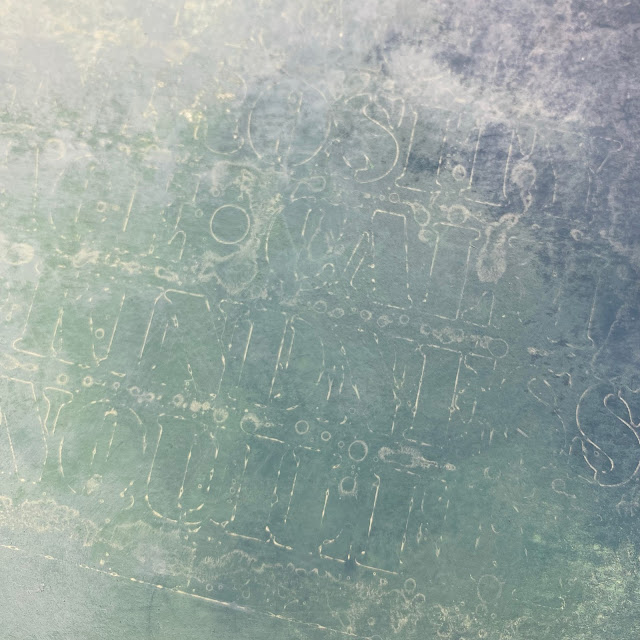
More smooching of colours randomly onto the page, loving those frosty grey-blue colours with the pop of hopeful ochre and pink. The words on the stencil (PS396) just say it all.


There is the whole 'Peace' Bird stamp a teeny tiny collage ... 


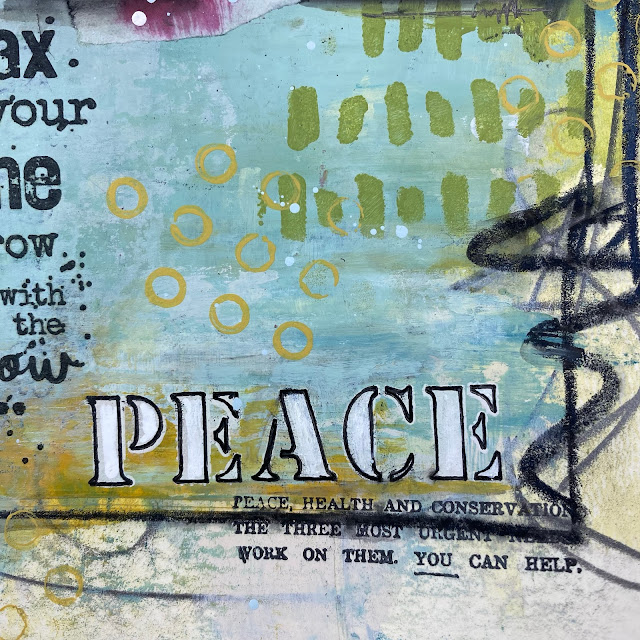
 ... the 'relax' quote, one that when practised, you can create by losing yourself in the moment - my escape from this crazy world is to find the peace of soothing creative moments.


The words were stencilled in white paint, but they did not have the impact I was after, so I traced over in a black pigment pen then diagonally scribbled across the interiors with the stencil in place.


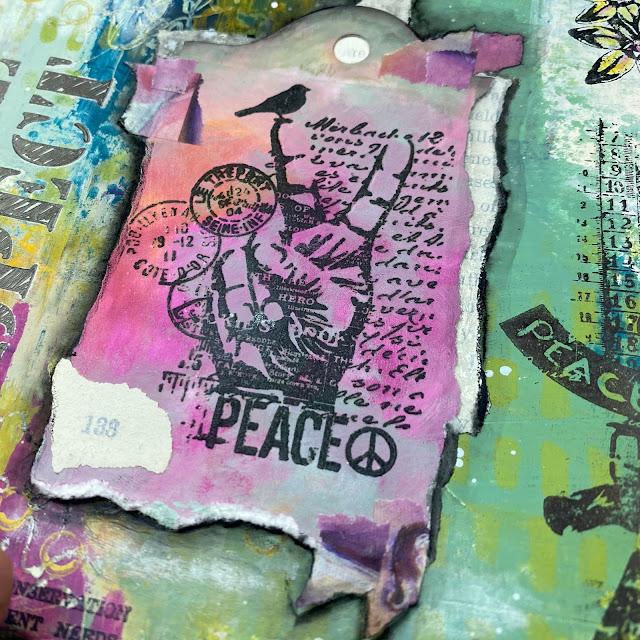
Another of the 'Peace' Stamps is this symbol, with the iconic PaperArtsy postmarks, some much loved script, and our black bird...we have a lot of regular symbols we like to use in our stamps. Repeating images is a type of security, I love that the Postmarks are an image from our original collection of almost 20 years ago.


Regular Size: 6.5" x 7" (16 x 18cm) Price: RRP €5.38 + VAT
  
PaperArtsy Stencil 392 (PS392)

We usually design stencils after we have designed the stamps, and I had been thinking about how I could represent both Peace and Love within an abstract stencil, and this was the result. 


The stencil is a bit like 2 fingers forming a V shape with Peace bird's wings flying  and the tiny hearts randomly dotted about to represent love. Metallic glaze catches the light over 2 layers of paint (white over teal green)

And in the sample below, it does look like a flock of birds, with one highlighted ...


I love using it to fade in and out of the background, and a sanding block can help to erode the image a bit too


This is the other side of the same journal spread ...


PaperArtsy Stencil 393 (PS393)

I really wanted to design a bunch of words to use with the stamps to also represent what 'Peace' should or could be, or can be even in these strange times. I played with size, and initially it was a lot more words in a much smaller font, but we landed on this being a good size for both backgrounds and feature words on journal pages. And I LOVE how it looks when you use drying retarder and a tiny bit of paint brayered on the stencil with a misting of water...
 

A mix of paint and 'reverse' stencilling ...


In bold happy colours, these words look so good ...


And both across and up the pages too...


It is easy to make them a focal by using the stencil as a template ...


PaperArtsy Stencil 394 (PS394)

Another stencil that I just adore, I was planning this in my head some time ago, but the first version was loads more of these marks than this. But I got told off by the stencil police as it took way too long to cut, so we had to enlarge and make it all a bit bigger.....but i still LOVE it!

Gone Fishing


This was another super simple spread, using both the marks and the word stencils in the background, easy and effective! Mr fish is looking a tag grumpy though!


These marks are so good ... 


They just add to the page layers so perfectly


We really hope you find something interesting within this release. It really is our pleasure to create and bring products to market for all our creative enjoyment!

If you miss any of the designer lives over in PaperArtsy People FB group this week (or in previous months), you will find them all pinned to the 'featured' tab at the top of the group home page. Well worth a look to see the variety of style and products that PaperArtsy brings to you from each designer line.

Our stockists leave their product links in the live chat so you can find new releases fast and with ease. Below you will see a list of the stores that tend to order consistently from us, and therefore should have the new products in stock. 

Thanks for taking time to be with us this week!
Leandra, Dounia, Mark and the PaperArtsy team

 PaperArtsy Stockist List

Our stockists are your go-to  source for all PaperArtsy products, and we suggest that you also use the PaperArtsy People Facebook group to source a retailer in your country. Many are members of our FB group and will happily share links to their online stores.

Australia
Bev's Cross Crafts, Spreyton, Tasmania https://www.bevscrosscrafts.com.au/
Crafters Cupboard, Berwick, Victoria www.crafterscupboard.com.au
Memories on the Murray, Murray Bridge, SA  https://www.memoriesonthemurray.net/
Natalie May Scrapbooking, Dover Gardens, SA https://nataliemay.com.au/
Scrapbook Superstore & More, South Penrith, NSW https://www.scrapbooksuperstore.com.au/
The Scrapbooker's Confetti Box, Swansea, NSW https://thescrapbookersconfettibox.com/
The Scrapbook Store, North Perth,WA http://thescrapbookstore.com.au/ 

Belgium
Cart N Scrap Art, Antwerp, www.cartnscrapart.be
Créatelier Caracolle, Liège, www.createliercaracolle.be

Canada
Paper Art Creations Inc, Leduc, Alberta, www.paperartcreations.com/
Scrapbook Centrale, Dollard Des Ormeaux, Quebec www.scrapbookcentrale.ca
Scrap Addicts, Edmonton, Alberta www.scrapaddicts.ca/
Scrap and Bean, Edmonton, Alberta scrapandbean.com/ 
Scrapbooking Fairies, Drayton Valley, Alberta www.scrapbookingfairies.com/
The Paper & ink Boutique, Calgary, Alberta www.paperandinkboutique.com/
The Scrap Yard, Calgary, Alberta, www.thescrapyardcalgary.com/ 

Denmark
Hobbyboden Scrapworld Samso www.hobbyboden.dk

France
Eirl Bancon Cartoscrap, Midi Pyrenees, www.cartoscrap.com
Fée Du Scrap, Saint Sébastien-Sur-Loire, www.feeduscrap.fr/
Horizon Créatif, Ste Jalle www.horizon-creatif.fr
Instant Créatif, La Possession, La Réunion, www.icreatif.re
Katzelkraft, Ingwiller www.katzelkraft.fr/en/
Kerudoc Creation, St Yvi www.kerudoccreation.com
Le Grenier des filles, Pierre Benite
Page de scrap, Saint Pavace, www.pagedescrap.fr/
Scrap Déco Home, Goutrens, www.scrapdecohome.fr/
Toutencolle, Dun sur Auron www.toutencolle.fr

Finland
Heidin Korttipaja, Istunmaki, www.korttipaja.fi/fi
Piia Paper, Kittiläwww.piiapaper.com/fi

Germany
Stempelbar, Berlin, www.stempelbar.de
Stempeloase Munich, Munich www.stempeloase.de
Stempelfee Shop, Hilden www.stempelfee-shop.de
Stempellaedle, Stuttgart, www.stempellaedle.de/shop

Greece
Scraps N Pieces, Kallithea www.scrapsnpieces.gr

Italy
Immagine SAS di Rapaccini, Rome, www.immaginelab.com
Il Negozio Della Mamma Di Cle, Torino, www.ilnegoziodellamammadicle.com
Marte Savona, Savona, www.martesavona.it
Pezze E Colori, Lissone, www.pezzeecolori.it/ 
Piccole Passioni, Siena, www.piccolepassioni.it

Japan
La Wadao, Odawara, Kanagawa, www.lawadao.com
Tiny Dots, Funabashi-shi, Chiba www.tinydots.shop-pro.jp

Netherlands
De Hobbystudio, Genemuiden, www.dehobbystudio.nl/
Doe@ding,Spijkenisse doeading.nl/
Hobbycompleet de Duif, Leeuwarden www.hobbycompleet.nl
Stampingcorner, Capelle Aan Den Ijssel www.stampingcorner.nl

Norway
Hobbygarasjen, Kopervik, www.Hobbygarasjen.no

Spain
Cien por Cien Manualidades, Barcelona,  www.100x100manualidades.es
Ideas 10 Manualidades Y Scrapbook, Bilbao ideas10manualidades.com/
Marakiscrap, Tarragona, www.marakiscrap.com
Scrap & Papers Experiences, Barcelona, www.scrappapersexperiences.com
The Paradise Corner, Barcelona, www.theparadisecorner.com

Sweden
Butik Elva, Staffanstorp, www.butikelva.se

Taiwan
Mandy's Cards, Taipei www.facebook.com/mandy.card.77

United Kingdom
Amelia's Creative Crafts, Studley, Warwickshire  www.ameliascreativecrafts.co.uk
Art from the Heart, Harrogate, Yorkshire www.afth.co.uk
Crafts at The Malthouse, Herstmonceux,  East Sussex, www.themalthouse.co.uk/
Loobi Crafts, Leighton Buzzard, Bedfordshire, www.loobicrafts.co.uk
Stampers Grove, Springbank, Lilliesleaf, Melrose,Scotland www.stampersgrove.co.uk
The Artistic Stamper Craft Store, Faversham, Kent www.theartisticstamper.com
The Forget me not Kraft KabinRochford, Essex, www.TheForgetMeNotKraftKabin.co.uk

USA
Artistic Artifacts, Alexandria, VA www.artisticartifacts.com/
Artistic Studio Creations, Fayetteville, Georgia www.facebook.com/ASCbyCrystal
Craftiness, Chatsworth, CA, www.craftinessonline.com/
Everything Scrapbook & Stamps, Lake Worth, Florida https://everythingmixedmedia.com/
Frantic Stamper, Oregon www.franticstamper.com
Free Heart LLC, Denver, Colarado, www.freeheartllc.com/
Joggles, Coventry, Rhode Island, www.joggles.com
PaperCraft Clubhouse, Westbrook, Connecticut, papercraftclubhouse.com/
Qingquing's Stamp Shop, Portland, Oregon
Runaway, Art & Craft Studio, NE Salem, Oregon www.runawayart.com/
Simon Says Stamp, Columbus, Ohio www. simonsaysstamp.com
Topflight Stamps, Irmo, South Carolina topflightstamps.com/

If you are interested in becoming a PaperArtsy stockist contact Dounia@paperartsy.com for more information

PaperArtsy Links
Facebook Group PaperArtsy People
Facebook Page PaperArtsy