Hi everyone, Raquel here from Scrapcosy, wishing you a happy New Year full of health, happiness, creativity and great moments to remember! My New Year resolution is to spend more time in my craft room, creating things, playing with my stamps and stencils and sharing more projects with you in my YouTube channel.
I'm here today to share with you what 2025 has meant for me crafty-wise. I've reached what I feel is an unbelievable milestone: I went beyond stamp set number 50! I'm in love with all the designs I came up with this 2025. After all the hard work, having them turned into stamps and stencils to play with is an amazing feeling! I feel so lucky to design for PaperArtsy!

April Release: Garden Flowers
ESC50, ESC51 & ESC52
PS468, PS469 & PS470 (Large)
To celebrate the 50th stamp set I went for a favourite thing of mine: patchwork fabric with roses. I'm a patchwork fabric lover, I can't help it, when I see a beautiful rose-pattern fabric I just buy it, touch it, look at it, keep it... my Preciousss... So with design number 50 I wanted to be able to create a fabric-like pattern with roses, so I drew my own flower bouquet inspired in a couple of those fabrics I own and I got it in two different sizes and with extra little flowers to decorate. I was so happy with this design! And I created this sample to show you the type of fabric I love!
With ESC51 I was inspired to handwrite a poem about a day in a wild garden. With the help of Leandra and Alison Bomber, I polished it a little bit and all the writing was ready to create texture in different shapes. The daisies bouquet I saw in an embroidery vintage book inspired the flowers in this stamp set, so I decided to create a book mark showing part of the poem and the beautiful flowers. I created other samples on each side of the book mark with the little elements that allow the creation of repetitive patterns, which is another thing I love.
I chose this sample from the release since this is the one I did a live demo on. I love the background I created with PS470, grunge paste and infusions and I love how the magnolia flower from ESC52 (inspired by a heritage wooden box I have) stands out on top of it. This is my favourite sample on the release!
As you can see, some gorgeous shading on the flowers...
And beautiful paint details from stencilling various layers on the frame and the background.
November Release: Strawberries & Mushrooms
ESC53, ESC54 & ESC55
PS491, PS492 & PS493 (Large)
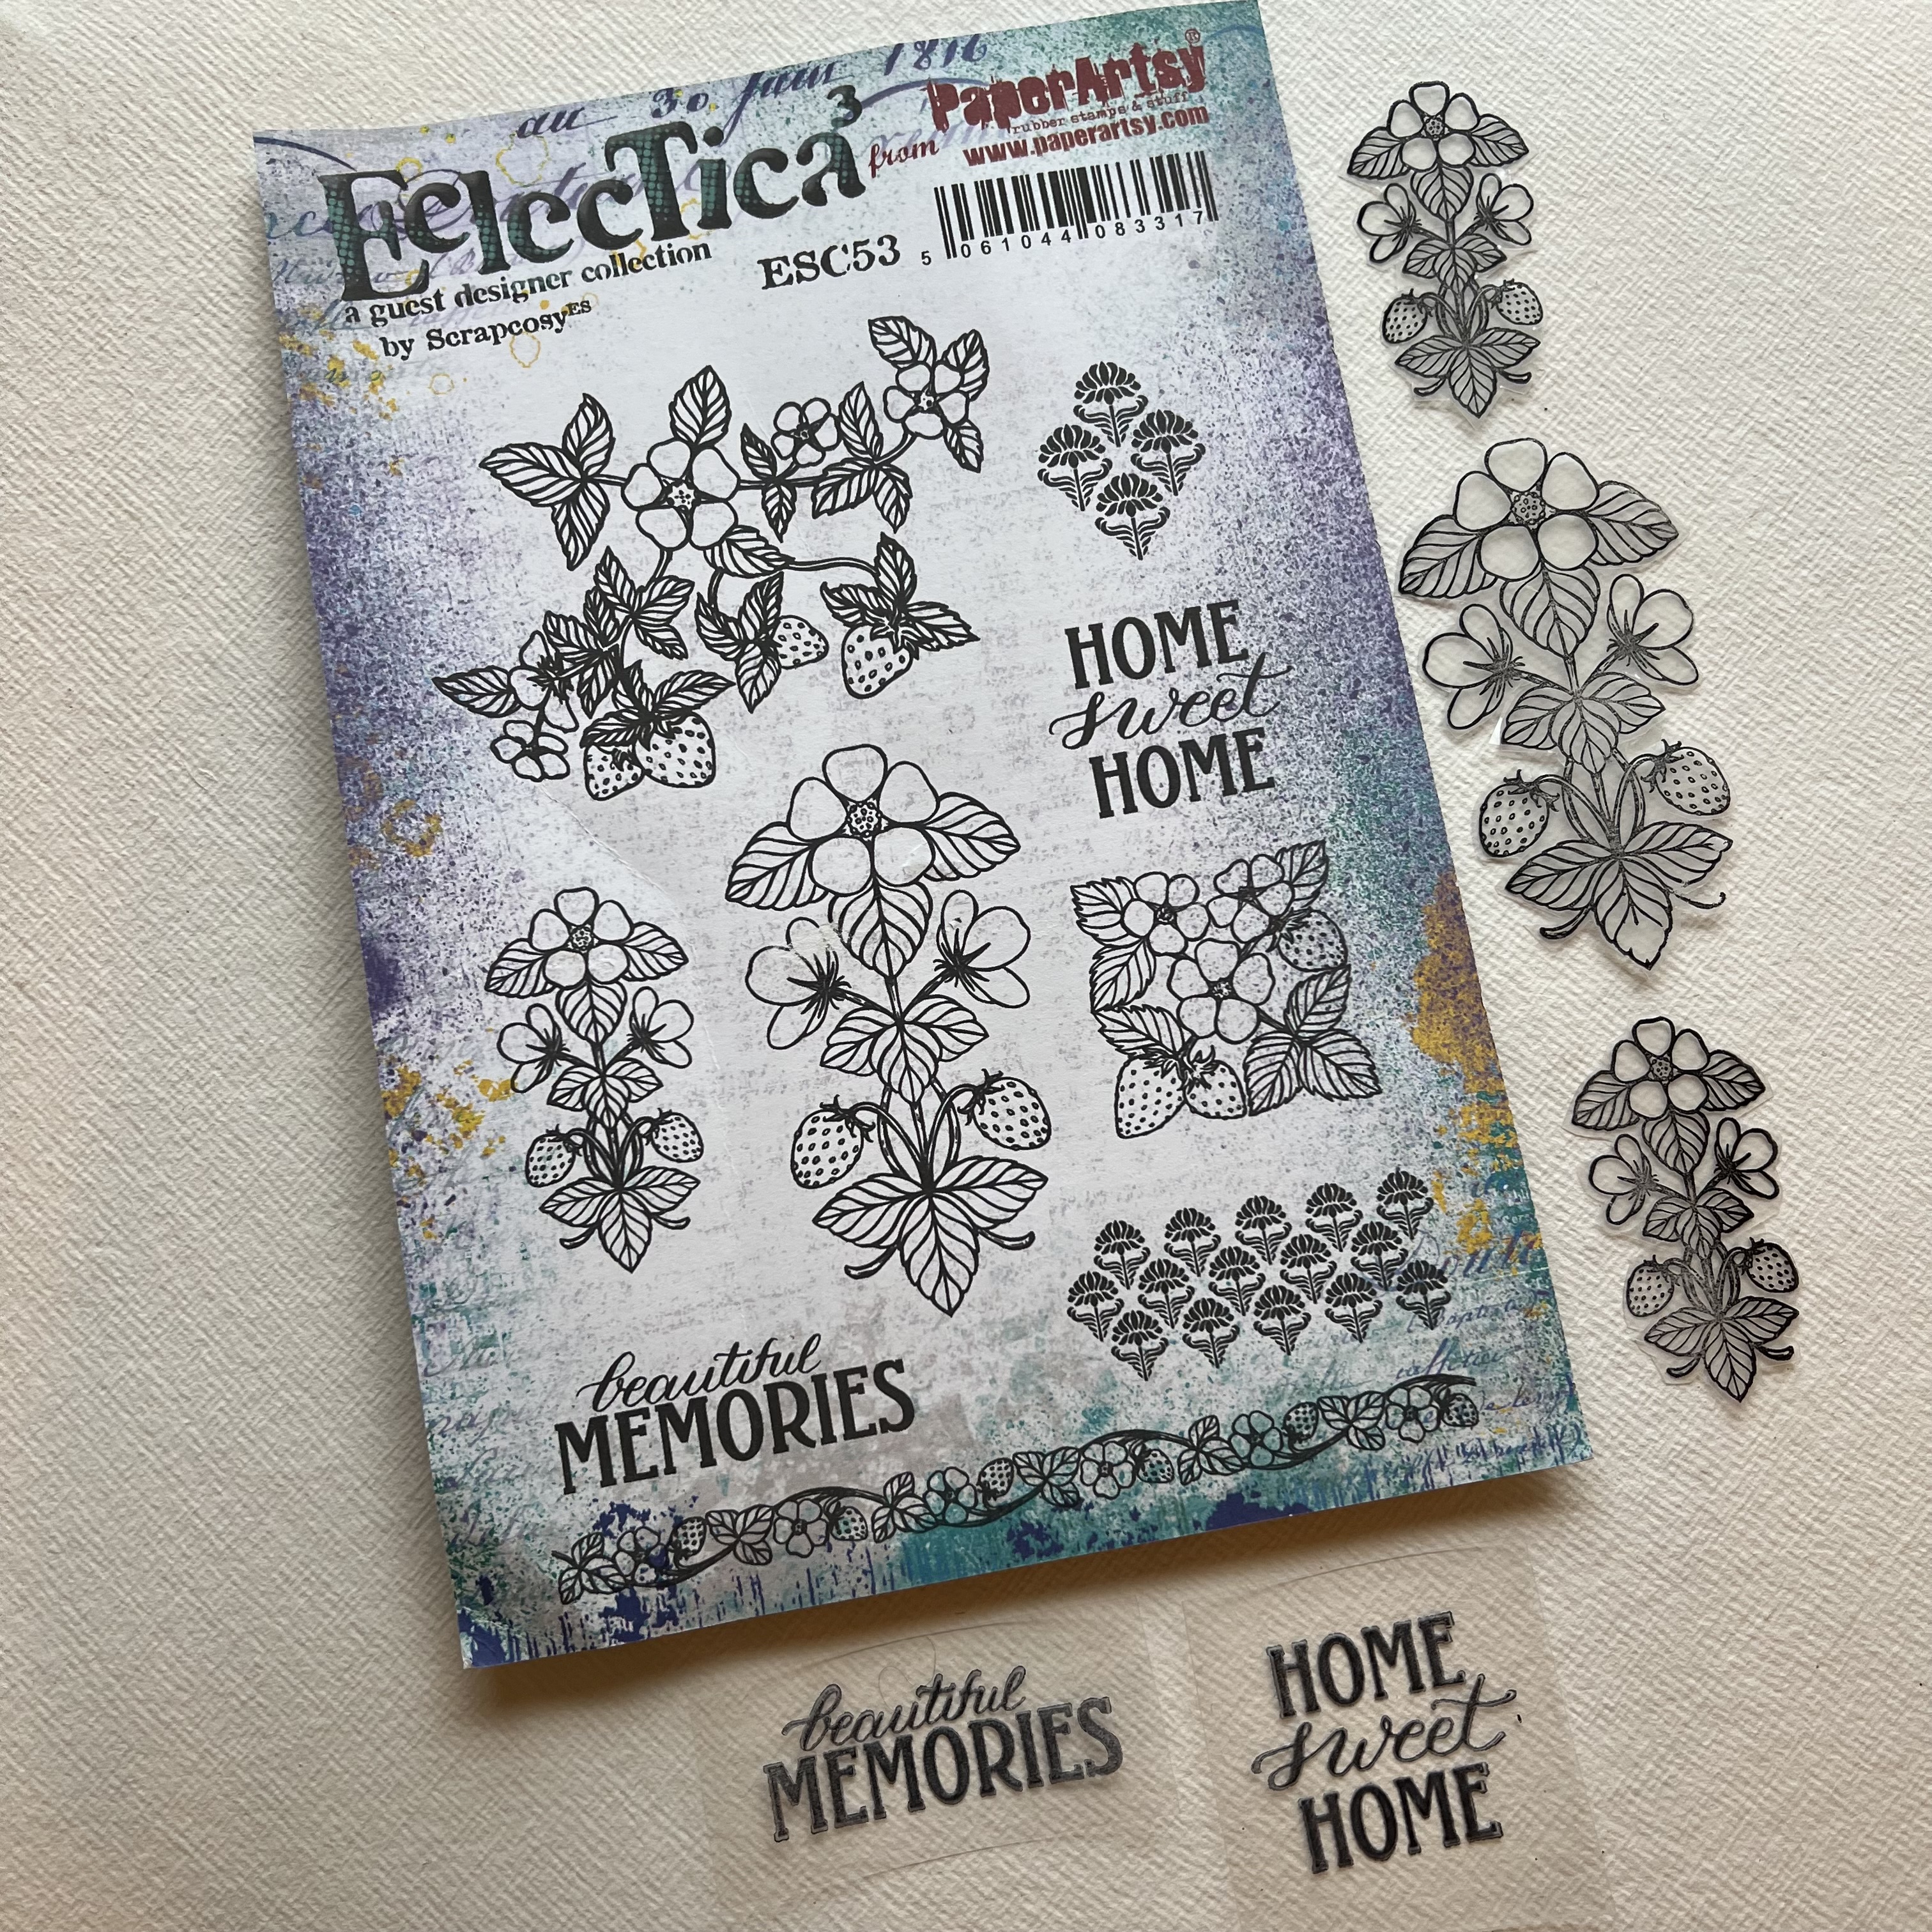
Inspired in the arts and crafts movement started by William Morris and the vintage perfume labels, ESC53 and ESC54 were born. I love strawberries so those and their plants in different shapes were the stars of these 2 stamp sets. I wanted to create a modernist label so I could use it not only for preserve jars but also for being the focal point of a sample, like this one, where PS491 stencil also stands out in the background.
ESC54 has also a countryside vibe, so that's what I wanted to convey with this sample, where I used the strawberry plant as a focal and the 2 tartan stripes to create a beautiful squared fabric-like pattern in the background. This stamp set is really versatile and those 2 stripes will let you create many different patterns.
This was my favourite sample on the release. I love mushrooms, so it was time to get a new mushroom stamp set with ESC55. I didn't want to just add new specimens to my previous mushroom sets, I wanted to create beautiful mushroom bouquets or groups of them that could be used as a focal and would be beautiful as stand alone images. I'm so happy with both collages and also with the fact that the extra images will let you add dimension and background patterns.
The image for this other sample is meant to be used in borders of cards and art journal pages, however it looks so stunning on its own that it deserved to be in the centre of the card. Multiple stamped and cut images allow that 3D effect on the card that pops the mushrooms out of the paper. It's like they are truly alive!
And this final sample was the one I made for the other demo I gave here on the PaperArtsy people facebook group. It comes out of the PS493 stencil, which is a multiple layer stencil, allowing you to add different colours for each layer. With the help of a white pen for the highlights and black pen for the shadows the stencilled image gets completely transformed into a hand drawn look like image, with far more details than a simple stencilled image. Meanwhile, over on the bog Tracy Hickman created this stunning journal page with my November release, you can see all the details here The new Postcards Printed Tissue made such a great backdrop to kick off her page
She also created 2 tags that make this spread interactive and allowed her to use the stamps to their full potential
End of Year Project: Xmas Baubles (by Raquel Burillo)

Although Christmas season is almost over (in Spain it lasts until 6th of January, with the celebration of the 3 wise men) this is a project that I wanted to share with you, since it can be applied to any other object, not just plastic Christmas tree baubles, but also jars, vases, coasters, wooden boxes, etc. I'll show you my way of working with PaperArtsy blank tissue paper and the stamps of your choice. Many of the designs of my 2025 releases can be used for this technique and if you keep your colour palette unified, when applied to Christmas trees baubles, you can create your own baubles collection for next year and combine these with plain and same colour baubles for a more textured Christmas tree.
Here you can probably see the supplies a bit better.
The very first layer is just adding Fresco Finish Chalk Paint to cover the plastic bauble. Here I'm dabbing the brush to add some texture.
I created 3 different bases for each of the baubles, a dabbing one, then long and full brushstrokes and finally a roughly brushed one, where the bottom of the bauble is still golden colour. If instead of Chalk colour you add a different one, then that will be the base colour of the finished project. These may look also gorgeous in light green or like blue, using Aqua Duck Egg or Niagara Falls, for example.

 In a nutshell, after adding the base colour, we need to glue the stamped images to the baubles and add the different colour layers. Let's see the details for each step.
First, stamp all the images on a piece of Blank PaperArtsy Printed Tissue Paper (PT10). I used Archival Ink, which dries much, much faster than Versafine ink. Just be careful when you stamp because the ink goes through the tissue and will stain your surface. Consider placing a piece of copy paper underneath the tissue, so it absorbs the ink or clean the ink from your surface after each stamped image, otherwise if you move the tissue to stamp on the same spot of your crafty table, the tissue will absorb that leftover ink and you'll be disappointed. 
Once everything is stamped you want to trim each image so you can glue it to the baubles. Don't use scissors please! Use a brush dipped in water to trace around the image, then tear it so you can see the paper fibers on all edges, that will ensure the edge disappears when you glue it to your surface. If the paper doesn't easily tear, your brush needs more water. Just make sure the water stays away from the image and tear the tissue paper carefully.

Here are the 3 designs I made, combining different elements of both stamp sets. The way to glue the tissue paper is by first applying a layer of glaze onto all the surface of the bauble that each piece of tissue paper will touch. I used Fresco Finish Satin Glaze but you can use a Fresco Finish Gloss Glaze for a shiny finish or Fresco Finish Matte Glaze for a completely matte finish instead of a satin finish. Then you lay one trimmed image into that wet surface and then you apply another layer of Glaze on top of the tissue paper. You are doing it right when the tissue paper becomes transparent and you can see your image on top of the painted background, as if the tissue paper just disappeared.

Now it's time to add colour. I used Ladybug Mattint (available from PaperArtsy stockists) for the red, Glow Mattint for the yellows, Olive Tree Infusions Dye Stain mixed with Fresco Finish Satin glaze for the greens and then I added some touches/dots of Fresco Finish Gold for a more magical and Christmassy touch. And for a final vintage touch I added some Vintage Photo Distress Ink, which will highlight the paper creases and will add some depth and texture to your project.


This is how they turned out. They look gorgeous in my Christmas tree!
The big roses combined with tiny ones and the small flower branches create a busy pattern that I love. By adding the gold spots here and there I fill the blank spaces with some magic and shine.
This design is much simpler, just 6 copies of that flower evenly spaced (or as much as I could) leave some gaps which again I filled with gold dots. These combine really well with the bottom of the bauble which I left without paint so it's also golden colour.
This same technique can be applied to other things. Imagine creating a set of coasters with the same images or a wooden tray with a repeated pattern. There are some many home decor elements you can upgrade to have that same look: pencil pots, kitchen clocks, inside of drawers, the top of a side table, wooden boxes and more.
I'm editing the YouTube video that has all the steps to create this baubles. I will add the link here once the video is published, or check my YT link below.
Instagram - follow me and contact me at instagram @scrapcosy


 In a nutshell, after adding the base colour, we need to glue the stamped images to the baubles and add the different colour layers. Let's see the details for each step.