Showing posts with label ELB29. Show all posts

Thursday, 5 October 2023

2023 Topic 10: Tags {by Autumn Clark} with Lin Brown stamps


Hi everyone it's Autumn Clark from SewPaperPaint with you today to share some autumnal inspiration with you, using my favorite substrate of all: tags.  I was delighted to have the opportunity to create with Lin Brown stamps.  Lin has a beautiful range of stamps in a variety of styles, but I am particularly drawn to her realistic/natural designs and am slowly collecting a set each season.  I had no doubt that the leaves would make a big impact on a pair of tags and am really so pleased with the result.  I hope you will enjoy reading a bit about my process...


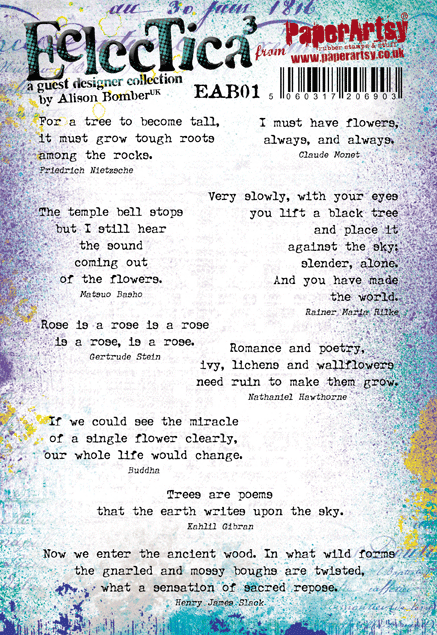
My first choice, was to use PaperArtsy Eclectica stamp set 29 by Lin Brown (ELB29) because it has so much to offer: multiple focal points & background elements along with a couple of beautiful sentiments. In  harmony with the theme Typography, I had to tie in an Alison Bomber stamp set (EAB01) which is filled with beautiful quotes about nature.


I limited myself to one bottle of Infusions and one PaperArtsy Fresco Chalk Acrylic at this point.  I always enjoy working with a limited color palette.


To begin, I cut a couple of watercolor panels to my chose tag size, 7x3.5", then adhered various book pages from my stash using matte Mod Podge, coating the tops of the papers as well.  I chose a variety of fonts and agedness for contrast.


I added a quick brayering of PaperArtsy Fresco Chalk Acrylics in Ochre to break up the white space.


Next I sprayed each tag with water and sprinkled with Infusions in Rusty Car, then sprayed again to encourage movement in the pigment.  I heat set my tags, taking care not to overheat and blister the Mod Podge.  I used the leftover ink on my mat to color a small piece of extra watercolor paper for my sentiments later.


Even with a limited color palette, you can see all of the variations in color achieved with one bottle of Infusions.  It never ceases to amaze me!
 

Next, I worked on my focal elements.  First I dyed another piece of paper with a small amount of Infusions in Rusty Car.  Over this background I stamped the leaves from PaperArtsy Eclectica stamp set 29 by Lin Brown (ELB29).  I used my stamp platform and repeatedly stamped the leaves in Distress Inks in Rusty Hinge, Vintage Photo and Walnut Stain.  I spritzed with water lightly where needed to allow the colors to bleed naturally.


I carefully fussy cut my leaves, curling the maple leaves with my bone folder.
 

I embossed over the teabags to add some shimmer.


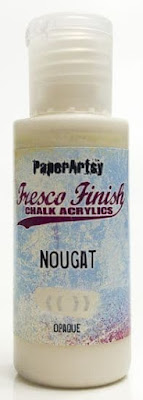
I wasn't exactly happy with the contrast between my  leaves and my background.  In retrospect, I wish I had used less of the Rusty Car Infusions and created a lighter background.  I decided to adhere teabags over the center of each tag to try and lighten the middles.  This helped some, but I felt more contrast was needed.  I carefully brushed on watered down PaperArtsy Fresco Chalk Acrylics in Nougat, a nice creamy color.  I blended the edges with my finger and blotted with a baby wipe until I was happy.  Only I wasn't quite happy!  I wish I could have taken the whiteness away completely, but it was too late.  I tried to add watery Distress Ink in Vintage Photo to dull it, but it didn't work so well.  So I have this awkward halo effect on each tag.


Sometimes that's just part of the process.  I certainly didn't think the tags should go in the bin, but am not 100% satisfied either...

Finally, I really wanted to incorporate a natural element, so I foraged for some moss covered sticks and adhered them over another piece of torn teabag.  I had stamped the cardboard texture in Walnut Stain just below to give it a grounding element.  I stapled some sisal fibers onto each tag and mounted my leaves over the staples.  I always mount my tags onto chipboard, which covers the staples.


The final touch was to mount my sentiments.  I cherry picked words from the quotes on PaperArtsy Eclectica stamp set 1 by Alison Bomber (EAB01), stamping them on my  mop up paper.  I went back and forth over whether or not to add a tag topper and decided against it.  I like how the circle of gold embossing lightens the top of the tags and the twiggy layers ground them.


Every time I session with PaperArtsy Infusions I am left with a feeling of wanting to keep playing!  I just can't get enough of the unpredictability of the pigments.  I'm so pleased with the layers of stamping and the gentleness of the text in these very colorful backgrounds.  My ideas for further exploration include stamping these gorgeous leaves with Infusions to make some backgrounds.  And I would really like to do some embossing resist with that cardboard texture stamp from the set.  I can just imagine the Infusions flowing around it!  I hope these tags have given you some ideas today and you'll have a play yourself.  xx

Autumn


YouTube: SewPaperPaint
Facebook: Autumn Clark
Instagram: @sewpaperpaint
Pinterest: SewPaperPaint

Monday, 12 July 2021

2021 Topic 8: Nature's Treasure with ELB {by Nikki Acton}

2021 Topic 8: Nature's Treasure

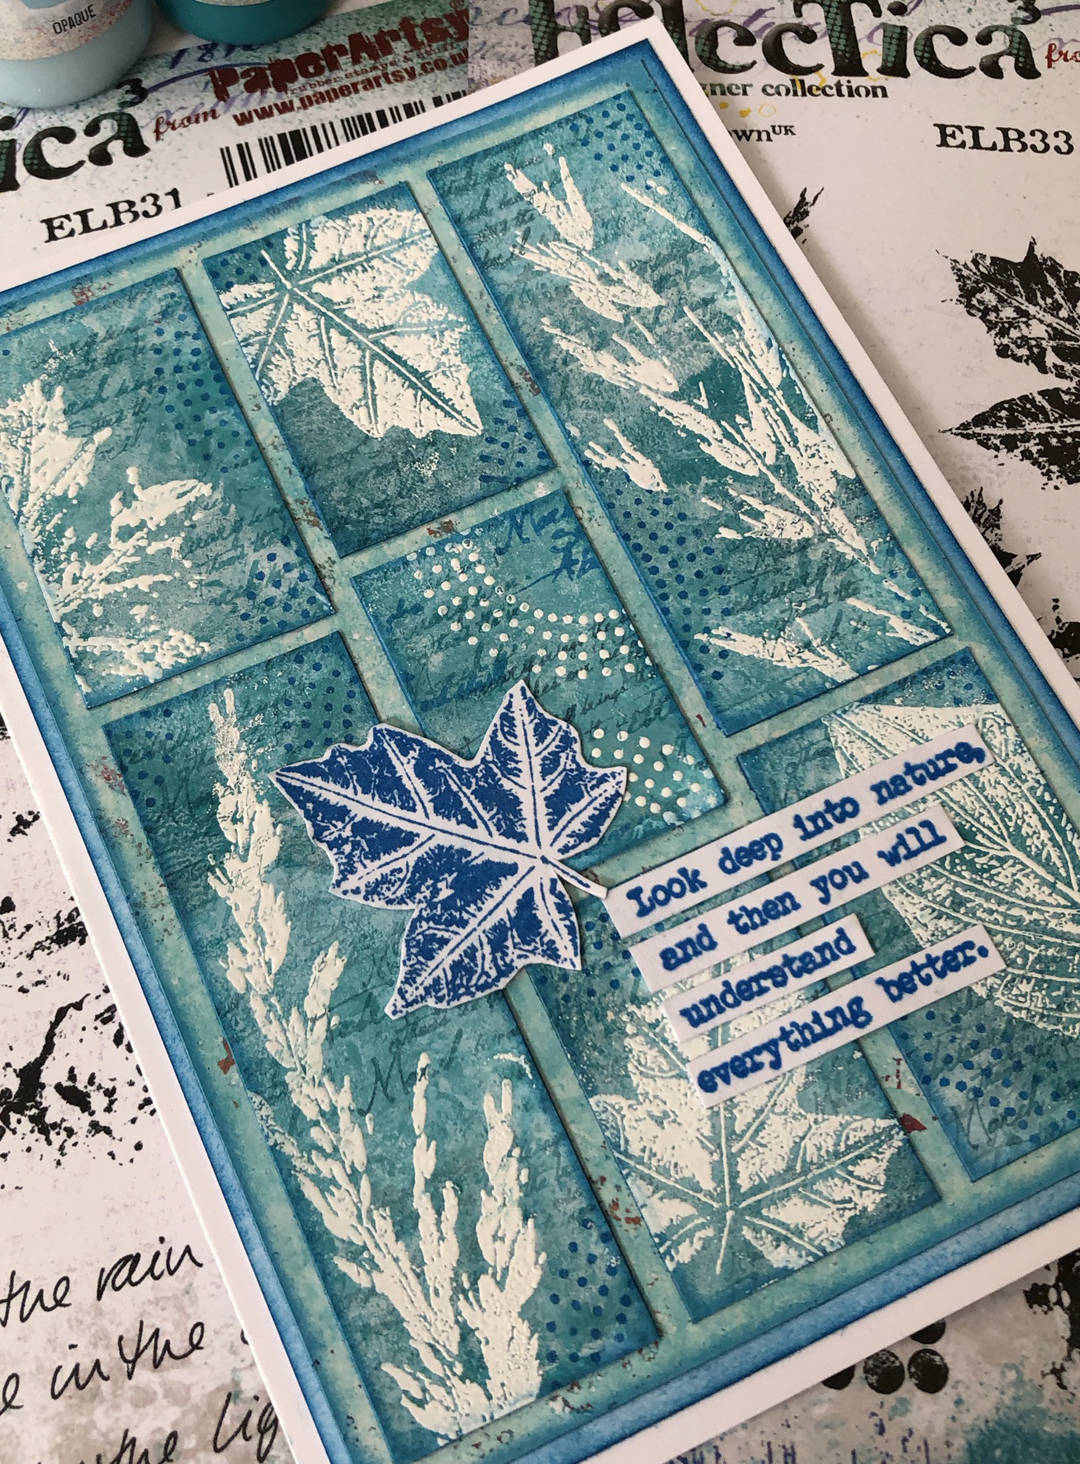
Dreamy shades of blues onto a gel plate and instant backgrounds are created, but look how that white embossing powder creates a contrasting 'pop' ! This tiled background is such a great idea!

~ Leandra

Hi everyone, Nikki here from Addicted to Art with you today, with my project for Nature's Treasure. I have the pleasure of using wonderful stamps from Lin Brown.

As I couldn't decide which stamps to use I created a tiled card that allowed me to use several stamps from Lin's series of stamps featuring leaves and grasses. 


I started by creating my backgrounds using PaperArtsy Fresco Chalk Acrylics (Captain Peacock and Blue Oyster) and my gel plate.


I have used a 5x7inch card base - I roughly calculated the sizes of my card pieces creating an asymmetrical design.
 

The background which I have cut into pieces, was simply created by adding a few blobs of each colour on the plate and then 'smooshing' some card stock in it - just to get some varied blue tones.
 
 
I then took my stamps from Lin Brown, selecting a mix of leaves and grasses from ELB30, ELB31 and ELB33.
 

I used Versamark to stamp my images and white embossing powder to heat emboss. I love how the stamps vary in their detail / intensity with some providing a more subtle image.
 
 
In the background I have used a combination of the script stamp from ELB30 and the dotty circles from ELB 29. I used Ranger Archival (Forget me Not) and Versafine Clair (Paradise) inks.


Finally I added one of the quotes from Alison Bomber Set 21 (EAB21) - Nature Edition. 


 The bolder blue ink was used along with the extra leaf to create a focal point.
 
 
I chose to cut the quote into separate lines before adding to the card.


Creating cards or journal pages with tiles or a patchwork effect creates added interest and allows a variety of imagery to be used.

Nikki x

Instagram: a2a.craft
Pinterest: nikacton
YouTube 

Tuesday, 27 October 2020

2020 Topic #19 Tin Full Of Words with ELB {by Ellie Knol}

   2020 Topic 19: Words Of Wisdom


It's lovely to work with a different shape to the norm, and in this post, Ellie uses fills a metal tin with gorgeous gel-printed pages, just perfect for some words of encouragement to adorn each page.
~ Leandra

Hi everyone, it's Ellie Knol with you today, and I'd like to share with you this tin with circular cards, each containing a 'words of wisdom' from Paper Artsy stamp sets, especially the ones from the ELB sets which are shown above... 

I did not want to just create a card or two, but make it a project that is a feast for the eye, feature these sayings, and change that into an item to be looked at over and over; a precious gift maybe... 
These circulars could easily be used for a card front of square cards! 


Just like all nine cards within the tin, it's top lid has also been decorated with a circular piece of kraft card, and a colorful inner circle.   


This collage shows all the cards, all decorated with stamps from ELB stamp sets, but with sayings/words from various PaperArtsy stamp sets. 


The tin's top lid has the beautiful saying from ELB29.


This picture shows what other PaperArtsy product has been used for color. 
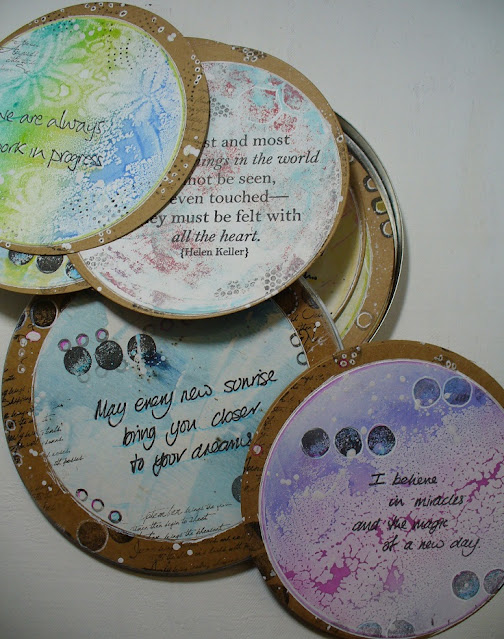


White was added with an acrylic marker and the white splatters made my craft table a mess... 


In the process of printing with the gelli plate I also like to use pieces of lace.  
 

Adding a little extra color to small elements make them pop even more.
The saying on the card on the right is from ELB33


I love the range of color and the way the words get enhanced by all the collage stamping on these cards and the lid. You can see some background stamping that has been done with stamp set ELB30 from Lin Brown.


These two are my favorites, because of their overall color and how they turned out. 
In the process of creating these I also used up a lot of backgrounds made with Paper Artsy Fresco Finish paints and Infusions, from a session with a 10 centimeters circular gelliplate; yes, leftovers from previous projects-to-be.   
Once I decided to just start on making them, they actually started getting more color and more definition as I went along splattering, adding color and more stamping. 

Let me know whether you like it, please... 

I really hope you got inspired to look through your stash and create some one-of-a-kind projects... 
Stay safe and until next time!