
2019 Topic 2: Brayers

I can see this inspiring a lot of people to get busy on making these beauties! Not only is the colour scheme amazing,but how wonderful is that stamp set from Tracy! lotte has nailed it, and the inside pages!! Well....Swoon!! ~ Leandra
Hey everyone, it's Lotte here,
hope you're all well and not too inconvenienced by winter - though it's
a good excuse for staying in and stamping, right?! I've been playing
with the new Tracy Scott stamps - they are (as you would expect from
PaperArtsy) endlessly versatile, and I was hard pushed to decide which
project to share with you, but it ended up being this one with a lovely
muted palette of pale blue and brown. I just loved the pattern of these
stamps, and decided to make a little notebook covered in the delicious
paper I ended up with. I do like making loads of printed papers - they
always come in handy for starting off something else, be it a journal
page or a greetings card. So, let's get started!
The notebook consists of two parts: the cover which will be wrapped on the outside with the stamped paper, and on the inside will be plain; and the pages of notelets which has a stronger piece of paper for the first and last page to attach securely to the inside of the cover. Let's call these support pages.
First, get a sheet of Heavyweight Smoothy and put a blob of Mermaid Fresco Finish Acrylic Paint in one corner, and a generous spritz of Tea Dye Ranger Distress Spray Stain in the other.

Next, use your brayer to randomly mix the paint all over the surface - don't worry about muddying on this occasion! - and when done, spritz lightly with plain water. The Spray Stain beneath the Fresco Finish will rise to the surface and give a lovely mottled effect, like old book pages.

Then get the stamps, and randomly stamp all over in Watering Can Ranger Archival Ink - start in the centre of the page, and build around that image, going over the edges of the paper as you fill the entire sheet.


Next, cut two pieces of thin cardboard (cereal box is fine) to measure 6" x 4.5". Turn the stamped paper face down and use a glue stick to adhere the pieces so that there is 0.25" gap between them - this will be the spine of the booklet. Trim edges to 0.5" all around and carefully cut the spine bit with scissors and glue down the inside of the spine. Use a bone folder to score along all edges.
(Please don't be confused by the colour of paper showing - thrifty as always, I used an already painted page and painted and stamped on the other side!)

Fold the side flap of the paper first, using a glue stick to secure the edges, pressing down firmly and ensuring a smooth edge.

Next, fold down the top and bottom flaps, likewise using a glue stick. The cover is now ready!

You will need a ribbon roughly 25" long. Position this so that it lies on the inside back cover; the ribbon should be folded, not in half, but so that there is 1/3 on the top, and 2/3 on the bottom. Glue in place.

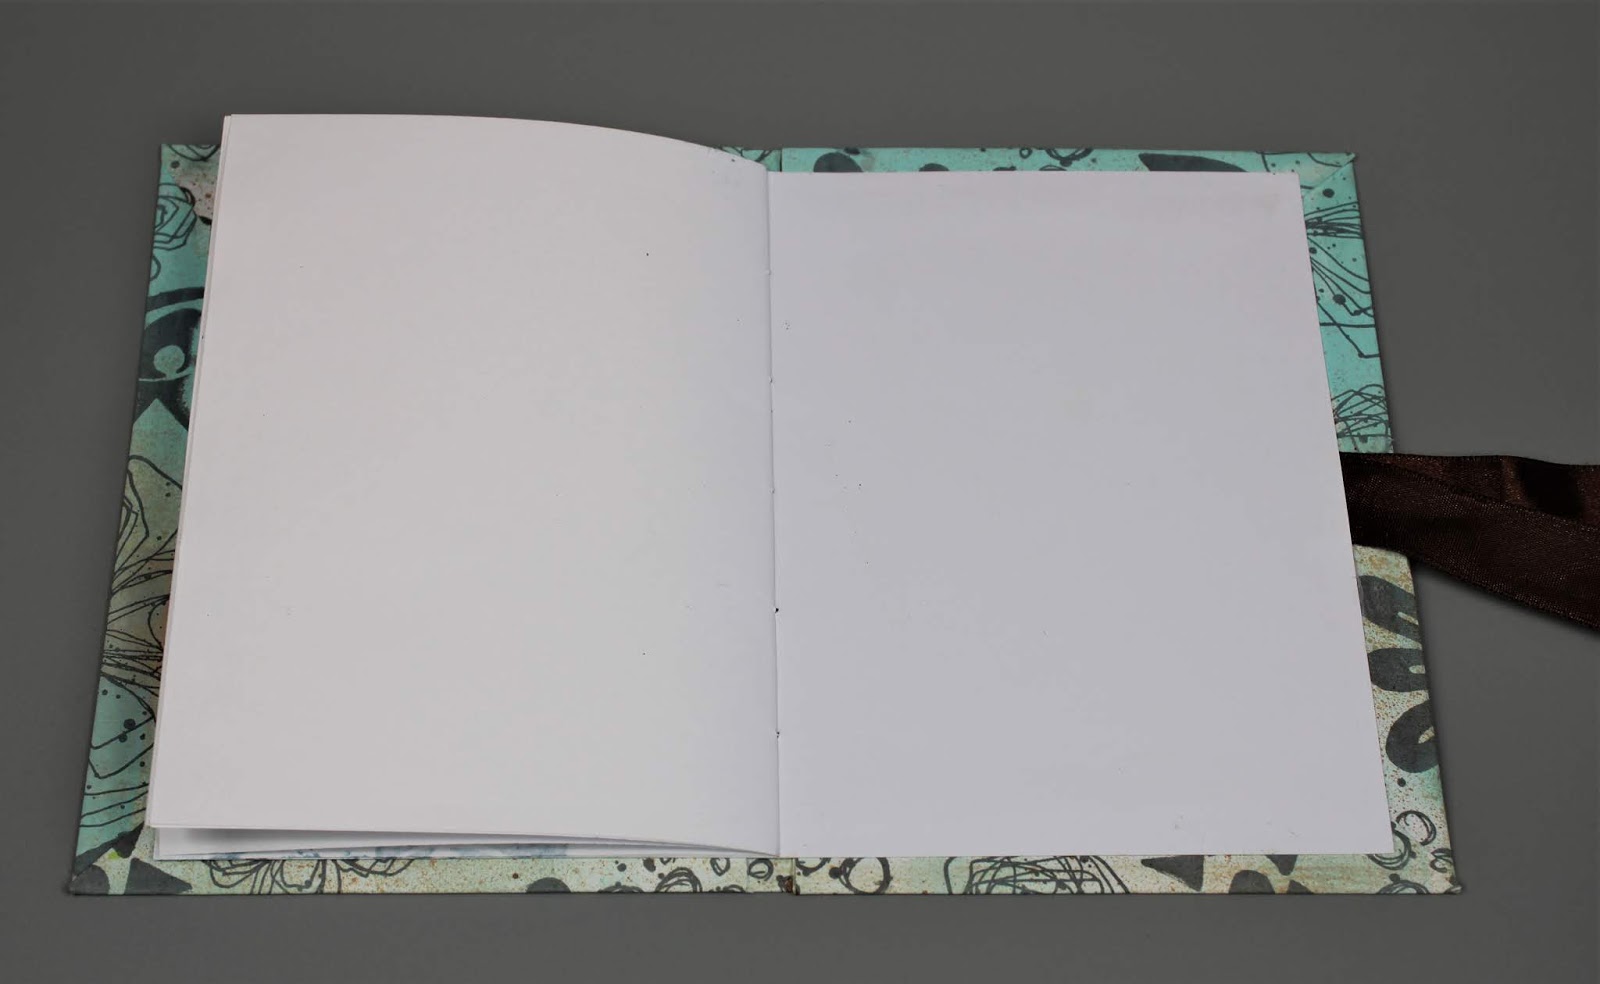
Now to make the inside of the booklet - I promise it's not as scary as it sounds! Cut 5 pieces of printer paper to measure 6" x 9", and one sheet of Smoothy card the same size which will be the support page. Use a bone folder to carefully score down the middle. Fold all pages together with the Smoothy card on the outside (these support pages will be attached to the inside of the cover of the booklet, and therefore needs to be a little stronger). Use a piercing tool to make holes at 1" intervals, and with white thread stitch the pages together. Secure the ends with knots on the side that will be glued, and make sure the thread is cut so that no ends are visible over the edge. Stamp images on the inside pages with Sky Blue Ranger Archival Ink pad.

Next, on the back of the back support page, use a glue stick to cover the entire surface, before attaching to the back inside cover of the booklet. Burnish down well.

Position a craft mat so that you can put glue all over the back of the front support page.

Fold over the front of the cover, ensuring all edges are stuck down firmly, and there is enough 'give' to close the notebook properly (this is why you don't glue the support pages flatly at the same time - doing so usually means there won't enough material for the spine). Make sure there is no excess glue around the edges, and press the notebook between two heavy books while it's drying.

I've
got to admit that I'm more than a little partial to notebooks of all
kinds, and I really enjoy making my own - you can personalise
everything, as well as making weird sizes and shapes. I hope you feel
inspired to have a go - both at making your own background papers, as
well as books. Don't forget to share you makes on the PaperArtsy
Facebook group page, I would love to see what you come up with! 😊

Lotte x
The notebook consists of two parts: the cover which will be wrapped on the outside with the stamped paper, and on the inside will be plain; and the pages of notelets which has a stronger piece of paper for the first and last page to attach securely to the inside of the cover. Let's call these support pages.
First, get a sheet of Heavyweight Smoothy and put a blob of Mermaid Fresco Finish Acrylic Paint in one corner, and a generous spritz of Tea Dye Ranger Distress Spray Stain in the other.

Next, use your brayer to randomly mix the paint all over the surface - don't worry about muddying on this occasion! - and when done, spritz lightly with plain water. The Spray Stain beneath the Fresco Finish will rise to the surface and give a lovely mottled effect, like old book pages.

Then get the stamps, and randomly stamp all over in Watering Can Ranger Archival Ink - start in the centre of the page, and build around that image, going over the edges of the paper as you fill the entire sheet.

Next, cut two pieces of thin cardboard (cereal box is fine) to measure 6" x 4.5". Turn the stamped paper face down and use a glue stick to adhere the pieces so that there is 0.25" gap between them - this will be the spine of the booklet. Trim edges to 0.5" all around and carefully cut the spine bit with scissors and glue down the inside of the spine. Use a bone folder to score along all edges.
(Please don't be confused by the colour of paper showing - thrifty as always, I used an already painted page and painted and stamped on the other side!)

Fold the side flap of the paper first, using a glue stick to secure the edges, pressing down firmly and ensuring a smooth edge.

Next, fold down the top and bottom flaps, likewise using a glue stick. The cover is now ready!

You will need a ribbon roughly 25" long. Position this so that it lies on the inside back cover; the ribbon should be folded, not in half, but so that there is 1/3 on the top, and 2/3 on the bottom. Glue in place.

Now to make the inside of the booklet - I promise it's not as scary as it sounds! Cut 5 pieces of printer paper to measure 6" x 9", and one sheet of Smoothy card the same size which will be the support page. Use a bone folder to carefully score down the middle. Fold all pages together with the Smoothy card on the outside (these support pages will be attached to the inside of the cover of the booklet, and therefore needs to be a little stronger). Use a piercing tool to make holes at 1" intervals, and with white thread stitch the pages together. Secure the ends with knots on the side that will be glued, and make sure the thread is cut so that no ends are visible over the edge. Stamp images on the inside pages with Sky Blue Ranger Archival Ink pad.

Next, on the back of the back support page, use a glue stick to cover the entire surface, before attaching to the back inside cover of the booklet. Burnish down well.

Fold over the front of the cover, ensuring all edges are stuck down firmly, and there is enough 'give' to close the notebook properly (this is why you don't glue the support pages flatly at the same time - doing so usually means there won't enough material for the spine). Make sure there is no excess glue around the edges, and press the notebook between two heavy books while it's drying.


Lotte x


8 comments:
This is perfect Lotte... Love your notebook
Prettyyyyyyy
Loooove it ❤️
wow how cool is your mottled technique!
Great technique and a lovely project Lotte!
Thank you for your lovely comments, warms me old cockles :D
Love the paint and distress stain idea and such a fab notebook x
This is great ! Love it !
Post a Comment