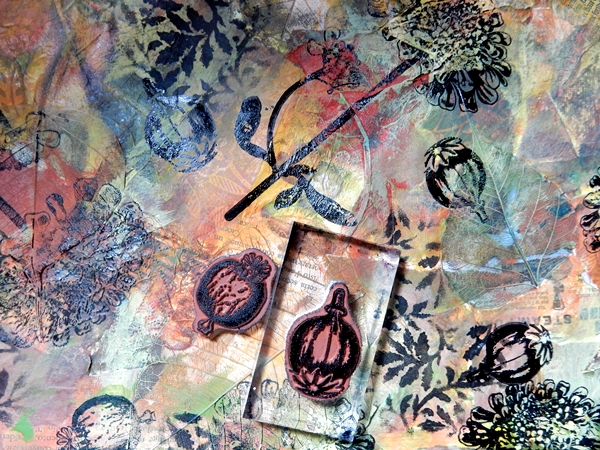
Hi everyone, Liesbeth here. A long time ago here at the PaperArtsy Blog I showed you a mixed media technique called ,Paper-fabric' . This time another one called... Fabric -Paper !
You don't need any fabric, you just start with a piece of tissue paper or sewing pattern paper and lots of bits and pieces of coloured papers, book paper, wraps, napkins, scrapbook papers, even backgrounds you made and never used...and real Autumn Leaves, skeleton leaves ! Use every paper you have ! . The one I made here is about 70 x 50 cm. You can use the finished piece of paper for lots of possibilities: wrapping presents, cut in pieces as a background, for covering boxes or books with it, etc... I covered a book and used a small piece as a card background, using some of the beautiful Hot Picks, see pictures below. It's so FUN creating this !
Step One: Start with a big piece of tissue paper or pattern paper (autumn colors) onto a piece of plastic (plastic bag) Printed paper is ok as well ! Cover the entire paper with torn papers of all kind and some skeleton leaves or dried leaves. A fluid matte medium works perfect for this, you can also use normal matte medium, thinned with water.Just glue everything down..
...Till it looks like this:
Step Two: Remove the plastic after drying. Start painting to blend the papers. First some yellow here and there..after that some green, orange, red and brown, building up layers till you are satisfied. Use mainly Translucents, so the papers and leaves will show through. I used Pumpkin Soup,Autumn Fire, Brown Shed, Hey Pesto and some French Roast.
Step Three: Add some leaves here and there using a stencil (Mini Vineyard) , a sponge and black Fresco Finish Little Black Dress.
Step Five: Finish the fabric paper by highlighting and outlining some stamped and stenciled images and the skeleton leaves with a fine white gelpen or paint marker.
Your paper is ready !
I then covered my (plain) book with the ,Fabric Paper', and added the word autumn using punched out letters.
For this card , I choose a beautiful and interesting area and cut it out (12,5 x 12,5 cm) , added some extra paint onto the flowers and I sponged the edges with black ink. I stamped the two owls (Hot Pick 1011) onto a separate piece of paper, cut them out and coloured them with colour pencils. I finished by glueing the owls onto the card.
Well, I hope you like this Fabric paper and give it a try yourselves ! I love to see what you create ! So grab your paperstash, some Autumn Leaves, join the challenge and have lots of fun !
We would love to see how you interpret this Autumn Leaves topic by linking what you make to our 2016 Challenge #18: Autumn Leaves, on this page HERE.
All of our bloggers love to see your twist on their ideas, particularly if you were inspired directly by their post.
All links go in the draw to win a £50 voucher to spend on products of your choice from the PaperArtsy online store. The Autumn Leaves link will close 17:00 (London Time) Sunday, Oct 2nd 2016. The winner will be announced 2 hours later at 19:00.
Hi everyone, It's me, Bracken, again! Hope you're all okay? This time I've been busy making a bird house not only for a bird but for a Hedgehog as well, which I have named Hogwart:)
1. First I painted the house with Fresco Finish Chalk Acrylic Slate(All paints used for this project were Fresco's), then applied Crackle Glaze in a few spots I'd like the cracks to show. Once that had semi dried, I painted Stone on top of the glaze and the rest of the house.
2. Next I mixed Slate into Grunge paste and covered the roof in it using a thin layer as well as the little ledges on the base. The underside of the roof and base were just normal Slate without the Grunge paste.
3. Using a trusty glue gun and small round wood chips bought at The Range, I glued together a stand for the bird house. As the chips were layered, I encorporated fake moss also bought at The Range (live for that stuff!..so cool and handy!)
4. I wanted to wind some sort of twig round the house but couldn't find one thin or bendy enough to wrap round it so took a small piece of one of my mum's ornaments...Sorry mum! (she didn't mind really). I attached that using the glue gun.
5. Onto a piece of thin card, painted chunks of Autumn Fire, Brown Shed, Cherry Red (limited edition:(),Claret, Blood Orange (Sadly no longer with us:(...But Claret is almost identical anyway), plenty of Irish cream (Good bye old friend:(...But Mushroom isn't a bad alternative) and Caramel. Once that'd dried, I stamped the cluster of leaves from the Squiggly ink set Flora and Fauna 3 using Jet Black Archival ink. They were then all cut out and stuck onto the twigs using the Ranger Glossy Accents.
6. Hogwart was Stamped onto Yellow tissue paper which had been painted in watered down Toffee and Irish cream. He was then stamped with Black Staz-on. Hogwart was from the Squiggly ink Flora and Fauna set 2. He was also attached to the house using the glue gun.
If you wanted to do something different, you could always create more of a silver themed bird house by adding treasure gold to the leaves and using glossy card to cut the leaves out of.
Hope you liked this are having a great day.
Happy making.
See Ya, ArtymeB:) X
Please feel free to cruise my blog but please be aware that I'm literally going into Exams head first at the moment so haven't and won't be able to post anything until at least next May so I can really focus on getting that good result.
Great to see you here Bracken, we know how busy you are and wish you well with your final exams at school. Wow, such patience to cut out all those tiny leaves, but a fantastic result. ~Darcy
We would love to see how you interpret this Autumn Leaves topic by linking what you make to our 2016 Challenge #18: Autumn Leaves, on this page HERE.
All of our bloggers love to see your twist on their ideas, particularly if you were inspired directly by their post. All links go in the draw to win a £50 voucher to spend on products of your choice from the PaperArtsy online store. The Autumn Leaves link will close 17:00 (London Time) Sunday, Oct 2nd 2016. The winner will be announced 2 hours later at 19:00.
Hi everyone Sarah Allan from the handmade card blog joining you this evening with a post on brayered backgrounds . I chose this technique after I was inspired by learning how to do this by Leandra on the Paperartsy Youtube Channel.
This technique appeals to me because it is so versatile, plus you can use a variety of different paints onto the surface. My project today is a handmade card that uses Paperartsy Fresco Finish Paints.
I have been crafting since 2009, it all started with making a few cards, and it has been a wonderful journey and I enjoy playing and creating so much. I love to try new techniques and incorporate them into my craft projects. So when I learned the brayering technique I could not wait to try it out!
Step Two: I then used the large leaf from Lin Brown ELB29.to stamp and emboss leaves over the card, plus an extra leaf that was cut out. I used versamark ink, then with copper embossing powder heat set it to create a lovely focal point for the card.
Step Three : I then took some chocolate cardstock and used the sentiment from the stamp this time and inked it with versamark ink with more copper embossing powder to give it a lovely autumny feel .
Step Four : Layering.. I layered the stamped and embossed sentiment onto olive green cardstock and the brayered leafy background onto chocolate cardstock, roughing up the edges with the edge of my scissors.
Step Five: More Stamping. I took a piece of olive cardstock measuring 5.5" x 5.5" and stamped the block lines stamp from the same ELB29 stamp set and with versamark ink stamped all around the outside edge and allowed to dry.
Step Six : The white card base measures 8" x 8" and I used the two leaf stamps to stamp a border around the outside edge, the inks used were a yellow ochre chalk ink and spiced chai stazon. I then used some distress ink and blended the border of the card base.
To complete the card I took a piece of Metallic Gold Cardstock and using the small trio circles stamp went around the edge in Spiced Chai Stazon ink. These two layers were then adhered together and the focal point attached to the front.
I had so much fun creating this card for the blog, I really enjoyed doing the brayered background technique.
The addition of some crackle glaze would have looked great on this card too, perhaps I can try this on my next craft project, really the possibilities are endless, I encourage you to try doing a brayered background, they are so much fun, easy and just add that little bit extra to your project.
I have a few upcoming workshops in Edinburgh if you fancy joining us the dates have just been released on the Stampers Grove Website, classes held at Stampers Grove, 92 Grove Street, Edinburgh EH3 8AP, for Booking info click {here} Thanks Sarah those lovely coppery tones are totally Autumn, and your choice of layering cardstocks colours really supports the focal images beautifully. This new stamp set of Lin's is packed with gorgeous images that all work so well together on this card. ~Darcy
We would love to see how you interpret this Autumn Leaves topic by linking what you make to our 2016 Challenge #18: Autumn Leaves, on this page HERE.
All of our bloggers love to see your twist on their ideas, particularly if you were inspired directly by their post.
All links go in the draw to win a £50 voucher to spend on products of your choice from the PaperArtsy online store. The Autumn Leaves link will close 17:00 (London Time) Sunday, Oct 2nd 2016. The winner will be announced 2 hours later at 19:00.
Well hello everyone, Darcy here, welcome to out newest topic. This one calls out to me for many reasons, I love Autumn, especially the colours. The leaves are falling, drying out and providing a crunchy carpet underfoot. The blazing sun of summer (hmm maybe not) has passed but there is still that lovely warmth.
Evenings have that little nip in the air, somehow that is comforting as it makes you dig out your favourite sweater, scarves and gloves. Wrapping up snugly for Autumn walks on a Sunday afternoon is quite special.
Before we start, let's see who won the Topic 17: Making Marks Challenge... I am so glad you took the plunge and had a go at mark making, I know it sounds scary and seems like you need to be good at drawing but that is not the case at all. Even the simplest of marks can be interesting, both in backgrounds and as focal images.
Email Darcy to claim your prize. Darcydotneedles@gmail.com
So let's talk leaves! What do we know about them? well firstly on evergreen species the leave mostly stay on, and on deciduous species the leaves fall off. The shapes vary enormously, these are defined by the types of edges; smooth, fringed, toothed, serrated, indented,wavy and spiny. The way the leaves are arranged on the stems can also vary; alternating, opposite, in rows, rising from the base and rosette formations. As for leaf surfaces there can be leathery, waxy, smooth, hairy,sticky, spotted, wrinkled and warty! Phew! so many differences! but there is more, the veins vary too, they are sunken below the surface and carry food and water to the plant or tree. These can be arching, split, aligned, palmate, parallel, secondary, branching or rotating.
People have always taken pleasure in trying to preserve natural beauty that surrounds us,there are examples of leaf rubbings going back as far as 1425. Even Leonardo Da Vinci pressed leaves into some of his manuscripts. In 1543 the first botanical gardens were set up in Pisa, there they catalogued and displayed leaves especially those useful for making perfumes and medicines. In the 16th and 17th centuries people would decorate prints that they owned, much like we use old book pages now. Here is a print of a rhino, you can see the borders have had leaves added to them.
There have been many ways of preserving the beauty and fragility of leaves. In 1854 they used electrotyping to produce exact copies. By 1862 the negatives from photos of leaves were used when creating woodblocks. These were incredibly popular in the domestic market. The most fragile leaves of course are skeleton leaves. This is an ancient art, going back to the Chinese during the Ming Dynasty. It used to be a very lengthy process that would take several weeks. But now you can make your own skeleton leaves really quickly. Check out THIS SITE to see how to make them.
If you don't fancy boiling up your leaves, how about cutting sections away to create a different kind of skeleton.
Leaf rubbings are something we have probably all tried, but how about printing with leaves. add your paint or ink directly to the leave and you are ready to go.
Of course you don't have to use real leaves, you can easily make your own. Check out this post by Tim Holtz.
These fantastic leaves have been created by Carol Windsor, she laminates sterling silver between layers of paper to create amazing jewellery.
These ones by Lena Pavlova have been felted. This is a beautiful collar, and would look stunning over a black outfit, but can you imagine if it was extended into a decorate scarf.. oh yumminess!
For an autumn evening how about these lovely candle holders made from air drying clay, they could be a table decoration for a late supper or placed in the garden while you relax with a drink.
C*****mas is coming! ( I couldn't bring myself to type it just yet) but it is indeed coming, and these glittery leaves would make a stunning garland which you could make for autumn and leave up over the holidays.
There are so many ways to cut out leaves, either by hand, using punches or using metal dies. Here is one example layered up onto a card. utilising all the neutral shades as supporting layers.
Kellie has made some gorgeous Autumn leaves, see how she made them HERE and then join her in this video to see how she uses the leaves to make a journal page.
Here is another stunning journal page, just look at those rich zingy colours.
When it comes to mixed media, leaves are a definite favourite, both for their shapes and for their colours. This one incorporates copper pieces and watercolour paper leaves.
With this topic we don't want to limit you to just using leaves, so have a think about the colour schemes that Autumn leaves bring to mind. There are so many stunning, rich, jewel-like tones that you can use.
This stunning art doll is very clearly dressed for autumn, those deep rich tones work perfectly together.
If you are in the UK then perhaps make a visit to Wallsworth Hall in Gloucester, here you will find the Nature in Art Gallery and Museum. It is the first in the world that is dedicated to art works, fine,applied and decorative, inspired by nature. Find out more about it HERE. Leaves in their original state are purely ephemeral, for the briefest time their shape, colour and beauty is admired, then it fades and crumbles away. It is no wonder then that we try to capture the memory in artwork.
Have fun over the next 2 weeks and show us how you can capture Autumn. Don't forget to follow Darcy and Leandra's Pinterest boards if this topic pushes your buttons, you will see plenty more examples to whet your appetite there!
Darcy
Topic 18: Autumn Leaves PaperArtsy Blog Challenge
We'd love you to share your ideas and link up your creative response to our current blog topic. Take a minute to read the challenge guidelines below.
All links go in the draw to win a voucher to spend on products of your choice from the PaperArtsy online store. The Autumn Leaves link will close 17:00 (London Time) Sunday, Oct 2nd winner will be announced 2 hours later at 19:00.
1. The challenge is a for you to show how you are inspired by the current blog topic.
Your entry should contain:
- a mention of which post inspired you and why, and
- a link in your blog post to that original post on the PA blog.
The whole concept of this challenge is 'play along with us'. You are encouraged to put your own twist on ideas you see on our blog, do your own thing - whatever grabs you!
2. The link you put on our linky page must lead directly to the specific post on your blog where you have explored the technique/ idea mentioned in point 1 above. Don't link to the home page of your blog.
3. We prefer your challenge blog post is created exclusive to our challenge, but if our topic fits perfectly with another challenge, then you may link to both if appropriate.
4. You are most welcome to use stamps/ products/ substrates you have to hand from a variety of companies, we do not expect you to exclusively use PA products - it's lovely when you do though!
6. You can enter as many times as you like. We don't want to restrict your creativity!
NB. Link closes at 17:00 Sunday Oct 2nd (London Time)
7. The winner of the random draw will receive a £50 credit voucher to be redeemed on the PaperArtsy Website. The credit voucher includes VAT and postage. We request that one of your purchases is an A5 rubber stamp. You can add any other items to your basket, but the final total should not exceed £50.
8. Each fortnight on Sunday, the winner will be announced at 19:00 (London time). In the same post, the link for the next fortnight will be posted.
9. It's your responsibility to claim your prize coupon from Darcy.
email: darcydotneedles@gmail.com
Good Luck! If you have any questions, don't hesitate to ask!