Tuesday, 7 September 2021

2021 Topic 11: Twinkle Twinkle with JoFY {by Lynn Good}

  2021 Topic 11: Twinkle Twinkle


I Absolutely love how Lynn's little stars in these photos are totally loving their time playing together and how perfectly she has created a background for those photos to chime with so well! Fabulous layout full of energy and happiness.
~ Leandra

Hi everyone, it's Lynn (Memories on the page) with you today, and I'm here to share with you a scrapbook layout that I have created.

Twinkle Twinkle - just up my alley - colour and bling comes straight to mind.  Combine that with JOFY’s new stamp and stencil and what is there not to love!!!!!


I am using the 12x12 340 gsm smoothly heavy cardstock.  I love this cardstock when using paint or wet medium.  I began by covering the page with gesso.  I did this because when using the reduction paint technique you get a much whiter “wipe off” image. It also allows a little more time before the paint dries.

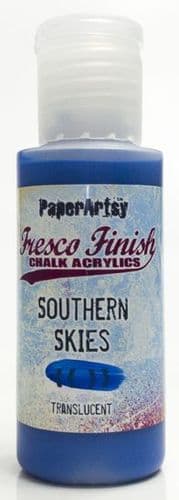
I have used the following Fresco Finish Chalk Acrylic Paints - Red Lipstick, Firebird, Caribbean Sea, Southern Skies, Tangerine Twist and Zesty Zing,


I have painted on colours and before they dry, placed on top a Stencil JOFY PS275 and removed the colour through the stencil.  I have continued doing this along the bottom of the page.


I have used Little Black Dress Paint in areas of the layout - the contrast this gives really makes the page pop.


I have stamped the heart image from JOFY106 across the top of the page. and the circles on the bottom of the page on top of the paint.


Now that the black paint has dried I have colours the areas with a white Posca pen in circles to highlight the contrast even more.


Now that everything is dry I am able to put my layout together.  I have backed the main photo is black cardstock and then red glitter cardstock and adhered it to the page with the second photo which I fussy cut out.

I have coloured the stamped circles on the painted area  with Posca pens.

I have coloured the hearts with Fresco Finish Chalk Acrylic Paints - Red Lipstick, and Zesty Zing - and applied some glitter around the layout (on the dots!)

I have stamped the words from the JOGY106 Set “Peace Love Joy” onto yellow cardstock and fussy cut around it.

A touch of stardust and yellow glitter and my layout is complete !!!


I love the bright colours and get such a happy feeling when I create with them - if you don’t normally use these colours, give it a go and see how you feel :) 

Thanks for stopping by…..

Lynn


Monday, 6 September 2021

2021 Topic 11: Twinkle Twinkle TOPIC INTRODUCTION

 2020 Topic  11 - Twinkle Twinkle

Hi everyone, Keren here with a glittering, flashing sparkly theme. Twinkle twinkle could have us exploring glitter, outer space, stars, nursery rhymes or lights. It's a topic nearly as vast as the twinkling universe and one in which I think our blog designers will shoot off in nearly as many different directions as there are galaxies!

Sara Naumann is well known for experimenting and more recently for her love of resin. She's caught the glitter in the project using a glittery embossing powder and has a wonderful twinkle in the project.

Chris Creswell glittered up some backgrounds which is a really good way of using glitter and highlighting texture whilst leaving the main images to 'sing'. It gives a crisp snowy effect perfect for these mischievous Zinksi characters to get up to no good!

Emma Godfrey took the theme of one of her stamp sets to do some star and sparkle based art. It fits in just perfectly here.


Onto some projects that I've found in my search. This next stencilled and painted piece is very beautiful. Using a rose stencil and making a galaxy lit up sparkling background. So very atmospheric.


I love how the next artist, Kirsten, has kept the background more neutral so it focuses our eye on the beautiful striped hair. She's used some lovely glitter for the stars. You can use glitter on top of Frescos or Grunge Paste if you're looking for a more textural finish.


Keeping with the theme of solar systems and stars, this next piece is looking at the moon and stars and using more subtle colours with a fab contrasting quote page. It's a great journalling technique.


Muhammed Salah creates amazing art often with star themes. The reflections of the stars in the water are a clever touch.


If we're talking twinkling lights, this beautiful lantern festival takes place annually in Busan, South Korea and attracts over 1 million visitors a year.


This next piece is a useful idea to tuck away for those 'mojo-less' days. Stamp or draw an outline and add journalling or a quote into the negative space. This piece of art happens to have the twinkle twinkle childrens song as its theme.


If you're looking for ways to light up the autumnal evenings inside, why not try this twinkling idea (using battery operated tea lights). You could really go to town adding extra layers and I wonder how embossed areas or Grunge Paste would look with some soft light shining against it.


Johan Meuris is a visual designer from the Netherlands and some of his art is around constellations. I thought that having the constellation names fleshed out in images but using subtlety of colour contrasted with the brightness of the stars was inspired.

Next up is a bit of a stretch ;-) I thought that showcasing this clever idea for those that appreciate sci-fi plus bullet journalling might light some of you up! There's a few stars on the mood tracker page, but it's 'star' wars related!


Maybe you're in the mood for some experimentation? Using the PaperArtsy translucent Frescos to layer and create different shades could send you in a similar direction to this simple 'bokeh' inspired card.


Scrapcosy has made some clever glittery dimensional stars here - and we've showcased them a few times recently. On a slightly different tangent, here's a fab mobile with origami stars and I could image them done from book pages or masterboards too.


I thought we'd go big to finish- if any of you have an important occasion coming up, why not think about creating your own backdrop (or easier still, purchase one!!). I love the fluffy clouds and the dangling clouds - giving off a gentle, soporific vibe!

I hope your eyes are twinkling with so many ideas racing around in your head. Our bloggers will have some inspiring ideas over the next two weeks, so do keep checking back through the week to see. Oh, and do leave them some love in the form of a comment, it really encourages them!

If you want to create along with us while we explore this topic, please share your makes on our social feeds so we can follow along. Instagram @paperartsy or why not join us and post in the PaperArtsy People Group on Facebook. Make sure you tag us in your contributions, we love to see what you get up to in your creative world! 

Saturday, 4 September 2021

2021 Topic 10: My Favourite Colour with TS {by Claire Snowdon}

Watching someone layer up elements is always a treat. Claire has built up each layer with care, so each one is distinct and amplifies the textural effect. Her favourite colour pink is loud and proud going from the purple pinks right through to the orangey hues and is definitely the star of these beautiful ATCs.
~ Keren

Hi everyone, it's Claire Snowdon here with you today to share a trio of ATC's I created using my favourite colour - PINK!  To be honest I was pretty surprised about the distinct lack of love for pink during this topic......I think I'm only the second blogger to choose it for this topic.

Creating on multiple pieces at the same time is one of my favourite things to do when I'm not using a journal - it leaves plenty of room for error as you can just discard one piece if you don't like it.
 

So to start with I took my three ATCs and swished on Fresco Finish Chalk Paint in Blah Mange, Sorbet and Cerise to create a kind of marbled effect.


Once dry I used a Tracy Scott stencil (PS201) and Grunge Paste on each ATC to create some texture and extra interest.


Whilst my Grunge Paste was drying I moved onto the focal elements for the ATC's. I stamped two of the flowers from Tracy Scott set 61 (TS061) onto some PaperArtsy Smoothy card then used watercolour pens to add colour.  Then I fussy cut the flowers into three separate elements and inked all the edges in black.


Now that my Grunge Paste stenciling was nice and dry I went in with the Infusions to grunge them up a bit more - I used Magenta and Raspberry.  Spritzing with water, dabbing and drying until I was happy with the effect - I really love using Grunge Paste and Infusions together as the paste takes on some of the colour in places and then the infusions puddle in the grooves too so every time you use them it's unique.


I decided the cards needed some black - so I went in with black ink and a crackle stamp from Tracy Scott set 52 (TS052) and added the stamping at random to each card.  I also edged around each card using the same black ink too.
I also added splatter to all three cards using three colours of Fresco Finish Chalk Paint - Little Black Dress, Cloud 9 and Gold.


The last thing to do was assemble each card - I took some black cotton thread and added it to each card underneath the main floral image. I attached the flowers with foam pads to give them some extra depth.


And the very final touch was adding a quote sticker to each card.


Here are some closer up photos of the finished ATCs - I really love how textural they turned out.
 

The black cotton thread was another textural element that created another layer of depth on the cards.


Here are the three completed ATC's - you can see how the theme running through each card is consistent however they are all very individual.


And some close up's of each of the flowers from Tracy's beautiful set (TS061).


And one final photo of the three ATC's together.


I love how my ATCs turned out - the techniques I used to create them could be used for any number of projects for example cards or journal pages.
Creating these in my favourite colour has been so much fun - but any colours would work equally well! 

Thank you for joining me today,