Showing posts with label TSM12. Show all posts

Thursday, 10 August 2023

2023 Topic 8 : Master Wheel - Tetradic {by Victoria Wilding} with Tracy Scott stamps


Hi everyone

Victoria back with you today and I'm so excited to get all colourful with you as we revisit tetradic colour schemes as part of the 'Master Wheel' topic. I'll be creating an art journal spread using a skinny rectangle tetradic colour palette, but before we start I must confess that I'm not the most disciplined colour mixer, so prepare yourself for my rather slap dash approach!

Whilst I'm on a roll with the confession thing, I also thought I'd share that I'm a bonafide art journal junkie! I have dozens of different art journals and sketchbooks that I create in simultaneously and keep the journal I'm working in today, just for colour swatching and mixing. Here's a couple of reasons why I enjoy creating in art journals:
1. Art journals provide a safe space to play and experiment. They are relatively inexpensive and there's really only ever you going to be flipping through the pages.
2. They're a great reference tool for techniques, colours and compositions. Each page holds a lesson for next time and looking back on past pages is both inspiring and rewarding. It's a great way to see your progress and will teach you more about the things you love and the things you don't like so much.

I'm also going to share how the use of negative space in my pages, fits with this quarter's transparent theme, since you can see through to the white of the paper. Negative space is an important consideration in the composition of a piece and it consistently features in many of my creations. I'll show you how to use it to your advantage when creating loose florals and collaging geometric shapes like those in Tracy Scott's Minis.


The pastel colours I mix turn out really pretty and I really enjoyed all the playful elements of putting these pages together. I hope it inspires you to have a play in your art journal too!


These art journal pages use a minimal number of PaperArtsy supplies and a handful of other creative essentials. To mix my tetrad colours I use PaperArtsy Fresco Finish Acrylic colours; Butter (FF129), Candy Floss (FF70) and Aqua Duck Egg(FF199). I then use two mini stamp sets TSM10 and TSM12 to create some collage shapes for the main focal point.


Before we get into the detail of the page creation, let's spend a couple of minutes revisiting the colour wheel and tetradic schemes.

In segments 1, 5 and 9 of the wheel below you can see our three primary colours; Butter, Candy Floss and Aqua Duck Egg. Secondary and tertiary colours are created by mixing different combinations of these three colours. To mix a secondary colour (segments 3, 7 and 11) combine an equal amount of two of the primary colours. To mix a tertiary colour (segments 2, 4, 6, 8, 10, 12) mix a bit more of the primary colour into the secondary colour.


Tetrads are four colours which are distributed evenly around the colour wheel, which means there is no clear dominance of a single colour.

They can either be found in the formation of a square (see image below).


Or in the formation of a rectangle (see image below for a skinny rectangle).


I decided to use a skinny rectangle tetrad scheme for my journal pages, selecting the colours in the top middle. This tetradic scheme is organised into two complementary colour pairs making it a rich and vibrant colour choice.


I started off by mixing my colours and testing these out in swatches on the lefthand page and had a couple of attempts at creating the secondary and tertiary colours from the tetradic scheme.


Once I was happy with my colour mixes I created some background papers, applying a single colour at a time to the paper, with a sponge.


I then added patches of one of the other colours on top, using a mix of complimentary (colours opposite each other) and analogous (colours next to each other) colour pairings from my colour mixes.


Finally I created some single coloured sheets and set them all aside to dry.


Hand-lettering and loose florals are some of my go to options for mark making on my art journal pages. I adore the pretty effect they create and they pair so nicely with a really wide range of other images. Whilst I was waiting to move onto the main focal point, I lightly sketched out some cheats handlettering in pencil (this is basically a swirly capital letter combined with cursive script).


Sketching in pencil first takes a bit of the pressure off as you can rub out any errors and once you're happy you just go over the lettering in ink. I chose a dark grey ink to tie into the ink I will use for stamping in a few more steps.


Next I used up the leftover paint by painting a smattering of loose florals. At this point I had the thought that I should have painted the swatches in clusters to mix in amongst the floral clusters and create a more harmonious composition, but hey ho, something to remember for next time.

The loose florals I use here have become part of my signature style and I find myself coming back to them time and time again. They are so easy to put together and the trick is in laying gaps between the shapes you put down on the page. That transparent (or negative!) space, provides closure and helps the eye decode the assortment of shapes and recognise them as flowers and leaves.


Paint four uneven circles in a cluster to form the flower petals. A sport of stickles glitter in the centre of each cluster represents the pistil and pulls the flower together. Use different colours to provide contrast and help the eye see individual flowers. Paint in wonky oval/teardrop shapes for the leaves, again in a different colour.


Next I moved on to creating the main focal point for the page to the right. I stamped out a selection of the circles and squares from 
TSM10 and TSM12.


 I then cut out all of the shapes and organised into piles.


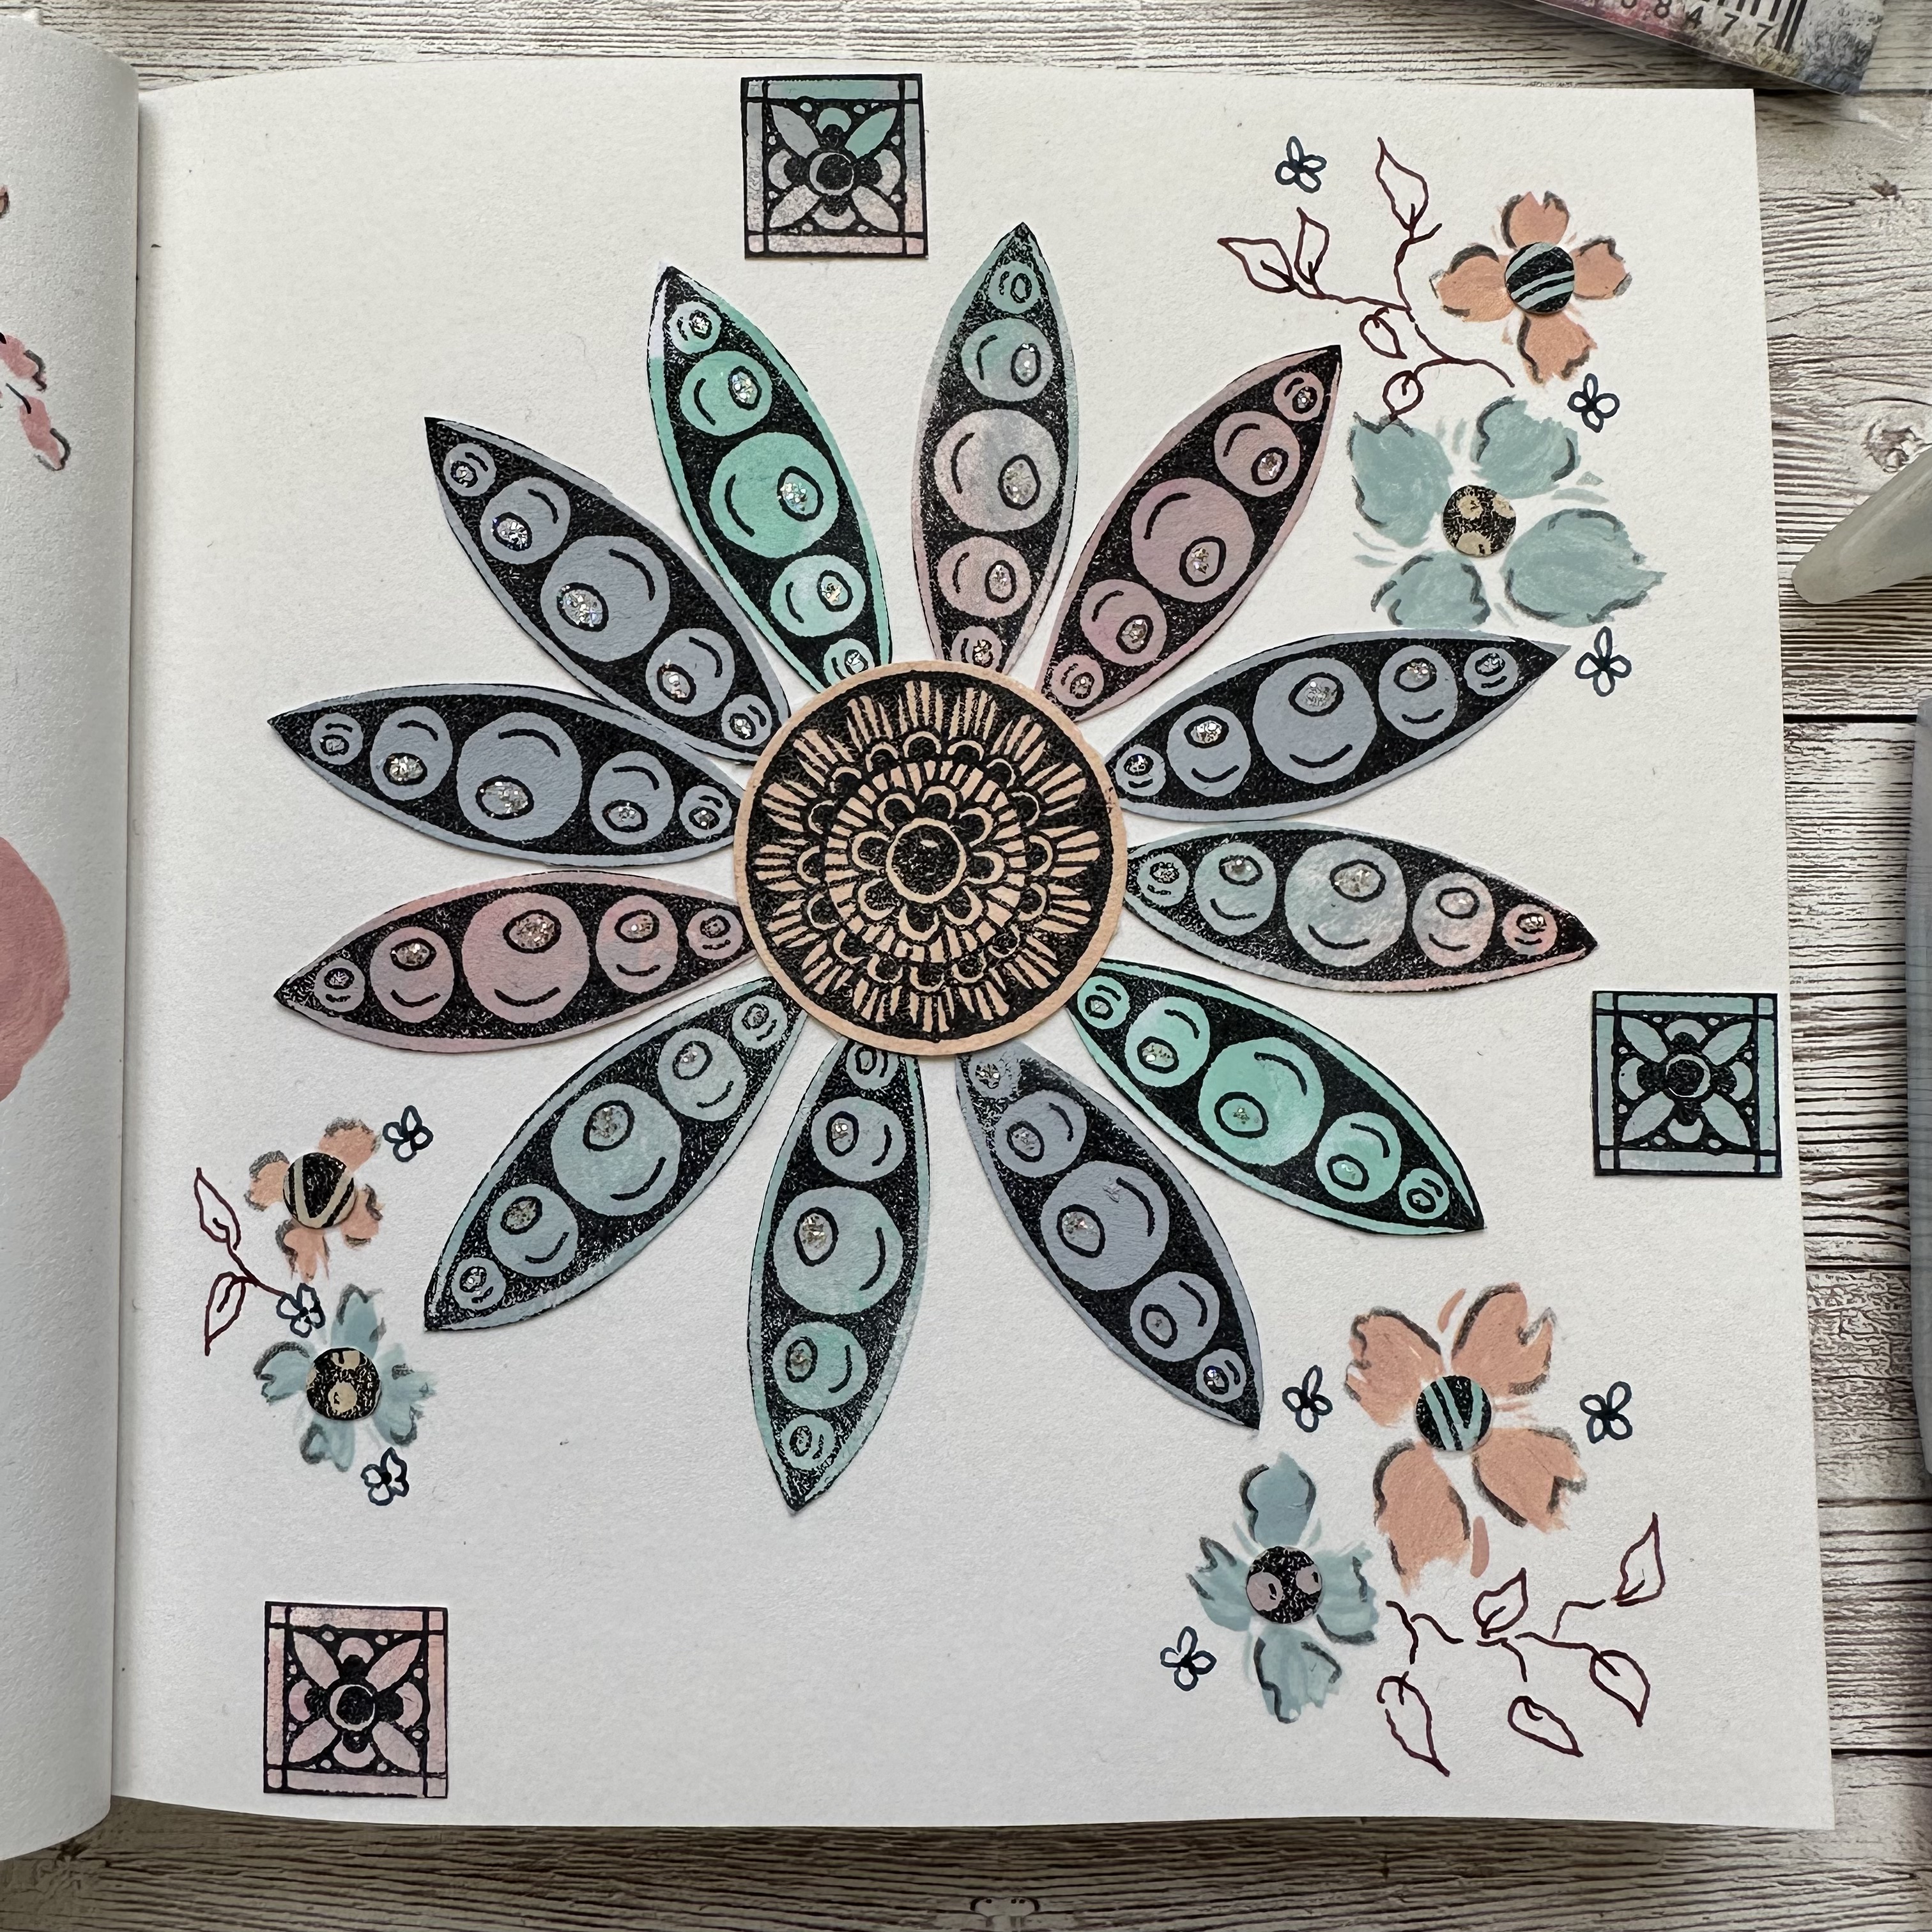
I'd decided that I wanted to create a college flower from the geometric shapes to compliment the loose florals I'd already painted on the lefthand page. So I cut the centre petal shape from each of the squares and set to one side.


I then decided to use a circle punch to create some tiny circles from the offcuts. I thought these could be used to create some smaller flowers on the outer edges of the page.


The next step was to assemble the collage flower. I stuck the petal shapes to the back of a circle with masking tape, spacing them as evenly as possible around the edge.


Here are the flowers ready to be used.
 

At this point I was ready to pull the pages together with all the final elements and finishing touches. The collage flowers were a bit bigger than I initially anticipated, so I only needed one of them. I glued it to the righthand page and painted some larger loose flowers in the same style as before to create repetition across both pages and bring unity to the piece as a whole.


I then used the small circles I created from the off cuts as the centres for the loose flowers, gluing them in place. This provides further continuity from the large centre flower.
 

To create balance on the page of a tetradic colour scheme, you should let one colour slightly dominate in the composition. You can see here how I used colour segments 8 and 9 of my selected scheme, more often on the page.
 

Finally, it was time to add the finishing touches. I added some watercolour pencil in Payne's Grey to outline the edges of the petals and leaves.


And drew in some leaf vines in fountain pen ink to give a final element of visual contrast to the overall piece.


Working in the rule of threes for an even composition, I added three small squares to each outside page edge. This mirrors the three clusters of painted flowers and helps create layers within the composition. The eye naturally moves from the centre of the page and the large collage flower, to the painted flowers and finally to the three small squares at the edges of the page.


I hope you feel inspired to get out your paints and create your own colour wheels and triadic colour palettes. Working with colour in this way is a great way to explore new colour schemes and discover different colour palettes from just a small selection of initial colours. I'll definitely be playing some more with this same scheme, but using a different skinny rectangle or square for other triadic combinations.

Wishing you a creative, happy week

Victoria


Monday, 24 April 2023

NEW PaperArtsy Products: Tracy Scott {April 2023}


A note from Leandra:
You may remember that some time ago Tracy created 8 minis, very useful background elements. Here's a reminder. They used to be called EM57 - EM64.

We have rebranded these onto new 'Tracy Scott Mini' index sheets, and so they now have new codes too TSM01-TSM08 


For this April 2023 release Tracy has designed 8 new minis, and they are also a 'mini' take on her pattern play concept .... across these 8 minis you will discover 26 stamps! That'll keep you busy! 
I'm sure you can see how the pattern play is going to offer endless options. Tracy also has 6 new stand-alone stencils too, more about those later in this post.


Tracy will be along to share with you LIVE this new release over in our Facebook Community PaperArtsy People at 20:30 Paris time today, April 24th. The replay will be pinned to her guide if you can't catch the live. She's got lots of wonderful samples to share with you!
 
If you are looking for a stockist in your area, it does make sense to order locally where possible, you will find a list at the foot of this post.

Hi everyone, Tracy here

I'm super excited to share with you my newest release for PaperArtsy. 8 mini stamps and  6  stencils.

You all know by now how much I love my pattern stamps and how much I love my stencils too, so this release is a particularly exciting one for me.

I've designed a selection of 8 mini pattern stamp sets with a total of 26 mix and match stamps, all designed to work alone or combine to work wonderfully with each other. The possibilities for these stamps really are endless.

And as for stencils, there really is a variety to choose from, florals, doodle patterns, mark making, swirls and more, I think there is something for everyone. but see what you think?
Check them out below....


Price: RRP €4.90 +VAT    Size: approx credit card size
All stamps are individually trimmed onto cling foam, with a laminated storage/index sheet.
  
Tracy Scott Mini stamp 09 (TSM09)

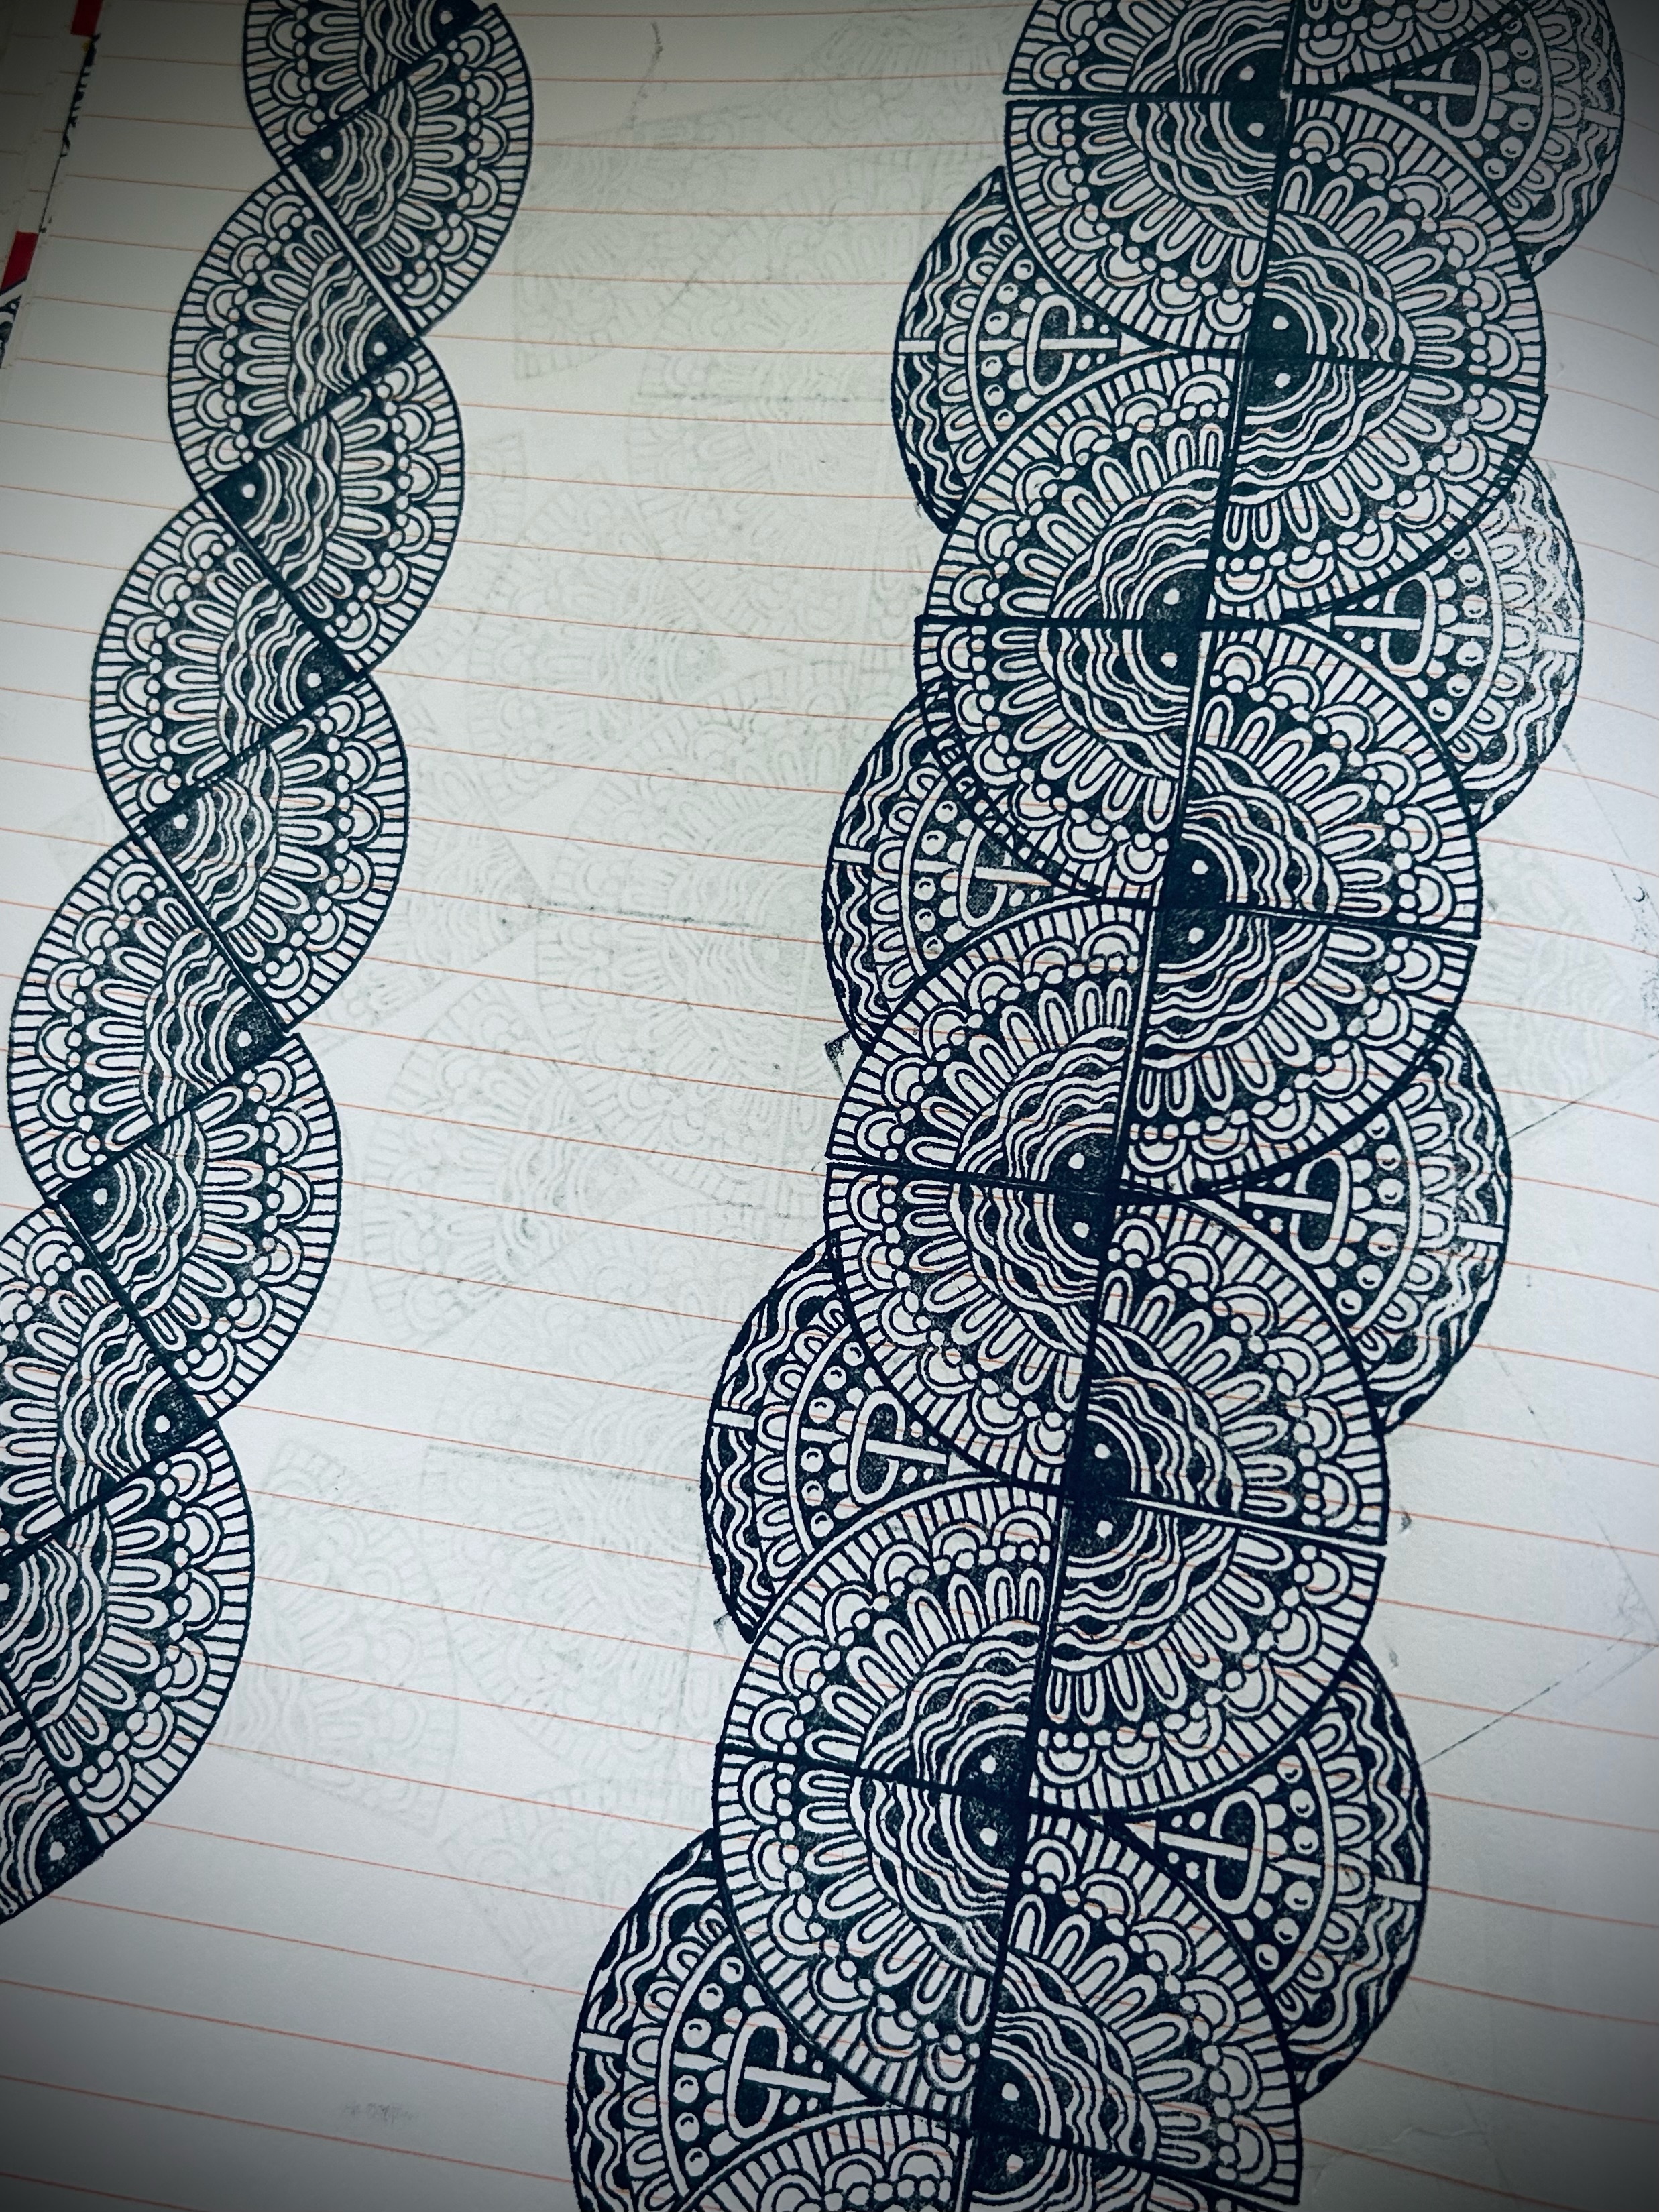
What's not to love about circles?... they appear in my artwork all the time so these versatile semi circle designs had to be included. You will find that TSM12 offers circles to fit perfectly in the centre, but there are other things you can put there too, such as this little square from TSM10.


Loving that wiggly line that is possible  from joining the semi-clircles.


And the shape that fits between each circle in this view is from TSM15, a very handy little scallop element!


Tracy Scott Mini stamp 10 (TSM10)

Of course lets not forget the humble square... these have been designed as multi directional stamps so dependent on which rotation you stamp will produce a different pattern, they will also combine to make a perfect central starting point for a larger design... and the way I have coloured them (see above and below), the square itself is hardly recognisable!


This might sound obvious, but there are 4 corners to each of these 2 square stamps. By choosing a different 'corner' to go in the centre, you create circles with different centres ...


And on this version, the petal shapes face to the centre, but the dots have been lined up to match on one of the sides.


And the same type of rotations on the other square also produce different effects and helps you recognise other possible pattern repeats on a larger scale too


There are 2 tiny squares on this set, which can be used to make borders ....


These little squares also work as corners to match the long strips on TSM11 (below), or stamp one 4 times to match the size of the squares shown above.


Or in this sample, the small square became the focal for the centre of a circle made from TSM09


Tracy Scott Mini stamp 11 (TSM11)

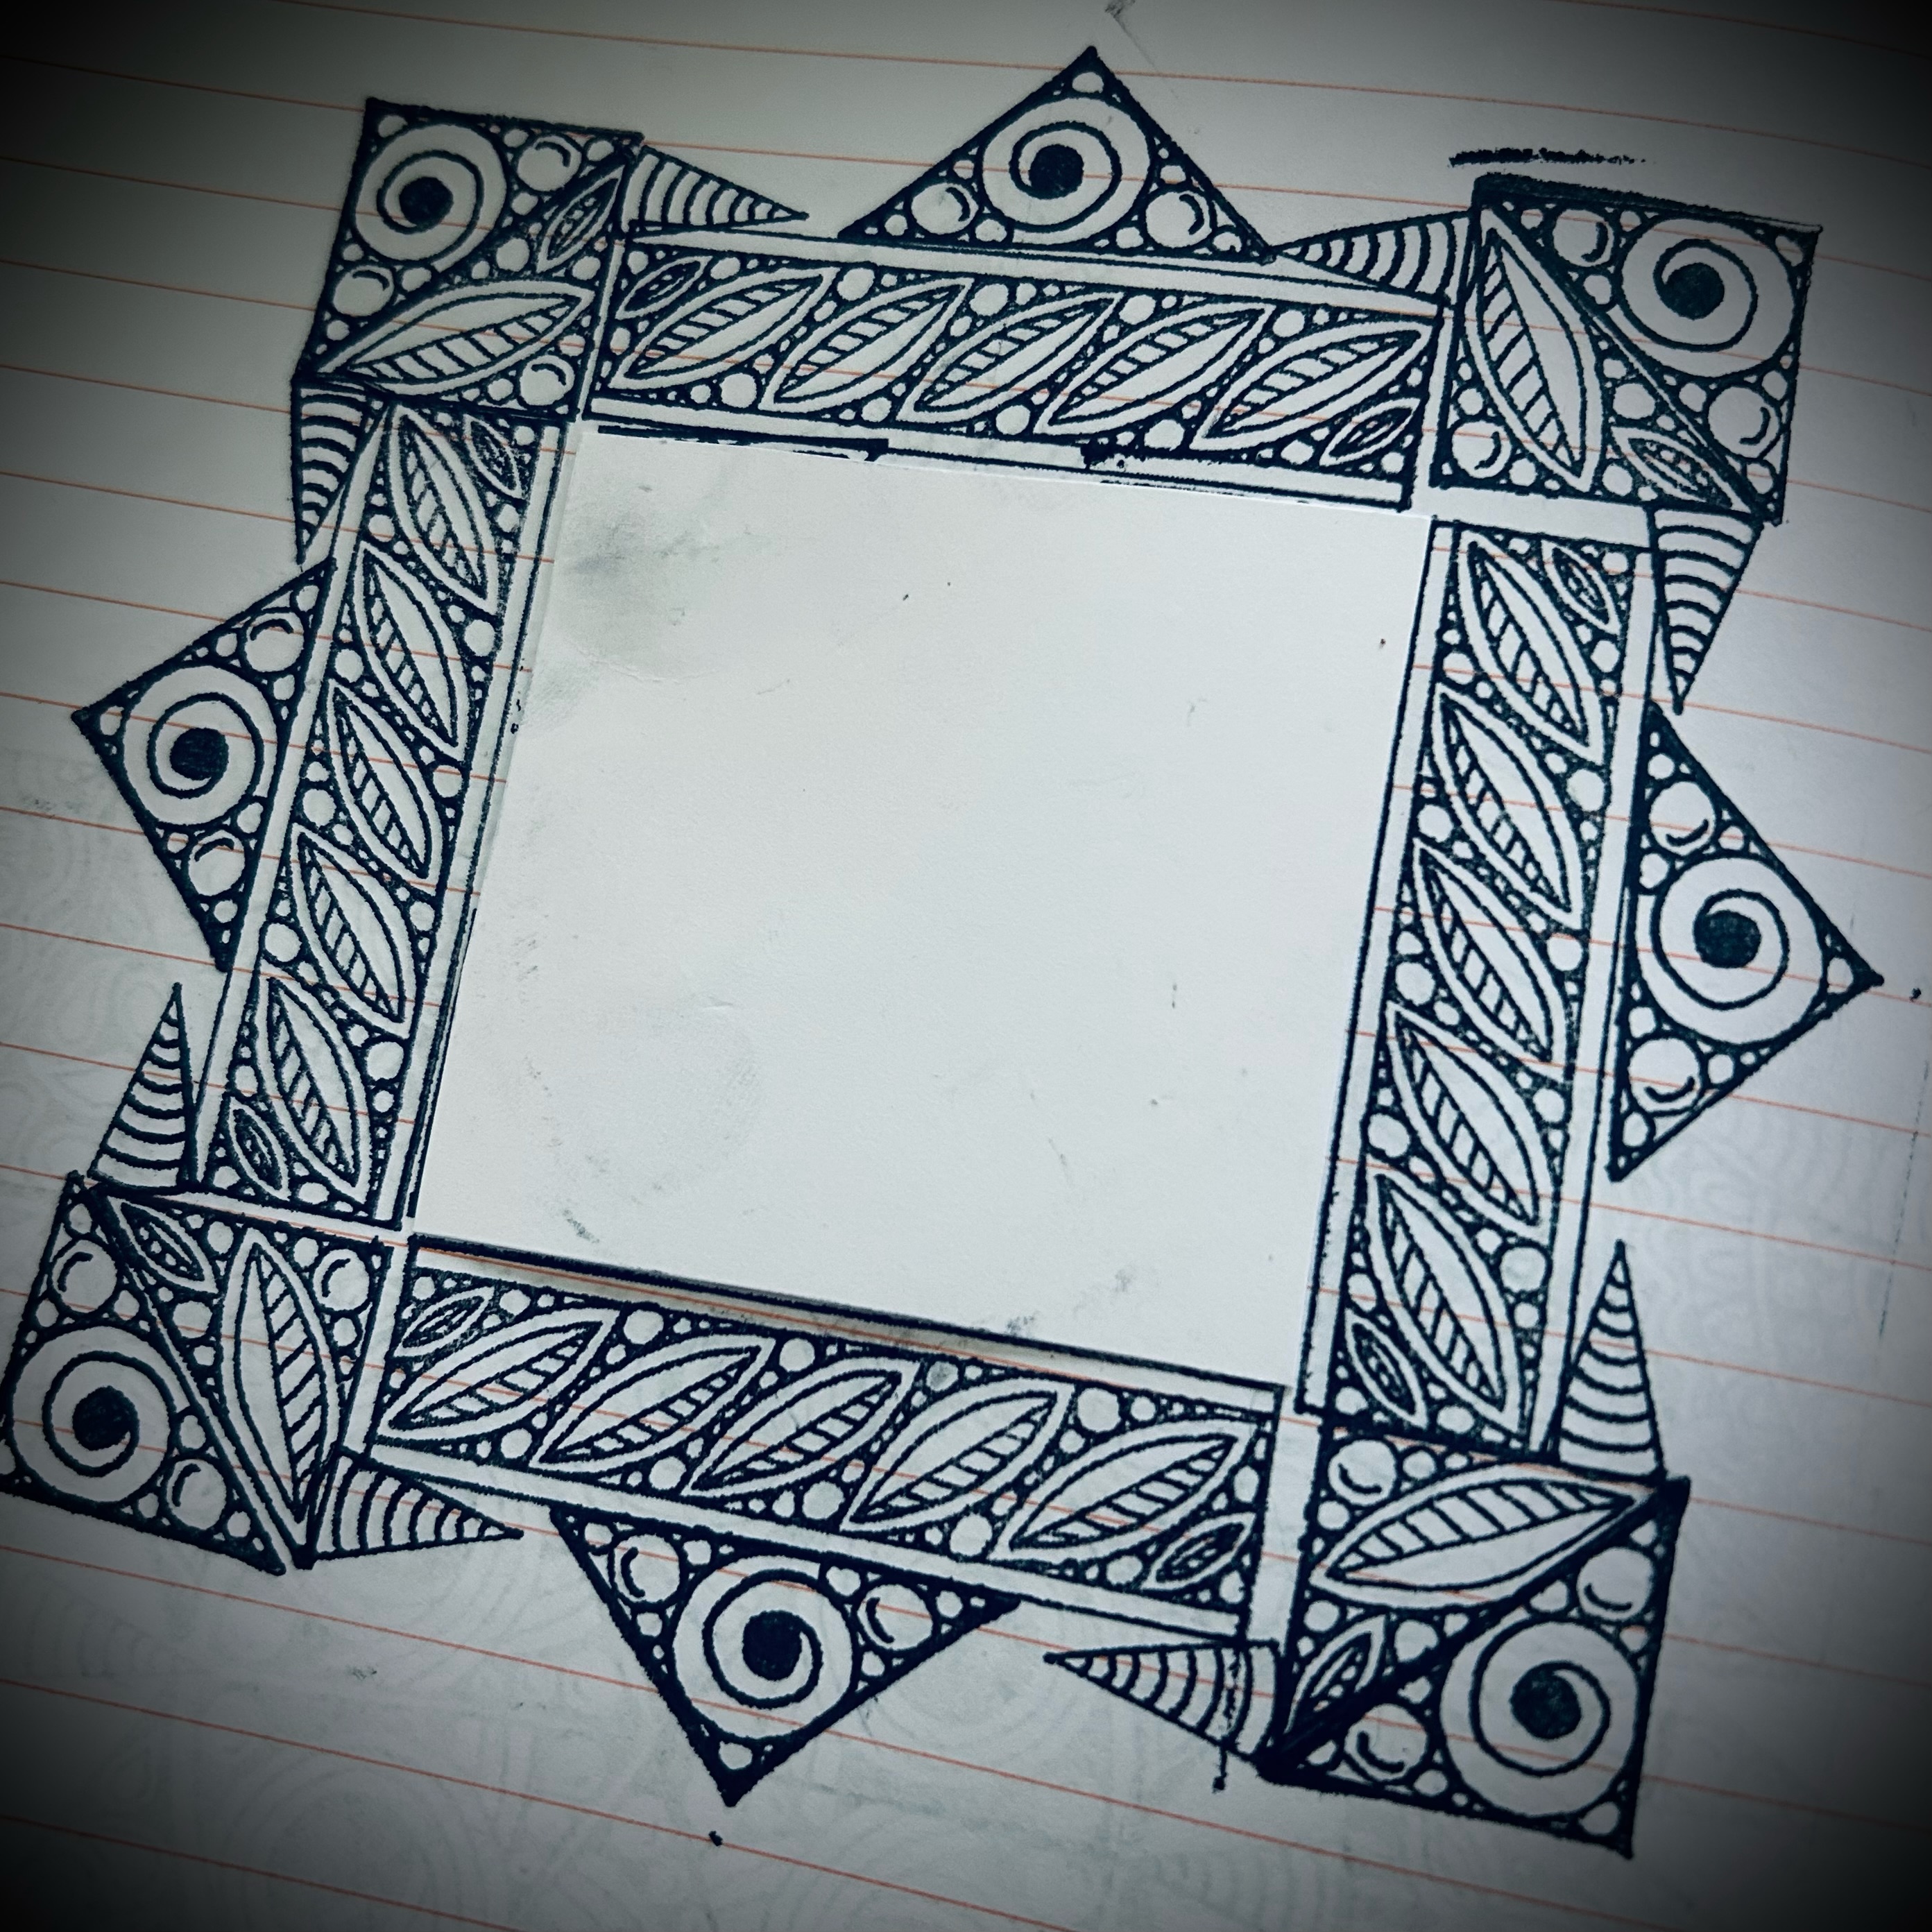
I love that these can be combined to make fabulous frames, perfect for a journal page but also for scrapbook photos or maybe even a focal point for a card, and of course can be incorporated into more elaborate designs...


The more you play the more combinations you find as you play.


And then all that remains is to add colour!


Tracy Scott Mini stamp 12 (TSM12)
 
The simple circle!.... These appear in my artwork and journals consistently and are fabulous to add to backgrounds in an art journal, and they really are essential when building patterns with the other stamps. They fit perfectly inside the semi circle stamps to create a whole new look. Also as they are mini size they are perfect for my micro journal !!


Even off set gives a semi circle a whole new look!


The micro journal really is very micro! It makes the circle stamp look huge by comparison!


who'd have thought a simple series of circles would make this happy pattern!


Tracy Scott Mini stamp 13 (TSM13)

Well I've included circles and squares so why not triangles.... I just love the angular shapes you get from these, and look at that bold central circle, hexagon and star shape you get from multiple stamping of the same shape...


This triangle has a concave edge (curves inwards) which makes it super handy for fitting into other curves too


Just with a bit of spacing, the concave triangles create a zone perfect to fit that tiny triangle (the very tiny tip of one of the 30 degree triangles from TSM14)


Just by pattern matching the sides of the triangle, you introduce a new dimension


Tracy Scott Mini stamp 14 (TSM14)

I actually decided to cut my stamps apart when I received them on this stamp set so that the little end points were separate from the cone shapes and this meant that I had the flexibility of using the entire shape or using the small end points and filler stamps and they just work perfectly for this purpose. They are pretty close together, so you will need a sharp pair of scissors, and just bend the design and the gap grows enough to trim between.

They can be stamped multiple times to create circular mandala type shapes or stamped at different angles to create something much more interesting...


With the tip snipped off the end of this wedge, it creates a new shape and more opportunities!


3 wedges make 90 degrees, and the circles fit in the centre hole perfectly too!


Tracy Scott Mini stamp 15 (TSM15)

Mandalas, patterns, borders, frames... you name it and this set does it all.  You can create lovely central circles, semi circular patterns, triangles that can be stamped into squares, and a mermaid scale shape that is super useful either on its own or as a filler between your stamped circles.


Tracy Scott Mini stamp 16 (TSM16)


Large Size: 6.25" x 9.5" (16 x 24cm) Price: RRP €6.58 +VAT
  
PaperArtsy Stencil by Tracy Scott {Large} 383 (PS383)

 Floral Wreath Planner Page

I love to use my stencils in different ways and will very often use them as a template for drawing onto a journal page of into my planner.

Here I have done just that... not only can the stencil then be used to create the wreath shape that covers the centre of my planner page but it also meant that I could drawn in the straight bordered edges too.


Lady Bug Card

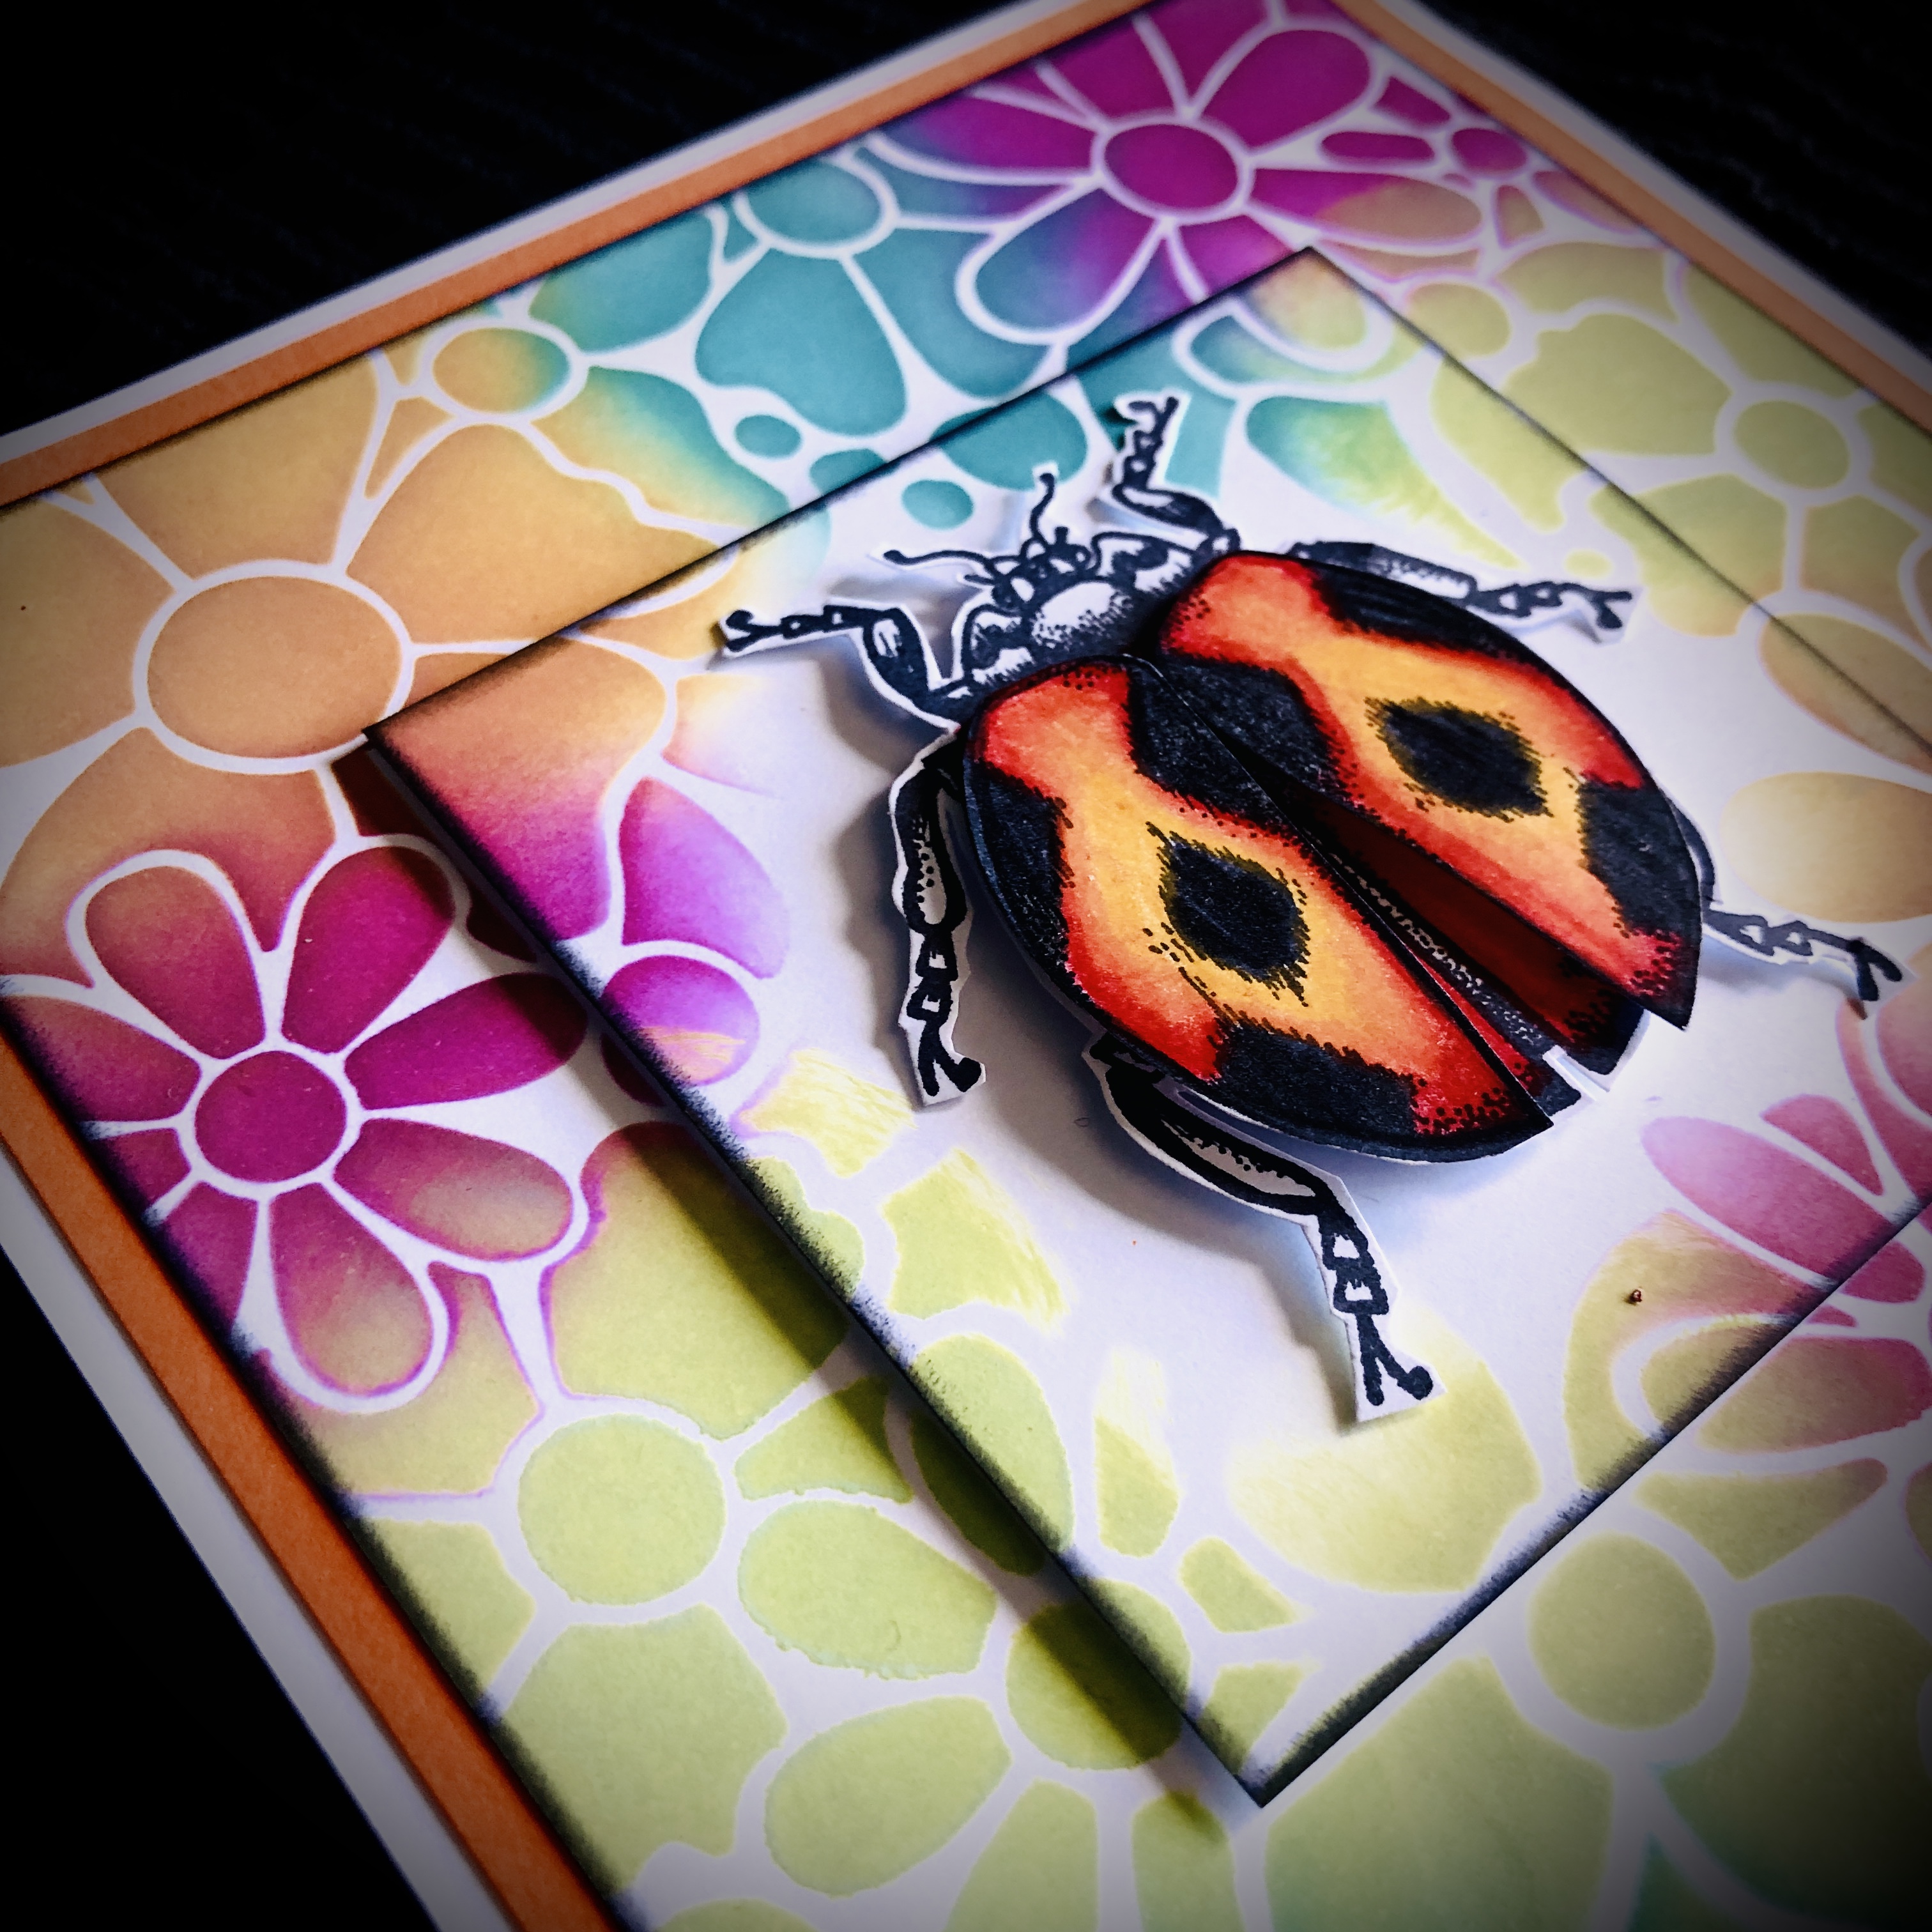
Here I've used the stencil with multicoloured inks to create a perfect and very fast background for my card, clever mounting creates the 3D effect, and my little ladybug from Stamps set TS027 makes the perfect finishing touch don't you think?


PaperArtsy Stencil by Tracy Scott {Large} 384 (PS384)

Journal Background

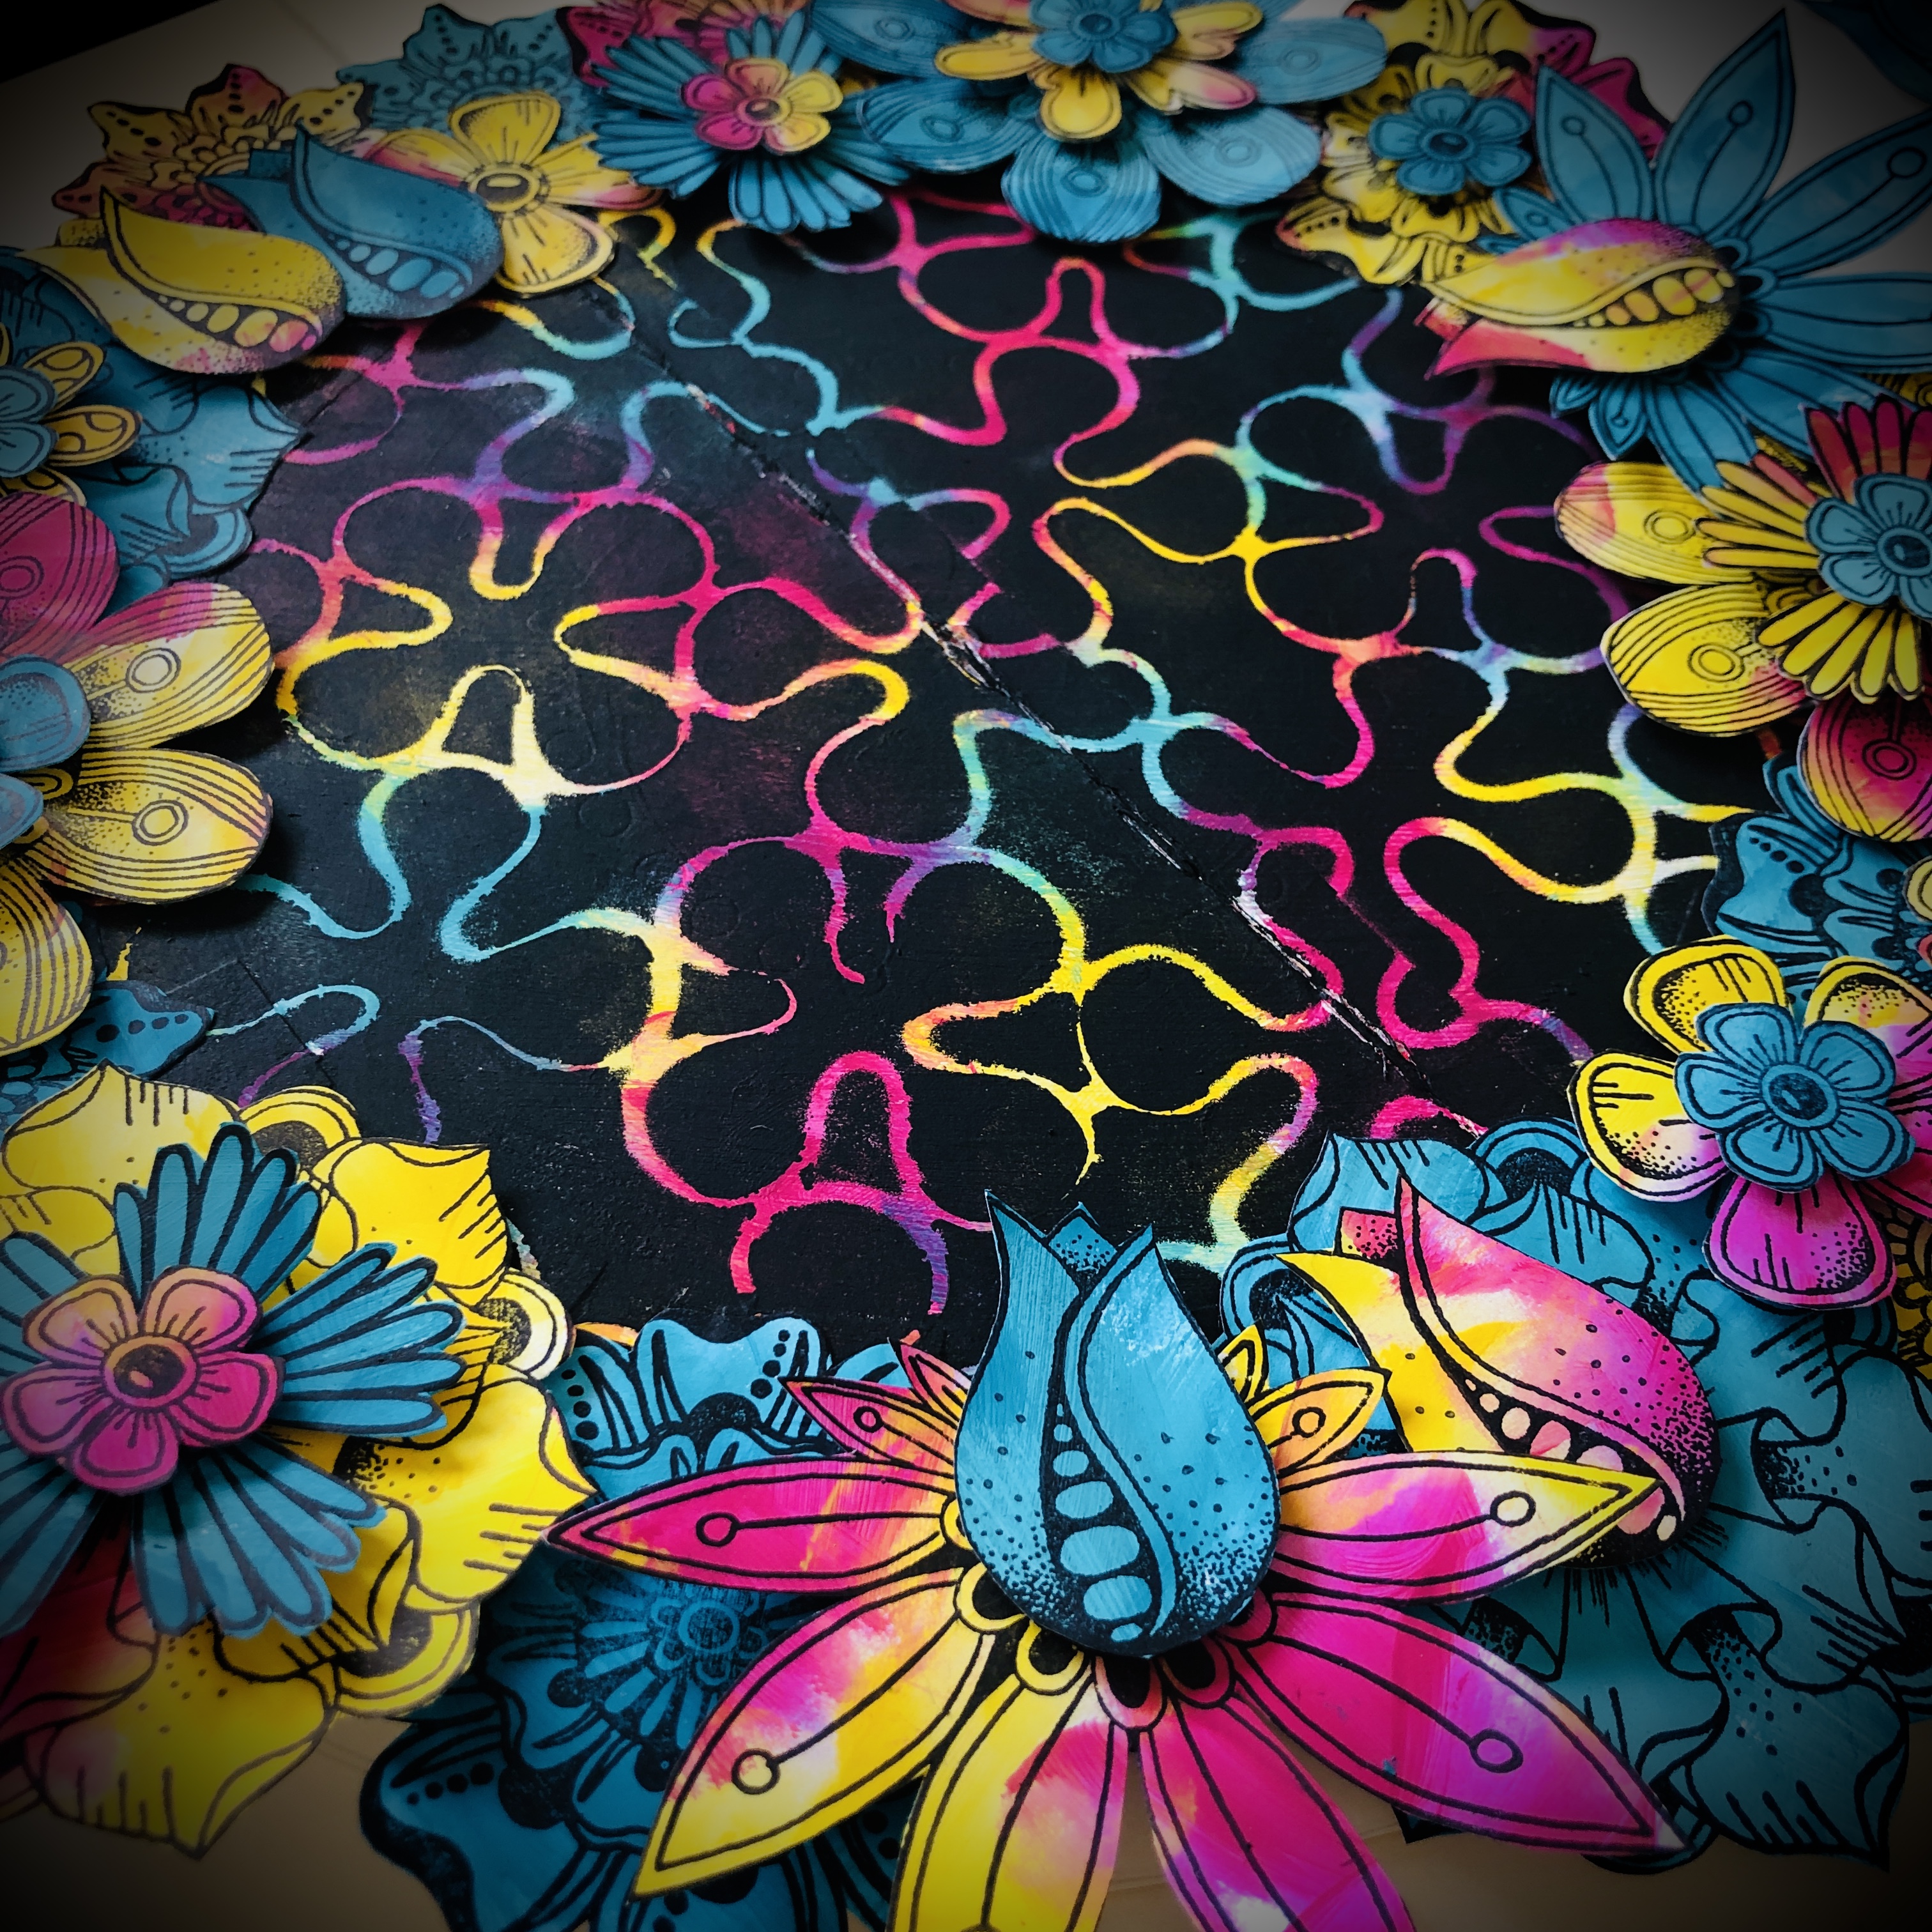
For this one I took advantage of all of the open spaces on my stencil to create this multicoloured lined background in my journal, I love how when the black is stencilled on all that appears are those bright coloured lines.


Paint Chart Planner Page

The open shapes on this stencil just instantly reminded me of paint splats and as I'd been meaning to swatch my Fresco paint colours for some time it gave me the perfect opportunity to do this. Now I can see all of my colours in one place.


PaperArtsy Stencil by Tracy Scott {Large} 385 (PS385)


Floral card
Loved the way this trellis design works perfectly as a background for both journaling and card making. Here I have paired it with the doodled flowers from my January release stamp set TS078 to create a pretty card perfect for any occasion.


Birdie Card

So for this one, I decided to over stencil, I played my stencil down the first time in a green tone and then shifted the stencil and over stencilled in blue. The result is a completely different pattern.... two for the price of one!


PaperArtsy Stencil by Tracy Scott {Large} 386 (PS386)

Gems Mini Album

So very obviously this is a mark making stencil right?... but I wondered what else I could do with it... and then it came to me... the larger shapes would be perfect to use as a template to make my own gems.... trace the shape, add some colour and a little doodling around the edge and voila... I managed to make a whole mini album.

Of course I used the whole stencil to add detail into my multi coloured backgrounds too.


Magazine Journal Cover

I needed to create a journal cover for my magazine doodle journal and the designs on this stencil were a perfect addition to create some interest in my painted stencilled background.
I stayed with the neutral tones for this one so that they would show off my focal image but would look equally at home on a bright coloured background as I did in my gems mini journal.


PaperArtsy Stencil by Tracy Scott {Large} 387 (PS387)

Stained Glass Journal Page

Although this stencil wasn't designed with this in mind... as soon as I saw it I just knew I had to create a faux stained glass effect with.
This developed very quickly into a full blown journal page project and then I knew I needed to take it to the next level and add lights.... it's quite chunky in my journal but definitely worth it!


Stencil Doodles

Because of the big open spaces in this stencil I just knew it was going to be a perfect template for doodling. I sketched in all the circles from the stencil and then proceeded to add some of the other shapes in (but not all !!)

Then I grabbed a pen and my favourite pencil and set about created my design.  You can hardly tell that this started life as a stencil can you?


PaperArtsy Stencil by Tracy Scott {Large} 388 (PS388)

Flourish Journal Page

Simple but perfect to show off the potential of this beautiful stencil.  Again I used the stencil as a template and drew it directly onto my coloured page,  I also used the dots as a border from the trellis design stencil.

Then it was just a case of happily colouring to really make the design pop from the background.


Under The Sea Journal Page

I instantly knew that the smaller designs on this stencil were going to be the [perfect addition to my under the sea seahorse page.

The multi coloured plants really do add the perfect finishing touch to my drawing as well as a perfect addition to any painted background.


Below are a few extra projects using a combination of products.....

Magazine Doodle Journal Cover


Floral Wreath Double Journal Page


Floral Planner Page


Butterfly Card 


Gems 


More Florals For My Planner


Thank you so much for joining me today, I hope this has left you buzzing with ideas and inspired ready to create.
I look forward to seeing what you do with them.

Socials...

Instagram: Tracy Scott

Below is a list of the retailers who have already got these new releases in stock ready for you to buy NOW!    

 PaperArtsy Stockist List

Our stockists are your go-to  source for all PaperArtsy products, and we suggest that you also use the PaperArtsy People Facebook group to source a retailer in your country. Many are members of our FB group and will happily share links to their online stores.

Australia
Bev's Cross Crafts, Spreyton, Tasmania https://www.bevscrosscrafts.com.au/
Crafters Cupboard, Berwick, Victoria www.crafterscupboard.com.au
Memories on the Murray, Murray Bridge, SA  https://www.memoriesonthemurray.net/
Natalie May Scrapbooking, Dover Gardens, SA https://nataliemay.com.au/
Scrapbook Superstore & More, South Penrith, NSW https://www.scrapbooksuperstore.com.au/
The Scrapbooker's Confetti Box, Swansea, NSW https://thescrapbookersconfettibox.com/
The Scrapbook Store, North Perth,WA http://thescrapbookstore.com.au/ 
Time To Createwww.timetocreate.com.au

Belgium
Cart N Scrap Art, Antwerp, www.cartnscrapart.be
Créatelier Caracolle, Liège, www.createliercaracolle.be

Canada
Clipper Street Scrapbook Company, Langley, BC. www.clipperstreet.com
Paper Art Creations Inc, Leduc, Alberta, www.paperartcreations.com/
Scrapbook Centrale, Dollard Des Ormeaux, Quebec www.scrapbookcentrale.ca
Scrap Addicts, Edmonton, Alberta www.scrapaddicts.ca/
Scrap and Bean, Edmonton, Alberta scrapandbean.com/ 
Scrapbooking Fairies, Drayton Valley, Alberta www.scrapbookingfairies.com/
The Paper & ink Boutique, Calgary, Alberta www.paperandinkboutique.com/
The Scrap Yard, Calgary, Alberta, www.thescrapyardcalgary.com/ 

Denmark
Hobbyboden Scrapworld Samso www.hobbyboden.dk

France
Eirl Bancon Cartoscrap, Midi Pyrenees, www.cartoscrap.com
Fée Du Scrap, Saint Sébastien-Sur-Loire, www.feeduscrap.fr/
Horizon Créatif, Ste Jalle www.horizon-creatif.fr
Instant Créatif, La Possession, La Réunion, www.icreatif.re
Katzelkraft, Ingwiller www.katzelkraft.fr/en/
Kerudoc Creation, St Yvi www.kerudoccreation.com
Le Grenier des filles, Pierre Benite
Page de scrap, Saint Pavace, www.pagedescrap.fr/
Scrap Déco Home, Goutrens, www.scrapdecohome.fr/
Toutencolle, Dun sur Auron www.toutencolle.fr

Finland
Heidin Korttipaja, Istunmaki, www.korttipaja.fi/fi
Piia Paper, Kittiläwww.piiapaper.com/fi

Germany
Stempelbar, Berlin, www.stempelbar.de
Stempeloase Munich, Munich www.stempeloase.de
Stempelfee Shop, Hilden www.stempelfee-shop.de
Stempellaedle, Stuttgart, www.stempellaedle.de/shop

Greece
Scraps N Pieces, Kallithea www.scrapsnpieces.gr

Italy
Immagine SAS di Rapaccini, Rome, www.immaginelab.com
Il Negozio Della Mamma Di Cle, Torino, www.ilnegoziodellamammadicle.com
Marte Savona, Savona, www.martesavona.it
Pezze E Colori, Lissone, www.pezzeecolori.it/ 
Piccole Passioni, Siena, www.piccolepassioni.it

Japan
La Wadao, Odawara, Kanagawa, www.lawadao.com
Tiny Dots, Funabashi-shi, Chiba www.tinydots.shop-pro.jp

Netherlands
De Hobbystudio, Genemuiden, www.dehobbystudio.nl/
Doe@ding,Spijkenisse doeading.nl/
Hobbycompleet de Duif, Leeuwarden www.hobbycompleet.nl
Stampingcorner, Capelle Aan Den Ijssel www.stampingcorner.nl

Norway
Hobbygarasjen, Kopervik, www.Hobbygarasjen.no

Spain
Cien por Cien Manualidades, Barcelona,  www.100x100manualidades.es
Ideas 10 Manualidades Y Scrapbook, Bilbao ideas10manualidades.com/
Marakiscrap, Tarragona, www.marakiscrap.com
Scrap & Papers Experiences, Barcelona, www.scrappapersexperiences.com
The Paradise Corner, Barcelona, www.theparadisecorner.com

Sweden
Butik Elva, Staffanstorp, www.butikelva.se

Taiwan
Mandy's Cards, Taipei www.facebook.com/mandy.card.77

United Kingdom
Amelia's Creative Crafts, Studley, Warwickshire  www.ameliascreativecrafts.co.uk
Art from the Heart, Harrogate, Yorkshire www.afth.co.uk
Crafts at The Malthouse, Herstmonceux,  East Sussex, www.themalthouse.co.uk/
Loobi Crafts, Leighton Buzzard, Bedfordshire, www.loobicrafts.co.uk
Papermaze, Ipswich, Suffolk www.papermaze.co.uk/ 
Stampers Grove, Springbank, Lilliesleaf, Melrose,Scotland www.stampersgrove.co.uk
The Artistic Stamper Craft Store, Faversham, Kent www.theartisticstamper.com
The Forget me not Kraft KabinRochford, Essex, www.TheForgetMeNotKraftKabin.co.uk

USA
Artistic Artifacts, Alexandria, VA www.artisticartifacts.com/
Artistic Studio Creations, Fayetteville, Georgia www.facebook.com/ASCbyCrystal
Craftiness, Chatsworth, CA, www.craftinessonline.com/
Everything Scrapbook & Stamps, Lake Worth, Florida https://everythingmixedmedia.com/
Frantic Stamper, Oregon www.franticstamper.com
Free Heart LLC, Denver, Colarado, www.freeheartllc.com/
Joggles, Coventry, Rhode Island, www.joggles.com
PaperCraft Clubhouse, Westbrook, Connecticut, papercraftclubhouse.com/
Qingquing's Stamp Shop, Portland, Oregon
Runaway, Art & Craft Studio, NE Salem, Oregon www.runawayart.com/
Simon Says Stamp, Columbus, Ohio www. simonsaysstamp.com
Topflight Stamps, Irmo, South Carolina topflightstamps.com/

If you are interested in becoming a PaperArtsy stockist contact Dounia@paperartsy.com for more information

PaperArtsy Links
Facebook Group PaperArtsy People
Facebook Page PaperArtsy