Hi everyone, nice to be back with you again
Mags here with you today.
This year on the blog, we have free rein to do a deep dive into a PaperArtsy product ranges of our choosing. For this post I have been exploring Ink & the Dog stamps combined with Some Fresco Finish Chalk Acrylics, Grunge Paste and Just Walnut Infusions.
Today I'm looking forward to sharing with you how I recycled an old lino tile into the base for an industrial looking panel with lots of distressed layers.

I thoroughly enjoyed building the layers in this project, especially revisiting a technique which has been around for years, but which was ideal for building the distressed grungy background. The technique uses a household object along with 3 fresco Finish Chalk Acrylics to create a rusted, worn, distressed backdrop on which I could build more layers


When I first had the idea to create my industrial looking panel, I had a few decisions to make. What colours to use, which stamps etc. I knew I wanted to use Fresco Finish Chalk Acrylic Rusty (FF227) along with a dark and a pale colour. Eventually I chose Inky Pool (FF46) and Snowflake (FF15) This turned out to be a perfect choice for my intended technique.
The Ink &the Dog stamps I chose to use were a mixture of a bold portrait stamp, Man Of Numbers 3 (MON3), along with Gentlemen 5 (G5), Backgrounds 4 (BG4) and to enhance my industrial background. You will see, as we progress through the stages, how the other supplies added to the finished look.

Whilst sorting out a large cupboard in my mother's home I came across a stack of old Lino tiles. They were headed to the rubbish bin, but I thought to keep a couple for possible recycling. On reflection, I should have kept more. I chose a dark green tile as the base for my project.

I wasn't sure how well the tile would take paint. I decided to adhere a part sheet of Printed Tissue (PT12, available from PaperArtsy stockists) to give a good base and add some subtle texture. With hindsight I could have used blank tissue, as the script didn't show through the layers as I thought it would. I used matte medium as my adhesive and didn't worry about wrinkles or creases, in fact I wanted the texture in the tissue.

My next layer for the background was a slightly watered down coat of Fresco Finish Chalk Acrylic, Inky Pool , I loved the diluted colour, which was dark, but not too dark. When this coat was dry I neatened up the edges of the tile with a sanding block to remove the excess paper.

I wanted my background to have a distressed, worn, industrial look and I remembered a technique I used years ago. It involved using a wax crayon. As I didn't have any to hand I adapted the technique to use a small wax candle melt , the type that you put in a pottery container which holds a tealight below to melt the fragranced wax.
I dragged the wax over the painted background, concentrating on the edges and some areas more than others. I left the centre area of the tile free from wax, as I knew I would want to adhere objects there.
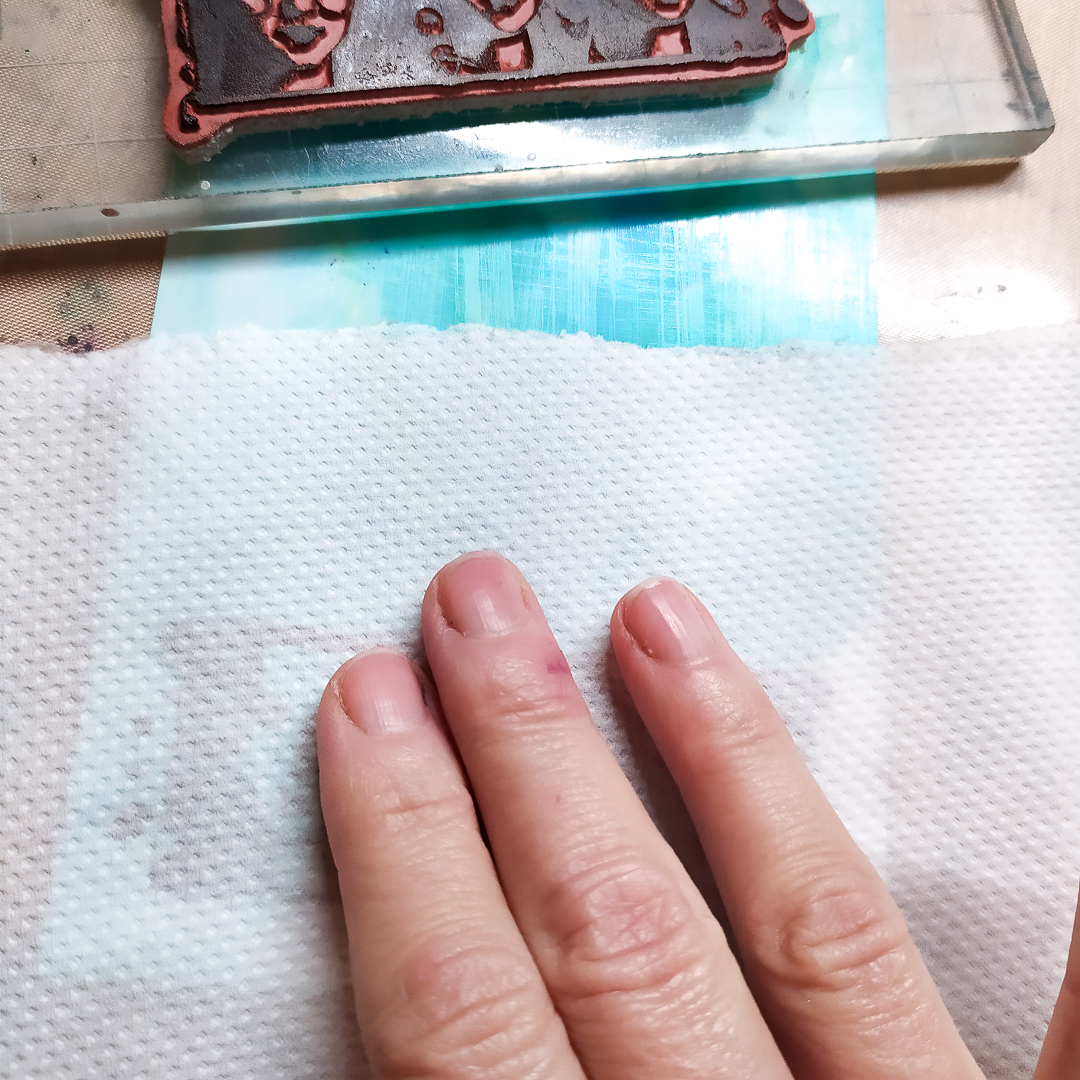
I added a touch of water to some Snowflake Fresco Finish Chalk Acrylic to thin it down slightly, and painted the tile. When I was sure it was completely dry, I used a baby wipe to rub the paint away from the wax underneath. I love the result.

I was unsure on exactly how to achieve my next layer but decided to just "go for it". I used a small sponge, to add Fresco finish Chalk Acrylic, Rusty around the distressed areas of paint, and allowed it to dry. I rubbed away the paint from the distressed areas, again using a baby wipe.

When working on my vintage grungy projects I often reach for my 'Just Walnut' Infusions (CS25). I have mini spray bottle filled with the diluted Infusions always sitting on my desk, and gave my panel a few spritzes to give an aged look.
When the spray had dried, I stamped the letters and numbers randomly from Gentleman 5, using Ranger, Archival, Jet Black ink. I find using the stamp without an acrylic block gives me a softer more distressed look, almost like the numbering has worn away slightly.

The background was definitely getting there, but it needed some more texture and subtle dimension. So out came my Grunge Paste (GP190) I must point out at this point that my pot of Grunge Paste had dried up a little and needed a couple of spritzes of water to rejuvenate it. I love that it can so easily be rescued, unlike some other brands.
I used PaperArtsy stencil PS456 (available from PaperArtsy stockists) and used the paste straight out of the tub. I did wonder about colouring it with a touch of Inky Pool Fresco, but decided against it. At this point I set the panel aside to dry overnight.

Although I loved the colour of the Grunge Paste, it wasn't cohesive with the rest of the project,
Adding a coat of watered down Inky Pool did the trick. When it was dry I gave the panel a couple more spritzes of Just Walnut Infusions, which pooled around the dried paste nicely.

When I chose the stamps I wanted to work with for this project I wanted a strong focal stamp. Man of Numbers 3 stood out as the perfect choice. It had a background which included numbers, which tied in with the other stamps, and enough blank space to which I could add additional interest.

It was time to get to work on my focal image. I started by spraying some Smoothy cardstock (SCA4H) with the same Just Walnut spray I had used previously, this gave a vintage look to the cardstock. Next I stamped the Man of Numbers portrait on to the cardstock using Versafine Claire, Nocturn and set aside to dry completely.

I positioned the portrait on my background to see how it looked, it was fine but it needed something extra. My idea was to add some dimension to the portrait. I stamped it onto a book page and cut out the head and shoulders. Finally I stamped it again onto some of the leftover sprayed Smoothy cardstock and cut out the jacket section of the stamped image.
The portrait looked good once layered up with some foam pads, I also added some colour to the first layer using Greenstone Mattint (MT09, available from PaperArtsy stockists)


It was time to create some of the extra elements for my composition. I painted some Smoothy card with Inky Pool and left it to dry. Brayering some Snowflake Fresco onto my craft mat in an even layer, meant I could then brayer the paint onto the Ink & the Dog Backgrounds 4 and stamp onto my painted card. When the paint was dry I spritzed a couple of Just Walnut Infusions sprays onto the card and left to dry again.


To add a vintage feel to the stamped images, I used the just Walnut infusions spray again.
When the stamped images were completely dry I cut them out and inked the edges with Ranger Archival Distress, Vintage Photo.
I now had all the main elements ready to bring the project together and create my grungy industrial panel. I also had some extras to use in future projects.

I'd like to take you through a few close up shots of my project, and point out the details within it's construction.

I hunted through my stash of vintage and rusty objects for little items to add extra texture and dimension to the project. These little keys, coin, nuts and bolts were ideal, I used Heavy Gel Medium to adhere them to the panel.

I found some metal rings and washers in my stash, these tucked nicely between other elements in the composition.

In this image you can see how well the Greenstone Mattint coordinates with the rest of the project. Also how adding dual layers of metal embellishments adds dimension and interest.

Layering up sections of the Mini stamped image with foam pads between, behind the focal portrait adds dimension and reinforces the focal image.

The Inky Pool and Snowflake stamped Backgrounds 4 panels add much needed darker tones to the project, drawing the eye to the portrait.

I recently purchased a few vintage bus and train tickets, these were on my desk whilst I created this project. Happily two were the perfect colours to add to the project.

I loved creating this project, and revisiting some of my favourite techniques from the past. I still have the other Lino tile, so who knows how that will be used.
Lots of these techniques and supplies could be used to create a journal page, or in a small scale, a set of tags.
I hope you enjoyed seeing how I created the project and give some of the techniques a go.

Thank you for visiting, happy crafting
Mags x